HMS Medea (28) (1778) 1/48 scratch build

I've also made progress preparing the decking planks. I had to modify the Aldi Workzone saw table as the gap around the blade was too wide to cut tiny thicknesses. They kept tearing and breaking off down beside the blade. It now works really well for a cheap saw and I have enough 1/16" x 1/4" planks to complete the gun deck. The blade is 64 tooth.

IMG_20210916_094321298.jpg

IMG_20210916_094329890.jpg
Cutting two pieces of 1/16" X 1/4" together.

IMG_20210916_094342528.jpg

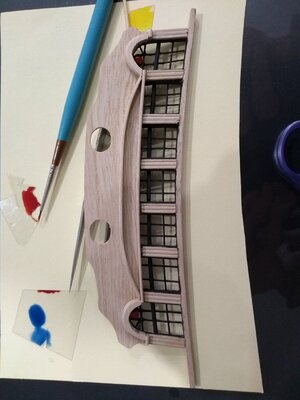
A light hand sand brings these up to standard and I'll move onto planking the gun deck after I complete the planking above the wales. Made a start today.

IMG_20210918_144452783.jpg

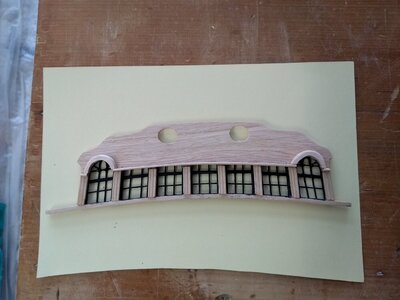
The paint on the wales has suffered and will have to be done again, but that will be much later.
 
Looking back over my build log, it has taken a very long time to get to this point....Thank you to anyone still reading along.

I recently formed the stern piece, using 1/8" jacaranda. I cut it out as near as comfortable with the scroll saw and then sanded, chiseled and filed it into its final shape. With the grain running across the piece it bends very nicely to the contour of the stern.

View attachment 256787

View attachment 256788

View attachment 256789

I'm just waiting for delivery of my Micro Wood Profile Scrapers so that I can form the colonnades before gluing onto the frames.
It is actually quite simple to make your own scraper. Take a razorblade and grind the profile you need into the razorblade, scraper finished. By this methode you can make every profile you need at no cost.
 
It is actually quite simple to make your own scraper. Take a razorblade and grind the profile you need into the razorblade, scraper finished. By this methode you can make every profile you need at no cost.
Thanks Maarten. I've seen this here on SOS but my attempts so far have been poor. I decided to buy the ready-made ones and spend my time on the build instead.
 
I received the profile scrapers in the mail today so immediately had a go at them. I think my technique will improve with time but I was satisfied enough to mount these examples on the stern frames. The frames they are glued to are deliberately oversize so I can sand and file the edges down to match the colonnades.

IMG_20210923_134003992.jpg
IMG_20210923_133924095.jpg

IMG_20210923_144407404.jpg

IMG_20210923_144433803.jpg

There's still some shaped fittings above and below the colonnades to finish it off (another day....) but I think it's going to work out okay.
 
One more quick step back to repair an error. I mistakenly started planking one row above the wales with 1/6" timber I had prepared for the deck planks. Luckily I realised my error before going too far and took it off again.

IMG_20210925_145200145.jpg

IMG_20210925_145921149_BURST000_COVER_TOP.jpg

IMG_20210925_151306221.jpg

All those splinters!! Enough to terrify a seasoned sailor.

IMG_20210929_111423420_HDR.jpg

Three strakes of the correct thickness now on each side and ready to move onto some deck planking which I have been really looking forward to.
 
This is my adaptation for the Dremel. I used a hard plastic lid from a bottle and cut the sandpaper from a normal orbital sanding disk. It works better than I had expected and I was able to level all the bearers and stringers for the deck without changing paper.


IMG_20210928_113658187.jpg

For the deck planks I originally wanted to use some White Beech which we salvaged from our farm but the tree (wind damaged) was immature and had no heartwood. A pity because White Beech is the decking timber of choice in the boat building industry around here. My sample just tore under sanding and I couldn't get a fine finish.

So I reverted to my stock standard Jacaranda and once again it has performed brilliantly.

IMG_20210930_135454371.jpg

I edged the boards with a black BIC Intensity Metal Pro ultra resistant permanent marker.

Still have to tidy up around the hatches and will give the whole deck a good sanding when it is complete. I'm really enjoying this part of the build and have to find something else to do each time I wait for glue to set.
 
A break from deck planking for a day or two and set about building the stern window frames. For this I am using bamboo cocktail sticks.

I mark one side of the stick with felt pen to orientate it then sand that side down flat, about 1/3 the thickness of the stick.

IMG_20211004_105301104_HDR.jpg

I measure and cut the piece to size and make a recess at each end on the round side.

IMG_20211004_110618638.jpg

Cut a corresponding groove in the back of the stern plate and glue the piece in, round side facing down.

IMG_20211004_111310949.jpg

The first part, these heavy sash separators, completed. Individual panes will be separated with thinner strips, but that's for another day.

IMG_20211004_120207049.jpg

Laid over the plans.

IMG_20211004_132700417.jpg
 
More progress on the stern. Grooves were cut in the back to inlay brass wires. CA glued in place.

IMG_20211005_134927584.jpg

Still have the more difficult end panels to do but they will need soldering and I've left them for another day.

IMG_20211005_140528987.jpg

After a little bit of straightening of wires then painted black, with a sheet of thin acrylic glued to the back, I think they will pass for stern windows.
 
A bit of progress since my last post.

I've partially laid the gun deck planking. I've left the stern section until after I attach the quarterdeck beams (to mount the steering wheel on and rig the rudder and steering).

IMG_20211006_134120749.jpg

Next I cut out all the gun ports. I only built up three planks above the wales to make it easier.

IMG_20211006_143455861.jpg
IMG_20211009_112506702.jpg

For the last three days I have been building up the gun port frames. All port side done. Time for a whisky.....

IMG_20211017_162953003_BURST000_COVER_TOP.jpg

IMG_20211017_162932433.jpg
 
5 hours filing and sanding today and pretty satisfied with the port side. Not so the starboard side and I'll continue with that tomorrow.

IMG_20211028_123617931.jpg

I made my first attempt at a dead-eye yesterday. :cool:

IMG_20211028_172349268.jpg


Got home from the workshop after an hour or so on the planer/thicknesser and found this 10 mm bruise and three neat holes in my thigh. Must have been a splinter of timber or something but I didn't hear any gunfire.......o_O
 
I sealed the lower hull with a 50/50 mix of PVA and water (Thanks Bryian ;)) just in time for the arrival of my double sided, self-adhesive copper tape. I had a quick practice on a scrap of wood today and it is going to work really well, but tedious I think. I also used some Casey Black on it and it gave it a very satisfying aged look. Images another time.

IMG_20211029_155136252_HDR.jpg
IMG_20211029_155219709.jpg
Despite these images, it's very smooth. I used two coats and will look at it again before coppering.
 
Many hours spent getting the stern to my satisfaction but I think it's getting close now.

IMG_20211105_101120655.jpg

IMG_20211107_144410679.jpg

IMG_20211107_153849251.jpg

IMG_20211105_101107235.jpg

To add a bit of flair I used glass paint on acrylic to simulate stained glass for the top windows on the quarters.

IMG_20211108_181555894.jpg

IMG_20211108_181615028.jpg

Looking at these images now they need another coat yet. The plain windows are done with Humbrol Clear Gloss Varnish.
 

Attachments

  • IMG_20211107_153834765.jpg
    IMG_20211107_153834765.jpg
    169.6 KB · Views: 10
  • IMG_20211107_175544722.jpg
    IMG_20211107_175544722.jpg
    174.8 KB · Views: 9
Back
Top