HMS Blandford 1:48 POF Modelship Dockyard [COMPLETED BUILD]

Dear Ken,
I followed you on your HMS Ajax build and you are a very accomplished modeller. You inspired me so much that I started to build my own HMS Ajax whixh has now kind of went off plan. Like you I found the plan very difficult to follow so happily just doing my own thing.
I stated in my new member introduction that I am a cheap skate and cannot afford the price of a kit so. will continue looking for free plans and using materials that are free or cheap to buy. I will follow you on this one Ken as I learnt a lot from you and your detailed photography on Ajax.
All the best shipmate
Ols salty
Hi Salty, Thanks for your compliments. I’m very much like yourself and only build from what I get with a kit unless it’s absolutely necessary, usually you can make stock items appear better than they actually are, it can get very expensive if you go down the rabbit hole of aftermarket parts, and usually with only a slight improvement. As you know I thought Ajax wasn’t as easy a build as it first appears, Euromodel kits are like that pretty awful, but persevere and they do turn out to be very nice models. Good luck with yours, I’m sure that you’ll make a success of it. Ken.
 
Last edited:
Ken, love the dark stain on the steps, fenders and railings. Magic Mike
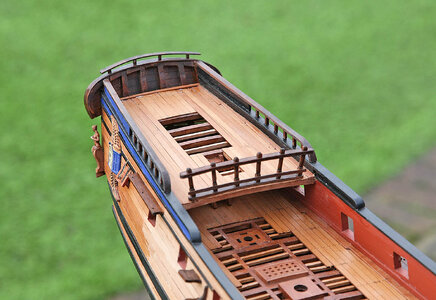
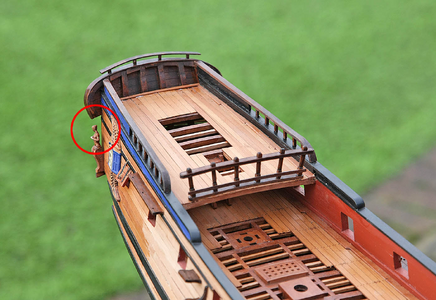
Hi Mike. Thanks for the thumbs up. I’ve used several different stains to pick out certain areas of the model, light mahogany for the ships structure, ribs, keel, beams etc. dark mahogany on inner parts, bits etc. rosewood on the hand and breast rails, as well as the steps, channels etc, and some light teak. I will do the gun carriages in oak, the planking takes on a honey colour when oiled, I think that this enhances the model by subtly highlighting different parts rather than it just being one tone.
 
Last edited:
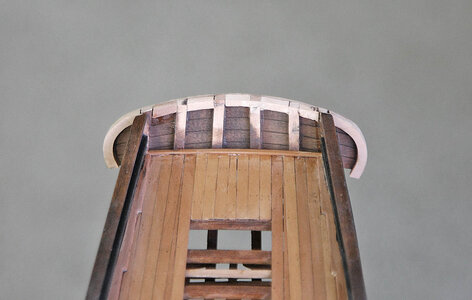
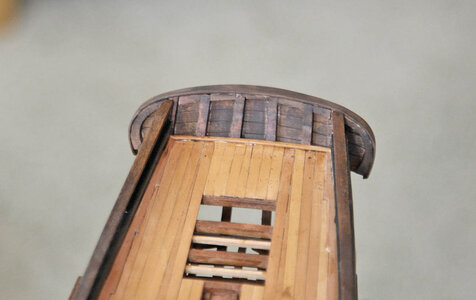
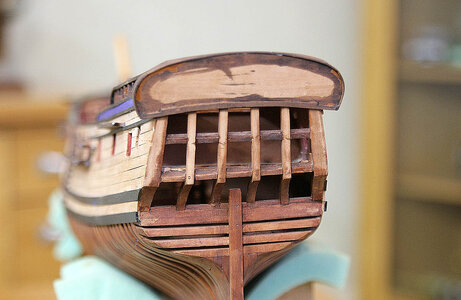
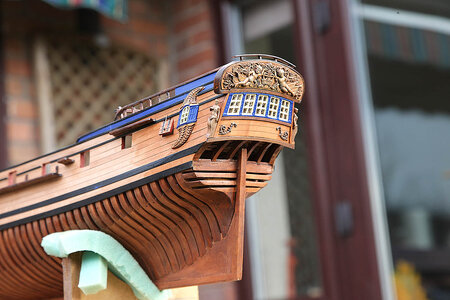
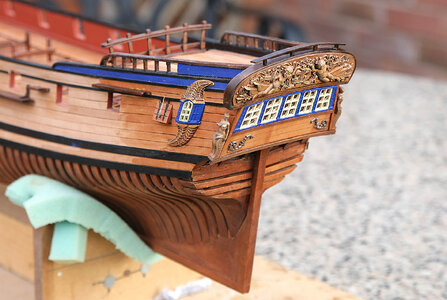
Hello, Today I’m showing you how I’m building up the rear transom, it’s coming along ok with no real issues. I’ve stained the decorations as I did with the figurehead and again I think it looks about right.

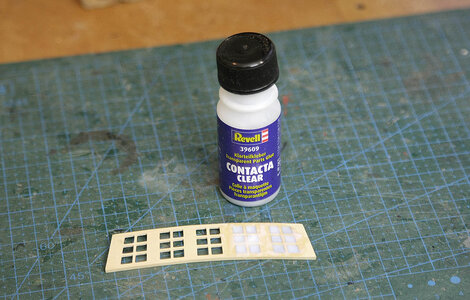
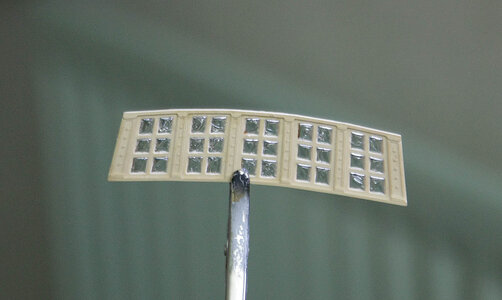
Next up will be the windows, the kit supplies pre shaped glazing, it’s opaque and quite thick making the frames difficult to seat. The method that I use is to coat the area to be glazed with clear glue just like when you were a kid making bubbles with wash liquid, when set the glazed area looks like mullioned windows. I used Revell glue but there are others which I’ve successfully used. I’ve shown pics so you can judge for yourselves.

415.jpg

416.jpg

417.jpg

419.jpg

418.jpg

420.jpg
 
Hello, Today I’m showing you how I’m building up the rear transom, it’s coming along ok with no real issues. I’ve stained the decorations as I did with the figurehead and again I think it looks about right.

Next up will be the windows, the kit supplies pre shaped glazing, it’s opaque and quite thick making the frames difficult to seat. The method that I use is to coat the area to be glazed with clear glue just like when you were a kid making bubbles with wash liquid, when set the glazed area looks like mullioned windows. I used Revell glue but there are others which I’ve successfully used. I’ve shown pics so you can judge for yourselves.

View attachment 418495

View attachment 418496

View attachment 418497

View attachment 418498

View attachment 418499

View attachment 418500
That looks very nice, Ken. Like old fashion ‘drawn of rolled glass’.
Regards, Peter
 
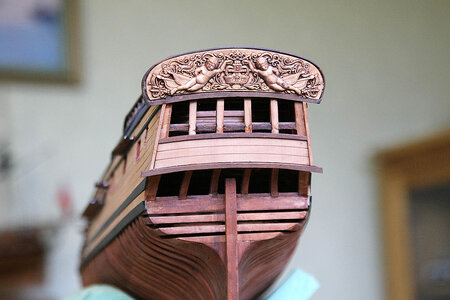
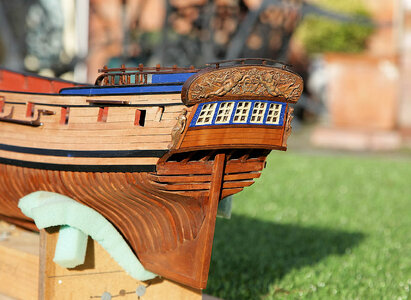
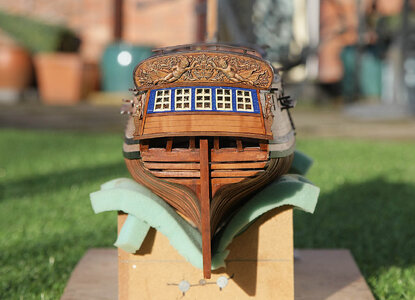
Good morning from the UK. Today is just a small update on the transom. It’s come together fairly well, the stain on the decoration for some reason came out darker than expected and initially looked more like copper, to tone it down a bit I gave it a dry brush using a cream colour, it’ll have to do for now. Below the windows looks a little blank, I might add some scroll detailing, just a thought at the moment. I finished off the stern off with a coat of oil.


422.jpg


423.jpg
 
Good morning from the UK. Today is just a small update on the transom. It’s come together fairly well, the stain on the decoration for some reason came out darker than expected and initially looked more like copper, to tone it down a bit I gave it a dry brush using a cream colour, it’ll have to do for now. Below the windows looks a little blank, I might add some scroll detailing, just a thought at the moment. I finished off the stern off with a coat of oil.


View attachment 418666


View attachment 418667
Beautiful transom Ken, you have some of the best faux glass work that I've seen yet!
 
Splendid transom view, Ken! I love how you aged the carving!!
Hi Jim, thanks. The ageing effect wasn’t intentional but came about by accident. I more than likely used a darker stain than intended by mistake, I played about with various dry brush colours trying to lighten it up, it ended up with what you see and I decided to stop there, I probably couldn’t repeat the effect even if I wanted to. That’s the way finishes end up sometimes and not what you set out to do.
 
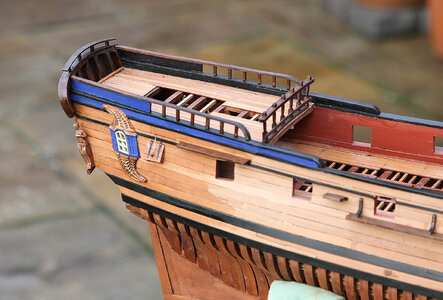
Hello, Again thanks for following and for your likes. As usual at this time of the year I spend much of the day at my bench busying away at whatever model I have on the go and seem to get quite a bit done. Yesterday I managed to finish off the stern, I fitted a little bit of scroll from my spares stash and completed the quarter galleries as well as a couple of cabin port lids. I tried to match the galleries up with the rear transom as much as I could, the window frames were very thin pear that broke at the slightest touch, I needed to remake these a few times, I glazed and painted these the same as the stern ones. The port lids were not included in the kit, nor were they even mentioned but without them it would look incomplete, I fitted them partly open so that they would be more noticeable. The next port along is a gun port, it will also need a lid so I’ll have to knock a couple up for that. Lastly I gave the area its first coat of oil, like the bow I just wanted to see how it would look, so far, so good.


424.jpg

425.jpg

426.jpg

427.jpg
 
Good morning, Ken. A small observation on the transom sculpture: It doesn't look like it touched the transom, so it might be an optical illusion.
I think the back of the sculpture has to lay flat on the hull.
View attachment 418911
Hi Jim, I know that’s what it looks like but the figure is actually sitting on a sort of plinth which has a flat rear that sits flush with the hull and holds the figure separate from the hull, you can probably see the plinth flush on the first picture.Thanks for keeping an eye on me. Ken
 
Hello, Again thanks for following and for your likes. As usual at this time of the year I spend much of the day at my bench busying away at whatever model I have on the go and seem to get quite a bit done. Yesterday I managed to finish off the stern, I fitted a little bit of scroll from my spares stash and completed the quarter galleries as well as a couple of cabin port lids. I tried to match the galleries up with the rear transom as much as I could, the window frames were very thin pear that broke at the slightest touch, I needed to remake these a few times, I glazed and painted these the same as the stern ones. The port lids were not included in the kit, nor were they even mentioned but without them it would look incomplete, I fitted them partly open so that they would be more noticeable. The next port along is a gun port, it will also need a lid so I’ll have to knock a couple up for that. Lastly I gave the area its first coat of oil, like the bow I just wanted to see how it would look, so far, so good.


View attachment 418877

View attachment 418878

View attachment 418879

View attachment 418880
Looks great Ken. Very nicely done
 
Hello, Again thanks for following and for your likes. As usual at this time of the year I spend much of the day at my bench busying away at whatever model I have on the go and seem to get quite a bit done. Yesterday I managed to finish off the stern, I fitted a little bit of scroll from my spares stash and completed the quarter galleries as well as a couple of cabin port lids. I tried to match the galleries up with the rear transom as much as I could, the window frames were very thin pear that broke at the slightest touch, I needed to remake these a few times, I glazed and painted these the same as the stern ones. The port lids were not included in the kit, nor were they even mentioned but without them it would look incomplete, I fitted them partly open so that they would be more noticeable. The next port along is a gun port, it will also need a lid so I’ll have to knock a couple up for that. Lastly I gave the area its first coat of oil, like the bow I just wanted to see how it would look, so far, so good.


View attachment 418877

View attachment 418878

View attachment 418879

View attachment 418880
The oil in combination with the colors looks very nice, Ken.
Regard, Peter
 
Looks great Ken. Brilliant modeling fueled by a keen sense for what looks right.
Hi Paul, Thanks very much for your kind comment. I think that you understand my modelling aims, I try to build to an overall good standard, unlike yours nothing is exceptional so no part outshines any other, the same with my finishes, that way hopefully each part is harmonious and compliments each other giving a pleasing overall result.
 
Back
Top