H.M.S. Fly by Amati 1:65 - Build log by Jcob

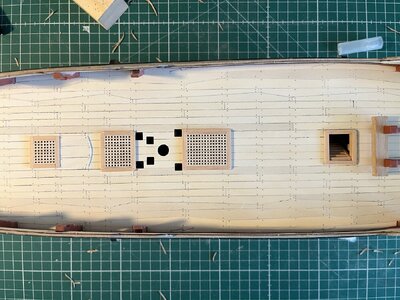
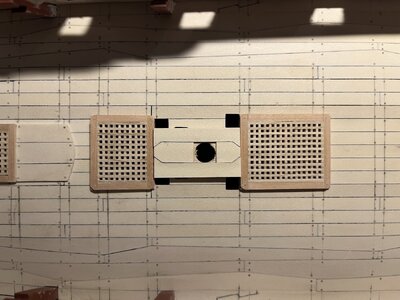
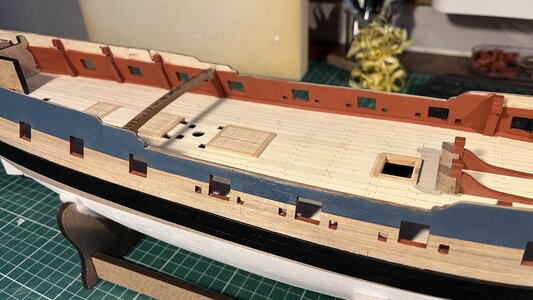
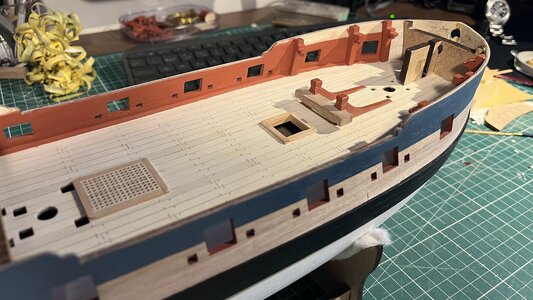
Used toothpicks from the grocery for the deck wood nails. Found the method on this forum and it worked out pretty well.

View attachment 394785
View attachment 394786
View attachment 394787

I'm happy with the result. Quite the time consuming task with each toothpick point having to be sanded down individually to fit.
View attachment 394788
View attachment 394789

The kit provided walnut strips meant for the hatches I thought were a bit too dark against the light holly deck, so I used some of the light Swiss pear sample I got from Hobbymill.
View attachment 394790

Made the riding bitt to the FFM instructions, with a replaceable backing piece. Was a challenge to figure out the colours on this one, I can't imagine the "working" part of the riding bitt was painted red as it would've been worn down from all the wear. So I went with a natural walnut on that one and painted the bitt pins and standards red.
View attachment 394791
View attachment 394792

This thin wooden sheet was a big challenge to fit properly. Used cannons to try to level it correctly and pins, clamps and all the tools available to keep it to shape whilst the glue dried. We'll find out later what I missed.
View attachment 394793
View attachment 394794
View attachment 394795

Been a busy time with work and it doesn't look like it will let up for the rest of the year. Gonna be slow progress from here. See ya!

/Jacob
What diameter did you use for drill the holes ?
 
Hello all,

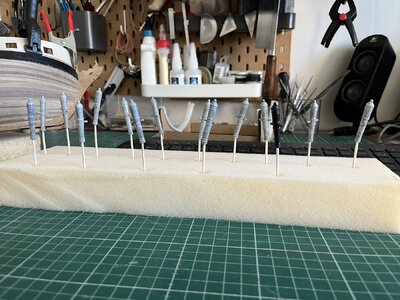
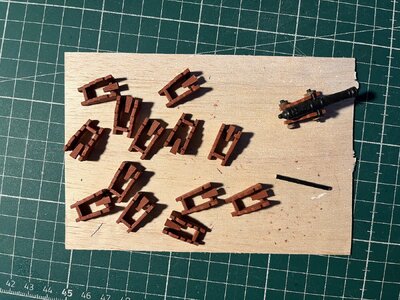
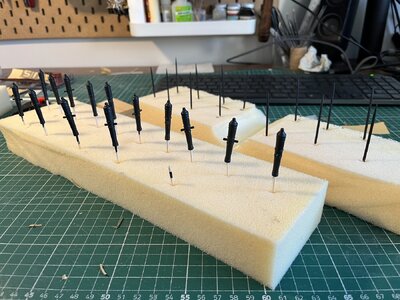
Been working on a few minor things since I last posted. Put a coat of metal primer on the cannons and painted them black. The painted toothpicks I will use as wheel axles for the carriages. The kit supplied carriages have these square pegs for the wheels which look odd, so I filed them down with a file about the same size as the toothpicks and they fit nicely with the wheels.
IMG_6020.JPG
IMG_6037.JPG
IMG_6060.JPG

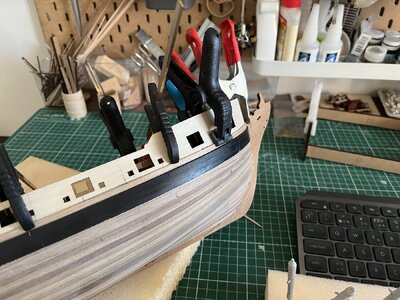
Been doing some work on the outer bulwark:
IMG_6021.JPGIMG_6054.JPG
IMG_6056.JPG

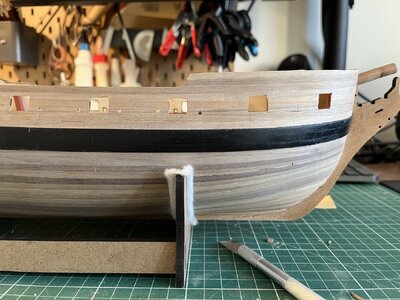
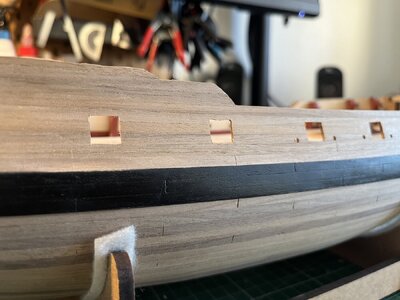
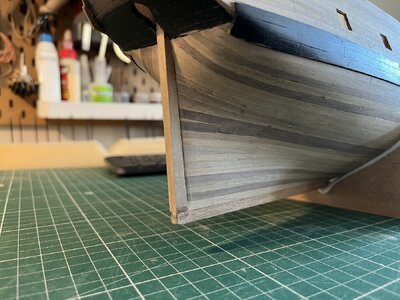
Finished the keel. Note to self: always give the first planking layer a good taper before beginning on the second.
IMG_6044.JPG

Also finished the gun deck planking:
IMG_6053.JPG

Gave the main mast partner a try. As you can see symmetry is way off with just my eyes for measurement xD, trying to think of better ways to do this in the second try:
IMG_6035.JPG

That will probably be it for this year so I wanna say merry christmas and happy new year to all of you. Looks to be a snowy christmas this year which is not so common here on the Swedish west coast. :D

Best, Jacob
 
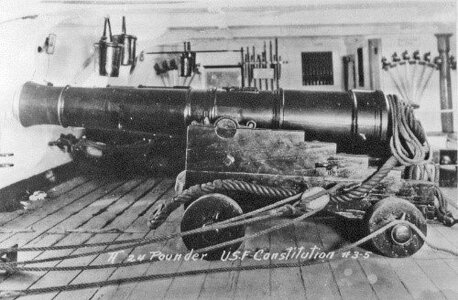
You are doing a nice job assembling the Fly, I fully agree with Paul (above reply). If I may, I don't want to spoil your holiday mood, but it seems you have assembled the gun carriages incorrectly. It might be too late to repair them once you will glue them on the deck. Below is the image for reference, should you will accept the repairs.

1703343726349.jpeg
 
You are doing a nice job assembling the Fly, I fully agree with Paul (above reply). If I may, I don't want to spoil your holiday mood, but it seems you have assembled the gun carriages incorrectly. It might be too late to repair them once you will glue them on the deck. Below is the image for reference, should you will accept the repairs.

View attachment 415973
Hi Jimsky, thanks and no worries. I post here partially to get tips on improvements, but could you tell me how this picture is different? I can't figure it out.
 
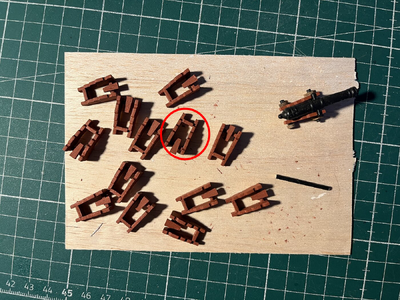
I believe some of your carriages are assembled correctly, but most of them other way around. The red circled is the correct way. The Quoin (the wedge) should be on the rear axletree.

IMG_6037.png

600_4140.png
 
I believe some of your carriages are assembled correctly, but most of them other way around. The red circled is the correct way. The Quoin (the wedge) should be on the rear axletree.

View attachment 415984

View attachment 415985
Oh crap, you are right. I was wondering if the tip of the gun wasn't pointing a bit upwards when placed on the faulty carriage. Thanks for pointing it out as I might still be able to fix this, will have to separate the parts carefully to put them back together. If it all fails, the carriages weren't the most expensive thing and can be replaced.:)
 
Oh crap, you are right. I was wondering if the tip of the gun wasn't pointing a bit upwards when placed on the faulty carriage. Thanks for pointing it out as I might still be able to fix this, will have to separate the parts carefully to put them back together. If it all fails, the carriages weren't the most expensive thing and can be replaced.:)
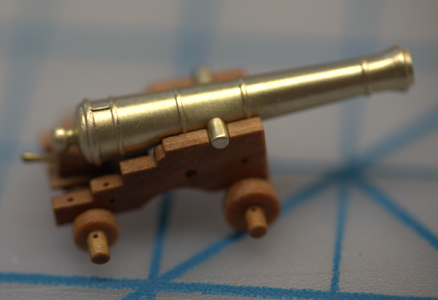
Yeah...you can carefully remove and reglue. The most difficult part is to remove it without damaging it. But...should you need a replacement (just saying), you can find one the best carriages in the aftermarket.

1703351078786.png


Yeah...you can carefully remove and reglue. The most difficult part is to remove it without damaging it. But...should you need a replacement (just saying), you can find one the best carriages in the aftermarket.

View attachment 415998


I will have to be careful with the scalpel. I saw those carriages earlier, they look so good it's a bit of a shame to cover them with red paint. Might be relevant if I accidentally destroy the ones I have. Though I was planning on going with the original parts for the Fly and then try out some of the upscale accessories for the East Indiaman Götheborg that I will start on afterwards.
 
Very good work on the planking and treenailing - Looking very good
 
Hello again,

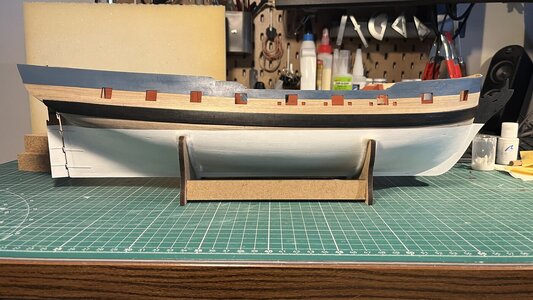
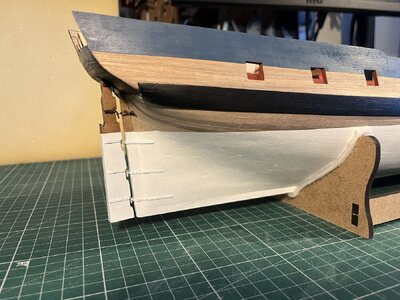
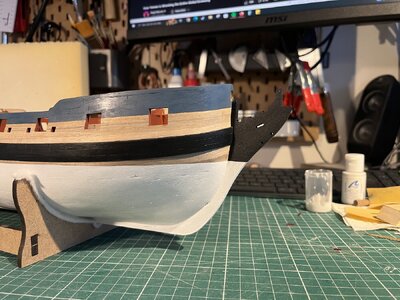
Been working a bit on the inner bulwark planking and filing the gun ports to size. Then paint. Red ochre to the inner bulwark, off white below the water line, some refreshing of the black paint that had been damaged on the bulwark as well as black on the bow. Also a medium blue that will serve as the background for decorations. The red looks a bit brighter in these picture than it does in reality.
IMG_E6107.JPG
IMG_E6108.JPG
IMG_E6110.JPG

Attached the rudder, I was weighing whether to let the below-waterline hinges be black or if I should paint them white with the hull. Went with white:
IMG_6114.JPG

And here I am curious if somebody familiar with painting of these Swan-class ships. I wasn't sure if the top of the bow should be painted black all the way down to the waterline, or if it should only be black down to the bottom of the wale. Looking at others' builds, it seems to be a theme to paint down to the waterline when also applying white paint below. In those cases I saw where the builders didn't use paint below the waterline, the bow paint only reached down to the wale. Any ideas of what is "correct" here?
IMG_6116.JPG
Next will be a final coat of white, but after that I haven't decided. Perhaps finishing the bulwark decorations so I can put a coat of varnish on the hull to seal it. Or finishing everything on the gun deck so that I can place the quarterdeck which might help working with the stern windows.

We will have to see :).

Best, Jacob
 
Hi Jacob,
I have only now discovered your HMS Fly build log :). It is very interesting and refreshing to see how other modellers approach the vary many tasks involved in putting this little ship together, and I am always on the lookout for better skills and techniques that will help me with my own Fly build without filling up the swear jar too quickly ROTF. So far you seem to have everything under complete control and your deck planking is quite remarkable. I look forward to following your continued progress and the many decisions you will inevitably need to make along the way. Best of luck Thumbsup
- Mark
 
Last edited:
And here I am curious if somebody familiar with painting of these Swan-class ships. I wasn't sure if the top of the bow should be painted black all the way down to the waterline, or if it should only be black down to the bottom of the wale. Looking at others' builds, it seems to be a theme to paint down to the waterline when also applying white paint below. In those cases I saw where the builders didn't use paint below the waterline, the bow paint only reached down to the wale. Any ideas of what is "correct" here?
Hi Jacob,
I am the last person to know the correct method for painting the bow, at least from a historical perspective, but the way you have gone about it matches most of the other Fly builds I have seen so far. As it is you that will be looking and scrutinising your finished model the most one day, and if you are not too fussed about historical accuracy, I suggest you decorate your ship in a way that is most pleasing to your your own eyes :)
- Mark
 
Last edited:
Dear Jacob, I have also only discovered your build log now. You are doing a fine job on the Fly - I am very pleased that you also enjoy the planking process. To me that is also the most satisfying part. Yours look so good, that it is almost a pity that the hull had to be painted!
 
Hi Jacob,
I have only now discovered your HMS Fly build log :). It is very interesting and refreshing to see how other modellers approach the vary many tasks involved in putting this little ship together, and I am always on the lookout for better skills and techniques that will help me with my own Fly build without filling up the swear jar too quickly ROTF. So far you seem to have everything under complete control and your deck planking is quite remarkable. I look forward to following your continued progress and the many decisions you will inevitably need to make along the way. Best of luck Thumbsup
- Mark
Hi Mark, thanks! Yeah, these instructions leave out a lot for interpretation so it's really cool to see the different ways people go about their builds :). Definitely more creativity that goes into this one than other builds I've done and your log is really good inspiration for ideas.

Hi Jacob,
I am the last person to know the correct method for painting the bow, at least from a historical perspective, but the way you have gone about it matches most of the other Fly builds I have seen so far. As it is you that will be looking and scrutinising your finished model the most one day, and if you are not too fussed about historical accuracy, I suggest you decorate your ship in a way that is most pleasing to your your own eyes :)
- Mark
You're totally right, in the end it's your own project and you make it to your own taste;). I noticed these British ships are a different challenge because so much of their original builds are documented and saved, which gives a more "definite" way to model them if you research them. Can feel a bit limiting so I take it more as inspiration, like the planking was interesting. Cannons however, I don't find too interesting right now but maybe reading about them, something will stick out that will do it. The East Indiaman Götheborg I'm planning on building next has almost no historical plans whatsoever, so it's all up for interpretation and I'm kinda looking forward to that.
Best, Jacob
 
Back
Top