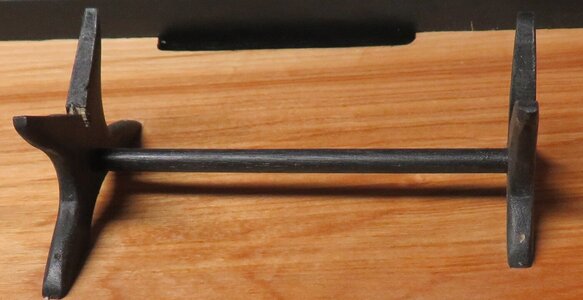
Display Base and Pedestals

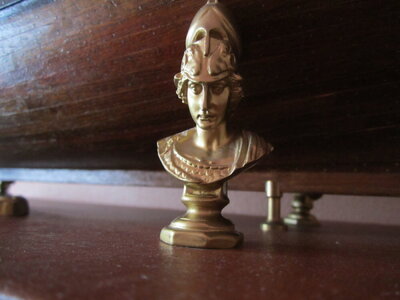
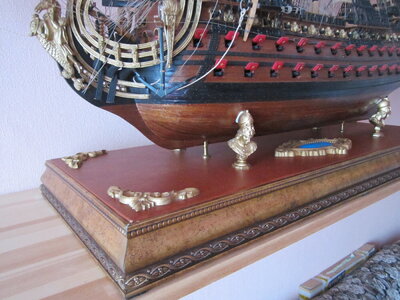
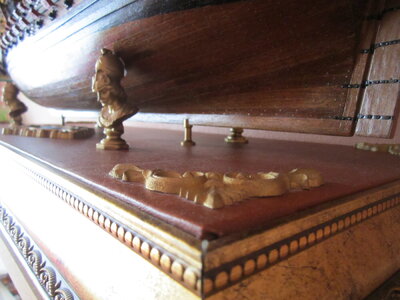
It all depends on the size and weight of the model.If the weight is small, you can do with two racks.If the model is large and heavy, additional supports are needed.At my Soleil Royal, I put an additional four busts of Athena.The stand itself is made of solid pine.The sides are decorated with a beautiful baguette.

IMG_2611.JPG

IMG_2610.JPG

IMG_2609.JPG
 
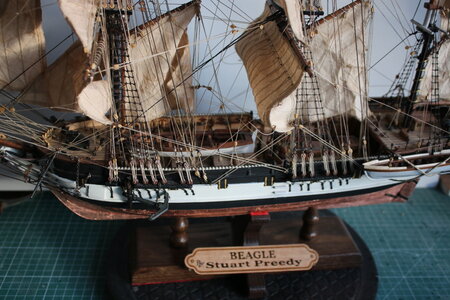
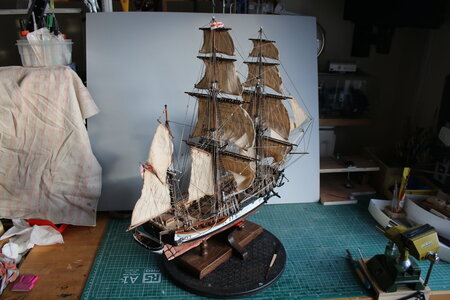
Mounting the model should be dealt with early on in the build as Nomad points out. For plank on bulkhead models I drill holes in the keel piece for mounting attachments before the bulkheads are installed so it can be clamped in a vise. Depending on the thickness of the keel the holes are sized for either 4d or 6d nails which will later be epoxied into the keel. I used to use pedestals but have switched to cradles for greater security. I make these from 1/4" Home Depot poplar sheets. They are fitted to the hull after the planking is complete while it can still be turned upside down . When finished, the cradles are also drilled in the center and attached to the model by expoxing in the the exposed portion of the nail. Most of this process is pictued in my bulid log for Berbice:
Thanks for sharing, polydoc, including the link to your model that describes your method. I hope you don't mind me posting a photo of your cradle assembly here. A great job, and it looks super secure and robust Thumbsup

Fig 49standIMG_2097.jpeg
 
I agree, that is an elegant finish. I have seen similar with Poseidon riding a fish/dolphin but where do you get such pieces?

PeterG
These, as you said, pieces were bought by me on Aliexpress.you can buy a lot of busts there. Art baguette for paintings.
 
Most of my models are mounted on a simple pine board with stain and poly. I use various pedestals such as the brass pedestals one can get on line. I have also made pedestals out of decorative finials…I cut the finial for a flat end and trim to size picking up the curves of the finial. What ever I use for mounts…including cradles…I drill a pilot hole up through the mounting board…through the pedestals (if they do not already have a pre drilled hole) or cradle…and into the keel. The placement of the pilot hole into the keel takes early preparation. At the point of assembling the false keel bulkhead choose where you want the mounting pedestals to be located. Reinforce that point with extra wood to add thickness to the false keel. Then drill the pilot hole through the keel into the false keel bulkhead. Then proceed with planking the hull. When I get to the point where I want to mount the model I can thread a long screw (I have found very thin three and four inch screws…normally a #4 four inch screw) up through the mounting board, the pedestals, and into the pilot hole of the model…tighten down the assembly…and the model is tightly mounted and secure. I usually mount my models after I have finished the hull details but before I start the rigging. Last, I embellish the mounting board with edge moldings or decorative brass corners.
 
Last edited:
Most of my models are mounted on a simple pine board with stain and poly. I use various pedestals such as the brass pedestals one can get on line. I have also made pedestals out of decorative finials…I cut the finial for a flat end and trim to size picking up the curves of the finial. What ever I use for mounts…including cradles…I drill a pilot hole up through the mounting board…through the pedestals (if they do not already have a pre drilled hole) or cradle…and into the keel. The placement of the pilot hole into the keel takes early preparation. At the point of assembling the false keel bulkhead choose where you want the mounting pedestals to be located. Reinforce that point with extra wood to add thickness to the false keel. Then drill the pilot hole through the keel into the false keel bulkhead. Then proceed with planking the hull. When I get to the point where I want to mount the model I can thread a long screw (I have found very thin three and four inch screws…normally a #4 four inch screw) up through the mounting board, the pedestals, and into the pilot hole of the model…tighten down the assembly…and the model is tightly mounted and secure. I usually mount my models after I have finished the hull details but before I start the rigging. Last, I embellish the mounting board with edge moldings or decorative brass corners.
Thanks for sharing your techniques Jim. I see now that planning the mounting up front is a very sensible thing to do, especially with brass pedestals which by all accounts need to be fixed to the keel in some way or the other. Just curious, how do you know where to position your pilot holes in the keel at the start? Is it just rack-of-eye stuff or is there a more scientific method to it?

Thanks, Mark.
After several model ship builds I have a sense of where the pedestals should be located. Usually four inches in from the stern post and six from the bow post depending on the size of the model. These measurements are for a ship scale 1/48 to 1/54. I adjust the locations a bit to make sure they are located in between the cross bulkheads. That is where I add solid wood blocks for added strength. One caution is to taper the blocks at the keel to accommodate the curve of the planking. Once I have the locations and the blocks in place I drill an undersized pilot hole up into the false keel. Then size up the drill bit to the size needed for the screw and drill the final pilot hole. Then on to planking. The issue is to remember all this must be prepped prior to any planking on the hull. The same issue for using a threaded bolt and nut. You need to embed the nut into a pilot hole in the false keel before proceeding with planking. The long screw, once tightened, also protects the keel from any side to side stress making for a very tight, strong mounting point.
 
After several model ship builds I have a sense of where the pedestals should be located. Usually four inches in from the stern post and six from the bow post depending on the size of the model. These measurements are for a ship scale 1/48 to 1/54. I adjust the locations a bit to make sure they are located in between the cross bulkheads. That is where I add solid wood blocks for added strength. One caution is to taper the blocks at the keel to accommodate the curve of the planking. Once I have the locations and the blocks in place I drill an undersized pilot hole up into the false keel. Then size up the drill bit to the size needed for the screw and drill the final pilot hole. Then on to planking. The issue is to remember all this must be prepped prior to any planking on the hull. The same issue for using a threaded bolt and nut. You need to embed the nut into a pilot hole in the false keel before proceeding with planking. The long screw, once tightened, also protects the keel from any side to side stress making for a very tight, strong mounting point.
Excellent, thanks for that advice Thumbsup
 
Back
Top