Thanks Daniel I'm enjoying this build more than I thought I would and beginning to wonder why it's taken so long to restart this kit.Nice clean tight work as usual Tony.
You are using an out of date browser. It may not display this or other websites correctly.
You should upgrade or use an alternative browser.
You should upgrade or use an alternative browser.
Corel HMS Unicorn - 1/75 scale [COMPLETED BUILD]
- Thread starter Tony H
- Start date
- Watchers 16
-
- Tags
- completed build corel unicorn
Thanks Grant and welcome to my log. I have seen your Victory build, excellent work a very big undertaking for a first kit. The Victory is a ship I would like to build but it's likely to be the last one I make.Tony she is just superb. Awesome
Thanks Daniel one of the things I was planning to do with this build is to copper the hull. Although it's not necessary with this kit I want the experience for future builds. Your log has provided lots of information on how to tackle this job.
Tony
Happy to know that Tony !!
Daniel
Good morning Tony - good thinkingThanks Grant and welcome to my log. I have seen your Victory build, excellent work a very big undertaking for a first kit. The Victory is a ship I would like to build but it's likely to be the last one I make.
 .
.Having seen the rope made by Paul and Daniel (Vasa builds) got me thinking about what rope to use on my Unicorn. I have already used some of the Corel rope on the Black Pearl and didn't like it very much.
I had most of the parts for a rope walk already made it just needed putting together.
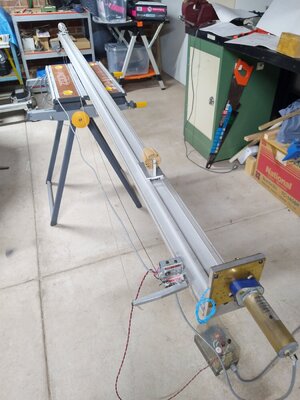
This is what it looks like, everything is recycled/reused from surplus parts. The aluminium extrusion was originally part of a conveyer system, it's 3 metres long. I have 3 other pieces which I could join together if I needed to make some really long rope.
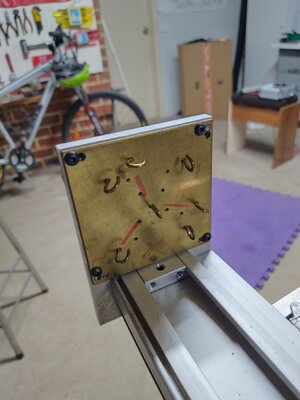
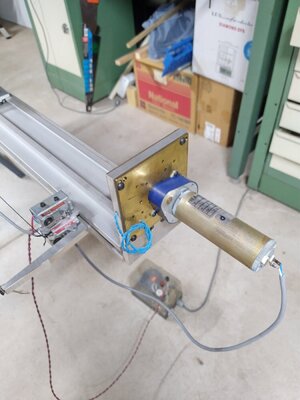
There are 6 hooks around the outside and one in the middle they are connected by gears and driven by a motor. The hooks are setup so I can make 3 or 4 stranded rope.
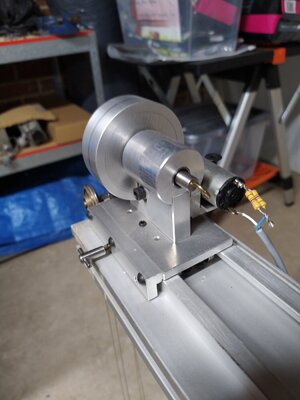
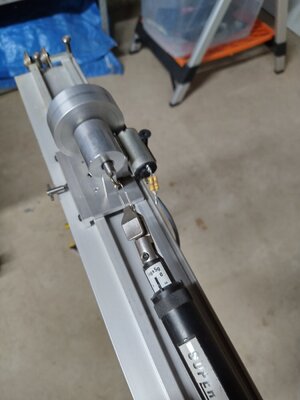
At the other end the hook is connected to a flywheel which can freewheel or be powered by an electric motor. I will use a scale to check the tension.
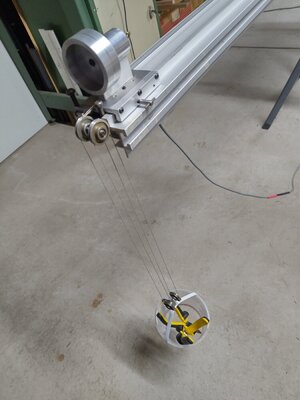
Because of the long length of the rope walk I made up a set of pulleys to apply the tension to the rope.
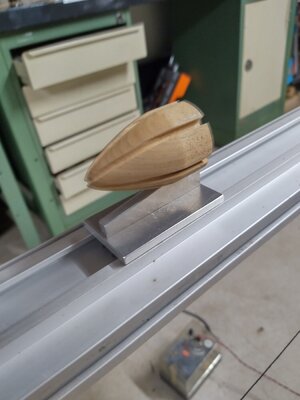
All the carriages run on small bearings inside the slot.
Now for the fun part start making some rope. I've got some overlocker thread not the best but it's cheap (I expect most will end up in the bin). I'll try it out tomorrow and see what happens.
I had most of the parts for a rope walk already made it just needed putting together.

This is what it looks like, everything is recycled/reused from surplus parts. The aluminium extrusion was originally part of a conveyer system, it's 3 metres long. I have 3 other pieces which I could join together if I needed to make some really long rope.


There are 6 hooks around the outside and one in the middle they are connected by gears and driven by a motor. The hooks are setup so I can make 3 or 4 stranded rope.


At the other end the hook is connected to a flywheel which can freewheel or be powered by an electric motor. I will use a scale to check the tension.

Because of the long length of the rope walk I made up a set of pulleys to apply the tension to the rope.

All the carriages run on small bearings inside the slot.
Now for the fun part start making some rope. I've got some overlocker thread not the best but it's cheap (I expect most will end up in the bin). I'll try it out tomorrow and see what happens.
My goodness Tony! You are Mcguyver, Inspector Gadget, Superman, Shaft and James Conn all rolled into one!! I just love how you make equipment out of spare parts that are lying around. I can't wait to see your rope.Having seen the rope made by Paul and Daniel (Vasa builds) got me thinking about what rope to use on my Unicorn. I have already used some of the Corel rope on the Black Pearl and didn't like it very much.
I had most of the parts for a rope walk already made it just needed putting together.
View attachment 276364
This is what it looks like, everything is recycled/reused from surplus parts. The aluminium extrusion was originally part of a conveyer system, it's 3 metres long. I have 3 other pieces which I could join together if I needed to make some really long rope.
View attachment 276365
View attachment 276366
There are 6 hooks around the outside and one in the middle they are connected by gears and driven by a motor. The hooks are setup so I can make 3 or 4 stranded rope.
View attachment 276368
View attachment 276369
At the other end the hook is connected to a flywheel which can freewheel or be powered by an electric motor. I will use a scale to check the tension.
View attachment 276370
Because of the long length of the rope walk I made up a set of pulleys to apply the tension to the rope.
View attachment 276367
All the carriages run on small bearings inside the slot.
Now for the fun part start making some rope. I've got some overlocker thread not the best but it's cheap (I expect most will end up in the bin). I'll try it out tomorrow and see what happens.
Cool. If you have not seen this video it is worth watching...
My goodness Tony! You are Mcguyver, Inspector Gadget, Superman, Shaft and James Conn all rolled into one!! I just love how you make equipment out of spare parts that are lying around. I can't wait to see your rope.
Thanks Daniel that's a huge complement. If there was more stuff available back then I would most probably have bought one. I have made some ropes but I'm having a bit of trouble getting a good photo, will post later.Cool. If you have not seen this video it is worth watching...
Great video Paul
The side rails and scrolls have been troublesome for a few reasons, this is how Corel intended them to be done.
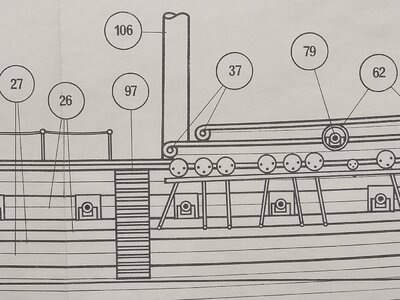
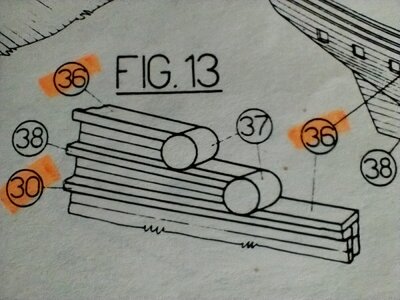
The scrolls are made from 6mm dowels blended into the rails. I tried this with some scrap pieces and was not happy with it. The other problem I had was there was only just enough material if I didn't get it right the first time. I would have to order more.
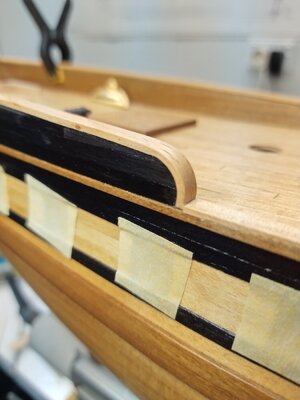
This is how I ended up doing the rails, simple alternative but it looks better than my trail run.
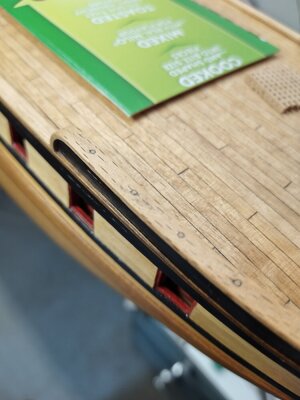
I had difficulties keeping the forward rails in place while gluing so I made some wooden pins to hold them in place. I only needed a couple but looked better with more.
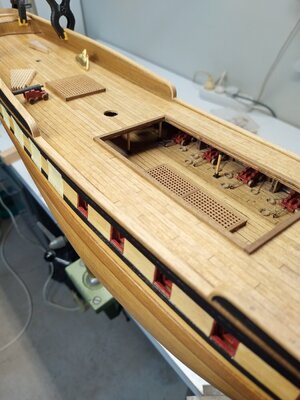
Job done.
Hope everyone has a merry Christmas and a safe happy new year.


The scrolls are made from 6mm dowels blended into the rails. I tried this with some scrap pieces and was not happy with it. The other problem I had was there was only just enough material if I didn't get it right the first time. I would have to order more.

This is how I ended up doing the rails, simple alternative but it looks better than my trail run.

I had difficulties keeping the forward rails in place while gluing so I made some wooden pins to hold them in place. I only needed a couple but looked better with more.

Job done.
Hope everyone has a merry Christmas and a safe happy new year.
I LOVE the rails you made. You've got mad woodworking skills Tony! Precision for days...
The side rails and scrolls have been troublesome for a few reasons, this is how Corel intended them to be done.
View attachment 277705
View attachment 277706
The scrolls are made from 6mm dowels blended into the rails. I tried this with some scrap pieces and was not happy with it. The other problem I had was there was only just enough material if I didn't get it right the first time. I would have to order more.
View attachment 277707
This is how I ended up doing the rails, simple alternative but it looks better than my trail run.
View attachment 277708
I had difficulties keeping the forward rails in place while gluing so I made some wooden pins to hold them in place. I only needed a couple but looked better with more.
View attachment 277709
Job done.
Hope everyone has a merry Christmas and a safe happy new year.
Very, very well done. The curve isn't easy and you got it. Plus those wood pins excelente job !!!!
Daniel
I LOVE the rails you made. You've got mad woodworking skills Tony! Precision for days...
The rails are a great addition to what is turning into a beautiful ship!
Thanks for the kind words. The curves weren't that hard to do, my main concern was not having enough timber to complete the job.Very, very well done. The curve isn't easy and you got it. Plus those wood pins excelente job !!!!
Daniel
Today I completed the catheads and discovered something interesting the deck is 2mm lower on one side. I knew it was a little bit out but didn't think it was that much. I don't know what caused this error but it's to late to try and correct it. At least the lower deck is OK.
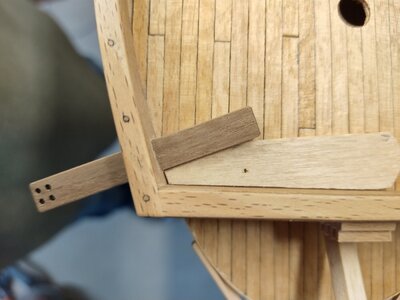
I made a template to insure the angle and spacing is the same on both sides.
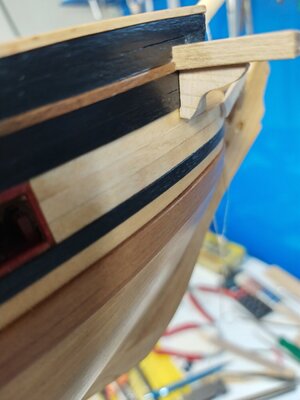
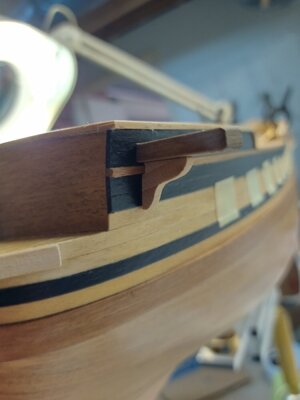
See the difference in hight.
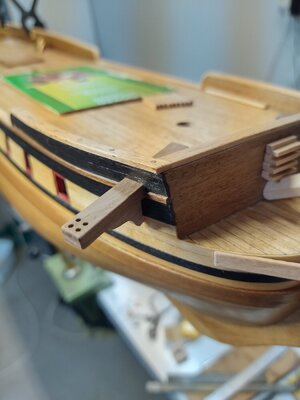
Finished but not fixed in place.

I made a template to insure the angle and spacing is the same on both sides.


See the difference in hight.

Finished but not fixed in place.
Hi Daniel I'm not to worried about it as there is not much I can do to fix it. After a quick check it appears the port side upper deck is too high. As the deck was nailed down firmly maybe it's an issue with the frames. Something to watch out for on my next builds.Counting the planked strips, they are the same at both sides. Could it be with the deck positioning ? That can't be seen from the pictures.
Nevertheless, it is looking very well and that issue is difficult to see.
Great Job !!!
Daniel
Firstly I would like to wish everyone a very happy and healthy new year. Over the last couple of weeks I've been working out a way to copper plate the hull. This is a feature I wanted to get some experience with, my biggest problem was obtaining the parts. It looked like it was going to be very expensive using pre-made plates, model expo sell a packet of 50 6x12 mm plates for $15. I need at least 20 packets which comes in at $300 and shipping to Oz was another $234. Copper tape with rivets stamped on it was a much better option.but I have been caught out with long delivery times before.
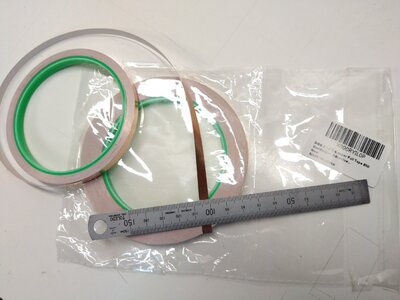
My solution was to buy two 20 metre rolls of 6mm copper tape from Amazon $10 to experiment with.
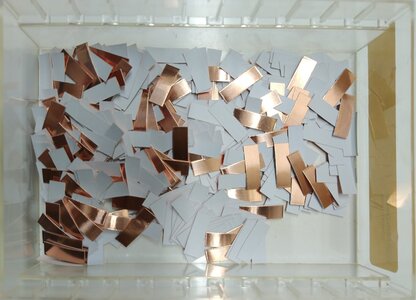
Next it's cut into 18mm lengths.
I tried these out on some scrap and felt it needed the nail heads to show.
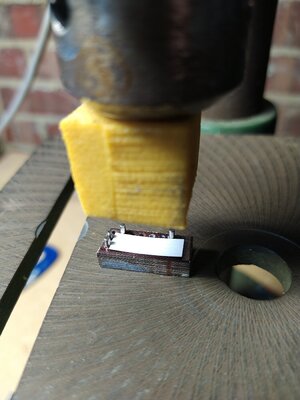
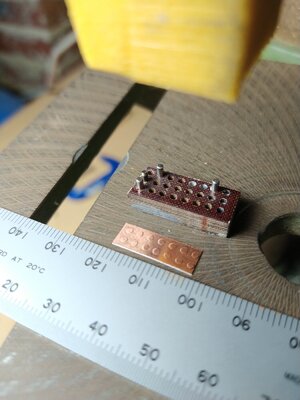
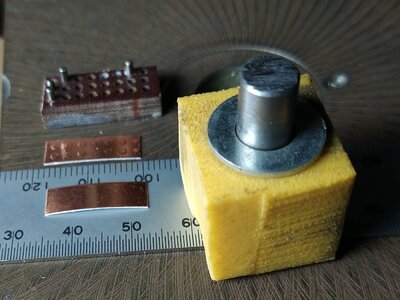
This was done using a small block with holes drilled in it and a medium hard rubber block mounted in a drill chuck. The drill was used as a press to make the impressions in the copper plate.
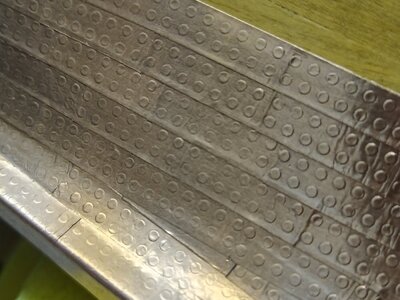
This is how it looks, it's going to take a little while to complete.
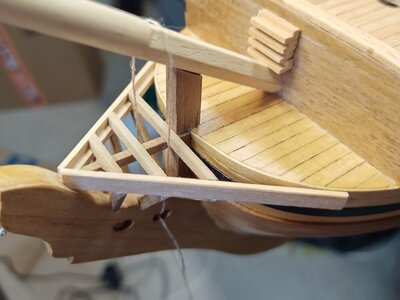
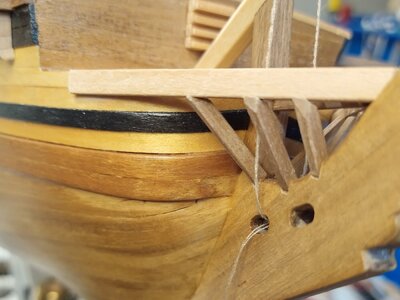
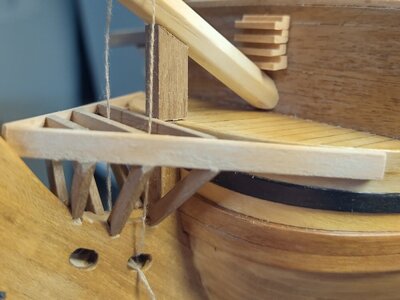
While working on the hull I fitted some of the head timbers.
My solution was to buy two 20 metre rolls of 6mm copper tape from Amazon $10 to experiment with.

Next it's cut into 18mm lengths.

I tried these out on some scrap and felt it needed the nail heads to show.


This was done using a small block with holes drilled in it and a medium hard rubber block mounted in a drill chuck. The drill was used as a press to make the impressions in the copper plate.

This is how it looks, it's going to take a little while to complete.


While working on the hull I fitted some of the head timbers.
Tony you are a genius! I am no expert on copper plating hulls but what you have looks very good.
Just a quick update and a few photos, today I've finished the copper plating on the hull. I found its a job a bit like tying rat-lines it takes a long time but well worth the effort.
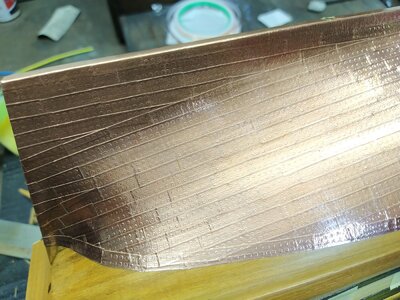
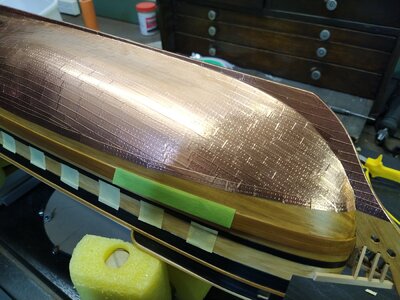
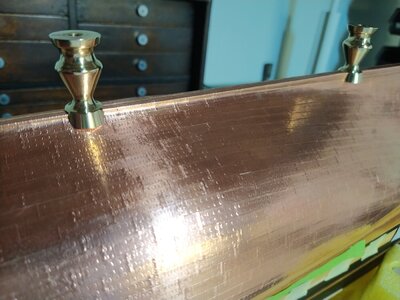
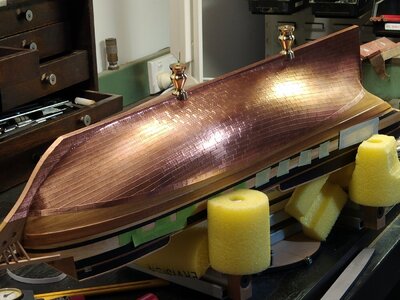

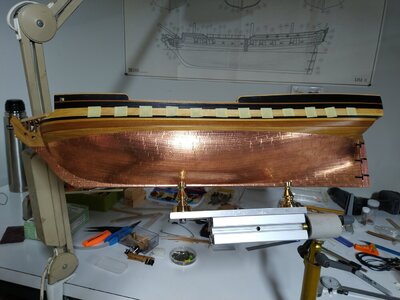
At the moment I'm not going to treat the copper to try and get an aging effect. Where I started the plating it's already started to tarnish, I'll see how it looks like in a couple of weeks and make my mind up then.


At the moment I'm not going to treat the copper to try and get an aging effect. Where I started the plating it's already started to tarnish, I'll see how it looks like in a couple of weeks and make my mind up then.
While the ship is upside down I installed the rudder. This was quite a simple process, first the hinges where bent to shape then attached all three to the rudder then to the hull.
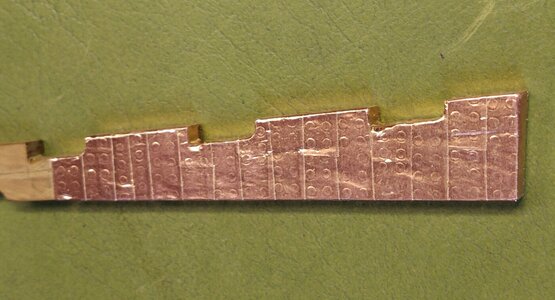
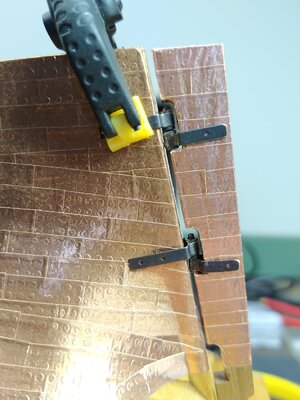
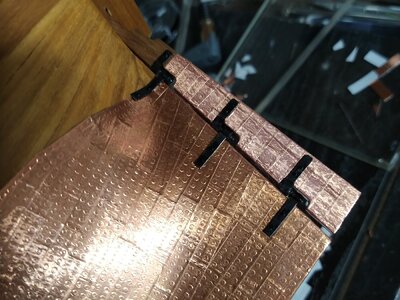
I'm a little disappointed with some of the fittings supplied with this kit the hinges should be narrower and more of them. Also the nail holes for the rudder where in the wrong position and had to be redrilled.
Next job is to do do the stern cabin this looks a bit tricky to get right.


I'm a little disappointed with some of the fittings supplied with this kit the hinges should be narrower and more of them. Also the nail holes for the rudder where in the wrong position and had to be redrilled.
Next job is to do do the stern cabin this looks a bit tricky to get right.


