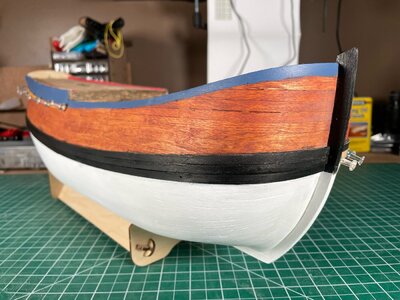
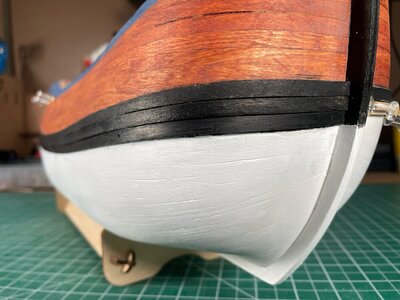
Building The New HMS Endeavour By Artesania Latina Video Log

Jamie the hull looks awesome! But could someone explain to me the drop planks vs. wedges.
Thanks Kramer.
Wedges are the simple triangle pieces we use to fill in the gaps. Points on all three corners. Absolutely nothing wrong with using them, but technically not a "correct" ship building technique. When building a "real" ship you want to avoid "pointy" things. Because material tapers to such a sharp point, that point becomes an area that wears out early. So they used blunt ends on their tapers to avoid these pointy things. Again in model building, there is nothing wrong with using them, it's a pretty common practice, and very much seen in many instruction manuals. But just like wanting to use aftermarket ropes, blocks or dead eyes, using a drop plank or a stealer adds a different element of realism. See the image below for a typical wedge.
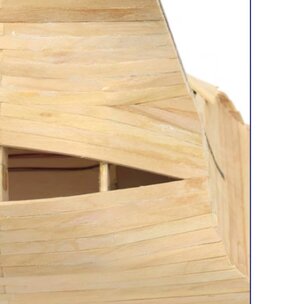
Wedge.jpg
Now, I will try my best to explain drop planks.
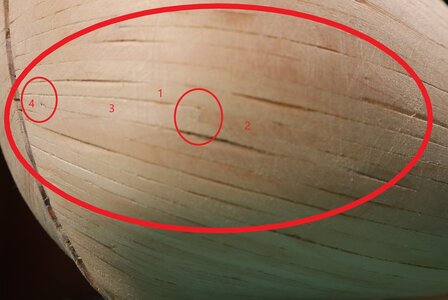
Keeping in mind that we want to avoid "pointy" things, take a look a the photo below.
Looking at plank #1, it has a natural flow to the stem. Tapered based on my planking plan.
If you follow plank #2, you will see that the natural flow would end somewhere between the numbers 1&3, resulting in a point, so we "drop" the plank.
I think this means my planking plan was wrong LOL.
The rule of thumb is that the end of the plank should not be less than half the width of the plank. My planks are 5mm wide, so my drop should be no less than 2.5mm.
Now plank 3 would also end in a point (or less than 2.5mm) at the stem so I dropped anther plank.
IMG_0306.jpg
It's a lot of work for a first timer like me, but it was a challenge that I wanted to try. I mean after all, I could just cover it with filler and move on if I failed. It doesn't have to be sea worthy, its just a model my children will toss in the landfill when I'm gone :)

I hope this answered you question, but if not, let me know and we'll get some real experts in here. ROTF
 
Jamie- it that a beer plank Beer.
Planking finished and rough sanded.
Achieved MOST of my goals.
Make a planking plan. Check
Add a drop plank. Check.
Add a stealer. Check
NO wedges, BIG CHECK!
Little to no filler. Check.
No CA Glue......well, you can't have it all lol
View attachment 326894
View attachment 326893
I still have some sanding to do, but overall, I'm pleased with it.
Mostly because I learned so much in the process.
Well, in my opinion that is brilliant! Cheers Grant
 
What.....Have.....I.......Done??
I may or may not regret starting this. ROTF

View attachment 327311
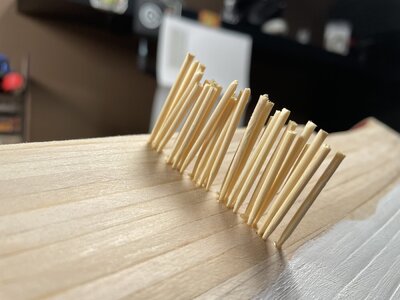
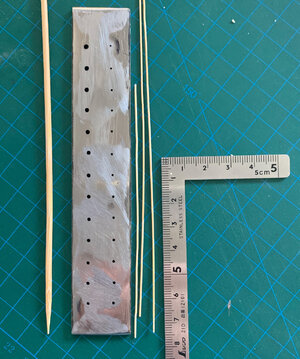
I bought a draw plate from Micro Mark for $20 (this is reduced from their original $75 as the Indian made draw plate is not very well made).. I have 0.7mm bamboo trenals now to provide mechanical connection as well as glue. Saves having to sharpen thousands of toothpicks.......
Micro-mark actually refunded me the $20 as many of the holes are the same size and it doesn't graduate down in size between holes, however gratuitous use of a flat file on the surface has given a good cutting edge on several holes and a little perseverance will get to the final hole.

I would like to go finer but jewellers draw plates (for drawing wire) down to 0.25mm cost US$150 upwards.

IMG_0402.jpg
 
Last edited:
I bought a draw plate from Micro Mark for $20 (this is reduced from their original $75 as the Indian made draw plate is not very well made).. I have 0.7mm bamboo trenals now to provide mechanical connection as well as glue. Saves having to sharpen thousands of toothpicks.......
Micro-mark actually refunded me the $20 as many of the holes are the same size and it doesn't graduate down in size between holes, however gratuitous use of a flat file on the surface has given a good cutting edge on several holes and a little perseverance will get to the final hole.

I would like to go finer but jewellers draw plates (for drawing wire) down to 0.25mm cost US$150 upwards.

View attachment 327858

The real deal. But shipping will be brutal...
 
I bought a draw plate from Micro Mark for $20 (this is reduced from their original $75 as the Indian made draw plate is not very well made).. I have 0.7mm bamboo trenals now to provide mechanical connection as well as glue. Saves having to sharpen thousands of toothpicks.......
Micro-mark actually refunded me the $20 as many of the holes are the same size and it doesn't graduate down in size between holes, however gratuitous use of a flat file on the surface has given a good cutting edge on several holes and a little perseverance will get to the final hole.

I would like to go finer but jewellers draw plates (for drawing wire) down to 0.25mm cost US$150 upwards.

View attachment 327858
I may actually look into this for future builds. The tree nails in the wales were used to cover the tack holes from securing the wales to the hull while the glue cured. So a true mechanical connection would have saved me a step in the process. (removing the tacks then filling the holes)
 
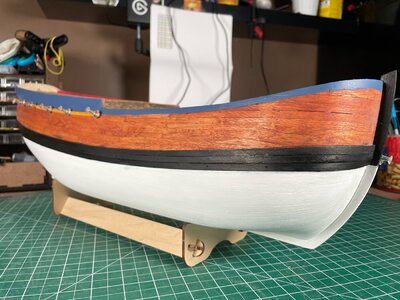
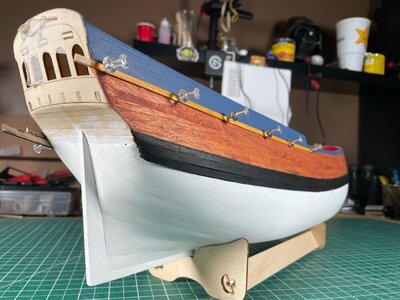
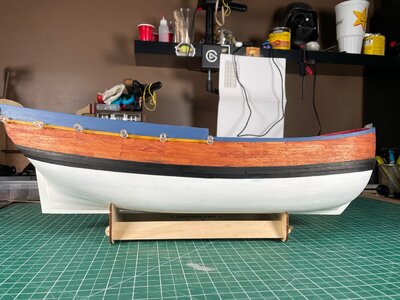
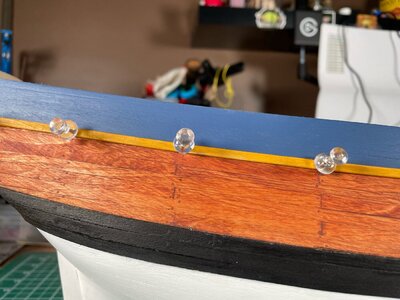
I would like some opinions from the group please.
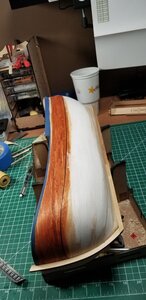
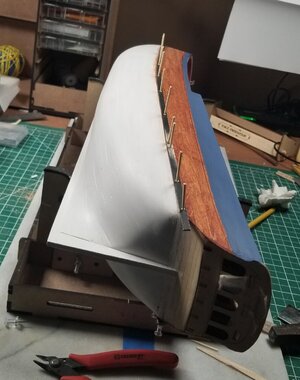
From the start, I wanted to plank the hull in a manner that didn't require any filler. Nice tight seams. I wanted the planks to be seen. I wanted it to look "real"
For the most part, I achieved the no filler part. That gap at the stem will need to be addressed, but overall, a pretty decent planking job.
And while I still have a lot of touch up to do, (and final painting)
I would like to know if what I have translates to proper planking lines or if it just looks like sloppy work.
I really want honest opinions here. I have no issues with filling the lines in and repainting.
I also feel as if the white is a little too stark and will likely end up toning it down with a wash of some sorts.
I have also chosen yellow ochre India ink for for the trim vs the suggested bright yellow in the manual and on the replica in Australia, but not 100% sold yet.
So, let me know what you guys think.

Thanks

image0.jpeg

image1.jpeg

image2.jpeg

image3.jpeg

image4.jpeg

image5.jpeg
 
Last edited:

The real deal. But shipping will be brutal...
There are several items on the Byrnes Model Machines site I would like to purchase but repeated emails to him through his website have resulted in no response.
 
Since the bottom will be painted, I will only do fro the wales up, so it may not be too bad.
But only the replica was painted. The original ENDEAVOUR did not have a painted hull. She was also pre copper so the underwater hull was coated with horse hair and tar mix lined in fir and then nailed over with large head iron nails. The references state that it was a messy looking affair but the aim was to provide a rusty iron coating and if the worms got through that there was a sacrificial fir lining before they got to the real planking. Wood ships really didn't like the tropics.

This type of hull finish is impossible tor replicate in model form so a messy brown finish is all I could do using walnut stain over the raw limewood strips.
I guess I'm building a replica of the replica, I ain't sanding all that off. ROTF
 
Back
Top