Bluenose - Model Shipways MS2130 - 1/64 - By JeffT [COMPLETED BUILD]

Time to work on the bulkheads. First, they were marked with the reference line from the plans. In most cases the reference line coincided with the top of the slot in the bulkhead where it fits to the false keel. The location of the refence line changes some on the bulkheads near the bow & stern and is used to show that the bulkheads are properly aligned during assembly.
View attachment 360935


One problem was noted on bulkhead H. The laser cut line from one side did not match the line cut for the other side. The good news was that the higher line had extra material as opposed to the lower line not having enough material. I used a paper template and marked the correct line on the higher side and sanded down to the line, so the curve for the deck was maintained and that the two sides were even.
View attachment 360936


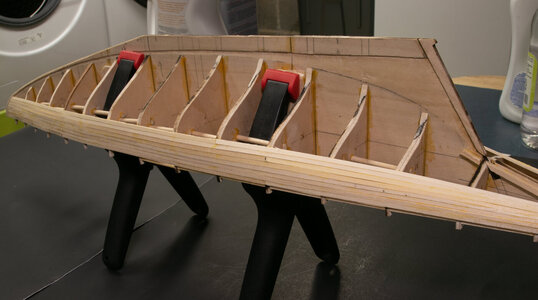
I did not take very many pictures of the installation of the bulkheads. I used Lego blocks on all four sides of each bulkhead to square the bulkheads with the false keel. You can see the results of the reshaping of the top of Bulkhead H in the picture. Titebond II was used to glue the bulkheads in place.
View attachment 360937


I also decided to strengthen the hull with 3/16" dowels set between each of the bulkheads. I didn't have a drill bit long enough to do more than one bulkhead's width, so I glue the dowels between 2 bulkheads moving the dowels away from the false keel based on the size of the bulkheads.
View attachment 360938 View attachment 360939
Covers for the masts were added to both mast slots in the false keel. The width of the hole is based on the size of the dowels used for the masts.
View attachment 360940

It's not shown here, but I also added some V shaped pieces (1/16"" square sanded down along the diagonal of the square) in the corners of the mast hole to fit the mast dowels more tightly.
I love the lego idea on the bulkheads
 
I love the lego idea on the bulkheads
I can't take credit for it as a technique. I have seen Legos used by many builders for aligning bulkheads. This was the first time that I used them. I ordered a small package of used Legos from eBay.
 
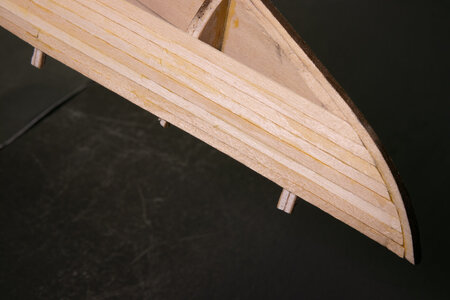
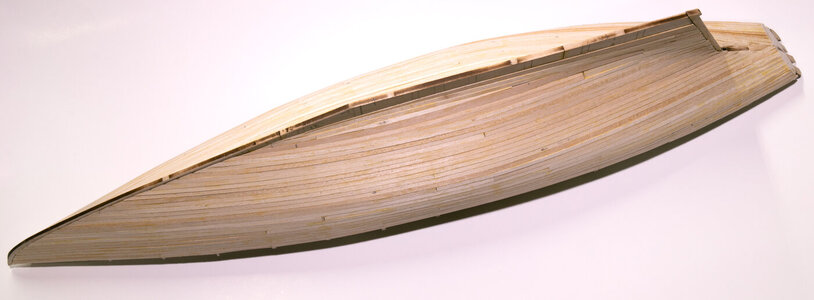
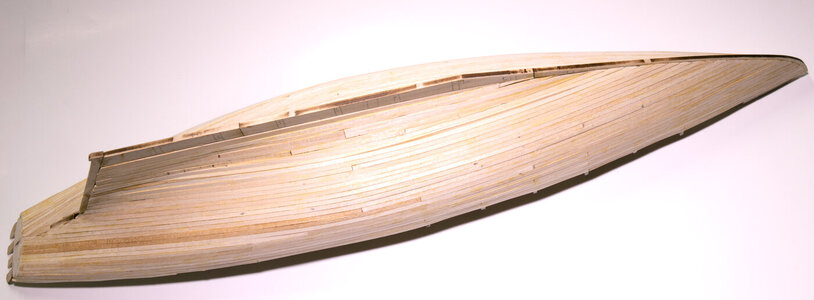
Planking on this kit is a single layer. This is where I get to see if I cut a decent rabbit or not. The better the rabbit is done the better the planking goes on. The supplied planking strips are not long enough to do the entire length of the hull, so instead of using shorter planks as has been suggested in some build logs I chose to go with 2 pieces per plank. The nice sharp bow of the ship allows the planks at the front to require very little adjustment of width, just an angle cut with some sanding to fit the rabbit. The stern is quite narrow compared to the bow and requires significant use of the plane to reduce the width of planks. I made a few measurements and decided on an approximate width for each plank. I did not do a great job with getting the width of each plank the same but the curve around the stern turned out OK. I seemed to have forgotten that I own multiple cameras while planking as I did not take very many pictures of the process. I did have to cut the rabbit deeper in the deadwood at the stern to get the planks to lie more evenly and to fit to the sternpost correctly.
IMG_7070.jpgIMG_7072.jpgIMG_7073.jpg
Due to the shape of the hull and an adequate job on the rabbit, this was the easiest planking job I had undertaken to date.

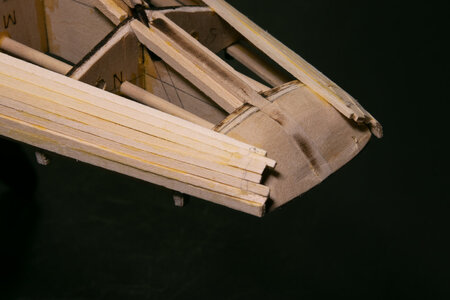
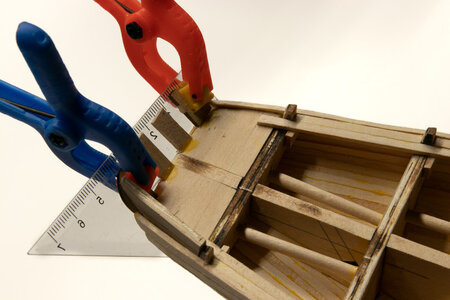
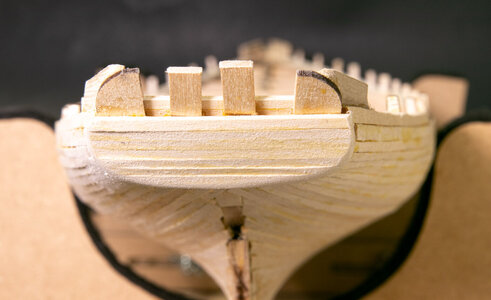
I added the stern frames. These little pieces were the most difficult part of the build so far. The stern blocks had to be notched for the frames to sit in and there was little contact area to glue the frames. I used a small triangle taped to the stern to lean the frames against to get the correct angle. The blocking material on the starboard side is temporary and will be replaced with a similar (less tall) version later. I couldn't get CA or Titebond to hold adequately, so I mixed up some 5-minute epoxy which did the trick.
IMG_7085.jpgIMG_7086.jpg


Other than a few minor errors requiring some fixes, the planking turned out well.
IMG_7093.jpgIMG_7094.jpg
 
Way to go Jeff. A major accomplishment presented with little fanfare. Bravo on a job well done. I can’t wait to see what it looks like sanded out.
"Little fanfare"! It must be my training in writing scientific papers. At least I'm not writing in third person. Thanks for the complement on the planking even if it is succinct. :D
 
Planking on this kit is a single layer. This is where I get to see if I cut a decent rabbit or not. The better the rabbit is done the better the planking goes on. The supplied planking strips are not long enough to do the entire length of the hull, so instead of using shorter planks as has been suggested in some build logs I chose to go with 2 pieces per plank. The nice sharp bow of the ship allows the planks at the front to require very little adjustment of width, just an angle cut with some sanding to fit the rabbit. The stern is quite narrow compared to the bow and requires significant use of the plane to reduce the width of planks. I made a few measurements and decided on an approximate width for each plank. I did not do a great job with getting the width of each plank the same but the curve around the stern turned out OK. I seemed to have forgotten that I own multiple cameras while planking as I did not take very many pictures of the process. I did have to cut the rabbit deeper in the deadwood at the stern to get the planks to lie more evenly and to fit to the sternpost correctly.
View attachment 363225View attachment 363226View attachment 363227
Due to the shape of the hull and an adequate job on the rabbit, this was the easiest planking job I had undertaken to date.


I added the stern frames. These little pieces were the most difficult part of the build so far. The stern blocks had to be notched for the frames to sit in and there was little contact area to glue the frames. I used a small triangle taped to the stern to lean the frames against to get the correct angle. The blocking material on the starboard side is temporary and will be replaced with a similar (less tall) version later. I couldn't get CA or Titebond to hold adequately, so I mixed up some 5-minute epoxy which did the trick.
View attachment 363228View attachment 363229


Other than a few minor errors requiring some fixes, the planking turned out well.
View attachment 363230View attachment 363231
A nice job done, Jeff. At the stern a lot of flowing lines comes together. She is showing here curves very well. And the transition of the planks into the rabbet looks neat.
Regards, Peter
 
A nice job done, Jeff. At the stern a lot of flowing lines comes together. She is showing here curves very well. And the transition of the planks into the rabbet looks neat.
Regards, Peter
Thanks for the vote of approval on the planking. There was a bit of a challenge at the stern since it is so oval above the waterline and it drops sharply below the water line.
 
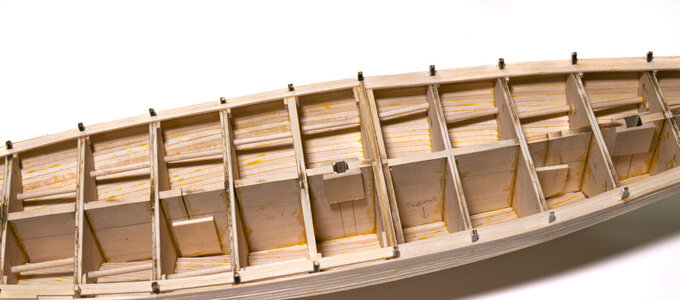
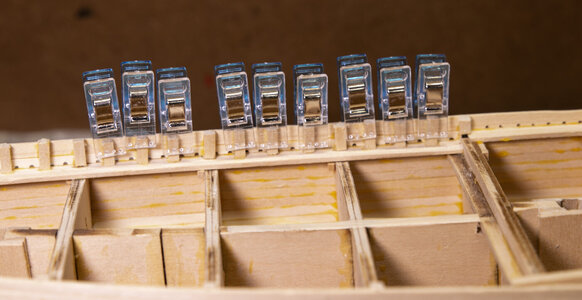
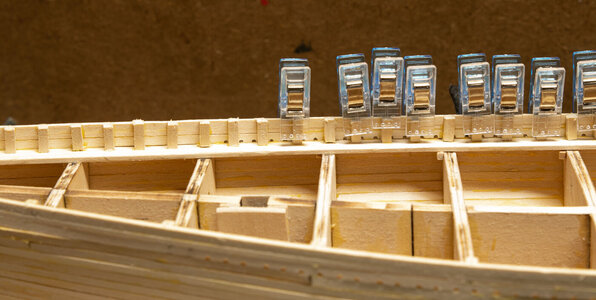
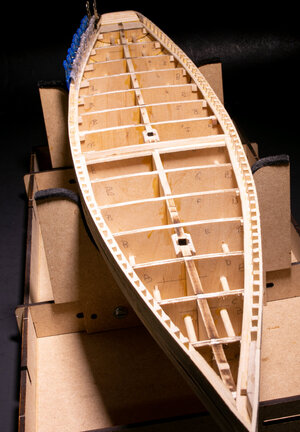
I added the waterways all around the ship. The process was to add the long strips inside the bulkhead extensions first and then the short pieces between each bulkhead. The fore deck has 3 pieces and the quarterdeck consists of 2 pieces. It is not immediately evident in these pictures, but I glued on some 3/16" square pieces along the bulkheads for the ends of the short strips (those between the extensions) to rest on while glue was drying.
View attachment 361983View attachment 361984View attachment 361985View attachment 361986View attachment 361987

I don't really care for how I ended up doing the bow, but it will not be visible in the final model.
Would you advise to paint the waterways before installing them, because they will be white
 
Would you advise to paint the waterways before installing them, because they will be white
Not necessarily. I installed the waterways first then cutoff the bulkhead "stanchions" and tacked them back in place (to be seen in one of my next posts). I installed the bulwarks and finally all of the false stanchions. Once the stanchions were in place, the waterways were painted grey per the instructions. I then painted the stanchions and inner bulwarks white. Then some touch up to the grey waterways. I would definitely recommend painting the waterways before installing the decking.
 
Last edited:
Starting the stern planking. Some further shaping of the stern will be needed once all of the planking is completed.
IMG_7098.jpg
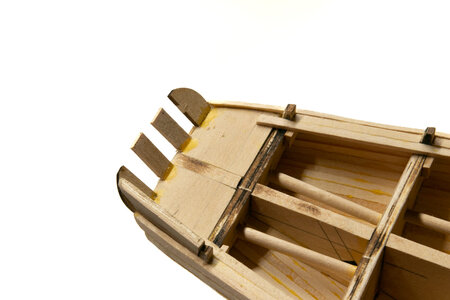
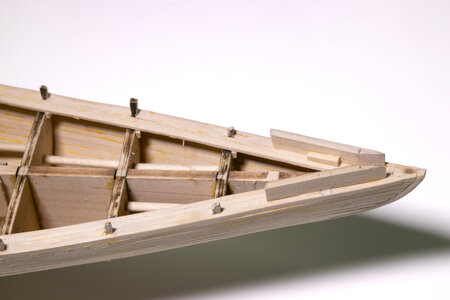
Waterways fully installed. Note how uneven looking the bulkhead tops are. The kit instructions suggest these should be used as stanchions, but most builders cut them out. I did as well. The knightheads and hawse timbers were installed at the bow. I cut a corner here and made a single piece (after cutting out the forward bulkhead tops. The instructions have the builder doing this in two pieces to use the bulkhead top as part of the unit. You can see where I cut the top off. I'll cut out the hawse hole for the anchor chain later.
IMG_7095.jpgIMG_7096.jpg
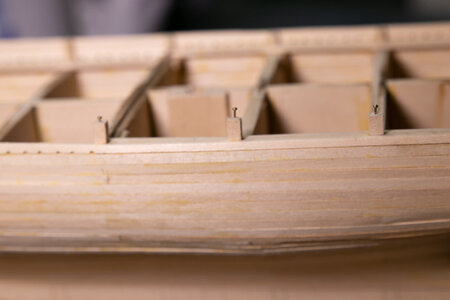
At this point I cut off all of the bulkhead tops and replaced them with 1/8 square pieces. I drilled these pieces and then glued and tacked them in place on the waterways in place of the original bulkhead tops. The nails were used to provide lateral stability for until the bulwarks were installed.
IMG_7100.jpg


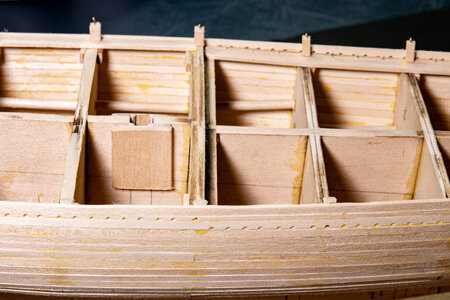
One photograph that represent a lot of work. All of the scuppers were cut into the bulkhead planks prior to mounting on the ship. I probably counted how many scuppers holes there were, but I'm also glad to have forgotten that number; 2 holes per stanchion. The scuppers are supposed to be rectangular, but I didn't have the tools (nor skills nor patience) to cut them into that shape. Instead, I used a rectangular file edge to cut "sort of rectangular" scuppers (more like half circles). The bulwarks planks were then installed. I'm still considering whether to attempt to reshape them a bit more.
IMG_7101.jpg
 
Last edited:
Starting the stern planking. Some further shaping of the stern will be needed once all of the planking is completed.
View attachment 364418
Waterways fully installed. Note how uneven looking the bulkhead tops are. The kit instructions suggest these should be used as stanchions, but most builders cut them out. I did as well. The knightheads and hawse timbers were installed at the bow. I cut a corner here and made a single piece (after cutting out the forward bulkhead tops. The instructions have the builder doing this in two pieces to use the bulkhead top as part of the unit. You can see where I cut the top off. I'll cut out the hawse hole for the anchor chain later.
View attachment 364416View attachment 364417
At this point I cut off all of the bulkhead tops and replaced them with 1/8 square pieces. I drilled these pieces and then glued and tacked them in place on the waterways in place of the original bulkhead tops. The nails were used to provide lateral stability for until the bulwarks were installed.
View attachment 364419


One photograph that represent a lot of work. All of the scuppers were cut into the bulkhead planks prior to mounting on the ship. I probably counted how many scuppers holes there were, but I'm also glad to have forgotten that number; 2 holes per stanchion. The scuppers are supposed to be rectangular, but I didn't have the tools (nor skills nor patience) to cut them into that shape. Instead, I used a rectangular file edge to cut "sort of rectangular" scuppers (more like half circles). The bulwarks planks were then installed. I'm still considering whether to attempt to reshape them a bit more.
View attachment 364420
Nice progress and a lot off work done, Jeff. The stern is gone look fine with the planking.
About the scuppers: it you turn your file 180dgr, perhaps the shape becomes more rectangular? Be sure then to let the pressure upwards.
Regards, Peter
 
Not necessarily. I installed the waterways first then cutoff the bulkhead "stanchions" and tacked them back in place (to be seen in one of my next posts). I installed the bulwarks and finally all of the false stanchions. Once the stanchions were in place, the waterways were painted grey per the instructions. I then painted the stanchions and inner bulwarks white. Then some touch up to the grey waterways. I would definitely recommend painting the waterways before installing the decking.
Thank you, that’s what I will do.
 
Stanchions, stanchions and more stanchions.

Stanchions are made from 1/8 x 1/8 stock. I didn't measure very accurately on length for each one. I just made sure they were long enough to be higher than the bulwarks. They were glued to the bulwarks and the water ways. This was a fairly simple step, but it took some time as I was adding 9 or 10 each session.
IMG_7102.jpgIMG_7104.jpgIMG_7106.jpg
 
I don't think I that I mentioned that I installed the "great beam" and associated parts before I did the waterway. The great beam is at the break in the deck between the foredeck and quarterdeck. The instructions have you waiting to do that until after the stanchions are in. That did not feel like the best way to do it to me and recommend that the great beam parts be added before/during waterway construction.
 
Stanchions, stanchions and more stanchions.

Stanchions are made from 1/8 x 1/8 stock. I didn't measure very accurately on length for each one. I just made sure they were long enough to be higher than the bulwarks. They were glued to the bulwarks and the water ways. This was a fairly simple step, but it took some time as I was adding 9 or 10 each session.
View attachment 365121View attachment 365122View attachment 365123
Looks really nice. That’s my fear all those stanchions, must be over 100. Get tired just thinking about it.
 
Stanchions, stanchions and more stanchions.

Stanchions are made from 1/8 x 1/8 stock. I didn't measure very accurately on length for each one. I just made sure they were long enough to be higher than the bulwarks. They were glued to the bulwarks and the water ways. This was a fairly simple step, but it took some time as I was adding 9 or 10 each session.
View attachment 365121View attachment 365122View attachment 365123
Those stanchions really add credibility to your build. Thumbsup
 
I don't think I that I mentioned that I installed the "great beam" and associated parts before I did the waterway. The great beam is at the break in the deck between the foredeck and quarterdeck. The instructions have you waiting to do that until after the stanchions are in. That did not feel like the best way to do it to me and recommend that the great beam parts be added before/during waterway construction.
Sometimes you have to make your own build sequence. I consider the build instructions as a guide, not the law.
 
Stanchions, stanchions and more stanchions.

Stanchions are made from 1/8 x 1/8 stock. I didn't measure very accurately on length for each one. I just made sure they were long enough to be higher than the bulwarks. They were glued to the bulwarks and the water ways. This was a fairly simple step, but it took some time as I was adding 9 or 10 each session.
View attachment 365121View attachment 365122View attachment 365123
A nice repeating placement of the 2x54 stanchions, Jeff. It gives the bulwarks their tru appearance.
It is a large number of stanchions, but this method avoids making just as many well-fitted recesses in the waterways.
Regards, Peter;)
 
Back
Top