Bluenose Model Shipways (again) by Mallacoota [COMPLETED BUILD]

Joined
Feb 8, 2021
Messages
417
Points
278

Location
Victoria Australia
I have already built this kit but sold the model to a friend and wanted one to keep. I intend to do some things differently to the first time.
I plan to get rid of the bulkhead top tabs as they are very difficult to make look exactly like the 1/8th square intermediates, and they require the outboard waterway to be installed in about 20 sections rather than one continuous piece. This also enables me to install all these top timbers offline on the bench and on the waist planks. I can also paint the whole bulwark assemblies white off the model. The other thing I am going to do for the first time is paint everything I can before assembly to improve the paint job (hopefully)
We will see how that all goes.This kit has been logged a lot but I thought I would do it again to test a different approach which might be of interest particularly if it doesnt work...?
 
Last edited:
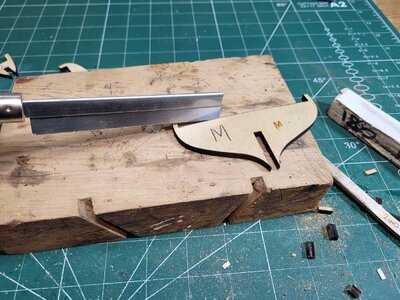
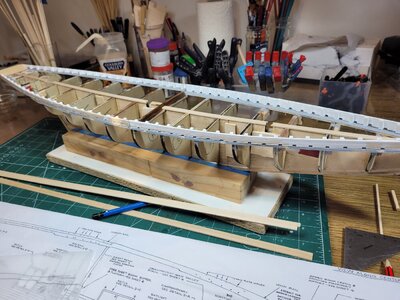
Cutting off the bulkhead tabs...no way back now. Nothing like an early commitment..LOL

20231009_091301.jpg


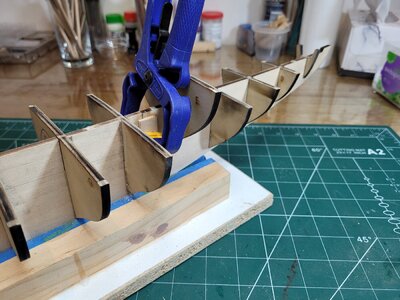
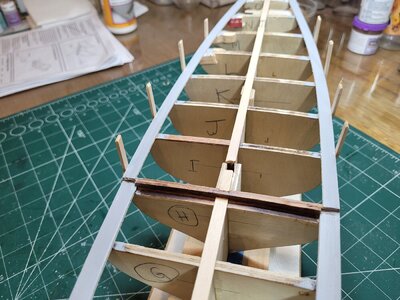
Dry fitting the topless bulkheads...I actually retained the bow one thinking it might prove a good idea, can always cut it off later if I need to. The clamps are just holding some additional joint bracing because you have to handle the keel ass'y quite a bit before the bulkheads strengthen the whole thing. The first time I broke the transom keelpiece extension off accidentally. This time I broke it, repaired it, and then broke it again. Not a fast learner..?

20231009_092657.jpg


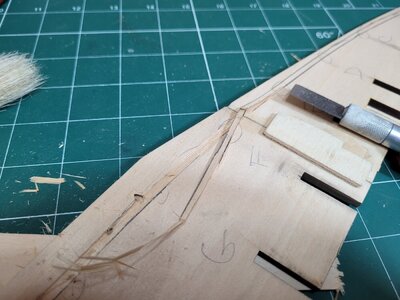
Cutting the rabbet

20231009_102739.jpg
 
Last edited:
On my first build, The Phantom, a solid hull kit, my mentor who ran the local ship building group showed me that cutting of the bulwarks off and leaving deck flat was best way and then add strips back like your showing. Worked for that small kit.
 
This approach definitely simplifies your waterways and will probably result in a good looking combination of waterways and stanchions.
 
I have already built this kit but sold the model to a friend and wanted one to keep. I intend to do some things differently to the first time.
I plan to get rid of the bulkhead top tabs as they are very difficult to make look exactly like the 1/8th square intermediates, and they require the outboard waterway to be installed in about 20 sections rather than one continuous piece. This also enables me to install all these top timbers offline on the bench and on the waist planks. I can also paint the whole bulwark assemblies white off the model. The other thing I am going to do for the first time is paint everything I can before assembly to improve the paint job (hopefully)
We will see how that all goes.This kit has been logged a lot but I thought I would do it again to test a different approach which might be of interest particularly if it doesnt work...?
Cutting off the bulkhead tabs...no way back now. Nothing like an early commitment..LOL

View attachment 398962


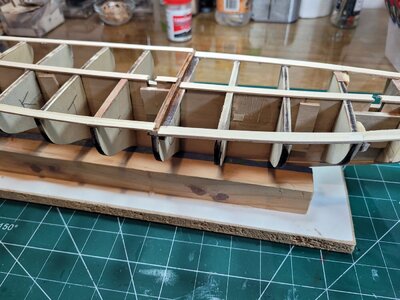
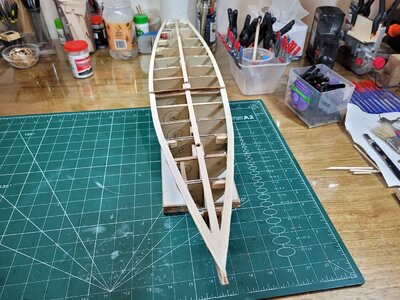
Dry fitting the topless bulkheads...I actually retained the bow one thinking it might prove a good idea, can always cut it off later if I need to. The clamps are just holding some additional joint bracing because you have to handle the keel ass'y quite a bit before the bulkheads strengthen the whole thing. The first time I broke the transom keelpiece extension off accidentally. This time I broke it, repaired it, and then broke it again. Not a fast learner..?

View attachment 398964


Cutting the rabbet

View attachment 398965
Always good to see a new build of a Bluenose, John. And you are right, you need to have one in your own living.
And when I see a saw on a picture in a Bluenose build-log ………. aha, just for cutting off some small parts. ;)
With the experience of your 1st build, you can now make a fine one for yourself.
But watch out when she is ready and good looking: there will be some other friends ………… before you know you have to start again.
Regard, Peter
 
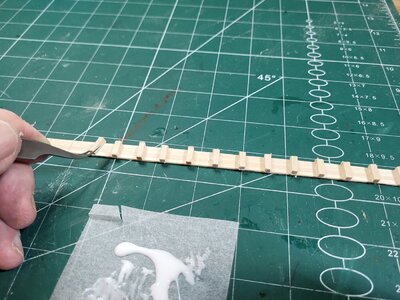
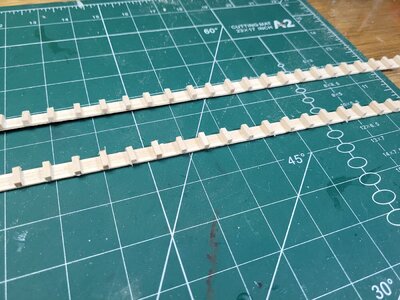
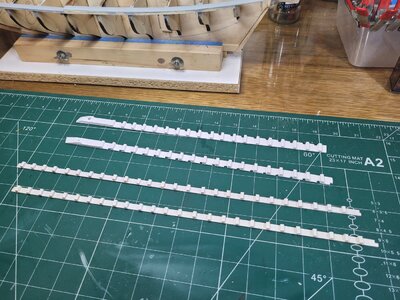
Have been making up the bulwarks and stanchions offline while waterways are drying

View attachment 400103View attachment 400104
I did the same with my BN, and after the fact I noted a few things I could/should have done… It might already be too late, but I’ll re-post them here.

—-
While my process to create the stations, rails, and scuppers worked, and I’m pleased with the overall outcome, if I were to have a mulligan, I would:
  • Take more time ensuring the stanchions were more uniformily spaced and perpendicular to the waterways.
  • Not filed the scuppers until the stanchions were glued to the board.
  • Possibly held off on painting the waterways until after the rail was completed.
Continued good luck.
 
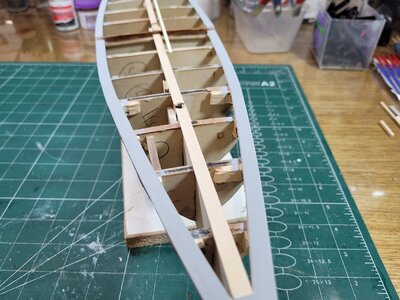
Finished the waterways after a couple of really dumb errors which had to be corrected...getting old is not very elegant. Now to paint a few coats of light grey as per the builders original colour scheme and then fit top plank. Then paint the stanchions and bulwarks and install. This time it is paint first, install second, and then touch up wherever possible to use this approach.
I have done a bit of a small kit-bash by installing a king plank just for appearance sake. There is not one visible in the photos I have seen so I dont think there was one.

20231017_091249.jpg20231017_091233.jpg
 
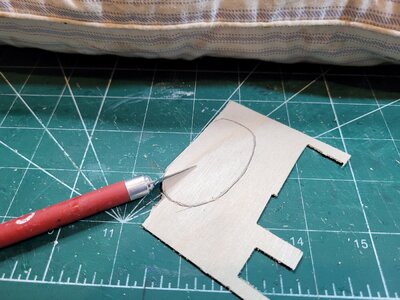
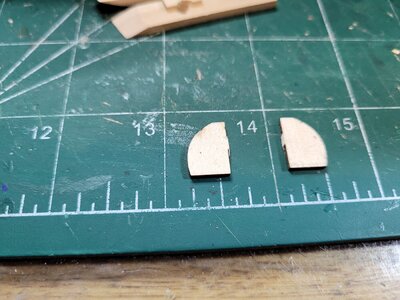
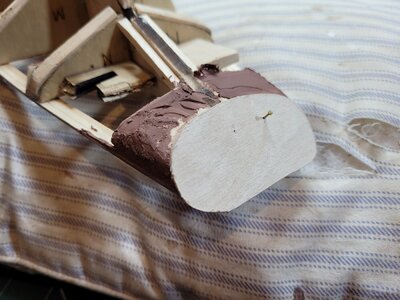
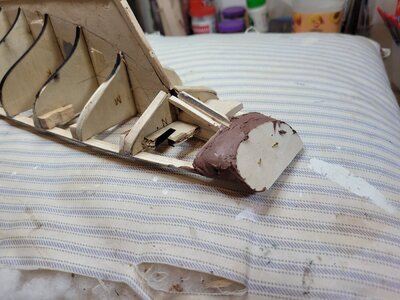
The other thing I have done is to change my approach to the transom. The kit asks you to fit two curved pieces of ply inset into the tops of the carved filler blocks, and than plank across them for the ceiling (inboard) and transom (outboard) finish. This is very difficult IMHO. I made a pattern and cut a full transom out of scrap thin ply and this gives me a finished surface in and outboard for the ceiling and transom planks and enables me to restore the symmetry of the carved blocks which were looking a little uneven. It gives you a really nice landing area for the planks after a bit of filler.

20231017_111628.jpg


20231017_113558.jpg


20231017_112125.jpg

20231017_113616.jpg
 
Nice idea with the plywood. I was difficult to try and get the stern looking right on the Bluenose.
 
The other thing I have done is to change my approach to the transom. The kit asks you to fit two curved pieces of ply inset into the tops of the carved filler blocks, and than plank across them for the ceiling (inboard) and transom (outboard) finish. This is very difficult IMHO. I made a pattern and cut a full transom out of scrap thin ply and this gives me a finished surface in and outboard for the ceiling and transom planks and enables me to restore the symmetry of the carved blocks which were looking a little uneven. It gives you a really nice landing area for the planks after a bit of filler.

View attachment 400541


View attachment 400542


View attachment 400543

View attachment 400545
Kit bashing and personal approaches are always nice to see, John. Such as the use of half cutted half-clothpins to strengthen the connection on the inside of the waterway on bulkhead ‘L’. No problem with that at all, because it’s on the inside and no one will notice.
Regard, Peter
 
Last edited:
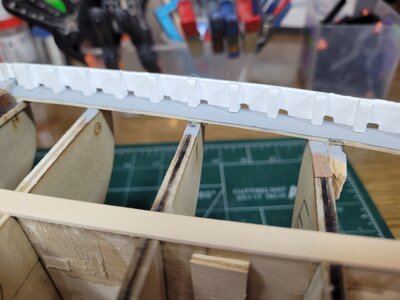
Installed the fore and aft bulwarks onto the waterways. Is it easier to do it this way than retaining the bulkheads tops..? I dont think it really is"easier" because its a PITA getting the edges aligned with the CA on the to the waterway edges. Is it a better outcome..? yes for me it is definitely a better result than the conventional way and particularly the opportunity to paint the job before assembly. Would I do it this way again..? hmmm probably but it is still the hardest part of the boat to do. It really is.

20231021_160609.jpg


20231021_160604.jpg
 
Installed the fore and aft bulwarks onto the waterways. Is it easier to do it this way than retaining the bulkheads tops..? I dont think it really is"easier" because its a PITA getting the edges aligned with the CA on the to the waterway edges. Is it a better outcome..? yes for me it is definitely a better result than the conventional way and particularly the opportunity to paint the job before assembly. Would I do it this way again..? hmmm probably but it is still the hardest part of the boat to do. It really is.

View attachment 401523


View attachment 401524
Your bulwarks turned out well. Nice and even spacing and good vertical 90° angles to the waterways.
 
Back
Top