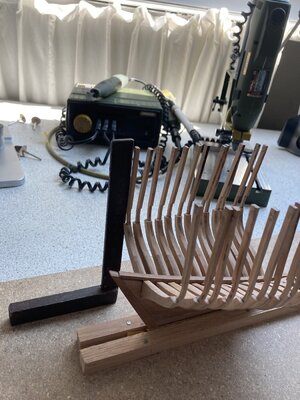
Bluenose by Liebre

I've done a few tests, and after editing they turn dark
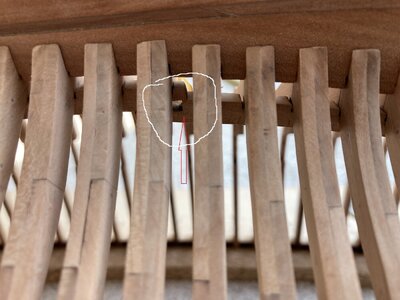
I'm using here for a wood filler ,dark oak for the contrast

first, holes of 6 mm drilled and transfer them afterwards with a toothpick in, and then the excess away immediately to abrade

IMG_0093.JPG
 
When a frame complete is place them in the temporary setup to check frames and keelson in well in the frames fit

after placements nevertheless revealed that one was a little bit crooked, and what stress sat up, no unnecessary check so

After a frame is ready I check whether the frame fits tightly in the mold and I usually correct the recess of the mold a bit so that it clamps well and does not let go immediately

Again a bit of customization :)
IMG_0096.JPG
 
Last edited:
The treenailing on the open side is a good and productive idea as they will not be visible from the planked side. The care that you take now by custom-fitting the frames into the keel will pay handsome dividends.
 
Yes

I think so too Heinrich

A difficult point will be when I place the frames in the mold to get them into the keel easily.

I've made the cutouts fairly tight for the view for the open part.

So a lot of time will be spent on the frames.
Go for quality over quantity
 
Yes

I think so too Heinrich

A difficult point will be when I place the frames in the mold to get them into the keel easily.

I've made the cutouts fairly tight for the view for the open part.

So a lot of time will be spent on the frames.
Go for quality over quantity
Good plan Henk, you’re doing great work!
 
Some progress with the frames again

All frames in the keel dry fit
The legs are well positioned in the jig (which was very convex)

The jig fixed with 10 screws to correct it

the recesses of the jig in such a way that they are with a light pressure can be removed. and still clamps itself in the jig
IMG_0134.JPG
 
There are still a few things that I have to solve

Frame 1 to 8 there is a lot of tension on the keel

I think I will glue this one at right angles first

Started with frame 49 and put auxiliary frames in between and so on to frame 1


IMG_0131.JPGIMG_0135.JPG
 
Last edited:
In the mould, I had the keelson fit in its entirety.

If in the middle part, it does not connect.

This has to do with the fact that the other frames have become slanted ??

As mentioned, the legs connect flush to the base plate, and the noses are in the keel.
Solves this problem if all frames are straight, the logic escapes me in this:confused:

Keelson2.jpg
 
Today again the frames were removed for the 3rd time ...:)

The problem is that everything is set too tight and I have to make a little more space.

Just did a few tests with frame 34 to 48

Also made some measuring blocks for between the frames

This is getting better:) Thumbsup
Still dry fit
I expect this to get even better later with gluing
now some updating the noses
 
Last edited:
In the mould, I had the keelson fit in its entirety.

If in the middle part, it does not connect.

This has to do with the fact that the other frames have become slanted ??

As mentioned, the legs connect flush to the base plate, and the noses are in the keel.
Solves this problem if all frames are straight, the logic escapes me in this:confused:

View attachment 257027
Couldn't this be caused by the perpendicularity issue you have? One frame, not sitting at right angles could cause the keelson to shift either forward or aft. And then the issue gets aggrevated by the tight fit of the frames.
I think I would hold back as long as possible on gluing any frame until having a satisfactory dry fit.
Still, it's starting to look like a hull... ;)
Kind regards,
Johan
Ha Johan,
Yes it must have to do with the squareness

All frames are now back in place and the problem is not solved yet

Do something else for now, and let it sink in
 
Ha Johan,
Yes it must have to do with the squareness

All frames are now back in place and the problem is not solved yet

Do something else for now, and let it sink in
Hi Henk,
At first: 'some progress'? Well this a a big progress! It looks impressive.
I also had to adjust the keelson at the transition between 2 parts. If the frames are at a regular distance in the jig and in the keel, then that is not the problem.
And about the alignment: always place your square in the same position. Look at your picture with the square by frame 49 and a few pictures later bij frame 26.
By frame 49 I see also a very little 'light-triangle'. Not exact angled? And I supposed you have checked your flat jig/surface.
2 times a little bit is already a little bit more ....... ;)
PS: Sorry for my late reaction, on the posts of sept 6th, but there is something with the e-mail-allert on the SoS.
Regards, Peter
 
Last edited:
Great progress Henk…the fit of the frames in the jig is tight. I sanded the thickness of the upper frame where it goes into the jig to fit. But I made sure I sanded the same side on every frame! In other words, I started sanding on the aft side of the frames and maintained that on all of them. That upper frame gets cut off anyway, so don’t worry about reducing the thickness.
They are very fragile in that area because it is only one piece of wood instead of two. But that thin area is only the stanchion in the upper bulwarks, which is cut off level with the railing later in the build.
The frames look great so far! Good work!
 
Thanks for all the support guys

By now I think I know what's in the way

I've filed the recesses in the mold a bit to make the tight fits, so that they stay in place and relatively easy to remove without putting a lot of pressure, to prevent breakage

Frame 49 was 99, ....% square when I placed and also the middle frame

Because the recesses in the mold are no longer square, everything pulls skewed and furthermore skewed towards the middle
Frames 1 to 6 are nice perpendicular

I will remove the frames again make the recesses a bit bigger, and place the frame by frame with a piece of paper in between to clamp that is also possible

And check them frame by frame with the keelson

For this I had given the few slightly too large recesses a knife point with your glue and then filed them out again.

So all in all I did some thinking and spent a lot of time on it In retrospect

I should have done this differently, but some learning moments

So I'll take them out later, only continue when everything is a bit more perpendicular, I'm already so far that I know this will get in your way soon

@Dean, I had thought about auctioning the end of the frames a bit, but decided not to, to avoid breakage

I got a number of accounts added and my table is free of all frames again, so spend some time on that again, and on my sub

So the next update will have to wait a little longer;)
It’s good to read you have some ideas to build it up, in a way that gives you confidence, Henk.
Take your time. And building on your sub diverts attention for a moment.
Regards, Peter
 
Thanks for all the support guys

By now I think I know what's in the way

I've filed the recesses in the mold a bit to make the tight fits, so that they stay in place and relatively easy to remove without putting a lot of pressure, to prevent breakage

Frame 49 was 99, ....% square when I placed and also the middle frame

Because the recesses in the mold are no longer square, everything pulls skewed and furthermore skewed towards the middle
Frames 1 to 6 are nice perpendicular

I will remove the frames again make the recesses a bit bigger, and place the frame by frame with a piece of paper in between to clamp that is also possible

And check them frame by frame with the keelson

For this I had given the few slightly too large recesses a knife point with your glue and then filed them out again.

So all in all I did some thinking and spent a lot of time on it In retrospect

I should have done this differently, but some learning moments

So I'll take them out later, only continue when everything is a bit more perpendicular, I'm already so far that I know this will get in your way soon

@Dean, I had thought about auctioning the end of the frames a bit, but decided not to, to avoid breakage

I got a number of accounts added and my table is free of all frames again, so spend some time on that again, and on my sub

So the next update will have to wait a little longer;)
This seems like a sleepless night well spend... ;)
 
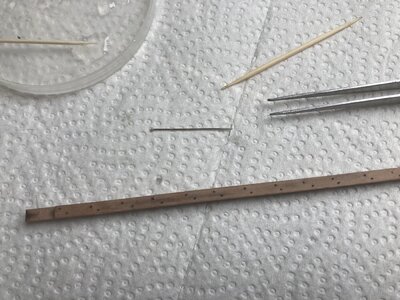
Pre-drilled holes with 0.3 mm
The nails slide in easy in
Nails put one night in the Brass Black to blacken
I glued the nails down instead of nailing them to keep the head black
Kept the keelson crooked
Holding the nails in so I could tap them with a small needle with Z- Proxy
And pressed with a toothpick, drying time 5 minutes
Keelson.jpg
 
Back
Top