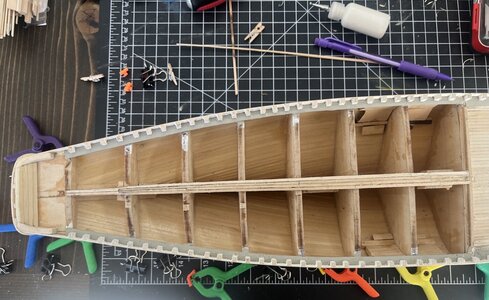
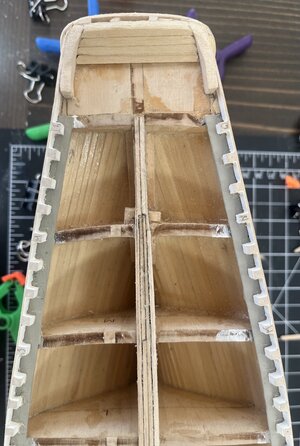
Bluenose 1:64 by Model Shipways - Build log

Do I paint the hull or do I install the rails?

  • Hull

    Votes: 0 0.0%
  • Rails

    Votes: 0 0.0%

  • Total voters
    0
  • Poll closed .
Glad the Elmer's wood putty worked out so well. It's pretty useful stuff. very malleable, reversable. With a little water it can be rejuvenated even if it dries out in the tub. Just be sure to add just a little water at a time.

Pete
 
Last edited:
I like the close ups of you meticulously carving the "fashion pieces" (Yup. That's what they're called!) Those are always challenging.
Take all the time you need. Life happens. The "Mulligans" are part of the process. Besides, who else is gonna know?
Looks good so far, fun to follow along. I look forward to the next installment. I think your approach is very creative and imaginative!;)

Pete
 
7/14 to 7/16
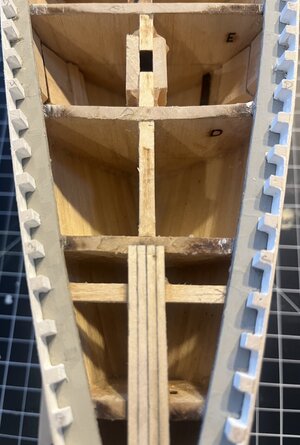
To prep for planking the foredeck, one thing I needed to decide was whether I was putting the coamings directly onto the deck or onto the bulkheads. I decided to put them on the deck. Hopefully I remember that since I’m putting them on the planks I’m supposed to make them 1/16” shorter.

The next thing I needed to decide was if I wanted to have planks running the full length of either the foredeck or the quarterdeck or instead cut them down to more realistic strakes. I looked back at a number of build logs including the one on Suburban Ship Modeler, and decided I was going to cut them to include strakes.

I know more work, but at this point, does it really matter?

After my review, I decided to follow the build log on Suburban Ship Modeler.I’ll have planks that are the length of 5 bulkheads. It makes the planks almost twice as long than they probably actually were (~45’ vs. ~27’), but I feel it will look better as you’ll see some individual planks/butts, but it shouldn’t be too busy.

To begin actual planking, I had to find the 1/16” x 3/32” boards. A great chance to use my new digital caliper. Not sure I like it as it has only 2 settings; inches (decimal) or mm. Given the plans are in fractional inches, I still have to convert everything. My old one has mm, but inches are shown in 64th of an inch.

I tapered the front of the first board to fit into the point of the waterways at the bow, then used a pencil to simulate caulking on the edges (including the end edge) and glued it in place.

Yeah! My first deck plank!

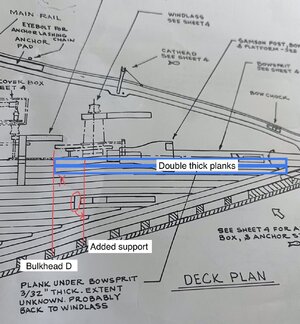
But wait… the 4 planks at center keel (2 on either side of center) are supposed to be a thicker plank at 3/32” x 3/32”, up to around the windlass. I know I had read that at least once before, even as late as last night, but in my excitement to be planking again, I forgot. I also had not seen this actually done in any build log - so do I do it or not?

I decided to go for it, so I pulled up the one plank that I had just done and began determining just how far back this thicker board should go to. The decision was fairly easy as there is a bulkhead slightly after where the windlass should end, which is bulkhead D.

At this point I also decided that it might look too busy if I were to bring the double-wide planks (also in the same area) back to bulkhead D, so I added in a support slightly in front of bulkhead D.

The plans show a butt between the keel and the double-wide board at D, but it does not align with my decking plan (of every 5th bulkhead) so I’m omitting it.
IMG_3983.jpeg
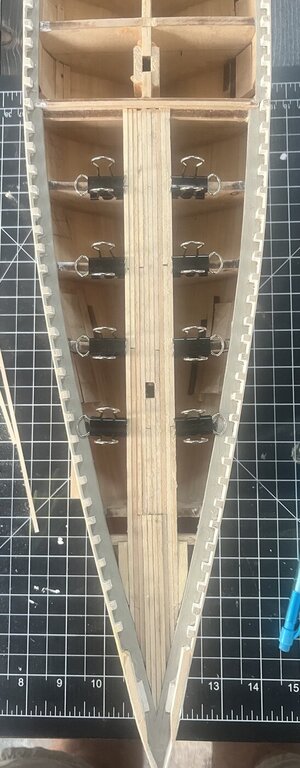
To end the night, I installed the 4 thick center planks. What that does to my plan of butts at every 5th bulkhead, I’m not sure yet, but that’s tomorrow’s concern. In the morning , I mapped out where all the butts will be on the foredeck. I’ve decided that the double wide board should also not go back to bulkhead D. I’ll need to add in a support of some sort for these boards to attach to. I’m thinking somewhere around the location of the next (false) stanchion towards the bow. This will break up the butts and make the area less busy.
IMG_3984.jpeg
This Saturday morning is the also the meeting of the Rocky Mountain Shipwrights club, my local club. Because of my travel schedule, I’m not always around for the meeting and I’m not sure of today’s topic, but I’m looking forward to attending. The main topic turned out to be mini-table saws. There were saws from 3 different manufacturers detailed. One interesting thing I learned was that the club has a number of “mini” wood working machines that anyone in the club may use. I’m not at a point to need this resource, but it’s nice to know the option exists.

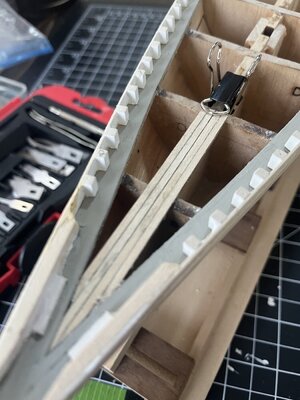
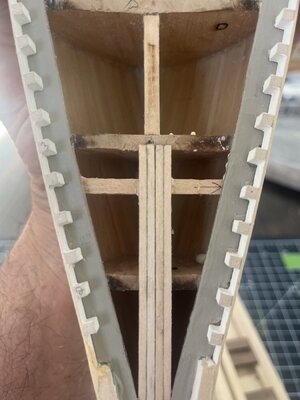
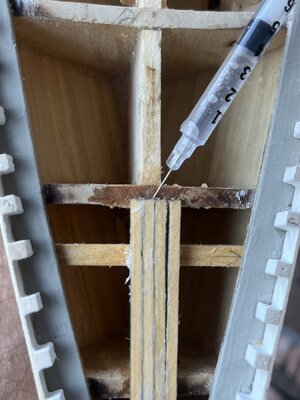
Back at home I cut and glued the extra supports for the double wide planks. After they dried, I noticed that the 4 planks were not directly centered on the keel. It wasn’t much (about 1/16”) but with the planks being 3/32”, that about 1/2 a plank width. Not sure how I missed it originally.
IMG_3988.jpeg
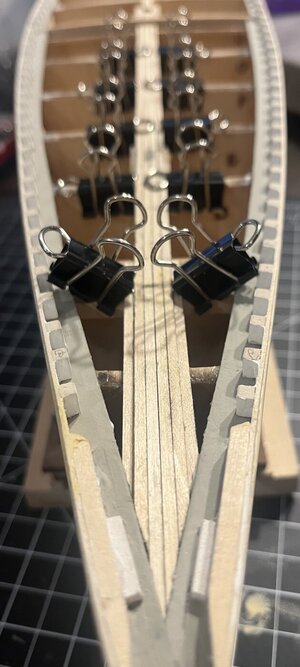
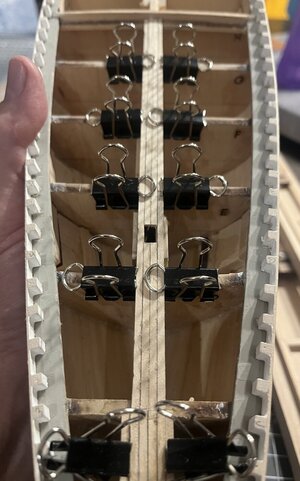
To correct this, I used a syringe to wet the planks and glue, and after a few minutes, I gently pried/pulled them up, repositioned them, glued, and clamped them into the correct location. Since water doesn’t stay exclusively where I wanted it, I had to reglue and clamp the tip of the rail at the bow as well.
IMG_3993.jpeg
IMG_4001.jpeg
I wrapped up my work by installing the 4 center strakes from the bow to the end of the foredeck plus the next two planks at the bow and carved out the hole for the mainmast.
IMG_4004.jpeg
IMG_4006.jpeg
Work time: 5 hours
Total work time: 109 hours
 
I believe these are called the "king" planks, and are often thicker than the surrounding planks. The origin of the term and the whys and wherefores I am at a loss to say. I am sure one of you with an encyclopedic knowledge of the origins and purposes behind such things will enlighten us. Please. Thumbs-Up

Pete
 
For detailing my BN I used the information from MS/Lankford and Jenson with his Saga. This Saga documented the BN-II but Jenson made also some 'interpretation' drawing of the original. And of course Chapelle's 'Bible' and a lot of pictures on the internet.
When you compare them, for example the deck for the foremast, you can see a lot of differences:
1689751830424.png
About the thicker king planks, Jenson does not named them. But on another forum there is/was a nice discussion about them. But Lankford also noted "Extent unknown". In Chapelle I could not find them.
Also interesting about the deck planking is de nibbling strake beside 1 (Jenson) or 2 (Lankford) waterway strakes. Lankford started the nibbling strake almost at the and of the bowsprit table and in front of them only pointed deck planks fitted to the waterways. But Jenson leads the nibbling plank up to the front.
The position of deck items is also different. For instance the catheads, chaingear /clutch cover box, length of the part of the bowsprit on deck etc.

So Hugh, nice to see your eye for the details of the king planks. And to do or not to do? I loved the builder who decided to make a re-do. Because your eye will always see this detail if you do not changed it. Chapeau for your decision!
And for other details: just based on both drawing parts, there is no right or wrong. Unless you made a stern-sprit ....... No, just kidding.
There are no original drawing. So all of the details are interpretation. Sometimes based on old pictures, but not all the details are shown. As long as we pay attention to details and don't just place the parts because the manual shows that.
Looking forward to the rest of your deck planking.
Regards, Peter
 
7/25 to 7/29
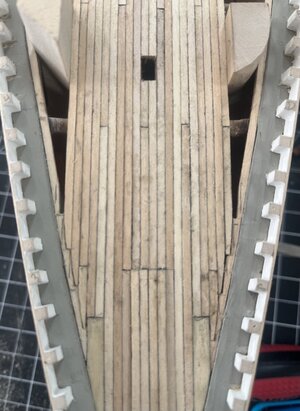
Planked out to where the double wide planks go, and then used regular width planks to finish from the double wide planks to the great beam. Next up nibbing.
IMG_4017.jpeg
I’m a bit nervous but also excited to do some nibbing. To begin the foredeck I installed the two nibbing planks, closest to the waterways. These planks are the same size as the deck planks. I used a pencil on their edges to simulate caulking.

My 1st two cuts for nibbing went ok. I know they are not aligned, but I feel I’ll be able to even them up within a few planks.
IMG_4061.jpeg
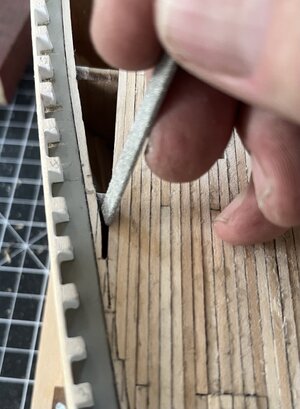
I ended up doing 7 planks with nibbing on each side, on my 1st day with each “pair” going a bit smoother than the one before it. The planks are now pretty much symmetrical. After about the 4th pair, I started using a small file to help “cut” the nibbing strake. I marked the strake where it needed to be cut, but then only cut enough to allow the file and in. Then I filed the nibbing as needed.
IMG_4065.jpeg
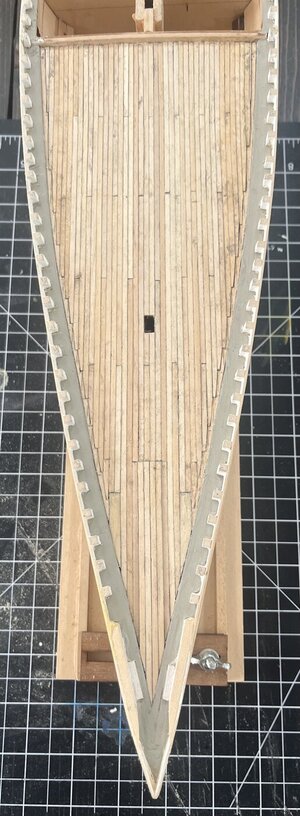
Wrapped up the foredeck planking today. Only thing different about the planks today was that the openings of the very last ones on both sides were slightly wider than a single plank. Instead of trimming one and putting it into a very tiny gap, I glued two planks together (after pencilling the edges) and then cut/filed the nibbing plank to accept these wider than normal last planks.
IMG_4079.jpeg
Over all I’m pleased. And know it will look better after a good sanding, but that’s either tonight or tomorrow morning when it’s cooler outside.
IMG_4081.jpeg
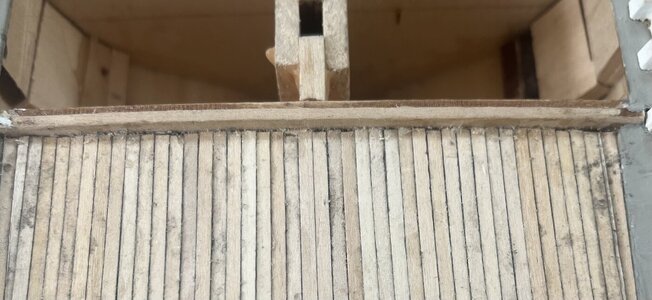
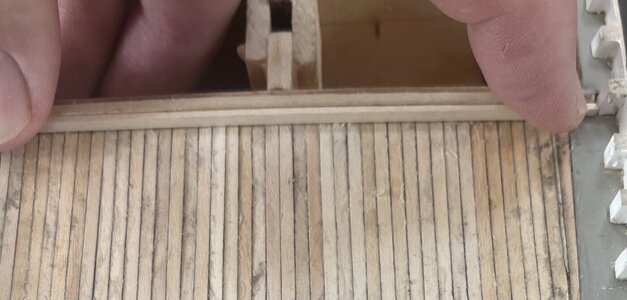
One thing I’m not 100% happy with is that all of my foredeck planks do not align along the great beam as well as I’d like them to. Sure I improved the more planks I did, but there’s some small gaps between the end of some of the planks and the great beam. The biggest one (one plank off the starboard of center) I glued a very small part of a plank into the gap. I can see it, but it’s not as noticeable as the gap was. Scroll up to the 1st picture of this update to see what it originally looked like.
IMG_4082.jpeg
I will wait until after sanding to decide if I’ll do something about this or not. If I decide to clean it up, I’ll put one trimmed and sanded deck plank (on its end) against the great beam. After trimming a little off of each end (where the waterways are), the height matches that of the great beam. I’ve dry-fitted the plank and like what it looks like so I’ll wait until after sanding to make my final decision. I’ll probably add it as it will definitely will cover the snaggle-tooth deck boards without being too noticeable.
IMG_4083.jpeg
Work time: 9 hours
Total work time: 118 hours
 
7/25 to 7/29
Planked out to where the double wide planks go, and then used regular width planks to finish from the double wide planks to the great beam. Next up nibbing.
View attachment 387338
I’m a bit nervous but also excited to do some nibbing. To begin the foredeck I installed the two nibbing planks, closest to the waterways. These planks are the same size as the deck planks. I used a pencil on their edges to simulate caulking.

My 1st two cuts for nibbing went ok. I know they are not aligned, but I feel I’ll be able to even them up within a few planks.
View attachment 387341
I ended up doing 7 planks with nibbing on each side, on my 1st day with each “pair” going a bit smoother than the one before it. The planks are now pretty much symmetrical. After about the 4th pair, I started using a small file to help “cut” the nibbing strake. I marked the strake where it needed to be cut, but then only cut enough to allow the file and in. Then I filed the nibbing as needed.
View attachment 387343
Wrapped up the foredeck planking today. Only thing different about the planks today was that the openings of the very last ones on both sides were slightly wider than a single plank. Instead of trimming one and putting it into a very tiny gap, I glued two planks together (after pencilling the edges) and then cut/filed the nibbing plank to accept these wider than normal last planks.
View attachment 387347
Over all I’m pleased. And know it will look better after a good sanding, but that’s either tonight or tomorrow morning when it’s cooler outside.
View attachment 387348
One thing I’m not 100% happy with is that all of my foredeck planks do not align along the great beam as well as I’d like them to. Sure I improved the more planks I did, but there’s some small gaps between the end of some of the planks and the great beam. The biggest one (one plank off the starboard of center) I glued a very small part of a plank into the gap. I can see it, but it’s not as noticeable as the gap was. Scroll up to the 1st picture of this update to see what it originally looked like.
View attachment 387350
I will wait until after sanding to decide if I’ll do something about this or not. If I decide to clean it up, I’ll put one trimmed and sanded deck plank (on its end) against the great beam. After trimming a little off of each end (where the waterways are), the height matches that of the great beam. I’ve dry-fitted the plank and like what it looks like so I’ll wait until after sanding to make my final decision. I’ll probably add it as it will definitely will cover the snaggle-tooth deck boards without being too noticeable.
View attachment 387349
Work time: 9 hours
Total work time: 118 hours
Good to you see you give the nibbing a try. I was pretty nervous about whether I could pull it off.
 
Having done this process on my model of the Baltimore Clipper Chasseur, of about the same size as your Bluenose, I had a sense of de ja vu, including putting a cover piece over the " snaggle tooth" butts of the deck planks. The end result not only solves the issue, but does so believably.
Everything else you describe, I ended up having the same experience. Very satisfying. Okay Looks great!

Pete
 
7/25 to 7/29
Planked out to where the double wide planks go, and then used regular width planks to finish from the double wide planks to the great beam. Next up nibbing.
View attachment 387338
I’m a bit nervous but also excited to do some nibbing. To begin the foredeck I installed the two nibbing planks, closest to the waterways. These planks are the same size as the deck planks. I used a pencil on their edges to simulate caulking.

My 1st two cuts for nibbing went ok. I know they are not aligned, but I feel I’ll be able to even them up within a few planks.
View attachment 387341
I ended up doing 7 planks with nibbing on each side, on my 1st day with each “pair” going a bit smoother than the one before it. The planks are now pretty much symmetrical. After about the 4th pair, I started using a small file to help “cut” the nibbing strake. I marked the strake where it needed to be cut, but then only cut enough to allow the file and in. Then I filed the nibbing as needed.
View attachment 387343
Wrapped up the foredeck planking today. Only thing different about the planks today was that the openings of the very last ones on both sides were slightly wider than a single plank. Instead of trimming one and putting it into a very tiny gap, I glued two planks together (after pencilling the edges) and then cut/filed the nibbing plank to accept these wider than normal last planks.
View attachment 387347
Over all I’m pleased. And know it will look better after a good sanding, but that’s either tonight or tomorrow morning when it’s cooler outside.
View attachment 387348
One thing I’m not 100% happy with is that all of my foredeck planks do not align along the great beam as well as I’d like them to. Sure I improved the more planks I did, but there’s some small gaps between the end of some of the planks and the great beam. The biggest one (one plank off the starboard of center) I glued a very small part of a plank into the gap. I can see it, but it’s not as noticeable as the gap was. Scroll up to the 1st picture of this update to see what it originally looked like.
View attachment 387350
I will wait until after sanding to decide if I’ll do something about this or not. If I decide to clean it up, I’ll put one trimmed and sanded deck plank (on its end) against the great beam. After trimming a little off of each end (where the waterways are), the height matches that of the great beam. I’ve dry-fitted the plank and like what it looks like so I’ll wait until after sanding to make my final decision. I’ll probably add it as it will definitely will cover the snaggle-tooth deck boards without being too noticeable.
View attachment 387349
Work time: 9 hours
Total work time: 118 hours
Closing a part of the deck or hull is always a milestone, Hugh. You get a new view of the overall shape.
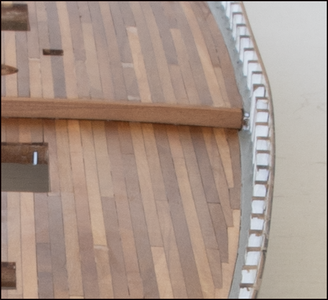
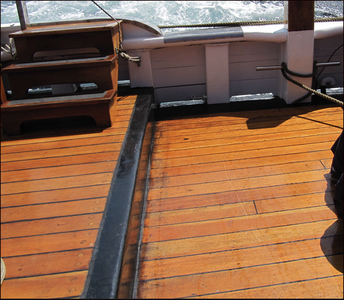
About the planks with the little gaps against the great beam: I think a trimmed and sanded beam is the best option. Perhaps make it at such a hight that you can trim the deck planks of the upper deck against it. Like this option on the YQ-models where it is on the ends of the lower deck planks:
1690738547231.png
Like on the current BN-II:
1690739341010.png
With your experience with the fore deck planking, you can make them on the upper deck much tighter.
Regards, Peter
 
Last edited:
Wow. It's been a full year since I've taken the time to think of all these same details on my 1/4" scale Elsie. I really feel good knowing some have found some of the same answers that I ran across. A few things I'll mention. My first larger scale project was Emma C. Berry by Sterling. I planked with thick balsa and sanded down to shape. This yielded a really nice fair surface with no noticeable hard spots. That was in '74 and I soaked the inside with polyester resin which stiffened up the hull surface and bonded the planks and bulkheads. I used lacquer sanding sealer on the outside, preserving a lot of the wood texture and plank lines. The lacquer also stiffened the surface preventing minor dings.
When I looked at the boat at Mystic in 2017, just as in her photos, you could see the plank lines and wood texture. Great, so I tried it with the Elsie model with it's Poplar planks and the result was not as appealing to the eye, however, the model survived eight feet of hurricane Ian in the shop because of the epoxy and lacquer. I will probably not do too much to that hull when I finish the model, just for the remembrance.
My deck has planks scaled off Rhonberg's drawings and looks too busy to me, but the planks along the centerline in the bow were the same width as some Midwest basswood sheet I had, so I glued down a piece of that for the thick part of the deck. The other thing I wanted to mention is how the hull planks run out on the transom on a wooden boat. Although some builders apparently had the transom planks covering the hull planks, it is unusual. As the boat moves through the water, leaks form at the joints. With the hull planks running past the transom plank ends, the water just flows past the joint. This is the way most of the wooden boats were/are built. If you see an older boat with the transom planks wrong way, it's probably a repair job. Emma C's stern is now like this at Mystic, but shows up right way in old photos. To try and fix hull planks damaged at their ends and have the joinery correct as built requires a ton of extra work. On a model ship, having the plank ends correct is very difficult though and if a lot of fill work is on that area, the model joinery is hidden. It might be esoteric, but it's food for thought, especially in larger scale work where the difference might be noticed.
 
18Lyman: Wow! That's a very informative post full of innovative as well as useful techniques adaptable to modeling wooden sailing craft in general. Altogether helpful and interesting. Thanks! Thumbs-Up

Pete
 
Last edited:
Closing a part of the deck or hull is always a milestone, Hugh. You get a new view of the overall shape.
About the planks with the little gaps against the great beam: I think a trimmed and sanded beam is the best option. Perhaps make it at such a hight that you can trim the deck planks of the upper deck against it. Like this option on the YQ-models where it is on the ends of the lower deck planks:
View attachment 387443
Like on the current BN-II:
View attachment 387444
With your experience with the fore deck planking, you can make them on the upper deck much tighter.
Regards, Peter
Thanks. Ironically right after I came up with the idea of putting a beam across the end of the planks, I remembered seeing a virtual tour of the BN2 and took a look at what this area of the ship looked like. After scooting around the tour, I was confident that adding it wouldn’t be bad. If you haven’t seen this before, take a “walk” around theBN2.
 
7/30 to 8/3
Started sanding the foredeck. Started by using an 80 grit sanding block, then switched to an 80 grit emery board. I have an assortment of sanding sticks being delivered later today. These sticks should really help sanding in the bow.

While sanding I realized that on my last plank (the starboard one that was a plank and a half), I forgot to put in a butt. No one probably would have noticed, but I “cut” it in and drew it with a pencil.

More sanding is needed, but right now, it’s on to the quarterdeck.

Planing the quarterdeck is proving to be more challenging than the foredeck mostly due to two factors; about half of the planks are tapered, and I’m not running the planks the full length of the quarterdeck (I’ll make them 5 bulkheads in length, the same as I did on the foredeck).

Scouring through many BN build logs, it’s difficult to find any that detail my scenario and then only a few that show pictures, and of those few pictures, most do not show the area around the steering wheel and boom crutch with enough detail to map this out in my head. So in other words, I’m winging it.

Here’s what I know…
  1. The 2 center-most planks do not run from the great beam to the transom; they run from the great beam to about the steering wheel (one bulkhead in from the transom).
  2. The next 2 planks (one on each side) run from the great beam to the boom crutch and are “nibbed” around the end of the 2 center-most planks (that end at the steering wheel).
  3. These 4 planks seem to create the gentle curve of the planks out to the side of the transom and from there, the planks are nibbed.
  4. All of these planks are to be tapered to about 1/2 their width over about 6”. So the plank is 3/32” wide and I’m supposed to taper it down to about 3/64”. That’s just crazy, but I’m going to give it a try.
First I’m going to temporarily forget about the planks only running 5 bulkheads and focus on the 2 center-most planks and their taper. I feel if I can get these 2 “right”, the rest of the quarterdeck will fall into place.

I tried to taper one of these three times, and while each one was better that the one before it, none of them looked like I wanted them to. And there wouldn’t be much of a chance that I could duplicate it for the one on the other side.

I then had the idea to glue 2 planks together and taper both of the outside edges. Bigger board, hopefully easier to work with. I’m pretty sure it will work, BUT I probably can’t completely glue the planks together since I’m going to stick to my plank length of 5 bulkheads. So I did some quick calculations and determined that each of these center planks will have a butt. The plank on the port side will have a a butt at bulkhead K and the one on the starboard side will have a butt at bulkhead M.
IMG_4093.jpeg
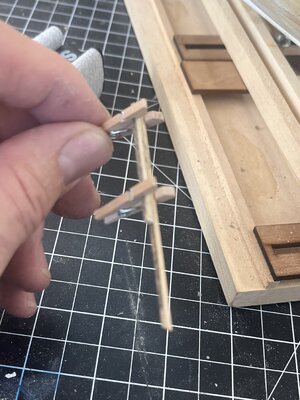
I cut two lengths of planks that were long enough to go from just before the great beam to just after where the end of the planks are by the steering wheel. I used small clips to hold the planks together and marked the:
  • End of the planks by the steering wheel, which is also where the taper ends
  • Location of bulkhead K
  • Location of bulkhead M
  • 6” towards the great beam where the taper starts
  • End of the plank at the great beam
I then put a dot of glue on both ends of the planks plus a line of glue between the marks for bulkhead K and M. I then clamped them together.

After drying, I drew lines of where the taper should be and started cutting off the excess. To be honest, I cut the 1st one way too fast and I messed it up. So onto a 2nd set. This time I took my time to cut each side, and then sanded the tapers. B I N G O! It looked awesome.
IMG_4094.jpeg
IMG_4097.jpeg
I then cut the ends off, and then cut the individual planks where the butts were to be. I marked up the sides with a pencil. I added glue along the top of the keel and centered the planks from the great beam to where the steering wheel will be located. I clamped everything to the top of the keel and after a few minutes, scraped the excess glue off. I then reclamped and let everything fully dry.
IMG_4098.jpeg
Overall I’m very happy with these 1st two planks, but should not have originally cut both planks at the great beam. I should have only cut the one on the port side as the one on the starboard side will have a butt which takes just a little bit of the plank away. If you look, this butt is a bit wider than what I’d like it to be, but I’ll live with it.
IMG_4101.jpeg
The above sounds LONG, but in the big picture it’s wasn’t too bad and feel the 1st two tapered planks look great. And with them glued in place, the 2nd set should not be near as time consuming.

Ok, on to the 2nd set of planks. I started by cutting 2 lengths of planks that are slightly longer than what they need to be, with about 1/16” extra at both ends. After drawing a line on each plank representing the 6” taper, I notched out where the 1st pair of planks ended (at the steering wheel) and cut the remaining taper on the inside of each plank. I then added a small taper on the outside of each plank from the “notch” to end of the planks (at the boom crutch).

After dry fitting both planks, I marked where the butts will be (remember I’m sticking with the plank lengths being 5 bulkheads). There will be 2 butts on the port side (bulkheads N and H) and one on the starboard side (at bulkhead J).

Learning from the 1st pair, I’ll do my glueing from the stern forward. This will help to ensure that the planks butt up cleanly to the great beam.

I cut the planks at N on the port side and J on the starboard side and sanded the edges. I finally penciled the edges and glued these on the quarterdeck. I then repeated this for the 3 remaining pieces of these planks, finally ending up with a nice butt for each side at the great beam.

After a few minutes of drying, I scraped the excess glue and reclamped.

And yes this pair, as hoped, was a lot quicker.
IMG_4110.jpeg
IMG_4112.jpeg
IMG_4113.jpeg
9.5 hours for some sanding on the foredeck and installing four planks on the quarterdeck is a bit painful, but from the beginning, I felt getting these first planks in would set the stage for the rest of the quarterdeck.

That’s it for now as I need to pack for Mexico as we leave early Saturday morning. It’s only a week long trip, but hopefully I’ll get to work at least a little bit on my Molino.

Work time: 9.5 hours
Total work time: 127.5 hours
 
7/30 to 8/3
Started sanding the foredeck. Started by using an 80 grit sanding block, then switched to an 80 grit emery board. I have an assortment of sanding sticks being delivered later today. These sticks should really help sanding in the bow.

While sanding I realized that on my last plank (the starboard one that was a plank and a half), I forgot to put in a butt. No one probably would have noticed, but I “cut” it in and drew it with a pencil.

More sanding is needed, but right now, it’s on to the quarterdeck.

Planing the quarterdeck is proving to be more challenging than the foredeck mostly due to two factors; about half of the planks are tapered, and I’m not running the planks the full length of the quarterdeck (I’ll make them 5 bulkheads in length, the same as I did on the foredeck).

Scouring through many BN build logs, it’s difficult to find any that detail my scenario and then only a few that show pictures, and of those few pictures, most do not show the area around the steering wheel and boom crutch with enough detail to map this out in my head. So in other words, I’m winging it.

Here’s what I know…
  1. The 2 center-most planks do not run from the great beam to the transom; they run from the great beam to about the steering wheel (one bulkhead in from the transom).
  2. The next 2 planks (one on each side) run from the great beam to the boom crutch and are “nibbed” around the end of the 2 center-most planks (that end at the steering wheel).
  3. These 4 planks seem to create the gentle curve of the planks out to the side of the transom and from there, the planks are nibbed.
  4. All of these planks are to be tapered to about 1/2 their width over about 6”. So the plank is 3/32” wide and I’m supposed to taper it down to about 3/64”. That’s just crazy, but I’m going to give it a try.
First I’m going to temporarily forget about the planks only running 5 bulkheads and focus on the 2 center-most planks and their taper. I feel if I can get these 2 “right”, the rest of the quarterdeck will fall into place.

I tried to taper one of these three times, and while each one was better that the one before it, none of them looked like I wanted them to. And there wouldn’t be much of a chance that I could duplicate it for the one on the other side.

I then had the idea to glue 2 planks together and taper both of the outside edges. Bigger board, hopefully easier to work with. I’m pretty sure it will work, BUT I probably can’t completely glue the planks together since I’m going to stick to my plank length of 5 bulkheads. So I did some quick calculations and determined that each of these center planks will have a butt. The plank on the port side will have a a butt at bulkhead K and the one on the starboard side will have a butt at bulkhead M.
View attachment 387933
I cut two lengths of planks that were long enough to go from just before the great beam to just after where the end of the planks are by the steering wheel. I used small clips to hold the planks together and marked the:
  • End of the planks by the steering wheel, which is also where the taper ends
  • Location of bulkhead K
  • Location of bulkhead M
  • 6” towards the great beam where the taper starts
  • End of the plank at the great beam
I then put a dot of glue on both ends of the planks plus a line of glue between the marks for bulkhead K and M. I then clamped them together.

After drying, I drew lines of where the taper should be and started cutting off the excess. To be honest, I cut the 1st one way too fast and I messed it up. So onto a 2nd set. This time I took my time to cut each side, and then sanded the tapers. B I N G O! It looked awesome.
View attachment 387934
View attachment 387935
I then cut the ends off, and then cut the individual planks where the butts were to be. I marked up the sides with a pencil. I added glue along the top of the keel and centered the planks from the great beam to where the steering wheel will be located. I clamped everything to the top of the keel and after a few minutes, scraped the excess glue off. I then reclamped and let everything fully dry.
View attachment 387936
Overall I’m very happy with these 1st two planks, but should not have originally cut both planks at the great beam. I should have only cut the one on the port side as the one on the starboard side will have a butt which takes just a little bit of the plank away. If you look, this butt is a bit wider than what I’d like it to be, but I’ll live with it.
View attachment 387937
The above sounds LONG, but in the big picture it’s wasn’t too bad and feel the 1st two tapered planks look great. And with them glued in place, the 2nd set should not be near as time consuming.

Ok, on to the 2nd set of planks. I started by cutting 2 lengths of planks that are slightly longer than what they need to be, with about 1/16” extra at both ends. After drawing a line on each plank representing the 6” taper, I notched out where the 1st pair of planks ended (at the steering wheel) and cut the remaining taper on the inside of each plank. I then added a small taper on the outside of each plank from the “notch” to end of the planks (at the boom crutch).

After dry fitting both planks, I marked where the butts will be (remember I’m sticking with the plank lengths being 5 bulkheads). There will be 2 butts on the port side (bulkheads N and H) and one on the starboard side (at bulkhead J).

Learning from the 1st pair, I’ll do my glueing from the stern forward. This will help to ensure that the planks butt up cleanly to the great beam.

I cut the planks at N on the port side and J on the starboard side and sanded the edges. I finally penciled the edges and glued these on the quarterdeck. I then repeated this for the 3 remaining pieces of these planks, finally ending up with a nice butt for each side at the great beam.

After a few minutes of drying, I scraped the excess glue and reclamped.

And yes this pair, as hoped, was a lot quicker.
View attachment 387938
View attachment 387939
View attachment 387940
9.5 hours for some sanding on the foredeck and installing four planks on the quarterdeck is a bit painful, but from the beginning, I felt getting these first planks in would set the stage for the rest of the quarterdeck.

That’s it for now as I need to pack for Mexico as we leave early Saturday morning. It’s only a week long trip, but hopefully I’ll get to work at least a little bit on my Molino.

Work time: 9.5 hours
Total work time: 127.5 hours
Interesting to follow the planking of your aft deck, Hugh. And the tapering of the planks. Perhaps you already have seen them in my build-log, but is has a lot (perhaps to much) pages. This is the link to the post where I started the aft deck planking of my BN:
—> Aft Deck Planking <—
Until post #1943 with the nibbling plank against the waterway.
Looking forward to see the rest of the planking.
Regards, Peter
 
Last edited:
7/30 to 8/3
Started sanding the foredeck. Started by using an 80 grit sanding block, then switched to an 80 grit emery board. I have an assortment of sanding sticks being delivered later today. These sticks should really help sanding in the bow.

While sanding I realized that on my last plank (the starboard one that was a plank and a half), I forgot to put in a butt. No one probably would have noticed, but I “cut” it in and drew it with a pencil.

More sanding is needed, but right now, it’s on to the quarterdeck.

Planing the quarterdeck is proving to be more challenging than the foredeck mostly due to two factors; about half of the planks are tapered, and I’m not running the planks the full length of the quarterdeck (I’ll make them 5 bulkheads in length, the same as I did on the foredeck).

Scouring through many BN build logs, it’s difficult to find any that detail my scenario and then only a few that show pictures, and of those few pictures, most do not show the area around the steering wheel and boom crutch with enough detail to map this out in my head. So in other words, I’m winging it.

Here’s what I know…
  1. The 2 center-most planks do not run from the great beam to the transom; they run from the great beam to about the steering wheel (one bulkhead in from the transom).
  2. The next 2 planks (one on each side) run from the great beam to the boom crutch and are “nibbed” around the end of the 2 center-most planks (that end at the steering wheel).
  3. These 4 planks seem to create the gentle curve of the planks out to the side of the transom and from there, the planks are nibbed.
  4. All of these planks are to be tapered to about 1/2 their width over about 6”. So the plank is 3/32” wide and I’m supposed to taper it down to about 3/64”. That’s just crazy, but I’m going to give it a try.
First I’m going to temporarily forget about the planks only running 5 bulkheads and focus on the 2 center-most planks and their taper. I feel if I can get these 2 “right”, the rest of the quarterdeck will fall into place.

I tried to taper one of these three times, and while each one was better that the one before it, none of them looked like I wanted them to. And there wouldn’t be much of a chance that I could duplicate it for the one on the other side.

I then had the idea to glue 2 planks together and taper both of the outside edges. Bigger board, hopefully easier to work with. I’m pretty sure it will work, BUT I probably can’t completely glue the planks together since I’m going to stick to my plank length of 5 bulkheads. So I did some quick calculations and determined that each of these center planks will have a butt. The plank on the port side will have a a butt at bulkhead K and the one on the starboard side will have a butt at bulkhead M.
View attachment 387933
I cut two lengths of planks that were long enough to go from just before the great beam to just after where the end of the planks are by the steering wheel. I used small clips to hold the planks together and marked the:
  • End of the planks by the steering wheel, which is also where the taper ends
  • Location of bulkhead K
  • Location of bulkhead M
  • 6” towards the great beam where the taper starts
  • End of the plank at the great beam
I then put a dot of glue on both ends of the planks plus a line of glue between the marks for bulkhead K and M. I then clamped them together.

After drying, I drew lines of where the taper should be and started cutting off the excess. To be honest, I cut the 1st one way too fast and I messed it up. So onto a 2nd set. This time I took my time to cut each side, and then sanded the tapers. B I N G O! It looked awesome.
View attachment 387934
View attachment 387935
I then cut the ends off, and then cut the individual planks where the butts were to be. I marked up the sides with a pencil. I added glue along the top of the keel and centered the planks from the great beam to where the steering wheel will be located. I clamped everything to the top of the keel and after a few minutes, scraped the excess glue off. I then reclamped and let everything fully dry.
View attachment 387936
Overall I’m very happy with these 1st two planks, but should not have originally cut both planks at the great beam. I should have only cut the one on the port side as the one on the starboard side will have a butt which takes just a little bit of the plank away. If you look, this butt is a bit wider than what I’d like it to be, but I’ll live with it.
View attachment 387937
The above sounds LONG, but in the big picture it’s wasn’t too bad and feel the 1st two tapered planks look great. And with them glued in place, the 2nd set should not be near as time consuming.

Ok, on to the 2nd set of planks. I started by cutting 2 lengths of planks that are slightly longer than what they need to be, with about 1/16” extra at both ends. After drawing a line on each plank representing the 6” taper, I notched out where the 1st pair of planks ended (at the steering wheel) and cut the remaining taper on the inside of each plank. I then added a small taper on the outside of each plank from the “notch” to end of the planks (at the boom crutch).

After dry fitting both planks, I marked where the butts will be (remember I’m sticking with the plank lengths being 5 bulkheads). There will be 2 butts on the port side (bulkheads N and H) and one on the starboard side (at bulkhead J).

Learning from the 1st pair, I’ll do my glueing from the stern forward. This will help to ensure that the planks butt up cleanly to the great beam.

I cut the planks at N on the port side and J on the starboard side and sanded the edges. I finally penciled the edges and glued these on the quarterdeck. I then repeated this for the 3 remaining pieces of these planks, finally ending up with a nice butt for each side at the great beam.

After a few minutes of drying, I scraped the excess glue and reclamped.

And yes this pair, as hoped, was a lot quicker.
View attachment 387938
View attachment 387939
View attachment 387940
9.5 hours for some sanding on the foredeck and installing four planks on the quarterdeck is a bit painful, but from the beginning, I felt getting these first planks in would set the stage for the rest of the quarterdeck.

That’s it for now as I need to pack for Mexico as we leave early Saturday morning. It’s only a week long trip, but hopefully I’ll get to work at least a little bit on my Molino.

Work time: 9.5 hours
Total work time: 127.5 hours
Tapering thise quarterdeck planks; you're a brave man! Thumbsup
 
Have you tried using a small block plane for the tapering once the two planks are glued together off the boat? Rather than with the X-acto blade? Of course, you have to be sure that the grain of the plank runs at an angle away from the blade in the direction that you are planeing, toward the narrow end, so that the blade won't grab the grain and chip and/or split the wood. But the same is true of the X-acto blade, only the block plane is more accurate and easier to control. of course, the blade must be VERY sharp. The depth of the cut will be infinitely more adjustable and very fine. I've had success even with very narrow pieces.

Pete
Thanks for the tip. Is there a good one or ones you (or anyone out there) recommend?
 
Back
Top