Bluenose 1:64 by Model Shipways - Build log

Do I paint the hull or do I install the rails?

  • Hull

    Votes: 0 0.0%
  • Rails

    Votes: 0 0.0%

  • Total voters
    0
  • Poll closed .
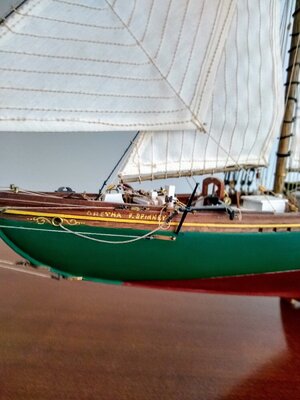
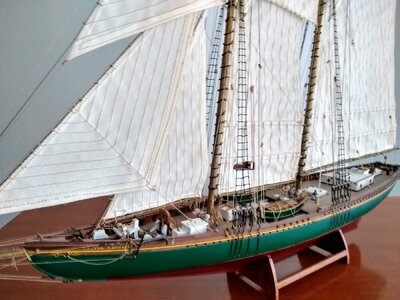
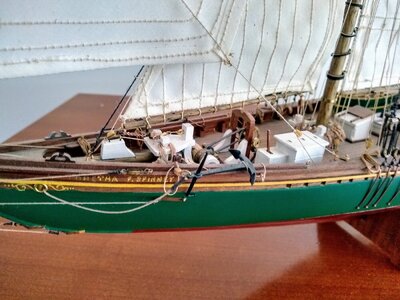
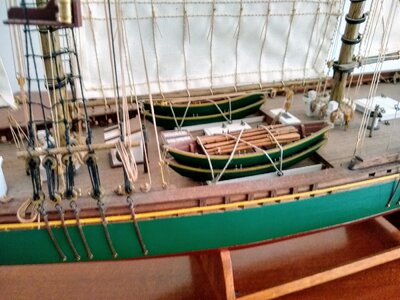
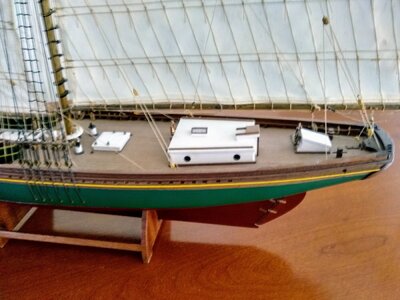
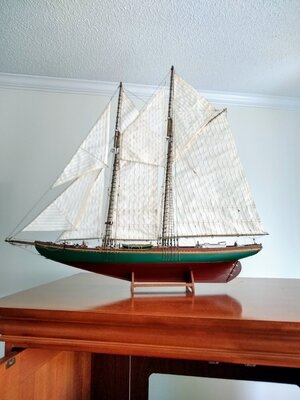
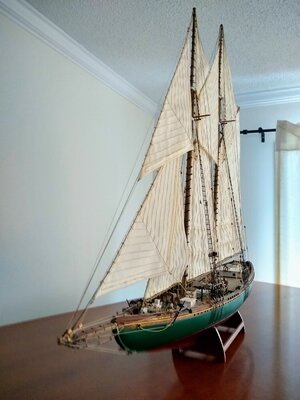
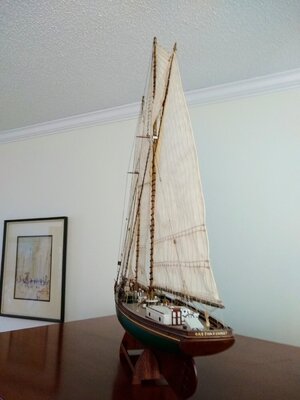
Here are the promised pics of the Oretha F Spinney mentioned in the post concerning the 1937 film "Captains Courageous" I planked the hull much the same as HughLo did, only he did a much better job. This was my second model and first attempt at planking. It looked like a patchwork quilt, required a LOT of filling and sanding. HughLo has a MUCH better platform to begin finishing than I did. So if he continues in the same vein as he has so far I expect he will have a spectacular Product!
Pete

IMG_20210220_141321417_HDR.jpg

IMG_20210220_141839013_HDR.jpg

IMG_20210220_141936754.jpg

IMG_20210220_142035771_HDR.jpg

IMG_20210220_142120342_HDR.jpg

IMG_20210220_142223902_HDR.jpg

IMG_20210220_142303646_HDR.jpg

IMG_20210220_142341919_HDR.jpg
 
Last edited:
I may have jumped the gun as it says is water clean-up. Once the grand daughter goes down for a nap, I’ll see what water does to it in a dried
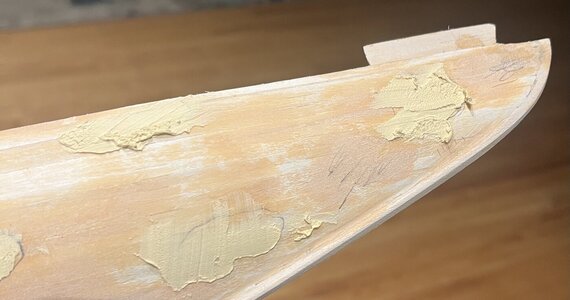
Water did very little to the Minwax filler in its dry state - really only allowed me to “knock” off the high points in the filler. Waiting for it to dry before sanding. I’ll pick up some of the Elmer’s for my next coat of filler.
 
Here are the promised pics of the Oretha F Spinney mentioned in the post concerning the 1937 film "Captains Courageous" I planked the hull much the same as HughLo did, only he did a much better job. This was my second model and first attempt at planking. It looked like a patchwork quilt, required a LOT of filling and sanding. HughLo has a MUCH better platform to begin finishing than I did. So if he continues in the same vein as he has so far I expect he will have a spectacular Product!
Pete

View attachment 377299

View attachment 377300

View attachment 377301

View attachment 377302

View attachment 377303

View attachment 377304

View attachment 377305

View attachment 377306
Thanks for the kind words. This is a beautiful ship. Thanks for sharing your pics
 
Judging from your work on the "Bluenose" so far I anticipate seeing the rest with great interest and high expectations. Thanks for stepping up and putting yourself out there. That takes a lot of courage! I think you are on track to a beautiful model!

Pete :D
 
Here are the promised pics of the Oretha F Spinney mentioned in the post concerning the 1937 film "Captains Courageous" I planked the hull much the same as HughLo did, only he did a much better job. This was my second model and first attempt at planking. It looked like a patchwork quilt, required a LOT of filling and sanding. HughLo has a MUCH better platform to begin finishing than I did. So if he continues in the same vein as he has so far I expect he will have a spectacular Product!
Pete

View attachment 377299

View attachment 377300

View attachment 377301

View attachment 377302

View attachment 377303

View attachment 377304

View attachment 377305

View attachment 377306
That's a very nice looking schooner under full sail, Pete.

Water did very little to the Minwax filler in its dry state - really only allowed me to “knock” off the high points in the filler. Waiting for it to dry before sanding. I’ll pick up some of the Elmer’s for my next coat of filler.
Looking forward to see the next stage of shaping the hull, Hugh.
Regards, Peter
 
6/2 to 6/8

Spent my time sanding away of the more of filler. The hull is really starting to look good. On Saturday, the local group that I’m part of (Rocky Mountain Shipwrights) had their workshop day, so I spent about 2.5 hours working while talking to other modelers. If you’re in the Denver CO area, check them out. They meet twice a month with one workshop and one meeting.

With the workshop being inside, I knew I wouldn’t be doing an actual sanding, so I focused on the hull looking for places that still needed to be sanded or that needed a bit more filler. I even pulled out my flashlight to get a good look at the hull. I used a pencil to mark the 2 different types of work that needed to be done. Scribbles for areas needing sanding and circles for where additional filler was needed. I then added filler. So now I know where to focus my time during my next sanding session.
B3AF1795-2A32-43C3-8B9E-78416E921784.jpeg
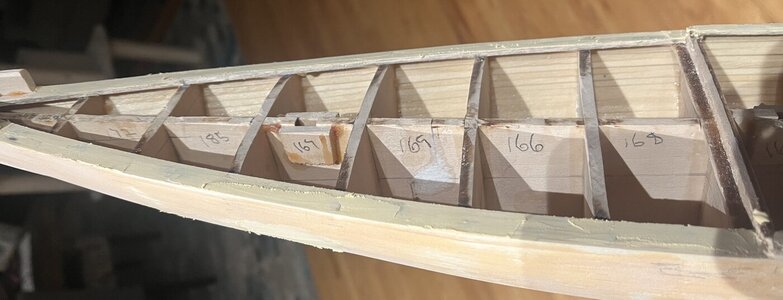
I then looked at the waterways. I measured the distance between each of the bulkheads. I know they should all be the same, but there are slight differences which I’ll blame on sitting in my basement for 20+ years. I wrote each measurement on the keel as in addition to needing a stanchion at each bulkhead, I need 2 between each as well. I’ll then divide the distance by 4 to give me the center point for each stanchion.
8623B274-F693-45B9-969A-CEF32065BB2B.jpeg
I them added filler to the waterways as I knew there were some gaps. I’ll hit them during my next sanding session too.

As I was typing this I had an idea to base the locations of the stanchions not on the locations of the bulkheads, but instead put them where they actually should be. After all, once the deck goes on, the bulkheads will not be seen. I’ll let that idea marinate for a little as I do have time (sanding time) before I need to add the stanchions.

I decided to put the stanchions where the should be, not based upon where the bulkheads are. I know it makes a very small difference, one that probably only I would notice if I didn’t do it, but I’m doing it.

I determined the gaps/spaces between each stanchion and marked there locations on the waterways. Even with “doing the math”, I still had to erase and adjust the marks a couple of times.
FF8E2D35-21B3-4D51-8A70-C86630F83DD4.jpeg
I want to do one more round of sanding so I masked off the parts of the waterways for all of the stanchions and primered the waterways and the hull.
68254564-05C7-4EC3-A5DE-D1145DA238DB.jpeg
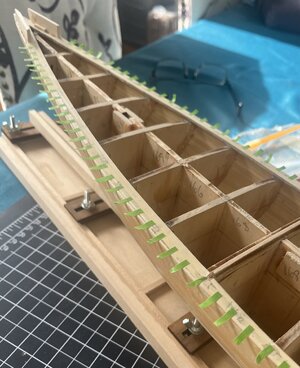
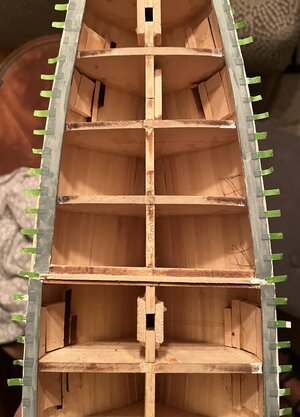
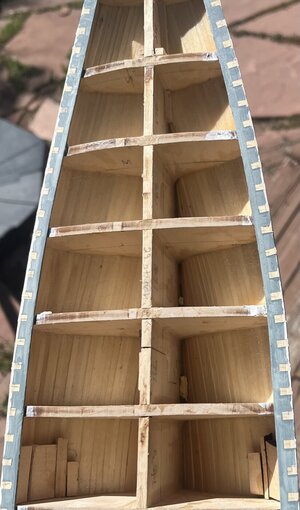
I also glued some wood scraps on the inside of the hull where the chain plates/deadeyes will be located. Not sure they are needed but I saw someone suggest doing it on a video build log so I did it knowing if they aren’t needed, they wouldn’t be seen once I plank them deck.
C86F3C6F-3E3B-4E48-A1D6-B059401DDB64.jpeg
Last of this section is the painting of the waterways gray before my last round of sanding.

Work time: 10 hours
Total work time: 83 hours
 
Wow! Your progress is really impressive, as is the development of your skills and techniques. You have become very meticulous and it shows
It is definitely making a difference. The model is looking terrific! Better with each installment! Following your build is proving very instructive to me Thumbsup .

Pete:D
 
You made my day! So glad you watched that movie! The "We're Here" in the movie was "portrayed" by the Schooner "Oretha F. Spinney" She was in San Diego In early 1942, having been purchased by the actor, author and avid sailor, Sterling Hayden. He subsequently sailed her from San Diego, down the west coast, through the Panama Canal, up and through the Caribbean to the Bahamas and Fla. Since this was the first full month of the war she was charged with keeping an eye out for prowling German subs. Later she was commandeered by the US Coast Guard (as were many civilian craft of her type) for that very purpose.
A record of the Journey was written by a crewman and father of a customer of mine (whose name has escaped me) and published in the Jan. 1942 issue of "Yachting Magazine"
For my second model I bought a kit of the "Bluenose" and was working on it when my customer came to my workshop, saw the model in progress and told me the story. My customer loaned me his precious copy of the magazine, loaded with pictures of the schooner. The model, being a fin keel Grand Banks Nova Scotia fisherman, she was practically a dead ringer for the "Oretha F. Spinney"! So I kit bashed her into that boat. I'll Post pictures sometime.
I know this sounds like a fairy tale or a sailor story. But I swear it's true. You know the difference between a fairy tale and a sailor story?
A fairy tale starts with "Once upon a time..."
A sailor story begins with "This ain't no $:#+!!!" :D

Pete
Pete - your model is beautiful. Are you saying you modified your “Bluenose” into the “Oretha F. Spinner?”

After reading this and seeing your pics, I googled “Captians Courageous” and found a link to the 1937 version of the movie. Watched it over the course of a couple of mornings. It was definitely dated, especially Spencer Tracey portraying a Portuguese fisherman (which he won the Oscar for Best Actor), but the movie was pretty good. I wanted more when it was over so maybe I’ll read the actual novel… And according to a trivia post in IMDB.com, the “Bluenose” was filmed for the full-view shots of “We’re Here” at sea (the rest was filmed on a 4/5th scale in a “tank”). There’s a newer movie version (1977) and a TV movie (1996) that I may try to watch as well.
 
I kit bashed my Oretha F. Spinney out of a Danish kit, but ordered the Model Shipways plans and manual. I took a hammer to a West Clocks wind up alarm clock for the donkey engine transmission gears. Thanks for the kind word for my model (Especially since I snuck It into your build log:rolleyes:)
Spencer Tracy couldn't do a Portuguese accent, so he just made it up!ROTF I saw the made for TV version. I like the '37 movie better. Never saw the '77 version . No idea which is closer to the book. I confess I never read it.Sick

Pete
 
6/2 to 6/8

Spent my time sanding away of the more of filler. The hull is really starting to look good. On Saturday, the local group that I’m part of (Rocky Mountain Shipwrights) had their workshop day, so I spent about 2.5 hours working while talking to other modelers. If you’re in the Denver CO area, check them out. They meet twice a month with one workshop and one meeting.

With the workshop being inside, I knew I wouldn’t be doing an actual sanding, so I focused on the hull looking for places that still needed to be sanded or that needed a bit more filler. I even pulled out my flashlight to get a good look at the hull. I used a pencil to mark the 2 different types of work that needed to be done. Scribbles for areas needing sanding and circles for where additional filler was needed. I then added filler. So now I know where to focus my time during my next sanding session.
View attachment 378704
I then looked at the waterways. I measured the distance between each of the bulkheads. I know they should all be the same, but there are slight differences which I’ll blame on sitting in my basement for 20+ years. I wrote each measurement on the keel as in addition to needing a stanchion at each bulkhead, I need 2 between each as well. I’ll then divide the distance by 4 to give me the center point for each stanchion.
View attachment 378705
I them added filler to the waterways as I knew there were some gaps. I’ll hit them during my next sanding session too.

As I was typing this I had an idea to base the locations of the stanchions not on the locations of the bulkheads, but instead put them where they actually should be. After all, once the deck goes on, the bulkheads will not be seen. I’ll let that idea marinate for a little as I do have time (sanding time) before I need to add the stanchions.

I decided to put the stanchions where the should be, not based upon where the bulkheads are. I know it makes a very small difference, one that probably only I would notice if I didn’t do it, but I’m doing it.

I determined the gaps/spaces between each stanchion and marked there locations on the waterways. Even with “doing the math”, I still had to erase and adjust the marks a couple of times.
View attachment 378707
I want to do one more round of sanding so I masked off the parts of the waterways for all of the stanchions and primered the waterways and the hull.
View attachment 378708
I also glued some wood scraps on the inside of the hull where the chain plates/deadeyes will be located. Not sure they are needed but I saw someone suggest doing it on a video build log so I did it knowing if they aren’t needed, they wouldn’t be seen once I plank them deck.
View attachment 378709
Last of this section is the painting of the waterways gray before my last round of sanding.

Work time: 10 hours
Total work time: 83 hours
Looking good! I like your idea on marking the stanchion positions. They should end up more even than mine.
 
6/9 to 6/16

Did one more through sanding, even (cover your ears) using my handheld orbital sander and finished up with my sanding block.

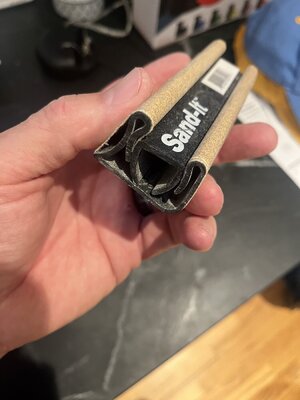
Quick plug for this sanding block… first off I don’t care for the specific grain sanding blocks that seem to be the norm these days. I’ve never used one, but it’s the old school in me that makes me not like them. I found this on Amazon and really like is. “Sand-It” used a 1/4 sheet of sand paper. It has all the typical sanding surfaces and holds the paper tight. Definitely with the $5. I like it so much and it’s fairly inexpensive, so I bought a second one for my Mexican toolbox.
08DE4BC9-8F69-48EE-BD7B-227993233292.jpeg
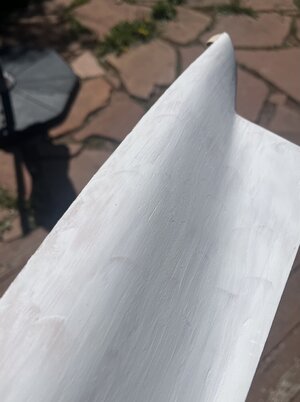
After this sanding, I primered the hull and marked it one last time places that needed filler.
B9664736-6A1E-4908-ADD4-363E452FFA3D.jpeg
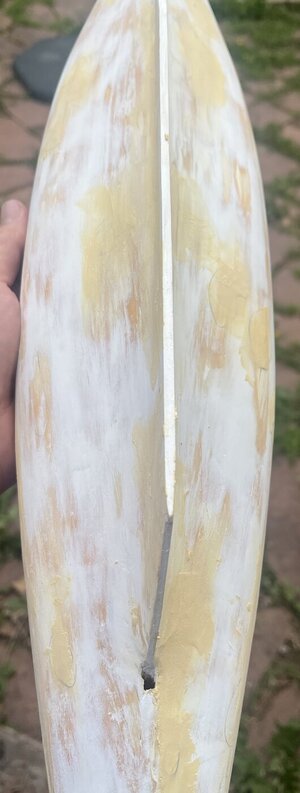
On a recommendation from @Peter Gutterman I started using Elmer’s Wood Filler (white tub, orange lid). This filler straight out of the tub is very smooth, but since it is water soluble, I can wet my finger and not just apply it, I can work it into the areas that need it and smooth it out. If I had tried the wet finger technique earlier, I probably wouldn’t have needed so may rounds of adding filler and sanding.
22ECB790-8E71-486C-BA6F-64E14D00E6B6.jpeg
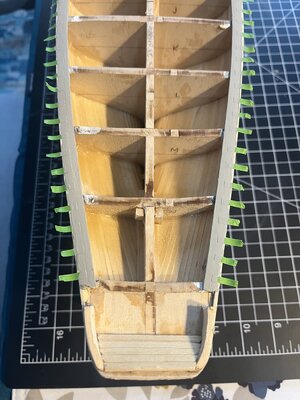
I didn’t really like the shade of grey I used on the waterways plus once I took the tape off where the stanchions will be installed, the size irregularities of the tape became apparent so I replaced them and repainted with a lighter shade of grey.
74A25769-D2C2-4AE8-BB7A-FC662FB74658.jpeg
I’m happy with the new tape and shade of grey.
94352A59-08EA-4B3D-A608-15E6F0578DE8.jpeg
I really like the way @Jeff T painted his Bluenose hull so I ordered the same red he used (Model Expo MS 4814 - Hull Bottom Copper Red), so I ordered a bottle. While I wait for the paint for to arrive, I’m going to install the stanchions which means it’s scupper-time.

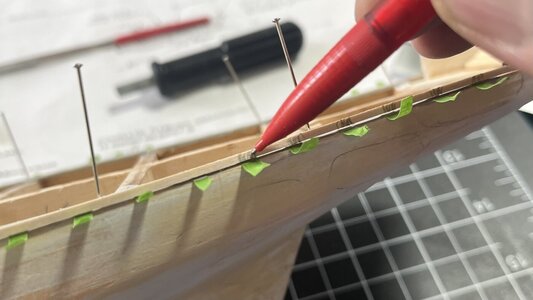
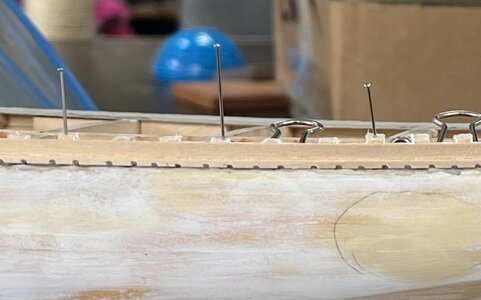
Like many others, I cut off the stanchions that were attached to the bulkheads, so I put pins in the waterways to help me align where the stanchions will be attached to the rail. I don’t have a pin pusher so I manufactured one using an old cheap screwdriver I had laying around. I took a hacksaw to the shaft, then drilled a hole into the shaft.

Due to the small size of the boards, I decided to omit the coves.

In researching how to do the stanchions and scuppers I couldn’t find a lot of detailed info (yes, lots of helpful pics), but not the details I like, so here’s what I did:
  1. Dry fitted the board that will have scuppers. For the quarter deck this is a 1/16” x 1/16” (same size of board I used as the top plank of the hull on the quarter deck) while on the fore deck is 1/8” x 1/16” (same size of board as I used to plank the hull). A0A4B0CA-DF42-43BE-9761-E1175B009645.jpeg
  2. Marked the board where each stanchion will be; this is where I taped the waterways.
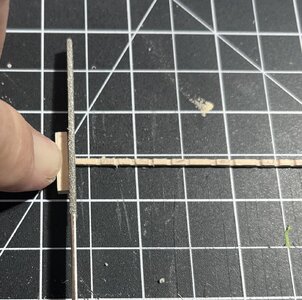
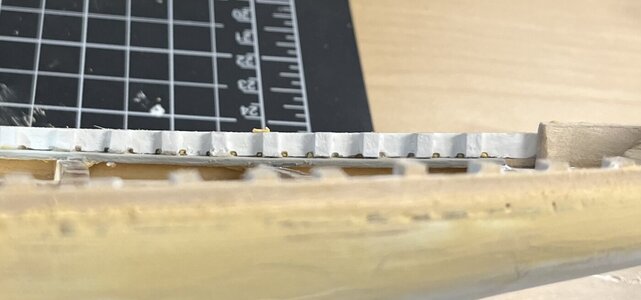
  3. I knew the scuppers were small, but it wasn’t until I started planning them out that I realized just how small they actually are. They are supposed to be 1/64” x 3/64” and for the quarter deck, they are on a 1/16” x 1/16” board. I used a small file that is about 1/16” thick, so I ran the file across the board until I was about half way thru the quarter deck board and about a 1/4 way thru the fore deck board. E169DC3F-6706-4160-82F9-E814740B718D.jpeg388ED5F6-87AC-4D70-B36A-75B42ECBFC80.jpeg
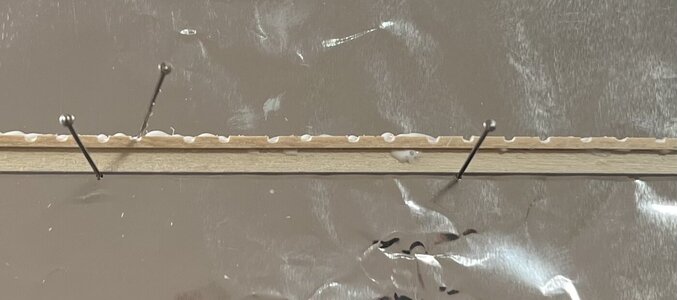
  4. The boards with the scuppers are thicker (1/16”) than the boards that are glued to them (1/32”), so I used a number of pins on a foil covered board to hold the scupper board and the rail board (1/8”) together while the glue dried. The foil was to make sure the 2 boards didn’t get glued to anything else. B29A9ACE-9100-4B51-A71D-2AF9CDA053FC.jpeg
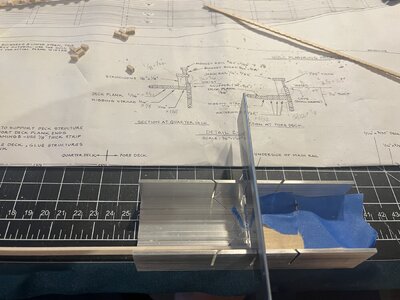
  5. Cut 1/8” x 1/8” stock into pieces that are a little bit taller then the 2 boards (scupper board and rail board). 736408B0-04D4-43C8-96CF-5AB0E09C3079.jpeg
  6. Glued stanchions to the boards. F2C59A98-D54A-4DAD-896E-FD92C76FE541.jpeg
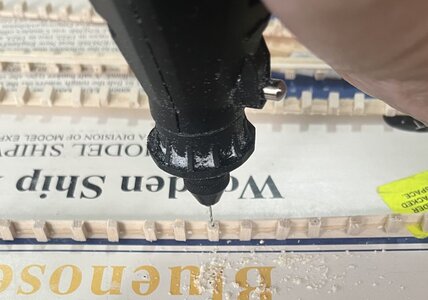
  7. Drilled 1/32” (?) hole in every 3rd stanchion or so.C2952B59-1909-4F74-91D9-E77C550D5401.jpeg
  8. Clean excess glue off/out of scuppers.
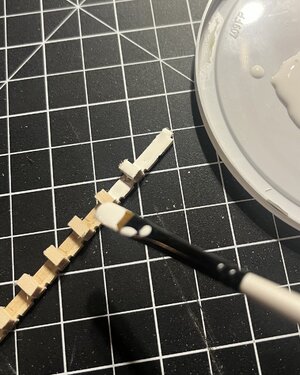
  9. Paint the inside of the completed rails white.3F7639C4-EE4E-456F-AC1B-4C930217A0FF.jpeg
  10. Remove tape from the waterways.
  11. Glue the painted rails to the waterways.
  12. Insert pins in drilled stanchions (to assist in keeping them in place while glue dries).
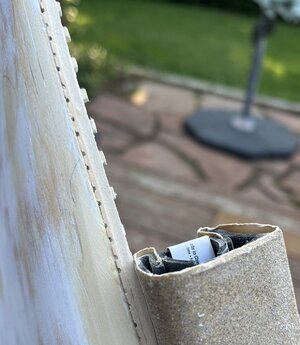
  13. Sand the outside of the rail boards to align them with the edge of the planks of the hull.
  14. Sand the excess tops of the stanchions off.
I only made it through #10 before having to pack it in as I’m off to visit family in North Carolina. Wish I could have finished the rails or be able to take it with me, but that is not possible.

Work time: 8.5 hours
Total work time: 91.5 hours
 
6/9 to 6/16

Did one more through sanding, even (cover your ears) using my handheld orbital sander and finished up with my sanding block.

Quick plug for this sanding block… first off I don’t care for the specific grain sanding blocks that seem to be the norm these days. I’ve never used one, but it’s the old school in me that makes me not like them. I found this on Amazon and really like is. “Sand-It” used a 1/4 sheet of sand paper. It has all the typical sanding surfaces and holds the paper tight. Definitely with the $5. I like it so much and it’s fairly inexpensive, so I bought a second one for my Mexican toolbox.
View attachment 379798
After this sanding, I primered the hull and marked it one last time places that needed filler.
View attachment 379799
On a recommendation from @Peter Gutterman I started using Elmer’s Wood Filler (white tub, orange lid). This filler straight out of the tub is very smooth, but since it is water soluble, I can wet my finger and not just apply it, I can work it into the areas that need it and smooth it out. If I had tried the wet finger technique earlier, I probably wouldn’t have needed so may rounds of adding filler and sanding.
View attachment 379800
I didn’t really like the shade of grey I used on the waterways plus once I took the tape off where the stanchions will be installed, the size irregularities of the tape became apparent so I replaced them and repainted with a lighter shade of grey.
View attachment 379802
I’m happy with the new tape and shade of grey.
View attachment 379803
I really like the way @Jeff T painted his Bluenose hull so I ordered the same red he used (Model Expo MS 4814 - Hull Bottom Copper Red), so I ordered a bottle. While I wait for the paint for to arrive, I’m going to install the stanchions which means it’s scupper-time.

Like many others, I cut off the stanchions that were attached to the bulkheads, so I put pins in the waterways to help me align where the stanchions will be attached to the rail. I don’t have a pin pusher so I manufactured one using an old cheap screwdriver I had laying around. I took a hacksaw to the shaft, then drilled a hole into the shaft.

Due to the small size of the boards, I decided to omit the coves.

In researching how to do the stanchions and scuppers I couldn’t find a lot of detailed info (yes, lots of helpful pics), but not the details I like, so here’s what I did:
  1. Dry fitted the board that will have scuppers. For the quarter deck this is a 1/16” x 1/16” (same size of board I used as the top plank of the hull on the quarter deck) while on the fore deck is 1/8” x 1/16” (same size of board as I used to plank the hull). View attachment 379804
  2. Marked the board where each stanchion will be; this is where I taped the waterways.
  3. I knew the scuppers were small, but it wasn’t until I started planning them out that I realized just how small they actually are. They are supposed to be 1/64” x 3/64” and for the quarter deck, they are on a 1/16” x 1/16” board. I used a small file that is about 1/16” thick, so I ran the file across the board until I was about half way thru the quarter deck board and about a 1/4 way thru the fore deck board. View attachment 379807View attachment 379805
  4. The boards with the scuppers are thicker (1/16”) than the boards that are glued to them (1/32”), so I used a number of pins on a foil covered board to hold the scupper board and the rail board (1/8”) together while the glue dried. The foil was to make sure the 2 boards didn’t get glued to anything else. View attachment 379806
  5. Cut 1/8” x 1/8” stock into pieces that are a little bit taller then the 2 boards (scupper board and rail board). View attachment 379808
  6. Glued stanchions to the boards. View attachment 379809
  7. Drilled 1/32” (?) hole in every 3rd stanchion or so.View attachment 379810
  8. Clean excess glue off/out of scuppers.
  9. Paint the inside of the completed rails white.View attachment 379811
  10. Remove tape from the waterways.
  11. Glue the painted rails to the waterways.
  12. Insert pins in drilled stanchions (to assist in keeping them in place while glue dries).
  13. Sand the outside of the rail boards to align them with the edge of the planks of the hull.
  14. Sand the excess tops of the stanchions off.
I only made it through #10 before having to pack it in as I’m off to visit family in North Carolina. Wish I could have finished the rails or be able to take it with me, but that is not possible.

Work time: 8.5 hours
Total work time: 91.5 hours
Interesting way to add the stanchions. It never crossed my mind to do it that way. I hope it works out for you.
 
6/9 to 6/16

Did one more through sanding, even (cover your ears) using my handheld orbital sander and finished up with my sanding block.

Quick plug for this sanding block… first off I don’t care for the specific grain sanding blocks that seem to be the norm these days. I’ve never used one, but it’s the old school in me that makes me not like them. I found this on Amazon and really like is. “Sand-It” used a 1/4 sheet of sand paper. It has all the typical sanding surfaces and holds the paper tight. Definitely with the $5. I like it so much and it’s fairly inexpensive, so I bought a second one for my Mexican toolbox.
View attachment 379798
After this sanding, I primered the hull and marked it one last time places that needed filler.
View attachment 379799
On a recommendation from @Peter Gutterman I started using Elmer’s Wood Filler (white tub, orange lid). This filler straight out of the tub is very smooth, but since it is water soluble, I can wet my finger and not just apply it, I can work it into the areas that need it and smooth it out. If I had tried the wet finger technique earlier, I probably wouldn’t have needed so may rounds of adding filler and sanding.
View attachment 379800
I didn’t really like the shade of grey I used on the waterways plus once I took the tape off where the stanchions will be installed, the size irregularities of the tape became apparent so I replaced them and repainted with a lighter shade of grey.
View attachment 379802
I’m happy with the new tape and shade of grey.
View attachment 379803
I really like the way @Jeff T painted his Bluenose hull so I ordered the same red he used (Model Expo MS 4814 - Hull Bottom Copper Red), so I ordered a bottle. While I wait for the paint for to arrive, I’m going to install the stanchions which means it’s scupper-time.

Like many others, I cut off the stanchions that were attached to the bulkheads, so I put pins in the waterways to help me align where the stanchions will be attached to the rail. I don’t have a pin pusher so I manufactured one using an old cheap screwdriver I had laying around. I took a hacksaw to the shaft, then drilled a hole into the shaft.

Due to the small size of the boards, I decided to omit the coves.

In researching how to do the stanchions and scuppers I couldn’t find a lot of detailed info (yes, lots of helpful pics), but not the details I like, so here’s what I did:
  1. Dry fitted the board that will have scuppers. For the quarter deck this is a 1/16” x 1/16” (same size of board I used as the top plank of the hull on the quarter deck) while on the fore deck is 1/8” x 1/16” (same size of board as I used to plank the hull). View attachment 379804
  2. Marked the board where each stanchion will be; this is where I taped the waterways.
  3. I knew the scuppers were small, but it wasn’t until I started planning them out that I realized just how small they actually are. They are supposed to be 1/64” x 3/64” and for the quarter deck, they are on a 1/16” x 1/16” board. I used a small file that is about 1/16” thick, so I ran the file across the board until I was about half way thru the quarter deck board and about a 1/4 way thru the fore deck board. View attachment 379807View attachment 379805
  4. The boards with the scuppers are thicker (1/16”) than the boards that are glued to them (1/32”), so I used a number of pins on a foil covered board to hold the scupper board and the rail board (1/8”) together while the glue dried. The foil was to make sure the 2 boards didn’t get glued to anything else. View attachment 379806
  5. Cut 1/8” x 1/8” stock into pieces that are a little bit taller then the 2 boards (scupper board and rail board). View attachment 379808
  6. Glued stanchions to the boards. View attachment 379809
  7. Drilled 1/32” (?) hole in every 3rd stanchion or so.View attachment 379810
  8. Clean excess glue off/out of scuppers.
  9. Paint the inside of the completed rails white.View attachment 379811
  10. Remove tape from the waterways.
  11. Glue the painted rails to the waterways.
  12. Insert pins in drilled stanchions (to assist in keeping them in place while glue dries).
  13. Sand the outside of the rail boards to align them with the edge of the planks of the hull.
  14. Sand the excess tops of the stanchions off.
I only made it through #10 before having to pack it in as I’m off to visit family in North Carolina. Wish I could have finished the rails or be able to take it with me, but that is not possible.

Work time: 8.5 hours
Total work time: 91.5 hours
Inventive and ‘out of the box’, Hugh. Looking forward to the end result.
Regards, Peter
 
6/9 to 6/16

Did one more through sanding, even (cover your ears) using my handheld orbital sander and finished up with my sanding block.

Quick plug for this sanding block… first off I don’t care for the specific grain sanding blocks that seem to be the norm these days. I’ve never used one, but it’s the old school in me that makes me not like them. I found this on Amazon and really like is. “Sand-It” used a 1/4 sheet of sand paper. It has all the typical sanding surfaces and holds the paper tight. Definitely with the $5. I like it so much and it’s fairly inexpensive, so I bought a second one for my Mexican toolbox.
View attachment 379798
After this sanding, I primered the hull and marked it one last time places that needed filler.
View attachment 379799
On a recommendation from @Peter Gutterman I started using Elmer’s Wood Filler (white tub, orange lid). This filler straight out of the tub is very smooth, but since it is water soluble, I can wet my finger and not just apply it, I can work it into the areas that need it and smooth it out. If I had tried the wet finger technique earlier, I probably wouldn’t have needed so may rounds of adding filler and sanding.
View attachment 379800
I didn’t really like the shade of grey I used on the waterways plus once I took the tape off where the stanchions will be installed, the size irregularities of the tape became apparent so I replaced them and repainted with a lighter shade of grey.
View attachment 379802
I’m happy with the new tape and shade of grey.
View attachment 379803
I really like the way @Jeff T painted his Bluenose hull so I ordered the same red he used (Model Expo MS 4814 - Hull Bottom Copper Red), so I ordered a bottle. While I wait for the paint for to arrive, I’m going to install the stanchions which means it’s scupper-time.

Like many others, I cut off the stanchions that were attached to the bulkheads, so I put pins in the waterways to help me align where the stanchions will be attached to the rail. I don’t have a pin pusher so I manufactured one using an old cheap screwdriver I had laying around. I took a hacksaw to the shaft, then drilled a hole into the shaft.

Due to the small size of the boards, I decided to omit the coves.

In researching how to do the stanchions and scuppers I couldn’t find a lot of detailed info (yes, lots of helpful pics), but not the details I like, so here’s what I did:
  1. Dry fitted the board that will have scuppers. For the quarter deck this is a 1/16” x 1/16” (same size of board I used as the top plank of the hull on the quarter deck) while on the fore deck is 1/8” x 1/16” (same size of board as I used to plank the hull). View attachment 379804
  2. Marked the board where each stanchion will be; this is where I taped the waterways.
  3. I knew the scuppers were small, but it wasn’t until I started planning them out that I realized just how small they actually are. They are supposed to be 1/64” x 3/64” and for the quarter deck, they are on a 1/16” x 1/16” board. I used a small file that is about 1/16” thick, so I ran the file across the board until I was about half way thru the quarter deck board and about a 1/4 way thru the fore deck board. View attachment 379807View attachment 379805
  4. The boards with the scuppers are thicker (1/16”) than the boards that are glued to them (1/32”), so I used a number of pins on a foil covered board to hold the scupper board and the rail board (1/8”) together while the glue dried. The foil was to make sure the 2 boards didn’t get glued to anything else. View attachment 379806
  5. Cut 1/8” x 1/8” stock into pieces that are a little bit taller then the 2 boards (scupper board and rail board). View attachment 379808
  6. Glued stanchions to the boards. View attachment 379809
  7. Drilled 1/32” (?) hole in every 3rd stanchion or so.View attachment 379810
  8. Clean excess glue off/out of scuppers.
  9. Paint the inside of the completed rails white.View attachment 379811
  10. Remove tape from the waterways.
  11. Glue the painted rails to the waterways.
  12. Insert pins in drilled stanchions (to assist in keeping them in place while glue dries).
  13. Sand the outside of the rail boards to align them with the edge of the planks of the hull.
  14. Sand the excess tops of the stanchions off.
I only made it through #10 before having to pack it in as I’m off to visit family in North Carolina. Wish I could have finished the rails or be able to take it with me, but that is not possible.

Work time: 8.5 hours
Total work time: 91.5 hours
Good evening Hugh- clever.
 
6/27 to 7/1

Ok, after a week in NC and a few days to catch up on yard work, I finally have some Bluenose time. Time to finish the rails (stanchions and scuppers).

  1. Glue the painted rails to the waterways.
  2. Insert pins in drilled stanchions (to assist in keeping them in place while glue dries).
  3. Sand the excess tops of the stanchions off.
  4. Add filler to rail/hull seam.
  5. Sand the outside of the rail boards to align them with the edge of the planks of the hull.
  6. Drill out scuppers as needed.
  7. Repeat steps 14 through 16 as needed
  8. Touch up paint on rails and waterways.

Picking up where I left off, at my step 11… glueing the rails to the waterways. I started with the quarterdeck on the starboard side. This didn’t go quite as smoothly as I had envisioned, as even with the pins, the rails didn’t like staying flush with the waterways. To help holding them flush, I ended up using a number of clamps and even just manually holding them together. I then did the port side and ran into the same issue. Nothing I can really do, but I think after a little bit of wood filler and sanding it will look fine.
IMG_3836.jpeg
I then moved to the rails on the foredeck. They both went on easily, with little to no gap between the hull planking and the rail.
IMG_3837.jpeg
The Rocky Mountain Shipwrights met on Saturday for their monthly workshop, so I packed up my stuff and joined in.

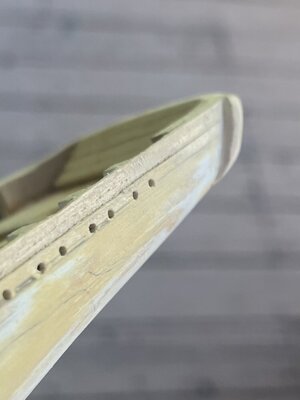
I sanded off the tops of the stanchions to match the height of the rail and then added a little bit of Elmer’s Wood Filler at the seam between the rails and hull planking. I used a wet finger to work the filler into the small gaps. At first I was trying to avoid covering up the scuppers with the filler, but I decided that I would drill them out later if needed.
IMG_3839.jpeg
One of the members of the club saw me using the wood filler and asked about it. I showed him how I used it, especially the part about using a wet finger to work it into small gaps. He liked it so much that he wrote down the name and said he was going to give it a try.
IMG_3849.jpeg
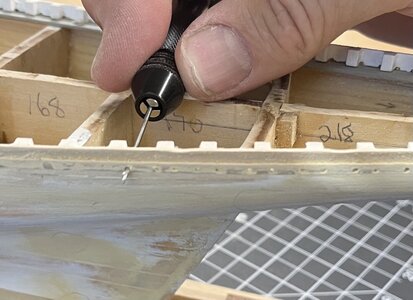
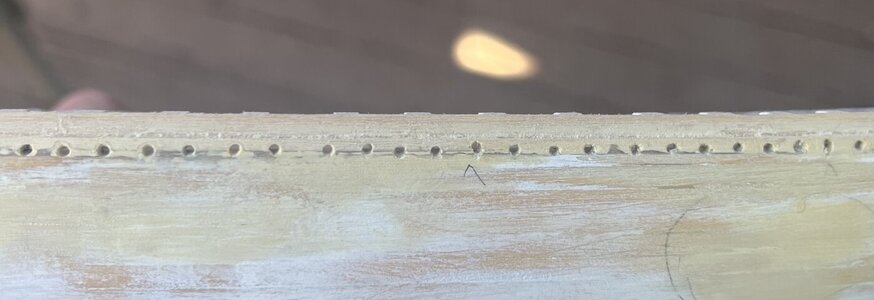
After the filler was dry, I sanded the area. This opened up many of the scuppers. I then took a very small drill bit in a hand vise and opened up all of the scuppers.
IMG_3851.jpeg
I had a few small areas that needed a second round of filler (and sanding then drilling) but overall I’m very pleased with the outcome.

I touched up the paint of the waterways (grey) and of the rails/stanchions (white).

I ended up switching the order of my original steps (13 & 14) and then added a new step 14 and then new steps 16 through 18.

As I mentioned earlier, I put more detail into the steps for this section as I really couldn’t find a lot of written steps.

I’m going to wrap up this portion of my build log, but know there are a few more things I need to do to wrap up the rails, stanchions, and scuppers.

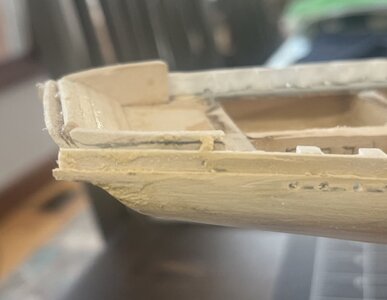
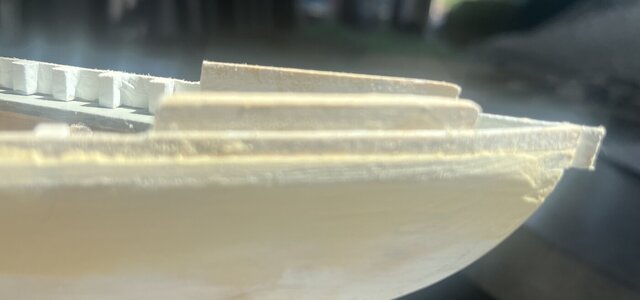
The rails at both the bow and stern need to be cleaned up. I’ll then add in the “fashion” piece at the bow.

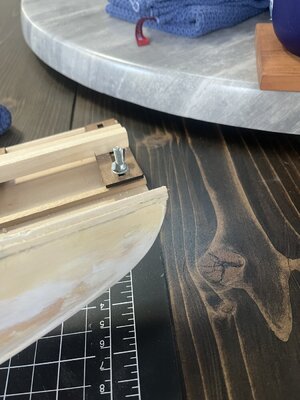
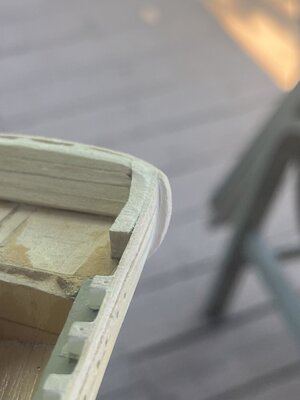
Something that I had not expected was that both the knightheads and stern blocks are too tall. They need to be cut/sanded down to match the height of the rails. For the stern blocks this also means that the upper portion of the transom needs to be cut/sanded.
IMG_3853.jpeg
IMG_3854.jpeg
Work time: 7.5 hours
Total work time: 98 hours
 
Looking forward to seeing how those stanchions turn out! One thing from person al experience about using filler - it's best to apply multiple thin layers, sanding lighting in between applications. You will lose less surrounding wood and preserve the overall shape of the vessel. Your looking good!
 
7/3 to 7/11
Back at it, or at least sort of… Seems to be too much stuff to do around the house, yard, and just overall life to chisel out time to work on my Bluenose. Don’t get me wrong, my “problems” are problems that many people would be “happy” to have. So I’m not complaining, just explaining why not much work is happening with my Bluenose.

In reality, we’re doing too much right now, but a month or so from now, it should be a bit more under control. But until then, the Bluenose is taking a bit of a backseat.

While my process to create the stations, rails, and scuppers worked, and I’m pleased with the overall outcome, if I were to have a mulligan, I would:
  • Take more time ensuring the stanchions were more uniformily spaced and perpendicular to the waterways.
  • Not filed the scuppers until the stanchions were glued to the board.
  • Possibly held off on painting the waterways until after the rail was completed.
Now that I’m done nit-picking my earlier work, onto the new work that I’ve been able to do…
I sanded down the knight heads and stern blocks to match the height of the rails. I haven’t done anything with the height of the planking on the transom, but that will come.
IMG_3927.jpeg
IMG_3928.jpeg
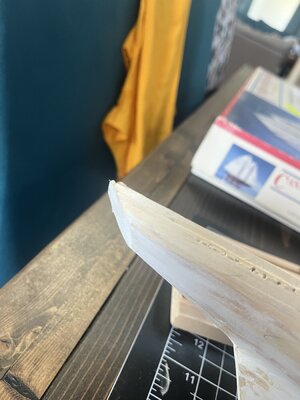
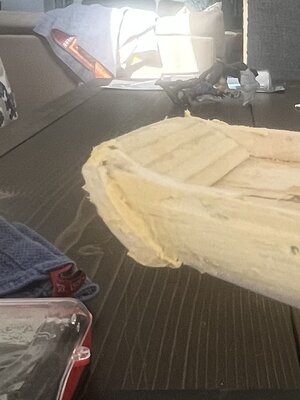
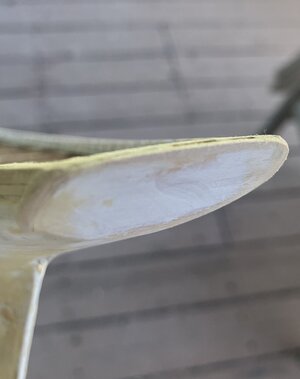
I cleaned up the tip of the bow. It still doesn’t have the classic Bluenose profile, but it is getting close.

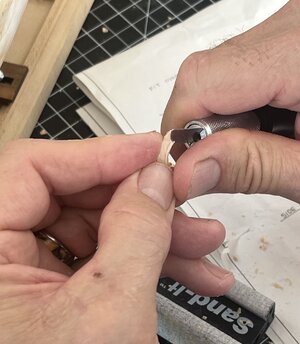
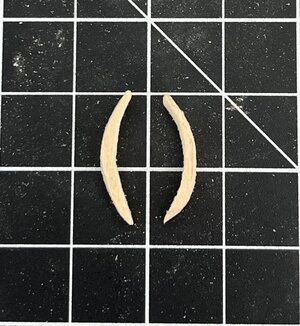
To create the “fashion” piece of the transom, I glued two small pieces of 1/4” x 1/16” stock together and then used a combination of carving and sanding to get them to lay fairly flat against the very end of the hull at the transom. These little curvy buggers end up being pretty small as they are about 1” in length and about 1/ 8” in diameter.
IMG_3932.jpeg
IMG_3946.jpeg
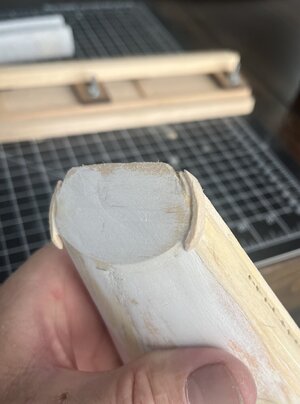
Glued them to the hull, added a bit of filler, and then sanded (and repeated) until I was happy with the overall look. Not really sure what these are other than “fashion” pieces but they are done.
IMG_3947.jpeg
IMG_3951.jpeg
In addition to sanding the fashion pieces, I also sanded down the transom planking and cleaned up the small lip between the two boards on the rail.
IMG_3957.jpeg
IMG_3958.jpeg
IMG_3959.jpeg
IMG_3960.jpeg
Next up - planking the deck.

Work time: 6 hours
Total work time: 104 hours
 
Back
Top