You are using an out of date browser. It may not display this or other websites correctly.
You should upgrade or use an alternative browser.
You should upgrade or use an alternative browser.
1682 HMY FUBBS - 1:24 - Stern Section
- Joined
- Jan 9, 2020
- Messages
- 10,378
- Points
- 938

Excellent work Daniel. The choice between the Aspen and the Pear would obviously depend on personal preference (I like them both), but you certainly do not have to worry that the Pear looks out of place. In fact, it creates a very integrated look at the stern.
Excellent work Daniel. The choice between the Aspen and the Pear would obviously depend on personal preference (I like them both), but you certainly do not have to worry that the Pear looks out of place. In fact, it creates a very integrated look at the stern.
Thank you Heinrich !!! . But let me ask: Why do you think that Pear wood could looks out of place ?
Daniel
- Joined
- Jan 9, 2020
- Messages
- 10,378
- Points
- 938

No not at all out of place. But whereas the Pear and Walnut create an integrated look, the Aspen Walnut combination creates contrast, which is also good. So pretty much a case of six of the one and half a dozen of the other.Thank you Heinrich !!! . But let me ask: Why do you think that Pear wood could looks out of place ?
Daniel
Good morning Daniel. Way to go !! I am really happy that you decided to go for it and do this. Excellent.Cheers GrantGuys, after reading this morning all your encouraging words, I decided to leave beside my internal depression and give a try to the unglue process.
After a few hours of soaking all in alcohol and a few sections with Goof Off, for superglue, I was able to get all out.
And I saw the origin of my mistake. We need to cut the win transom to allow the stern post to fit on it. I did that cut precisely. Then took it out to mill a wider rabet. When I returned, placed the win transom and stern post on its place, centered, glued, and for some reason I moved all to the left without realizing. Put a weight over it and gone. Later on the day, I saw that the win transom was protruding more on the left than on the right side. But didn't light a red light on my brain, because I was going to sand all at the end.
Now you can see that the stern post fits in a wider cut on the win transom.. That will be visible after the planking. I will cover it with a thin plank and all will be remembered as a bad dream.
THANK YOU ALL AGAIN !!!
Daniel
View attachment 388733
Major disaster?
Like it never happened!
Like it never happened!
Good morning Daniel. Way to go !! I am really happy that you decided to go for it and do this. Excellent.Cheers Grant
No not at all out of place. But whereas the Pear and Walnut create an integrated look, the Aspen Walnut combination creates contrast, which is also good. So pretty much a case of six of the one and half a dozen of the other.
Major disaster?
Like it never happened!
Thank you all for the nice comments and the likes !!!!VERY NICE DANIEL, GREAT FIX I AM LEARNING FROM YOU AND OTHERS, KEEP IT UP. GOD BLESS STAY SAFE ALL DON
The lower counter inner planks installed. As well as the Keelson.
The Keelson wasn't easy to work with. It's 10x10 mm Walnut.
Everyone needs to bend it to follow the hull shape.
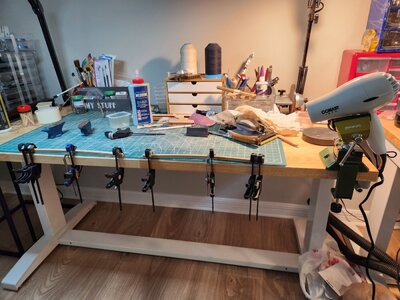
I took a molding of my hull shape with a flexible ruler. Then I placed the keelson in boiling water, then attached to the working bench and left it there for 24 hours.
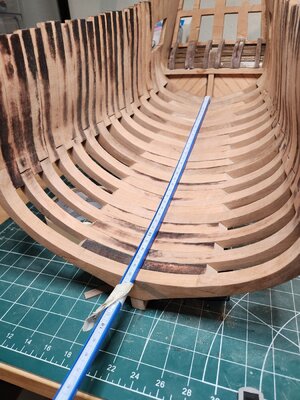
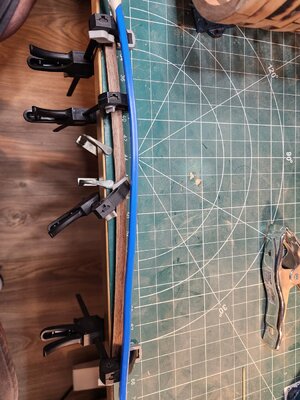
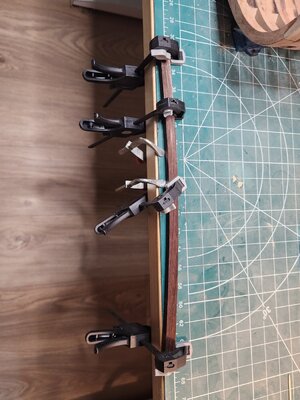
But, it wasn't enought, when you take the clamps will stretch a little again.
To achieve the final curvature I decided to use an old trick. Small cuts.
Boiled again in water for 15'. Clamped again and dried with a hair dryer and done !!!
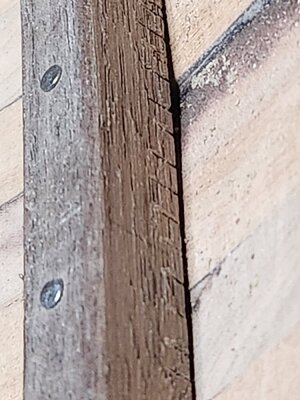
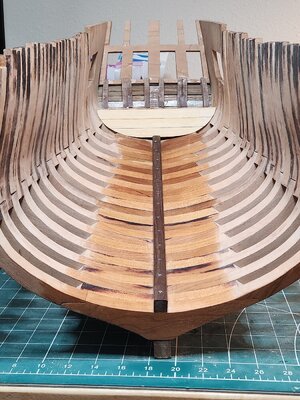
The Keelson was also nailed to each frame and glued.
Till the next update !!!
Daniel
Last edited:
Much better stern timbering - and also the types of wood are fitting much better
Good that you made the repair
Good that you made the repair
Nice work Daniel.
Thank you Mike and Uwek and to all the likes.Much better stern timbering - and also the types of wood are fitting much better
Good that you made the repair
Baby steps.....
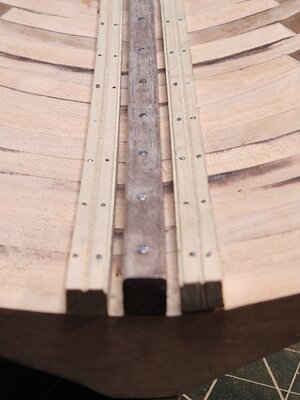
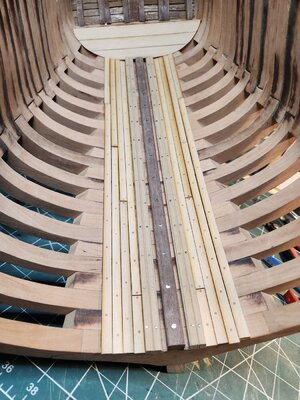
Limber Strakes installed. They are CNC boxwood simulating 2 timbers Each. I still need to draw a soft line on the Grove to simulate the caulking. Also the have a ledge that will serve as a seat for the Limberboard Cover (on next posting). A 3 mm space was left between the keelson and the limber strakes. That section will be cover later (to be done). These boxwood timbers were a little headache to bend to the hull shape. At the end I succeeded. Applied the same techniques used on the keelson.
Next started the installation of the footwaling strakes. Planks made of basswood.
That is all for now.
Cheers
Daniel
Last edited:
Very nice Daniel!
Thank you Paul, much appreciated. Also thank you to all the likes !!!Very nice Daniel!
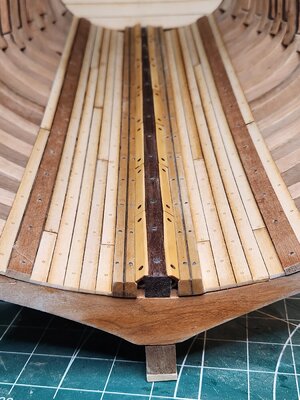
The Limber Board cover was installed as well as the Bilge Stringers, also known as Thickstuff (Mahogany). The Footwaling planks installation is done and with a pencil I recreated the caulking between the limber strakes to simulate 2 timbers.
The Limberboard Covers were laser cut in 3/64" Boxwood. They are a scale 4 feet long and include 2" grab holes for removal by the crew. Notice that the limberboard covers are mounted on the ledge done by CNC on the limber strakes. And the keelson border , that supports the limberboards covers, have been sanded with a small angle.
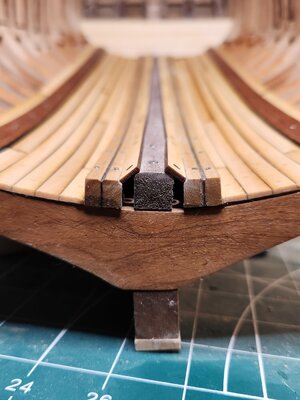
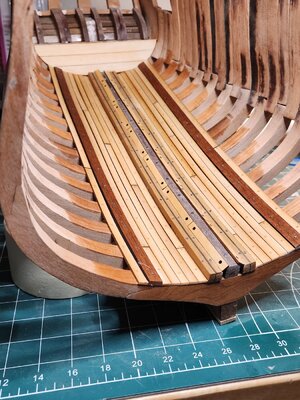
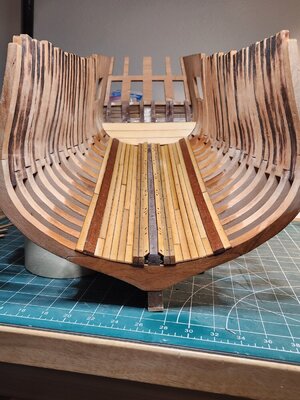
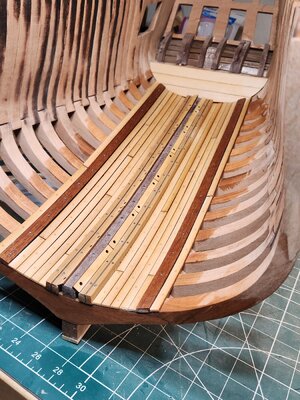
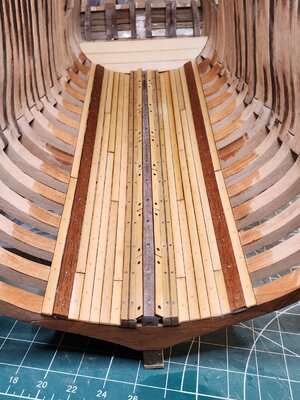
Untill the next update, all the best to all !!!
Daniel
Last edited:
Very good details with the thick stuff and in principle with using these bilge limberboards - the different kind of woods are beautiful
Maybe only two points which are necessary to discuss:
The stern section also includes the mizzen mast, so you have to add on top of the keel the mast foot or base -
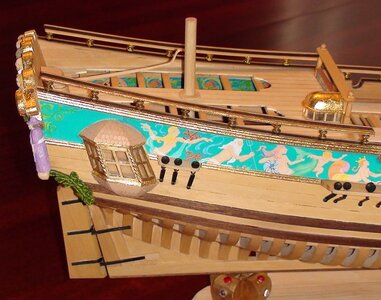
here the limberboards are not installed so you will have an open are, where no limberboards are laying, so I think first the mast step has to be fixed and than you can adjust the limber boards accordingly
Here an excerpt of my Granado drawings
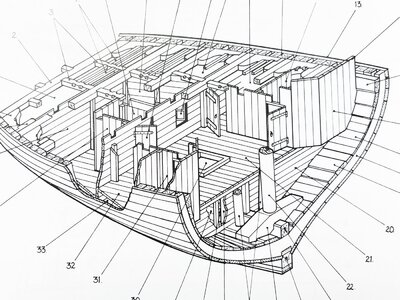
And I think the boards would not be higher than the surface of the keelson (red triangle) - maybe you reduce poartly the width of the board and adjust one edge
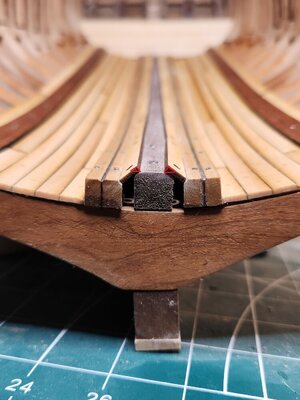
Granado
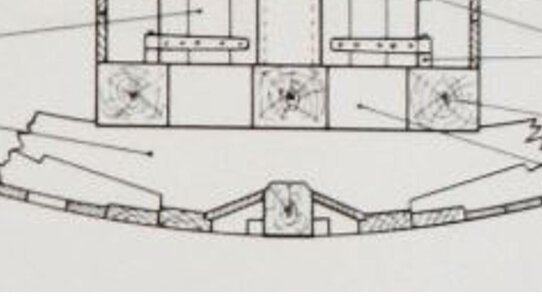
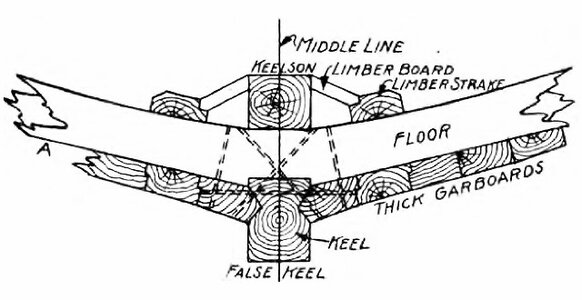
Maybe only two points which are necessary to discuss:
The stern section also includes the mizzen mast, so you have to add on top of the keel the mast foot or base -

here the limberboards are not installed so you will have an open are, where no limberboards are laying, so I think first the mast step has to be fixed and than you can adjust the limber boards accordingly
Here an excerpt of my Granado drawings

And I think the boards would not be higher than the surface of the keelson (red triangle) - maybe you reduce poartly the width of the board and adjust one edge

Granado


Thank you Uwek for these comments, they are excellent and educative.
Unfortunately, at this time, I do not have a way to change the positions of the limberboards covers as you posted. The prototype was designed on this way and all was aligned to end as I built it.
About the mast step position, you are correct too. As soon as I arrive to that part of the construction, I will unglue the 2 limberboards where the mast step will fit. They have a very tiny amount of Weldbond.
Thank you again !!!!!
Daniel
Very nice work, Daniel! I’m glad you didn’t end the project with the misplaced stern post. Good job!
BTW: I’m not getting email notifications for posts on this thread. Admins: Why?
BTW: I’m not getting email notifications for posts on this thread. Admins: Why?
Very good details with the thick stuff and in principle with using these bilge limberboards - the different kind of woods are beautiful
Maybe only two points which are necessary to discuss:
The stern section also includes the mizzen mast, so you have to add on top of the keel the mast foot or base -
View attachment 389922
here the limberboards are not installed so you will have an open are, where no limberboards are laying, so I think first the mast step has to be fixed and than you can adjust the limber boards accordingly
Here an excerpt of my Granado drawings
View attachment 389917
And I think the boards would not be higher than the surface of the keelson (red triangle) - maybe you reduce poartly the width of the board and adjust one edge
View attachment 389919
Granado
View attachment 389918 View attachment 389920
Hi Uwek, again, thank you very much for this comment. I texted a Weasel's team member and he sent me the drawing from the book "Peter Goodwin, Construction and Fitting of English Ships of War 1650 - 1860". (I couldn't find my book, still in some relocation box)
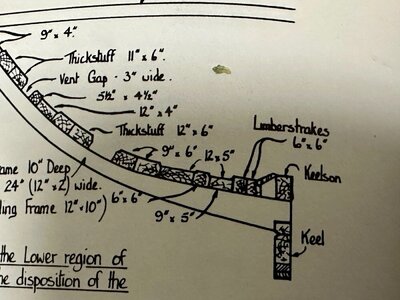
Then I sanded the section you pointed and I think that now the job is good enough and very similar to Goodwin's drawing.
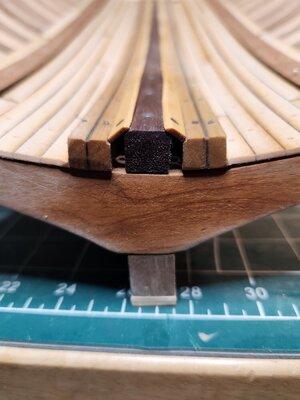
Again, thank you Uwek !!
Daniel
Very nice work, Daniel! I’m glad you didn’t end the project with the misplaced stern post. Good job!
BTW: I’m not getting email notifications for posts on this thread. Admins: Why?
Thank you Dave !!! Much appreciated!!!
Daniel
Thank you Heinrich !!! I really appreciate your comment.Very good progress Daniel. I think the sanded center section looks far more integrated now. The inner planking adds another dimension to the build and as Uwe said, the different wood colors look beautiful.
Have a nice weekend
Daniel
Daniel, the wood colors add so much detail and beauty! Love your work!! Magic Mike


