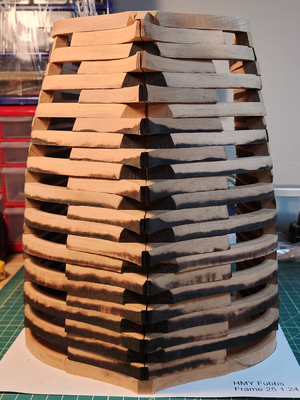
Good morning Daniel. I hope you are enjoying Florida ( my kind of climate- hot, hot and more hot) and have settled in. Must be exciting building a “one of a kind” (well 9 as you have said) build. So far you are certainly doing this “kit” justice. I have pulled up a beach deck chair2 more frames to bevel..... but I had to stop. Need to BQ burgers and sausages on my new griddle. HAHAHA
View attachment 386722
You can start to see the shape of this beauty !!!
View attachment 386717View attachment 386718View attachment 386719View attachment 386720View attachment 386721
Cheers to all
Daniel
You are using an out of date browser. It may not display this or other websites correctly.
You should upgrade or use an alternative browser.
You should upgrade or use an alternative browser.
1682 HMY FUBBS - 1:24 - Stern Section
Thank you Grant for stopping by at this log. I hope you enjoy it. I enjoying seeing your picture together with Heinrich and your beautiful Victory. Looks like you both spent a great time.Good morning Daniel. I hope you are enjoying Florida ( my kind of climate- hot, hot and more hot) and have settled in. Must be exciting building a “one of a kind” (well 9 as you have said) build. So far you are certainly doing this “kit” justice. I have pulled up a beach deck chair. Cheers Grant
Cheers !
Daniel
Hi all
I have achieved my first milestone: To have the frames with the first beveling done. It was achieved using a spindle sander.
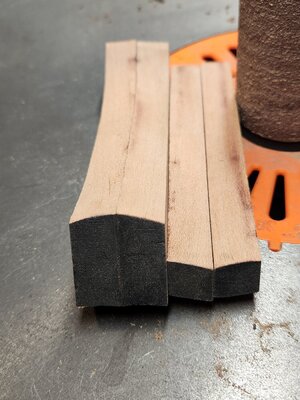
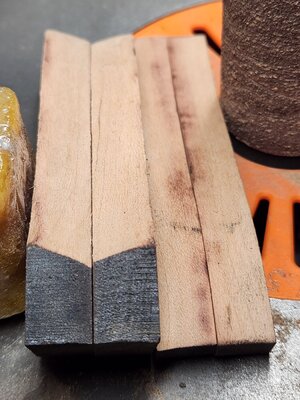
Then I proced to finish placing all the frames one over the other. It start with frame 25, end with frame 37. I have not placed for the pictures Frame37A neither Frame 38. Frames 37, 37A and 38 (these also full 3D) , as well as 25, are CNC. Frame 37 (CNC) you will see in the interior picture that has not been sanded yet.
Next steps:
- Take down frame by frame. Do a final char cleaning on the sections that will be visible (see the last 3 frames almost all those sections without char).
- Start to glue the frames.
- Final sanding for a smooth hull shape.
Let see a few pictures:
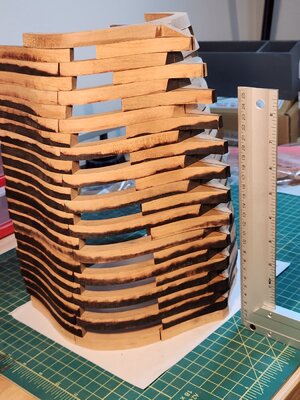
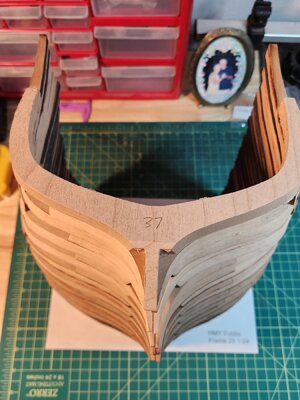
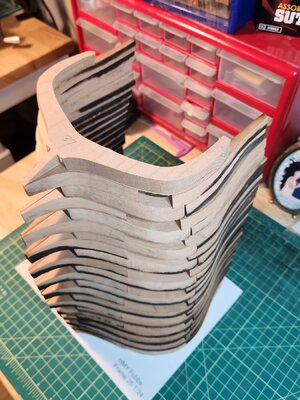
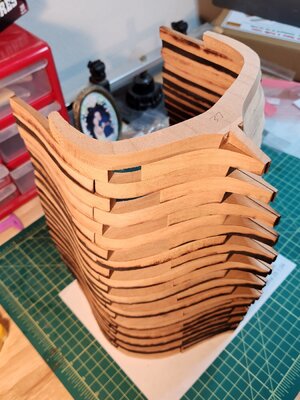
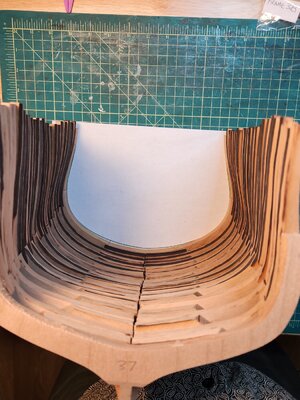
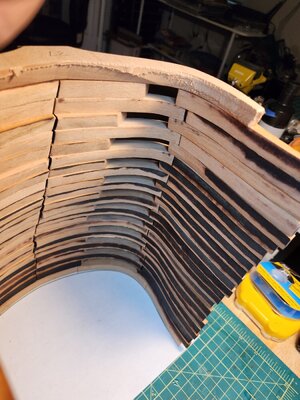
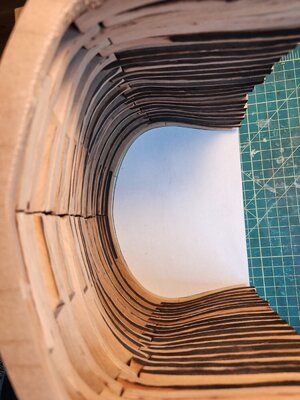
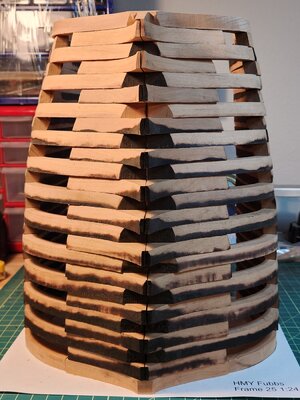
Cheers and have an excellent weekend !!!
Daniel
I have achieved my first milestone: To have the frames with the first beveling done. It was achieved using a spindle sander.


Then I proced to finish placing all the frames one over the other. It start with frame 25, end with frame 37. I have not placed for the pictures Frame37A neither Frame 38. Frames 37, 37A and 38 (these also full 3D) , as well as 25, are CNC. Frame 37 (CNC) you will see in the interior picture that has not been sanded yet.
Next steps:
- Take down frame by frame. Do a final char cleaning on the sections that will be visible (see the last 3 frames almost all those sections without char).
- Start to glue the frames.
- Final sanding for a smooth hull shape.
Let see a few pictures:


Cheers and have an excellent weekend !!!
Daniel
Last edited:
Thank you Mike !!!Hi Daniel, you are doing a good job removing the char on the frames, your stack looks better than mine. The build gets more interesting as the build goes along,
Mike
It is very encouraging when an experience modeler says something like that.
Cheers !
Daniel
Hi Daniel,
without going through your build log to find out, are the frames cherry or maple ? My Fubbs has maple frames.
without going through your build log to find out, are the frames cherry or maple ? My Fubbs has maple frames.
Hi Daniel,
without going through your build log to find out, are the frames cherry or maple ? My Fubbs has maple frames.
Cherry
Any news about your kit ?
Cheers
Daniel
my kit has left Florida clearance centre and currently in transit down here to Australia.
Kurt Konrath
Kurt Konrath
Nice photos, a Cathedral view and then a view of folded praying hands it looks good together.
Hi KurtNice photos, a Cathedral view and then a view of folded praying hands it looks good together.
Thank you for stopping at the log. I would like to understand what do you meant with a "view of folded praying hands".
Best
Daniel
Great job, Daniel! The bevels look great. I'll be starting my log in a day or two. I've been cutting out paper templates for the last two days! LOL!
Hi Doc nice to hear that. I am looking forward to follow your built at SOS.Great job, Daniel! The bevels look great. I'll be starting my log in a day or two. I've been cutting out paper templates for the last two days! LOL!
Best !!
Daniel
ribbs you do not even need to light the coals lol lol lolo. GOD BLESS STAY SAFE YOU AND YOURS DON
10 Fubbs kits have been produced, and most will feature in build logs on this forum soon.
Pulling up a chair to watch your new build. Have fun! Magic Mike
Nice to have you following the built.Pulling up a chair to watch your new build. Have fun! Magic Mike
Daniel
Hi guys just baby steps and moving on.
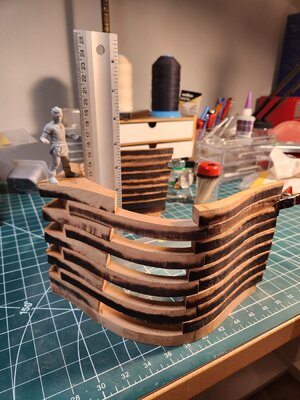
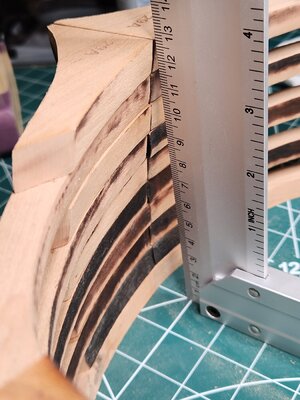
As mentioned, this built is a Navy Board Style. The navy board Style construction does not require a Jig, the frames are stacked vertically, one over the other. It requires a lot of stack testing before you move to glue the frames. This is the reason why I am posting many frames stacks at this stage of the built. The presicion of the stacking will define your frame assembling and position perfection. Of course, anyone is perfect, so you will still have to do a good sanding to the hull. Internally and externally.
Let's stop here the words and show some pictures.
Frames are , for example, 25 and 25 A , 26 and 26A and so on. First I glued all the pairs (frames X with XA)
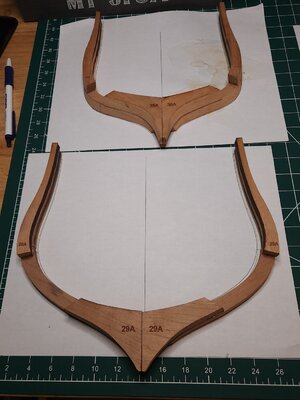
After that I staked the frames again (no glue)
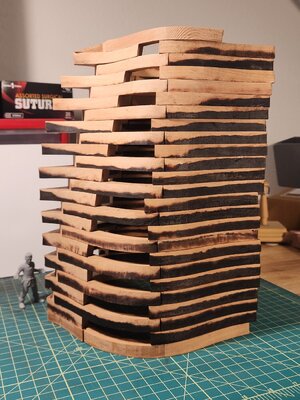
They looked fine so I moved to the next step. Glue the first set of frames. I will do 2 or 3 sets. This is the first set and the only one I did today.
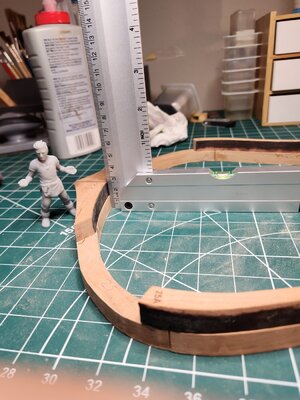
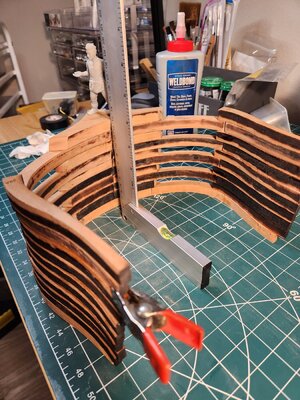
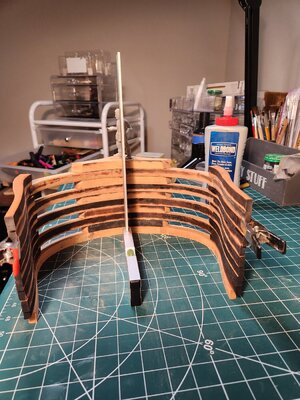
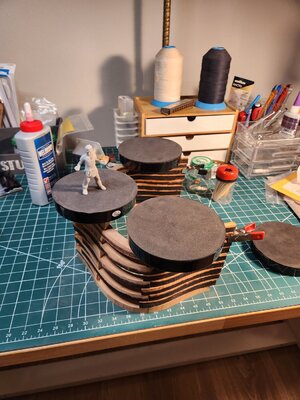
I will let them overnight with those weights. If you have any questions please, don't hesitate posting it.
All the best !!
Daniel
As mentioned, this built is a Navy Board Style. The navy board Style construction does not require a Jig, the frames are stacked vertically, one over the other. It requires a lot of stack testing before you move to glue the frames. This is the reason why I am posting many frames stacks at this stage of the built. The presicion of the stacking will define your frame assembling and position perfection. Of course, anyone is perfect, so you will still have to do a good sanding to the hull. Internally and externally.
Let's stop here the words and show some pictures.
Frames are , for example, 25 and 25 A , 26 and 26A and so on. First I glued all the pairs (frames X with XA)

After that I staked the frames again (no glue)

They looked fine so I moved to the next step. Glue the first set of frames. I will do 2 or 3 sets. This is the first set and the only one I did today.


I will let them overnight with those weights. If you have any questions please, don't hesitate posting it.
All the best !!
Daniel
Last edited:


