CSS Wilmington - an Ironclad of the civil war that was never finished

Joined
Apr 4, 2024
Messages
11
Points
48

Hallo there!

This will be the start of my build-log for the "CSS Wilmington" a ship that never got to launch.

Information about the Wilmington is rather sparse, being as construction was started, but never finished. The ship was burned while in construction to prevent capture from Union troops. As far as i can tell, it also never had a proper name given, the now used name is more of an assumption because she was build and destroyed in Wilmington and there was/is no other ship with the name. What is interesting is the deck arrangement. As there are two pyramidical casemate gun-positions, with one gun and seven gunports each.

But i will be honest, i did not research a whole ton about this ship, i found it while looking something up about the american civil war and really liked the look of her. So if anybody has deeper insights than what is found on Wikipedia, feel free to share with me/us.


As this is the second wooden ship i am going to build, i already knew that she will be build from 90% Balsa wood, having a keel made from Multiplex/plywood because it sort-of worked for the first build. Though in future builds, i will probably go for some "proper" keel material as there are some downsides to using it.
I also have some very nice looking hazelnut "strips", which id like to use for some detailing work on the deck.
So far, besides the keel, i only used Balsa in the build.(And loads of "Ponal Express" a wood glue)

A note on the plans for the ship.
I only found one proper picture of her plans, which was on Wikipedia.
PlanCSSWilmington.jpg
There are notably no numbers or measuremnts, but it is all that i found, so it was the basis for my plans.
I used the originals to create plans that fit my purpose.
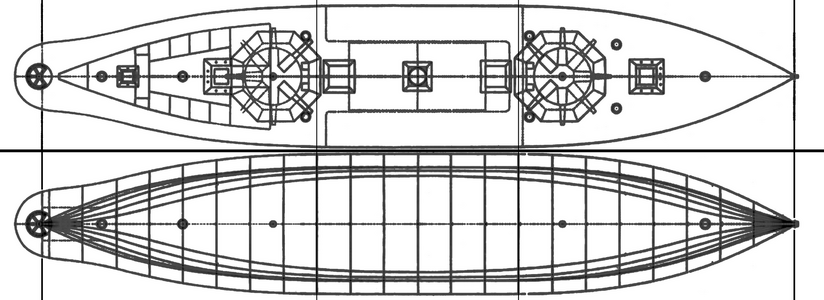
Deck-Hull-Plan_wip_b.png
Basically i "redrew" the lines in Gimp, mirrored them and that way got me a deck plan and a "top-down-lineview"(not sure what the proper term would be).
This plan was actually printed out to scale, and was my main guide in the early stages of construction.


I also tryied redoing the original plan the same way, but never put that much work into it because it didnt seem usefull at the time.
Top-Side-In-Scale_wip_copy.png
It was a nice exercise, but i never finished it properly nor did i print it.


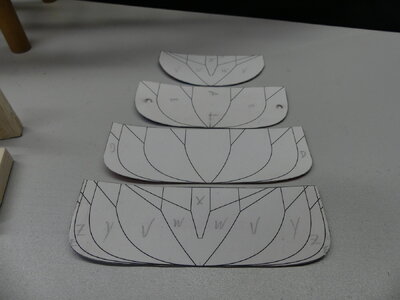
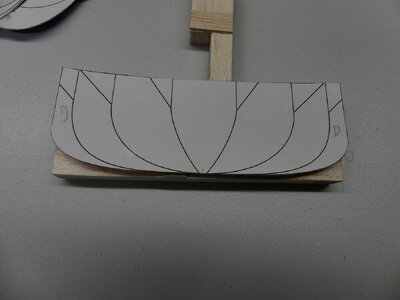
While these plans already are very helpful, i needed a proper template for the stations/frames, thats why i created these plans, closely following the original.
Front frames
Spanten-station-plan-FRONT.png
Rear frames
Spanten-station-plan-BACK.png
I decided to do a "main"-frame, the curved line going up into a straight line till it meets the deck(top most horizontal line) and an addon/balcony style extension for the outboard part of the frame(the triangle). In later pictures it will become clear what that looks like.


With the plans finished up, i started the construction.
This will conclude this post, the next one will try to take stock of what i already got done.
 
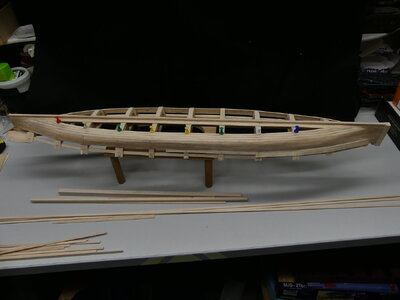
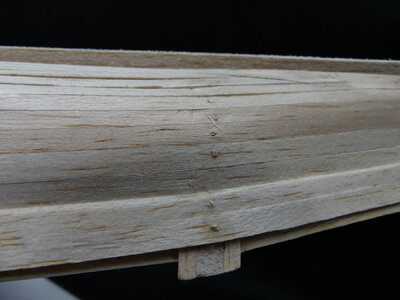
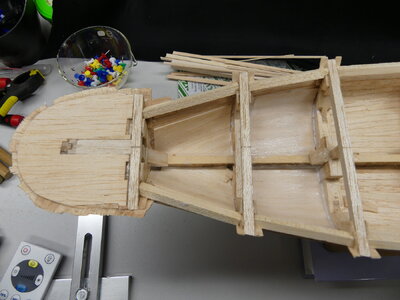
This is the first picture taken of her. At this point the frames are all done and i started the planking process.
In this specific picture you can see the pins i use to fasten the planks in place till the glue dries enough.
My goal so far was to have single planks running from one end to the other, which at first didnt work out for one reason or another, mostly because planks broke. I also had to replace three broken plankends where i wasnt carefull enough when clamping them while glueing.
P1080578.JPG


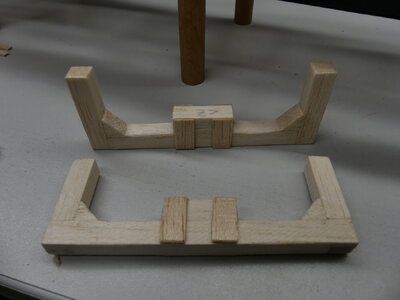
I dont have any pictures from the frame-building-process, but i do have two left over frames that sorta show the process.
P1080615.JPGP1080621.JPGP1080624.JPG
The frames were done from 10mmx10mm Balsa and "interlocked" in the corners. I probably could have done a better job of showing that, but its visible in the first picture on the underside.
In the middle you see a reinforced double braced part, which would be cut/filed out to fit on the keel.Which can be seen in the following.
P1080752.JPG
I decided on a "real"/"structural" keel made from plywood and a "false" keel ontop, or rather under it from Balsa.
 
A very interesting subject to model. I suspect a portion of her construction would have to be left open to truly see the details of the interior sections.
Good Luck.
Interesting subject indeed.
I am still debating if i have an "Interior" below the deck, or if that will be closed up. What will be open, or rather removable will be most deck structures. Like the Casemates or the Pilothouses.
 
What just occured to me, i didnt really think about the scale for this project.
What i know is that the ship in its current state is about 85cm or 33.5 inches long and about 15cm or 6 inches wide.
The real thing being about 71,1m long over all, would put it at about 1:83 scale.
WHen i started the project i had a rough length in mind that it should reach, i didnt plan on a specific scale.

Also, i dont plan on making it 100% accurate, simply because i am not sure about some parts yet. Though my goal is to get it as close as i can get it.
 
The current state sees one side being mostly finished with planking.
P1080755.JPG

Even though the planks are still rough, i am genuinely happy and proud with how they turned out so far.
The pattern i did in the planks turned out not just usefull for getting the curvature done nicely, but it also looks good.
Though i am not sure if it is historically accurate.
P1080772.JPG


I also tryied a new technique to fill up the holes left up by the pins i sued in the glueing process. I used offcuts from the planks cut in a wedge and stuck them with liberal amounts of glue in the holes, waited a moment and cut them off. Afterwards i shaved them down a bit. Currently they are drying with the rest of the planks. WHen i do the next work on the planks i will sand/shave them flush with the planks.
P1080738.JPGP1080741.JPG


Next steps will be about planking the other side of the hull, which currently only has 3 planks in place.
After the planking i will have to figure out how i will do the "upper"-hull planks, especially in the back.
The rounded platform requires some more attention.
P1080602.JPG
I will probably add another layer of Balsa as a support for planking. With that support continueing the planking in a vertical fashion up to where the rounded part meets the diagonal part should yield a satisfactory result. That way there should be a flush transition between the horizontal plank coming from the bow and the vertical planks from the stern-platform.
 
How will you simulate the iron plating around the gun casements? Will you use plywood and then round headed nails for the rivets? I really like the design of the ship that you chose. It is very interesting, and I will follow your build log closely. Thank you for posting.
 
How will you simulate the iron plating around the gun casements? Will you use plywood and then round headed nails for the rivets? I really like the design of the ship that you chose. It is very interesting, and I will follow your build log closely. Thank you for posting.
The casemates will be made from plasticard, a sheet of white plastic. With a mixture of Tamyia putty and tamyia glue i will try to recreate the cast iron look. Its a technique i have seen used in scale models for tanks and similars.
The rivets will be done from a mold. I have molds with different kinds and sizes of rivets/bolts that i cast out with an acrylic plasterlike substance from "greenstuffworld". My tests so far were quite succesfull. But the deck work will only start after the hullplanking is finished, so theres some work left to do^^
 
The underwater ship is finished planking.
P1080780_cropped.png

Next step is to figure out how to to the above water hull, the little "balcony". The biggest issue i have is with coming up with a way to do the stern end. The hull widens to accommodate the rounded platform.

The hull will get some sandpaper treatment when the whole hull is planked, though most planks are pretty flush with their neighbours.


As a side note, today i acquire an interesting book on the topic of historical shipmodelling, "Das Handbuch für Modellbauer - Historische Schiffsmodelle von Wolfram zu Mondfeld"("A modelers Guide to historical shipbuilding" rough translation). It is a bit dated but still has alot of interesting info on how to build a ship from the age of sail. I am already thinking about the next ship, perhaps a 6th or 5th rate from around 1800. But that has to wait some time till this one has reached a state that i am satisfied with.
 
Current State
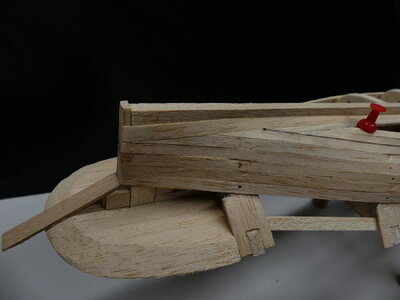
I just finished work on the lower hull. All planks are in place, the first round of sanding took place and smoothed out the planks nicely.
The "balcony" planks have been figured out and nearly finished.


P1080786.JPG
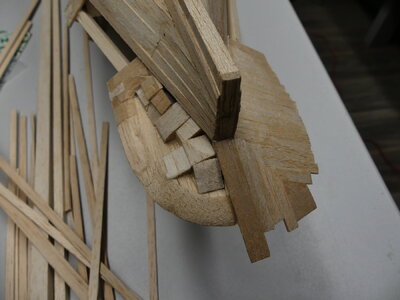
I build up the empty volume with bits of leftover balsa. It didnt need to look nice, the point was to create points of contact at the right places.


P1080792.JPG
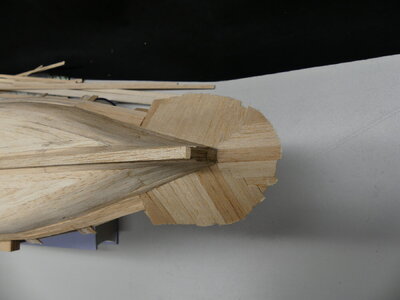
The finished aft "balcony". I decided to plank it perpendicular relative to the rest of the planking. It was way easier than trying to properly cut and bend them around. It mostly workout as intended, with the exception that the angle of the planks isnt symmetrical on both sides. I did properly meassure the angle, but didnt implement it the right way. But its close.
The freyed edges are a result of me roughly sawing off the overhanging plank length.


P1080797.JPG
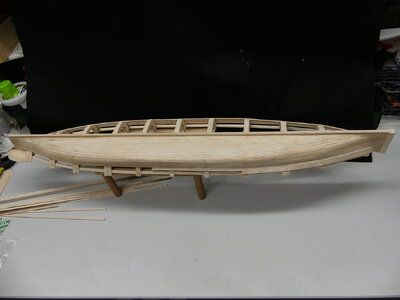
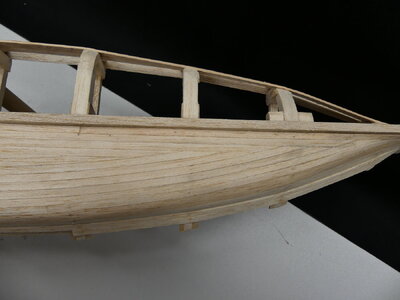
With the lower hull being done, the ship can now be turned around and worked from the "proper" side. Here you can see the first four reinforcements for the hullplanking. These patches are 0.8mm thick Balsa. Glued in place with slightly thinned woodglue(Ponal Express).
The hullplanks used are 1.5mm thick, with some amount of sanding they are probably closer to 1mm now. THey were stable enough to handle the ship, but just to be on the safe side, the reinforcement is done.


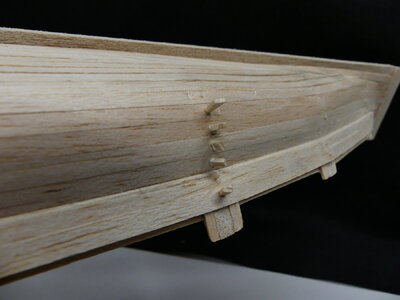
P1080798.JPG
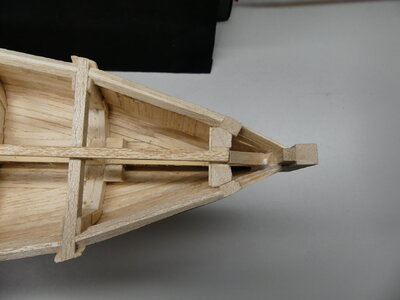
The bow of the ship, i didnt do anything with it besides adding the planks, but it maybe interesting to have a look at.


Next Steps

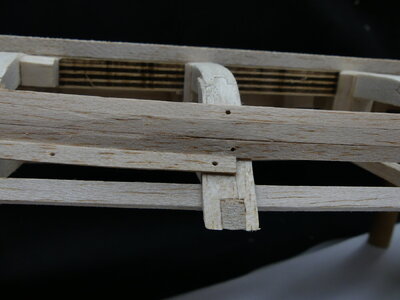
The general deck structure needs to be constructed. The deck is not curved, but rather slanted. The middle third is straight and level, with the outside thirds being slanted slightly downwards.
The beam in the middle of the deck in the last picture has the right height, there will be 2 more beams left and right of it that will form the outer high points of the deck understructure.


Side notes

Having now read dozens of build logs on this forum, i have found a huge amount of useful knowledge. Really glad that so many people chose to post their build logs.
I also found that starting my shipbuilding career with balsa wood has certain up- and downsides. The huge upside, its incredibly easy to cut, sand and work with in general. The major downside, it is very fragile. Simply clamping parts or planks in place with little clamps, even with cloth to soften them, damages the wood.

After reading all those buildlogs and reading up about what woods have what properties and how that translates to (model)shipbuilding, i decided my next ship project will be done with pear, (wal)nut and boxwood. Sprinkled in with some nice looking wood i picked up over time, stuff like "Mooreiche"/"Bog Wood" or redwood.

In regards to wood, i found a nice pdf titled "Database of Wood for Ship-Modellers by Harry Dunn and edited by the NRG Staff" that has a nice amount of infos. As far as my cross source research went, the data in the pdf seems pretty good. Though i am always open for more interesting sources in regards to (model)shipbuilding.


What is somewhat frustrating, through reading and research i found so many things i want to do differently with my current build. But doing that would essentially require an entire rebuild of the ship. So i decided to keep going with the plan i initially had for this ship and augment it with the new knowledge i now have. The deck for example will now not be done from balsa, but instead i will try out dark nut wood.

Another thing are plans, not having any proper plans is really detrimental. My next project will have as detailed plans as i can get, even if that means i will have to get into CAD to create them myself. Though id prefer to have some real premade plans to work with. But getting into a project with just the lineplan is really a bit of a hasty thing to do.


Question, is there a proper place in the forum where i can open a thread with questions for my next project? Help with gathering plans and infos for the next build etc.
 
a very interesting project - such a monitor
BTW: maybe it is mentioned somewhere, than sorry for the question: in which scale are you building the model?
 
a very interesting project - such a monitor
BTW: maybe it is mentioned somewhere, than sorry for the question: in which scale are you building the model?
The scale is (roughly) 1:83
In its current state it has a length of ~85cm ( 33.5 inches) and a width of ~15cm ( 6 inches )

Btw, i am hugely impressed by your Granado builds, really inspiring work!
 
Back
Top