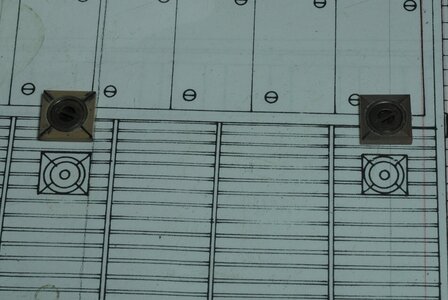
Working Steam powered wooden Drifter trawler, Formidable LT100, 1:24th scale

Coal Bunker Rings & Lids installed.


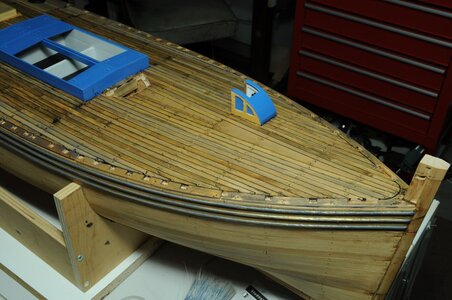
At long last I have installed the Coal Bunker Rings & Lids, funny this is something that I thought wouldn’t take all that long, how wrong could I be…

There was a bit more fitting to do before gluing up, gluing went pretty smoothly thankfully.
DSC_0375.1.JPG

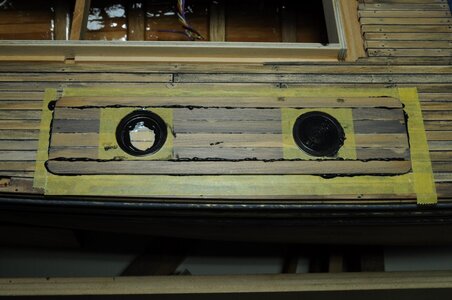
After gluing I wanted to seal the deck before I progressed any further, this required masking all the stanchion recesses and any deck fittings already attached. Also the “O” rings on the Coal Bunker Lids were installed along with a very fine smear of grease around the top edge to prevent said Lids from being glued in place due to the paint.
DSC_0378.1.JPG

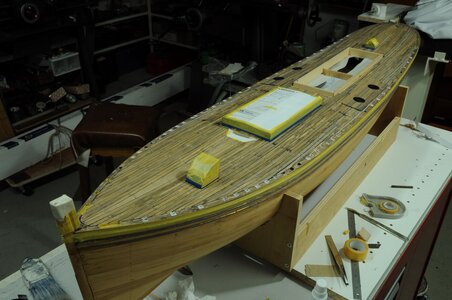
Once this was done I sprayed several coats of Full Gloss Automotive Clear Coat.
DSC_0381.1.JPGDSC_0382.1.JPG

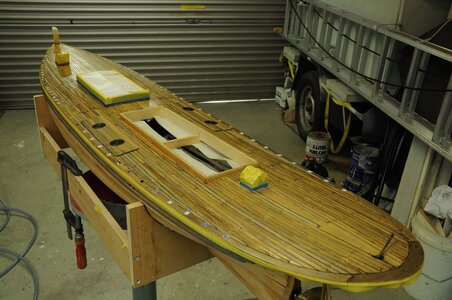
Then followed by a couple of coats of the same paint with a flattening or matting additive added to get the desired Matt finish.
DSC_0386.1.JPGDSC_0387.1.JPGDSC_0388.1.JPG

The finishing of Coal Bunker Rings & Lids is a small mile stone, as the mechanism that locks and unlocks the removable section is completely hidden now, just have to remember which lid to try and remove... :)


Thanks for the having a look, more to come.

Again I welcome constructive comments.

Cheers,

Stephen.
 
From following your build, I have a good idea of all the thought that went into those lids, but now you can sit back in the knowledge that it was a job well
 
From following your build, I have a good idea of all the thought that went into those lids, but now you can sit back in the knowledge that it was a job well
Thanks Heinrich,

Yes making a working model that you hopefully cannot tell it is a working model when on display adds quite a bit of complication.

Cheers,
Stephen.
 
Coal Bunker Rings & Lids installed.


At long last I have installed the Coal Bunker Rings & Lids, funny this is something that I thought wouldn’t take all that long, how wrong could I be…

There was a bit more fitting to do before gluing up, gluing went pretty smoothly thankfully.
View attachment 333079

After gluing I wanted to seal the deck before I progressed any further, this required masking all the stanchion recesses and any deck fittings already attached. Also the “O” rings on the Coal Bunker Lids were installed along with a very fine smear of grease around the top edge to prevent said Lids from being glued in place due to the paint.
View attachment 333081

Once this was done I sprayed several coats of Full Gloss Automotive Clear Coat.
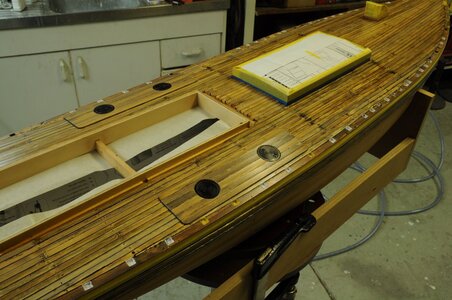
View attachment 333080View attachment 333082

Then followed by a couple of coats of the same paint with a flattening or matting additive added to get the desired Matt finish.
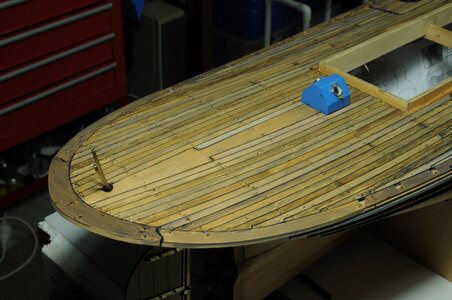
View attachment 333083View attachment 333085View attachment 333084

The finishing of Coal Bunker Rings & Lids is a small mile stone, as the mechanism that locks and unlocks the removable section is completely hidden now, just have to remember which lid to try and remove... :)


Thanks for the having a look, more to come.

Again I welcome constructive comments.

Cheers,

Stephen.
Excellent work as usual Stephen.
That deck looks great.
When I was reading through I was surprised when it said 'gloss', you can imagine my thoughts.
Until I continued reading.
I am really liking this build log.
Great work.
 
Coal Bunker Rings & Lids installed.


At long last I have installed the Coal Bunker Rings & Lids, funny this is something that I thought wouldn’t take all that long, how wrong could I be…

There was a bit more fitting to do before gluing up, gluing went pretty smoothly thankfully.
View attachment 333079

After gluing I wanted to seal the deck before I progressed any further, this required masking all the stanchion recesses and any deck fittings already attached. Also the “O” rings on the Coal Bunker Lids were installed along with a very fine smear of grease around the top edge to prevent said Lids from being glued in place due to the paint.
View attachment 333081

Once this was done I sprayed several coats of Full Gloss Automotive Clear Coat.
View attachment 333080View attachment 333082

Then followed by a couple of coats of the same paint with a flattening or matting additive added to get the desired Matt finish.
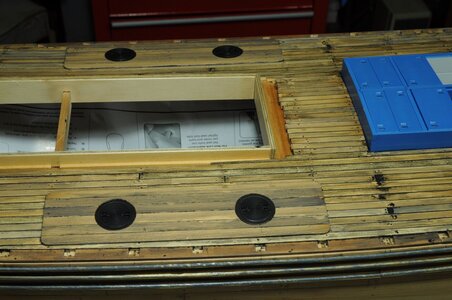
View attachment 333083View attachment 333085View attachment 333084

The finishing of Coal Bunker Rings & Lids is a small mile stone, as the mechanism that locks and unlocks the removable section is completely hidden now, just have to remember which lid to try and remove... :)


Thanks for the having a look, more to come.

Again I welcome constructive comments.

Cheers,

Stephen.
I step in the line of the other with the compliments. Well done, Stephan. The deck with the coal bunkers looks great!.
Regards, Peter
 
In the titel it says "Working" :) lol

Stephen, this was a lot of study, testen and making. The result is great, you can be proud about what you achieve.
I thought you only looked at the pictures, Stephan ROTF?

My title doesn't say anything about working but there have been days I considered a nautical trial in Lake Michigan...
 
Last edited:
Excellent work as usual Stephen.
That deck looks great.
When I was reading through I was surprised when it said 'gloss', you can imagine my thoughts.
Until I continued reading.
I am really liking this build log.
Great work.
Thanks Martin,
Yeah the deck was never going to be left with a glossy finish.
Gloss is really good for sealing and providing a water proof barrier and before it had dried completely I sprayed the Matt.
I am glad you like the blog.

Cheers,
Stephen.
 
I thought you only looked at the pictures, Stephan ROTF?

My title doesn't say anything about working but there have been days I considered a nautical trial in Lake Michigan...
I think the point Stephan is making is that my blog title says working.
Seeing your Vasa on the water now that would be something to behold, or maybe superimposed...:)

Cheers,
Stephen.
 
Back to the Fish Port surrounds.


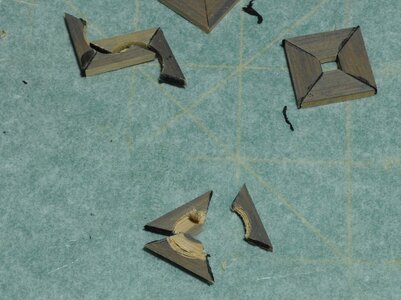
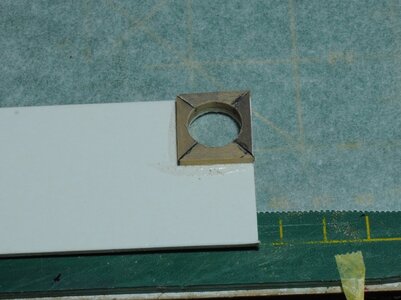
As pointed out my original Fish Port surrounds were not quite right due to only being one piece instead of 4 so I decided to re-make these, anyway how hard could it be, shouldn’t take long. Well it took a while, with a few disasters along the way needles to say it was a learning experience

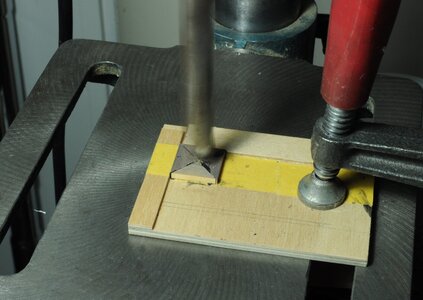
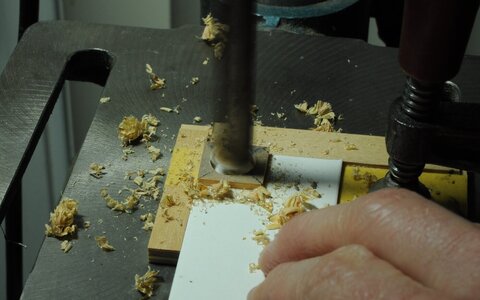
I thought it would be a good idea to glue the 4 parts together then drill the hole, using a simple jig on my drill press to help with consistency. I found out this didn’t quite go as planned, and after 2 failed attempts I looked for another way.
DSC_0389.1.JPGDSC_0391.1.JPG

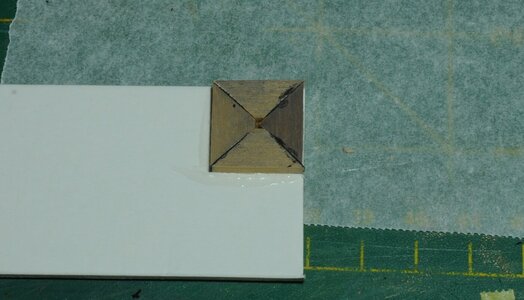
In the end I altered the original idea by gluing the part using normal PVA to a sturdy piece of cardboard then drilling the hole, most of the time this worked.
DSC_0392.1.JPGDSC_0393.1.JPGDSC_0394.1.JPG

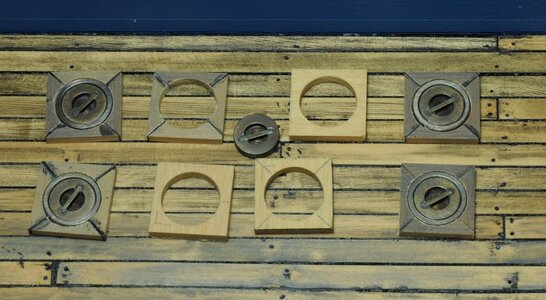
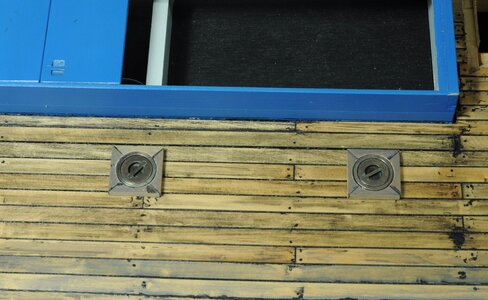
I have also chemically treated the brass fish rings and lids using the JAX Flemish Grey Black, funny on my test piece the colour was quite different.
DSC_0395.1.JPGDSC_0396.1.JPGDSC_0398.1.JPG

I have packed these parts away as I don’t need them for a while and I will decide if they need more attention before fitting.

Next up is to get back to working on the Bulwarks, although I will take a sideways step and work on making some solid carbide micro carving tools and a jig for producing custom moldings.

Thanks for having a look, more to come.

Again I welcome constructive comments.

Cheers,
Stephen.
 
Your attention to detail is commendable Stephen! Authenticity is the name of the game (in my opinion) and those surrounds cannot come more authentic than that. Once again, you did a fine job!
 
I LOVE the way these turned out! To my eye the brass finish is quite realistic.
I agree with Paul. They are so realistic
Your attention to detail is commendable Stephen! Authenticity is the name of the game (in my opinion) and those surrounds cannot come more authentic than that. Once again, you did a fine job!
Thanks Paul, Stephan and Heinrich.
I think you guys like them better than I do at present and I am not sure about the colour of the Brass rings they are supposed to look like they are galvanized...


Cheers,
Stephen.
 
Back
Top