Unicorn 1/48th scale Bonhomme Richard (Swiss Pear)

The Bonhomme Richard is a very good kit - I have worked on the section model of the Bonhomme, also from Unicorn models -> very good quality
Maybe you know the completed model by our member @OlegM - here you can see the full quality and the possibilities with this kit?
The monograph from Jean Boudriot will be of a big help
 
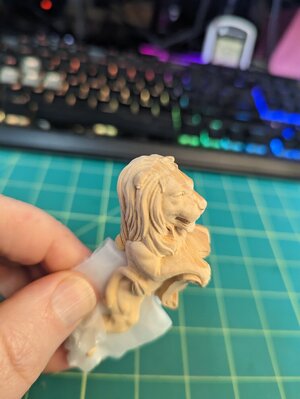
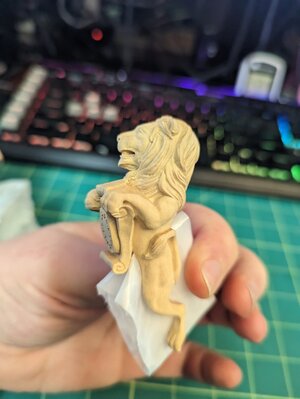
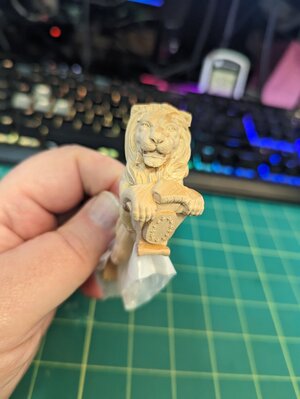
Someone on Ali is offering a box CNC carved replacement for the figurehead. It cost about $75.
PXL_20230302_225239541.jpgPXL_20230302_225243265.jpgPXL_20230302_225247562.jpg
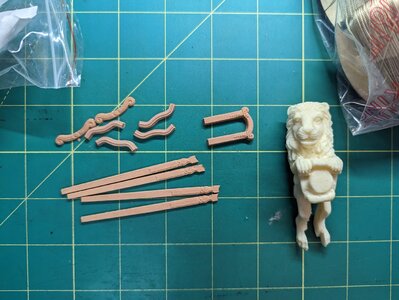
Here's the resin one suppled with the kit.
PXL_20230208_031526641.jpg
I would categorize it as "less than stellar" if pressed. So overall, yeah, impressed with the quality and detail and happy I got it.
 
The boxwood lion looks magnificent. Unbelievable what you can do with modern 4 or 5 axis cnc machines.
 
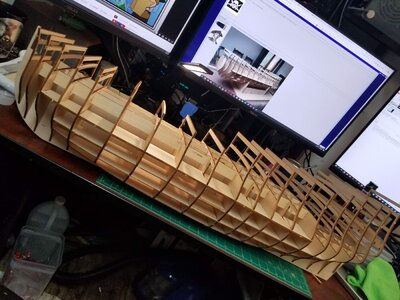
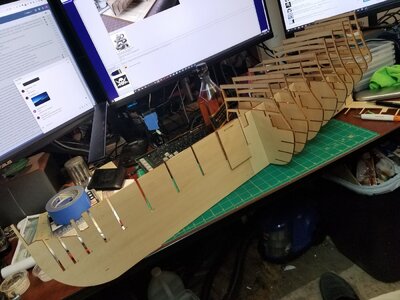
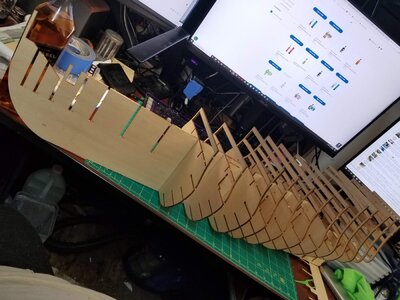
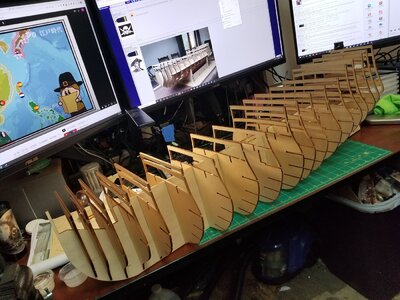
Whelp, I might have bitten off a bit more than I was ready to chew.

20230318_220524.jpg
I was planning to wait on this until I was a little more comfortable building wood models, but the troubles of the last couple of weeks has left me chomping at the bit to actually make some sawdust, so here we are.

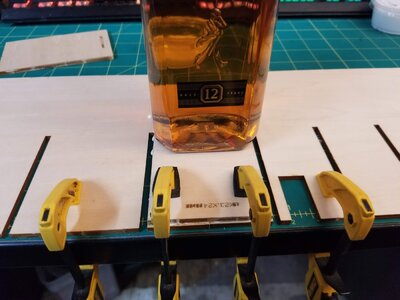
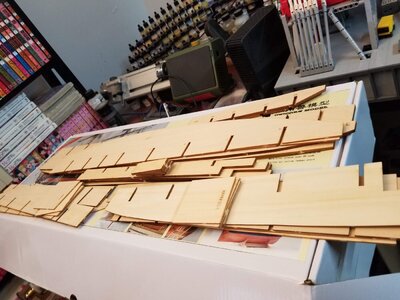
The centerline rib and all the longitudinals came in two pieces with designated pieces to act as joint reinforcement.. This kit is full of nice touches like that. There is already a stockpile of largish plywood pieces that could have been used for that, but these are precut and maximize the surface area of the joint.
20230317_230938.jpg
Gluing up the main rib:
20230317_230942.jpg

Here's all the longitudinal ribs ready for glue:
20230318_011231.jpg
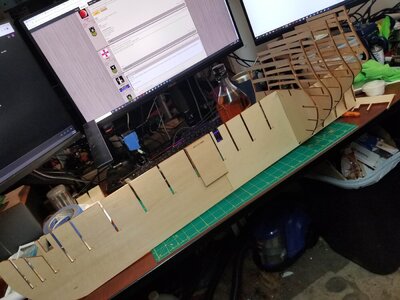
And the rest is just assembly:
20230318_192634.jpg20230318_202418(0).jpg20230318_204935(0).jpg20230318_214015.jpg
The ribs fit very tight, I had a small plastic mallet I used to ease the longitudinals in. I haven't glued anything together yet, I was planning on using PVA but seeing how tight the fit is now I'll probably just use CA and soak the joints since I am worried I might break something if I tried to take it apart. I wasn't even planning on posting this until tomorrow when I had more done, but the sheer size of it was kind of intimidating. Well, there's nothing in it I haven't done before so I'll keep at it and take breaks if I get overwhelmed.

EDIT: Now my office is suffering under the cloying aroma of CA. I think I used half a bottle.
 
Last edited:
Whelp, I might have bitten off a bit more than I was ready to chew.

View attachment 363658
I was planning to wait on this until I was a little more comfortable building wood models, but the troubles of the last couple of weeks has left me chomping at the bit to actually make some sawdust, so here we are.

The centerline rib and all the longitudinals came in two pieces with designated pieces to act as joint reinforcement.. This kit is full of nice touches like that. There is already a stockpile of largish plywood pieces that could have been used for that, but these are precut and maximize the surface area of the joint.
View attachment 363659
Gluing up the main rib:
View attachment 363660

Here's all the longitudinal ribs ready for glue:
View attachment 363661
And the rest is just assembly:
View attachment 363662View attachment 363663View attachment 363664View attachment 363665
The ribs fit very tight, I had a small plastic mallet I used to ease the longitudinals in. I haven't glued anything together yet, I was planning on using PVA but seeing how tight the fit is now I'll probably just use CA and soak the joints since I am worried I might break something if I tried to take it apart. I wasn't even planning on posting this until tomorrow when I had more done, but the sheer size of it was kind of intimidating. Well, there's nothing in it I haven't done before so I'll keep at it and take breaks if I get overwhelmed.
Good morning. Beautiful kit. As for “biting off more than one can chew “…..take smaller bites;). She does look intimidating however so far looking very good. A huge project here but as we say…How do you eat an elephant….one bite at a time. I am exited for you this looks like it is going to be a cool ship to build. Good luck and most importantly enjoy! Cheers Grant
 
…..take smaller bites;).
I did initially, but ran into a bit of a hiccup with the last kit I planned to build. So we get to where we are today. No biggie, just gotta readjust my thinking. And timeframe. And scale. And find another 30 square feet (3m^2) in my office.
 
Whelp, I might have bitten off a bit more than I was ready to chew.

View attachment 363658
I was planning to wait on this until I was a little more comfortable building wood models, but the troubles of the last couple of weeks has left me chomping at the bit to actually make some sawdust, so here we are.

The centerline rib and all the longitudinals came in two pieces with designated pieces to act as joint reinforcement.. This kit is full of nice touches like that. There is already a stockpile of largish plywood pieces that could have been used for that, but these are precut and maximize the surface area of the joint.
View attachment 363659
Gluing up the main rib:
View attachment 363660

Here's all the longitudinal ribs ready for glue:
View attachment 363661
And the rest is just assembly:
View attachment 363662View attachment 363663View attachment 363664View attachment 363665
The ribs fit very tight, I had a small plastic mallet I used to ease the longitudinals in. I haven't glued anything together yet, I was planning on using PVA but seeing how tight the fit is now I'll probably just use CA and soak the joints since I am worried I might break something if I tried to take it apart. I wasn't even planning on posting this until tomorrow when I had more done, but the sheer size of it was kind of intimidating. Well, there's nothing in it I haven't done before so I'll keep at it and take breaks if I get overwhelmed.

EDIT: Now my office is suffering under the cloying aroma of CA. I think I used half a bottle.
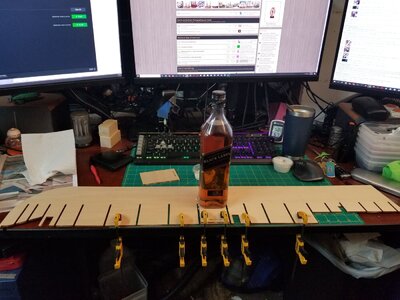
Remember that the Black Label will get lighter over time and not be as useful as a gluing weight. Small sips at a time ... :cool:
A big job ahead but looking like a great start.
 
Whelp, I might have bitten off a bit more than I was ready to chew.

View attachment 363658
I was planning to wait on this until I was a little more comfortable building wood models, but the troubles of the last couple of weeks has left me chomping at the bit to actually make some sawdust, so here we are.

The centerline rib and all the longitudinals came in two pieces with designated pieces to act as joint reinforcement.. This kit is full of nice touches like that. There is already a stockpile of largish plywood pieces that could have been used for that, but these are precut and maximize the surface area of the joint.
View attachment 363659
Gluing up the main rib:
View attachment 363660

Here's all the longitudinal ribs ready for glue:
View attachment 363661
And the rest is just assembly:
View attachment 363662View attachment 363663View attachment 363664View attachment 363665
The ribs fit very tight, I had a small plastic mallet I used to ease the longitudinals in. I haven't glued anything together yet, I was planning on using PVA but seeing how tight the fit is now I'll probably just use CA and soak the joints since I am worried I might break something if I tried to take it apart. I wasn't even planning on posting this until tomorrow when I had more done, but the sheer size of it was kind of intimidating. Well, there's nothing in it I haven't done before so I'll keep at it and take breaks if I get overwhelmed.

EDIT: Now my office is suffering under the cloying aroma of CA. I think I used half a bottle.
Are you sure the aroma was from the ca instead of the Black Label?
 
Well, the black label bottle is unopened and the ca bottle is empty, so it's just a guess.
 
Whelp, I might have bitten off a bit more than I was ready to chew.

View attachment 363658
I was planning to wait on this until I was a little more comfortable building wood models, but the troubles of the last couple of weeks has left me chomping at the bit to actually make some sawdust, so here we are.

The centerline rib and all the longitudinals came in two pieces with designated pieces to act as joint reinforcement.. This kit is full of nice touches like that. There is already a stockpile of largish plywood pieces that could have been used for that, but these are precut and maximize the surface area of the joint.
View attachment 363659
Gluing up the main rib:
View attachment 363660

Here's all the longitudinal ribs ready for glue:
View attachment 363661
And the rest is just assembly:
View attachment 363662View attachment 363663View attachment 363664View attachment 363665
The ribs fit very tight, I had a small plastic mallet I used to ease the longitudinals in. I haven't glued anything together yet, I was planning on using PVA but seeing how tight the fit is now I'll probably just use CA and soak the joints since I am worried I might break something if I tried to take it apart. I wasn't even planning on posting this until tomorrow when I had more done, but the sheer size of it was kind of intimidating. Well, there's nothing in it I haven't done before so I'll keep at it and take breaks if I get overwhelmed.

EDIT: Now my office is suffering under the cloying aroma of CA. I think I used half a bottle.

Beautiful kit , enjoy and please keep us informed. A technical question, did the whisky come included as ballast ???
 
I am a bit disappointed, I set you up for the perfect comeback with the rum joke, but not one person took the bait. You guy's really need to brush up on your pop culture jokes. There has to be one Pirates of the Caribbean fan in here.

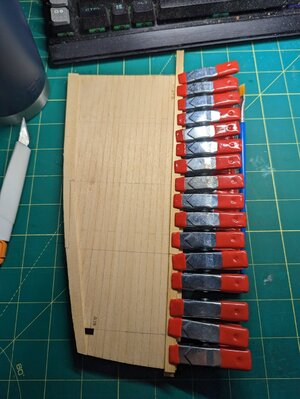
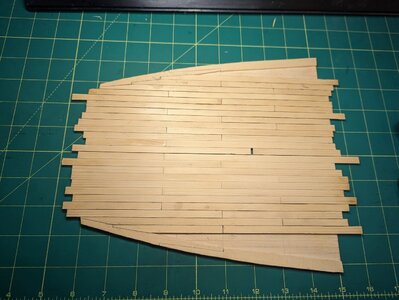
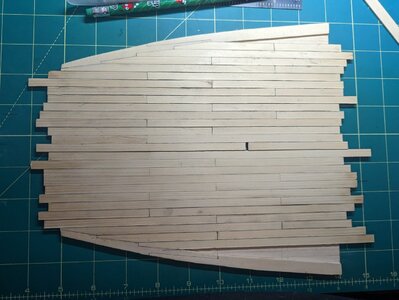
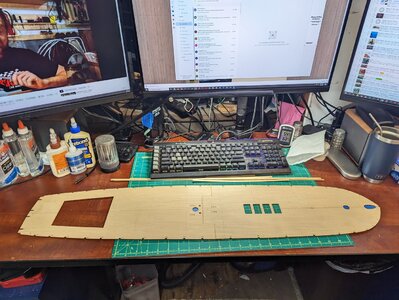
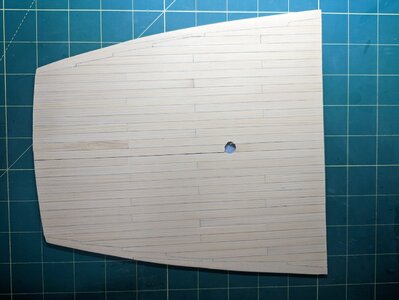
Onward! I have made some progress! The next step call for planking the two lower decks, the aft end of gun deck 1 and the whole of gun deck 2. The designer didn't really mean for you to detail out the aft areas because the windows in the galleries are just for show, there isn't anything inside the aft cabins. I intend to change that, but I don't know to what level, yet. I do know I wanted more experience planking a deck before I started on the big main deck. The decks themselves are 2mm plywood that you are supposed to plank with pear strips that are provided. I decided to use Alaskan Cedar instead for the contrast. The decks come in 2 parts for the lower deck and 4 parts for the upper. I used masking tape to tape them together for planking.
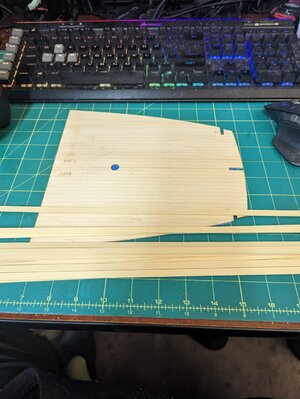
PXL_20230326_042904806.jpgPXL_20230404_014858464.jpg

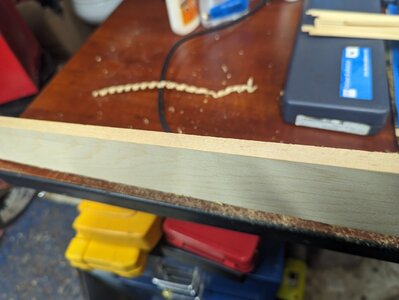
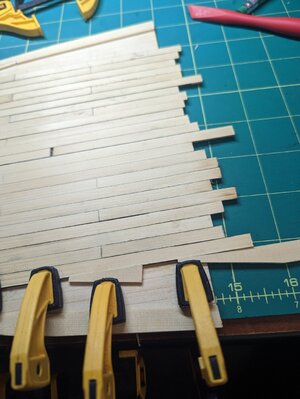
I bought some 5/32" and 1/4" billets from Dave. These came thicknessed to the proper deck plank width I wanted, but I needed to make my own planks from them. I cut them on the Byrnes saw, but I think I need more practice because my plank thickness repeatability is dreadful. At the very least I might need a Byrnes thickness sander to boot. I was able to use one of my Veritas mini tools, an end planer to clean up the rough sawn edges of the billets from Dave.
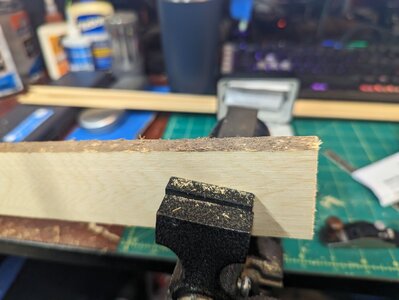
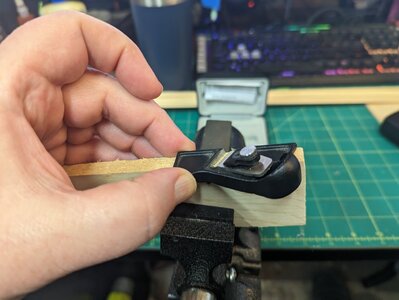
PXL_20230404_025939341.jpgPXL_20230404_025141187.jpgPXL_20230404_025536066.jpg

The results were some nibbing strake width planks and some regular planks.
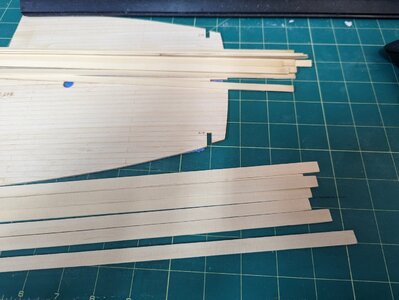
PXL_20230404_033159899.jpg
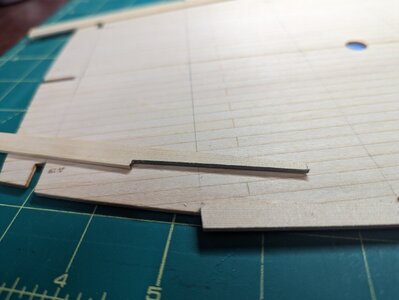
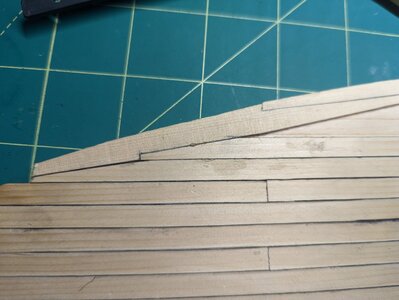
He is where I need practice. I started the nibbing strake from the end, but I soon found out I should start them from midships and work aft. The geometry doesn't wrok the other way around.
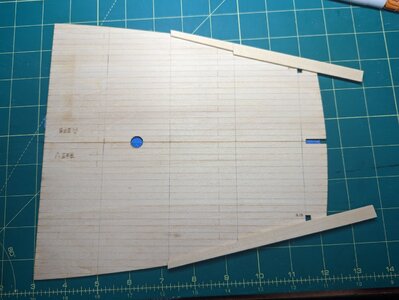
PXL_20230404_042237087.jpgPXL_20230404_055157878.jpg

PXL_20230404_055717150.jpgPXL_20230404_071654669.jpg

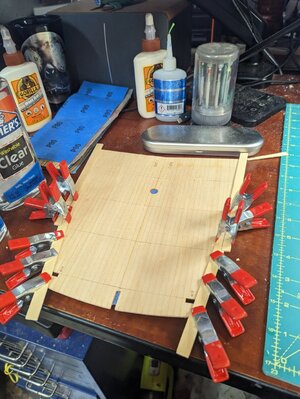
But with that figured out, I moved on to planking from the center out. Because this has to remain two parts until it is installed, it took some doing but I was able to glue the two strakes just outside the centerline like this:
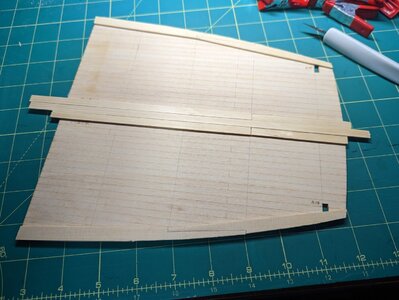
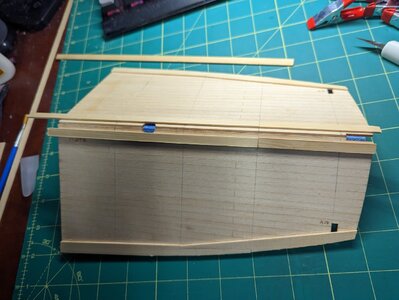
PXL_20230406_011752585.jpgPXL_20230406_011825028.jpgPXL_20230406_001413050.jpg

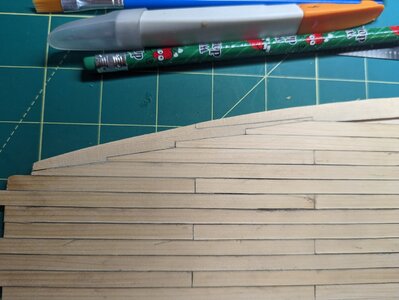
I went back and glued the center one to one side of the deck later on. Then I worked my way form the center out, planking as I went. Here you can start to see the board thickness problem really stand out.
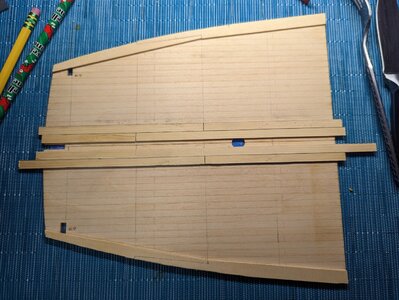
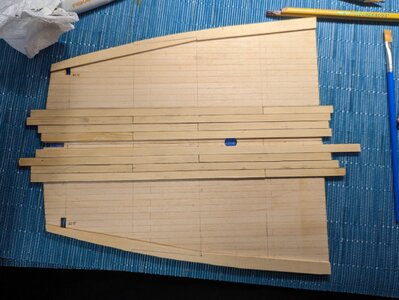
PXL_20230406_025812753.jpgPXL_20230406_051515009.jpg

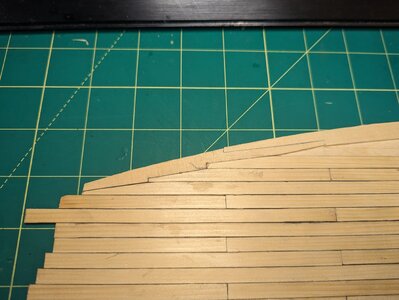
Next I started cutting in the nibbed planks. This was quite enjoyable for me.
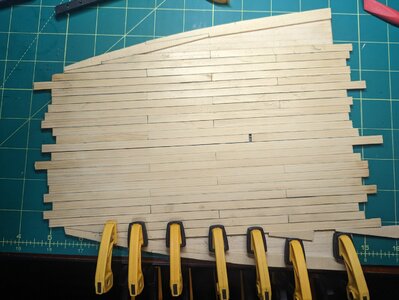
PXL_20230415_072958927.jpgPXL_20230415_073028450.jpg

PXL_20230415_073038527.jpgPXL_20230415_204217360.jpg

PXL_20230415_204220392.jpgPXL_20230415_230217990.jpg
PXL_20230415_230222145.jpg
You might see a couple spots where I practiced with the mini cabinet scraper to even out the boards midway through. When I finished planking the first thing I did was to scrape the whole thing down to a uniform thickness.
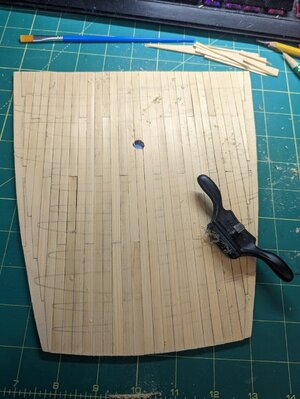
PXL_20230416_040809610.jpg
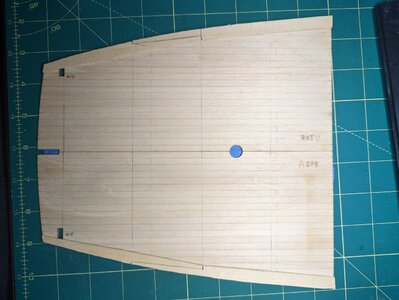
Here is the finished scraping. Because of the scale and the multiple directions of the wood grain, you might see a couple spots where I scraped against the grain, but unfortunately, I had little choice at this point.
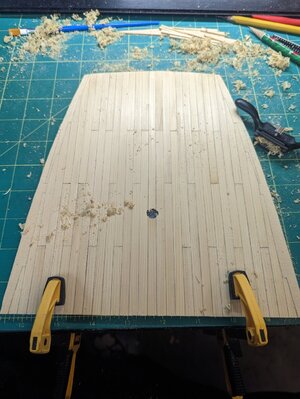
PXL_20230416_041857879.jpg
Only thing left is to sand it et, voila! I would give it a personal 7 out of 10 for a first time doing my own planks and doing nibbing. I am unsure if I want to do trennels at this point, but I might. I still have that whole main deck to do, so it might be something I distract myself from that with.
PXL_20230416_043644000.jpg
 
Back
Top