Topsail schooner Julia - with a digital twist.

Joined
Oct 19, 2022
Messages
24
Points
48

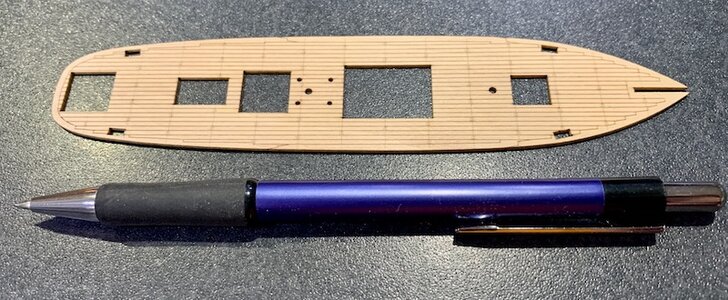
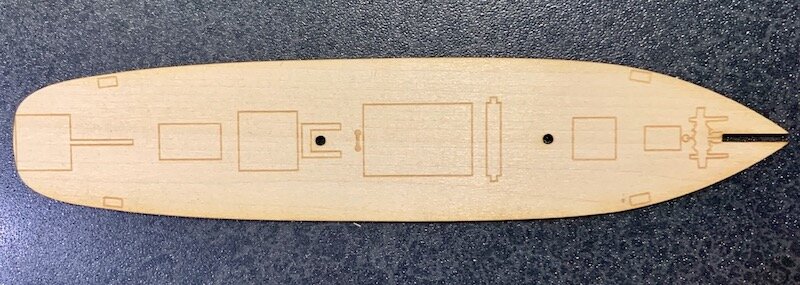
I really have no idea what I'm doing as I've never built a model ship before but I stumbled across Robert Wilson's website and purchased his topsail schooner Julia booklet and thought I'd give it a go. I drew up the deck in Adobe Illustrator and cut it out using a laser cutter. Then I saw Robert Hunt's article, Planking Decks in the MSB Journal on the Ships of Scale site so I added planks. Then to see if it worked I added treenails but they're so tiny you really have to look to see them. I should mention that this is only 151.6 mm long. I laser cut some templates out of matte board for the hull and then cut the hull out on the band saw. Here's this week's progress.

Here's the first iteration of the deck
IMG_3426.jpeg

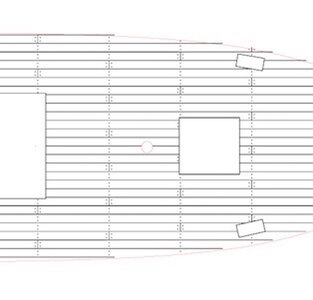
This is the Illustrator drawing with the planks and treenails added.
Julia Deck Final.jpeg

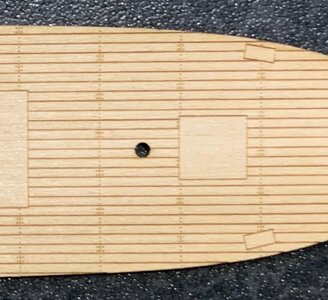
Here it is laser cut using 1/32" basswood.
IMG_3429.jpeg

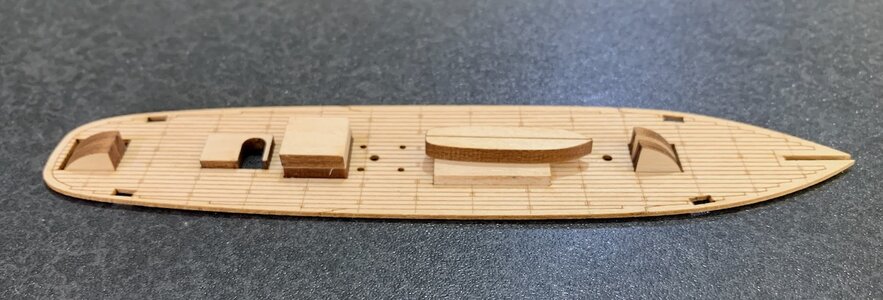
The whole deck and nothing but the deck.
IMG_3429 (1).jpeg

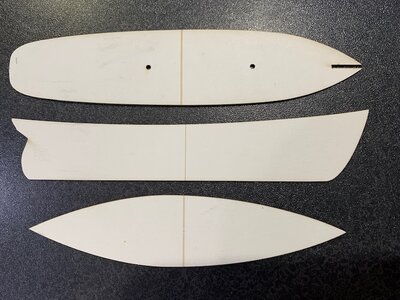
The matte board templates.
IMG_3423.jpeg

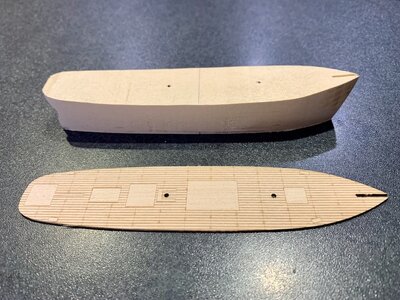
The hull and deck. The hull is bandsawn.
IMG_3431.jpeg

To be continued...

Cheers eh,

Todd
 
Last edited:
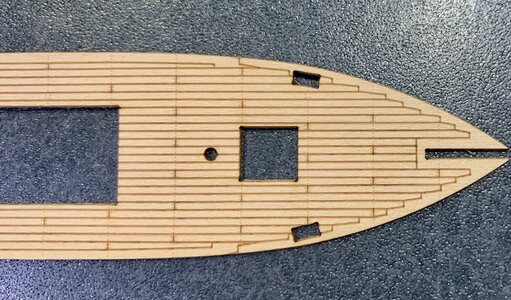
As I read more of Robert Hunt's Planking Decks article in the MSB Journal, I learned about nibbing strakes. Who knew such things existed? I didn't even though I've seen them on real boats. But, I do now, so, as a result, I've added more details that nobody will ever see to the deck of my model top sail schooner Julia. I spent many hours messing around on the computer and then two minutes and 43 seconds on the laser cutter to come up with this. I have also changed how the lines between the planks are laser engraved to give them a little more definition. I don't know why, but I find this kind of design work quite relaxing. And, I learn new things too. As you can see, I've also cut out where the hatches and deck house, etc. will go.

I was told to taper the planks so I did. Not perfect but it'll do. Will probably never be seen though.
IMG_3440.jpeg

I even added a couple of scarf (ish) joints.
IMG_3439.jpeg

To be continued...

Cheers eh,

Todd
 
Last edited:
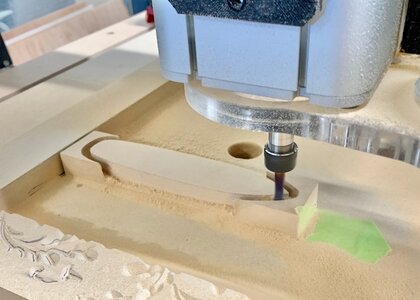
As I continue on with my build of the topsail schooner Julia, I'm cutting out the hull. I first tried a bandsaw and while the results were OK they were not as accurate as the laser cut deck. Since I have access to a CNC router at the school I teach at, I figured it was time to learn how to use it. After watching a few YouTube videos and talking to the wood shop teacher I gave it a go. I'm using a scrap of MDF to test things out here. An hour or two of messing around on the computer and CNC router and I came up with this. Still a few things to figure out but I'm happy with the results. The hull is almost exactly the same as the laser cut deck. I think I need to adjust for the kerf of the laser. Once that is done I need to learn to put the curve on the profile of the hull for the deck.

Testing the CNC on a piece of scrap MDF. The hull will be basswood once I figure this out.
HullCNC.jpeg

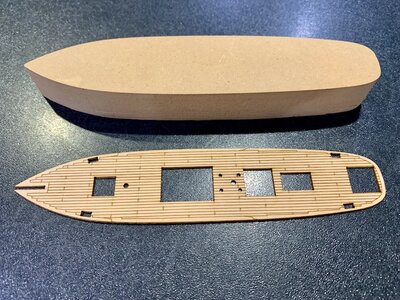
The hull prototype and the deck.
HullandDeck.jpeg

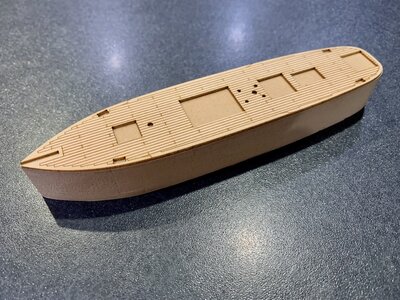
It's almost a perfect fit.
Deck on Hull.jpeg

To be continued...

Cheers eh,

Todd
 
I love your way of working - unbelieveable, that ships are a complete new subject for you
At the final end, I hope to see also such a pencil next to the model ...... ;)
 
I love your way of working - unbelieveable, that ships are a complete new subject for you
At the final end, I hope to see also such a pencil next to the model ...... ;)
Thanks Uwek. I shall include a pencil for scale in my upcoming images.
 
Thanks Uwek. I shall include a pencil for scale in my upcoming images.
This was a small joke, related to the well known pencil @shipbuilder added usually to his photos.
I do not know how many years we saw this special pencil .....
But independent to this: Often it is good to have something added to get an impression of the real size
 
Nice to see the process of building your lovely schooner, Todd. With all those new techniques.
And adding details no one would see …… no problem at all. You know they are there. :)
Regards, Peter
Thank you sir and thanks for all the likes. I have been adding these little details to other kinds of models for years so I guess it’s just natural to do it here as well.
 
A bit more of an update on my topsail schooner Julia model. I'm still refining the laser cutting of the deck. I've decided to do vector engraving vs raster engraving. It give slightly better detail. I've turned up the power up on some lines and down on the others. I've changed how the tree nails are engraved so as to make them look a little crisper. Here's a short video of how it looks being laser engraved and cut. This video has been sped up by 4 times.
 
Last edited:
Started on the hatches and deck fixtures of my topsail schooner Julia today. Here's the first prototype. Needs some alterations but I'm happy with the initial results. Trying to make it look something like what's in the painting of the ship. It has an interesting companionway.

I have also farmed out the job of drawing the hull in 3D for the CNC to our resident 16 year old CAD expert. I'm fine with 2D drawings but fumble about with some 3D stuff still.


Deck house and Hatches.jpeg
 
Last edited:
That looks great! I also have the Robert Wilson plans, and hope to build that if I ever finish my current Pride of Baltimore II. I'd paint it to resemble the POBII, maybe make some modifications. I had the opportunity to work on the 1:1 scale model last weekend on a "volunteer work day", sanding spars, scraping, applying penetrating oil to the masts etc. The amount of maintenance required to keep these wooden ships in good, safe sailing is phenomenal.
 
I've never thought about building a model this way, great way to expand my thoughts and to think outside the box. Thanks for your example!
Thanks! I like to mess around with the laser cutter and use it to learn to do new things. I enjoy the learning and design challenges a lot. The bonus is I get a model ship out of it.
 
That looks great! I also have the Robert Wilson plans, and hope to build that if I ever finish my current Pride of Baltimore II. I'd paint it to resemble the POBII, maybe make some modifications. I had the opportunity to work on the 1:1 scale model last weekend on a "volunteer work day", sanding spars, scraping, applying penetrating oil to the masts etc. The amount of maintenance required to keep these wooden ships in good, safe sailing is phenomenal.
Thank you sir! I can only imagine the work it takes to keep a wooden ship in fine form. Non-stop work I'm sure.
 
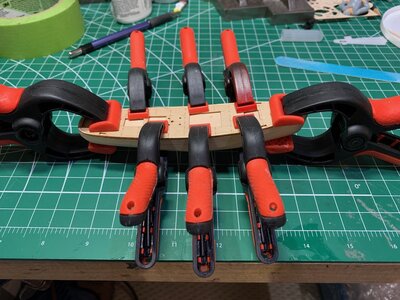
Thanks Mike and Alan! A bit more progress to report this morning. I gave up on waiting for the 16 year old to design the hull in 3D as it's the end of semester and final exam time. I hacked away at the hull with knives, rasps and sanding sticks. This is a basswood hull that I cut out. The nice thing about doing these bits digitally is if I stuff it up I can just cut another in minutes. I'll eventually get the 3D CNCed hull done. I've now glued the deck to the hull and am waiting for the glue to dry. Then it's on to the stem and stern and the bulwarks.

Glueing the deck.jpeg
 
Last edited:
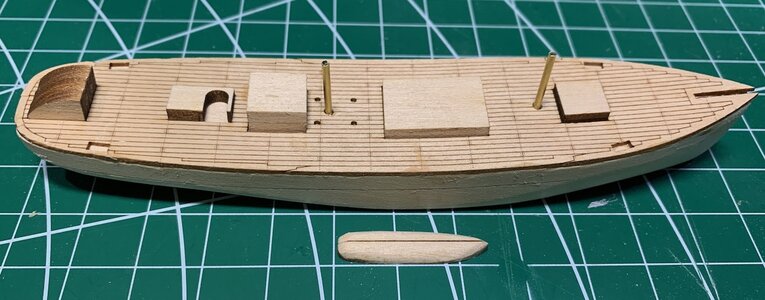
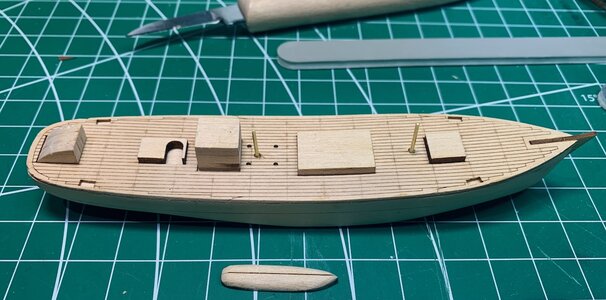
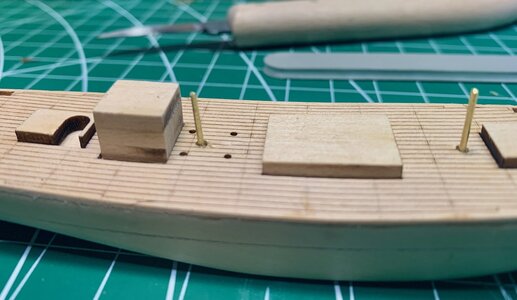
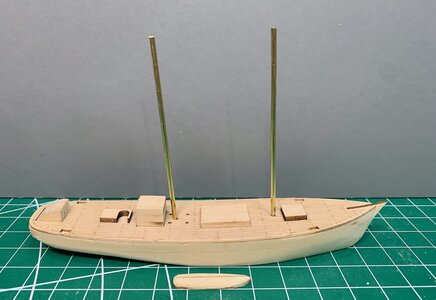
A bit more done today. Raised the height of the galley and started on the stem. Next is the galley roof. Made a rudder, but it's too tiny to do anything with so I'll redo it. Also, I think I may raise the height of rear companionway and still have to make the the companionway leading to the forecastle

The brass rods I had added for the mast stubs in the above post were too large so I chucked them up in the old Proxxon rotary tool and turned them down to about a 1mm diameter. I'm using 2mm brass tubing for the masts. I had originally thought I'd use 3mm masts but they look huge so it's back down to 2mm.

I've added the stem as well. Might not be high enough though as I forgot about the bulwarks. Mine is basswood as it's so easy for me to cut using the laser. A bit more wood and glue should fix that. Bob used brass in his booklet.

IMG_3468.jpeg


IMG_3470.jpeg


IMG_3471.jpeg

Cheers eh,

Todd
 
Last edited:
Back
Top