Admins - I could not determine where to put this post. If appropriate, please feel free to move it.
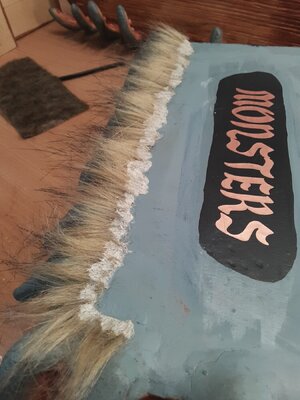
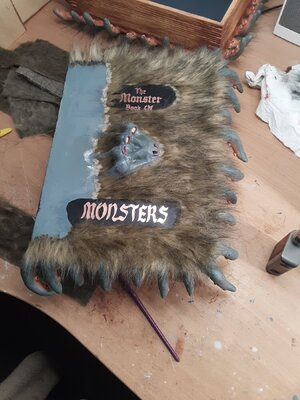
I saw this little chap as a film prop at Harry Potter World, so thought I would make one for a Christmas gift. I started in early November and am glad I did, because it took a while longer than I thought it would. That's why my Mary Rose log has not been updated for some time.
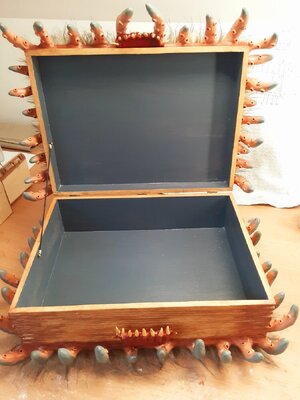
First thing was to buy a wooden book box from Amazon; at this price it's just not worth making one, but I wanted a big one so that the box would be of practical use and not just an ornament.
I built up the edges with planking to make them more pronounced and help with later processes. Holes also drilled around the edges-
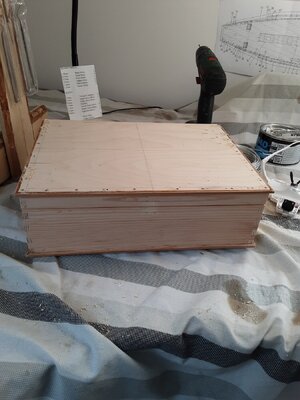
Aluminium wire inserted to represent the tentacles -
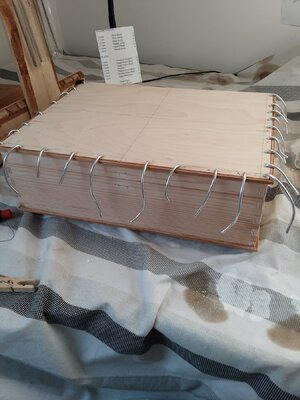
Para cord wrapped around to bulk them out a bit and give the filler something to key to -
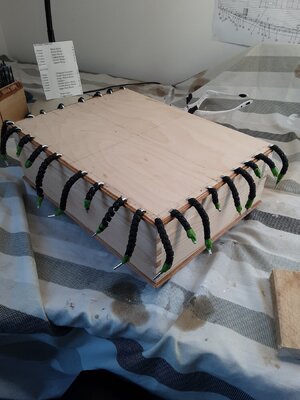
The filler I plumped for was an Isopon fibre glass paste, having previously used it to good effect in repairing a garden ornament -
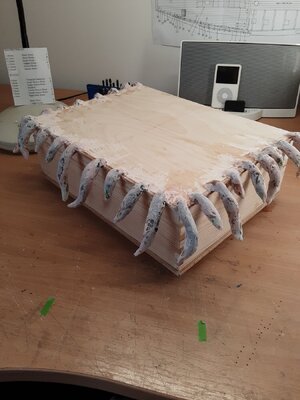
Final adjustment on the bottom tentacles -
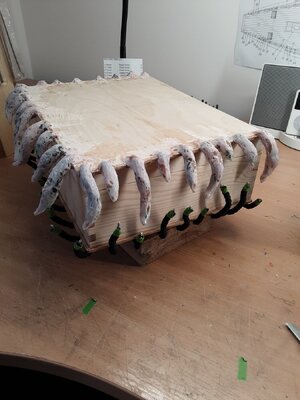
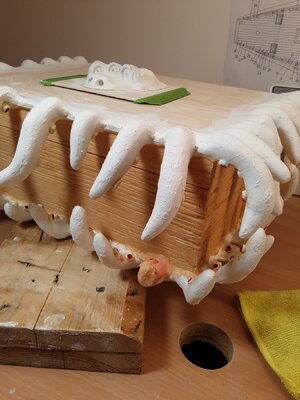
Bottom tentacles covered in fibre glass, Milliput epoxy tips added to hopefully make them quite hard wearing -
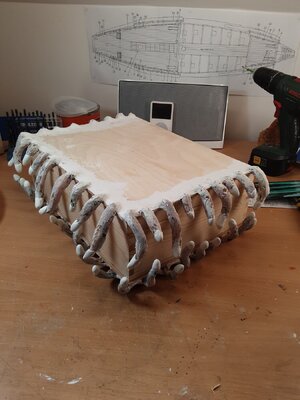
Off to the garage for a very dusty couple of hours of grinding back and shaping with a small drum sander attachment in my Proxxon -
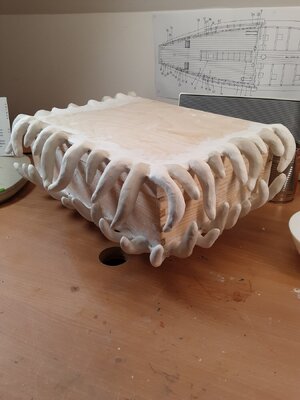
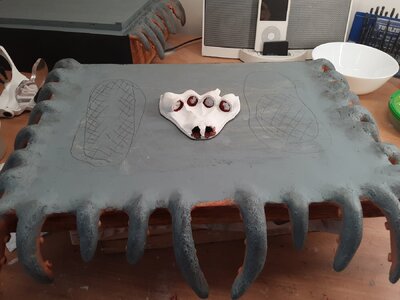
I used an air drying clay from the local Hobbycraft store to get the final shape and when dry add the suckers. This clay is good to work with and smooths well with a wet finger. The clay is best left to dry overnight and dries very hard -
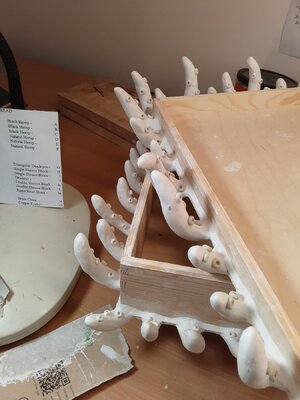
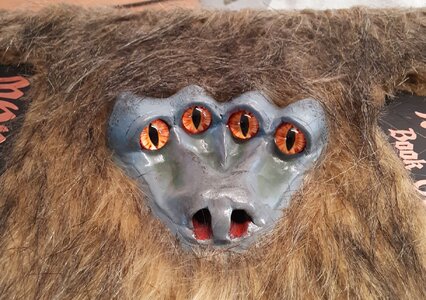
He needs a face which I modelled on a sheet of balsa -
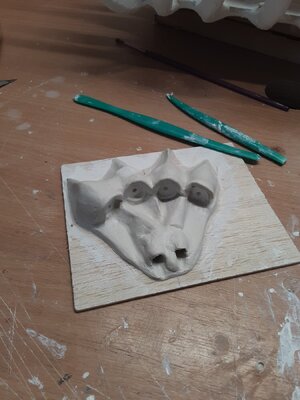
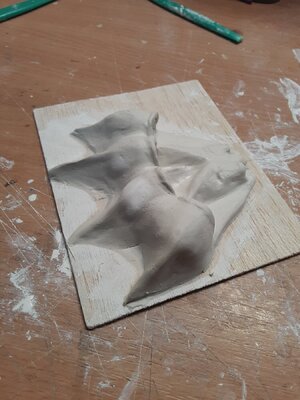
When this had dried overnight the balsa sheet had buckled and cracked the face. I managed to get it off the sheet in three pieces, PVA it to a new sheet and fill the cracks.
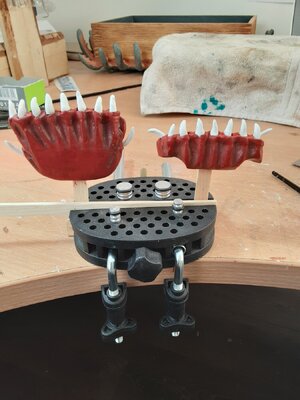
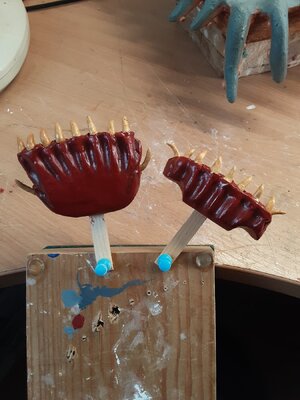
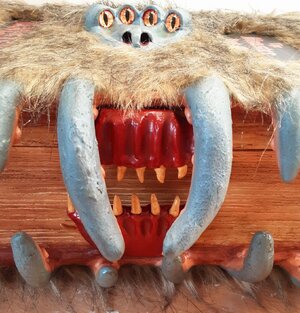
He wouldn't be much of a monster without some teeth. The gums I made by laminating some balsa sheet and then some hand carving and rotary tool work. The teeth at the moment are pinned bits of dowel in order to get the spacings right for the gum ridges -
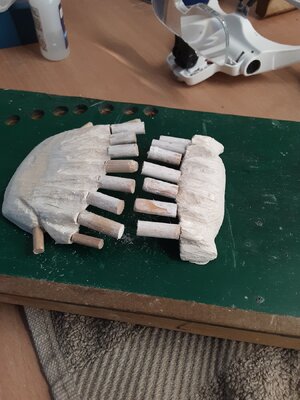
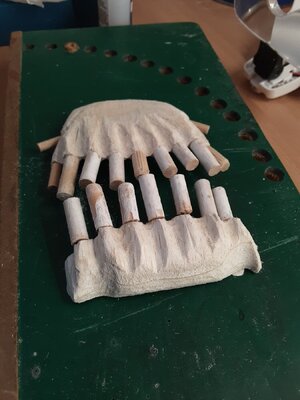
My plan was to then cover the gums in a thin layer of clay, but this was a disaster, so I pulled it off. To get the definition I wanted involved several coats of lacquer with sanding in between to fill the grain and this was a much better result.
Part 2 below.
I saw this little chap as a film prop at Harry Potter World, so thought I would make one for a Christmas gift. I started in early November and am glad I did, because it took a while longer than I thought it would. That's why my Mary Rose log has not been updated for some time.
First thing was to buy a wooden book box from Amazon; at this price it's just not worth making one, but I wanted a big one so that the box would be of practical use and not just an ornament.
I built up the edges with planking to make them more pronounced and help with later processes. Holes also drilled around the edges-

Aluminium wire inserted to represent the tentacles -

Para cord wrapped around to bulk them out a bit and give the filler something to key to -

The filler I plumped for was an Isopon fibre glass paste, having previously used it to good effect in repairing a garden ornament -

Final adjustment on the bottom tentacles -

Bottom tentacles covered in fibre glass, Milliput epoxy tips added to hopefully make them quite hard wearing -

Off to the garage for a very dusty couple of hours of grinding back and shaping with a small drum sander attachment in my Proxxon -

I used an air drying clay from the local Hobbycraft store to get the final shape and when dry add the suckers. This clay is good to work with and smooths well with a wet finger. The clay is best left to dry overnight and dries very hard -

He needs a face which I modelled on a sheet of balsa -


When this had dried overnight the balsa sheet had buckled and cracked the face. I managed to get it off the sheet in three pieces, PVA it to a new sheet and fill the cracks.
He wouldn't be much of a monster without some teeth. The gums I made by laminating some balsa sheet and then some hand carving and rotary tool work. The teeth at the moment are pinned bits of dowel in order to get the spacings right for the gum ridges -


My plan was to then cover the gums in a thin layer of clay, but this was a disaster, so I pulled it off. To get the definition I wanted involved several coats of lacquer with sanding in between to fill the grain and this was a much better result.
Part 2 below.
Last edited:


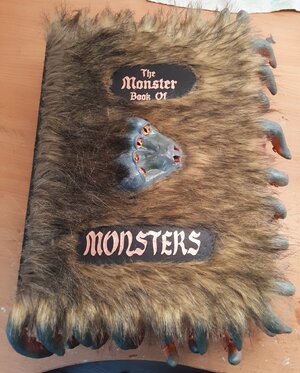
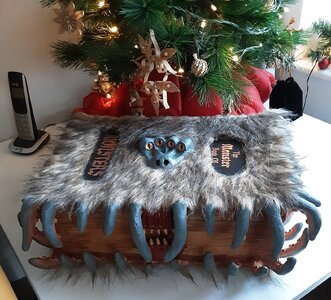


 Extremely creative work !

