Shipyard on the table. The La salamandre 1752 a longitudinal section of a ship

Great work !!
it's nice to see a half ship cut the length Okay :)
Thank you, my dear friend!

Last summer we were with my family in the Central Naval Museum in St Petersburg we saw a lot of shipmodel differenst size.


We were in this museum twice.

What I saw inspired me!

My wife helps to solve a lot of questions on the color of the shapes of the details, as there is a lot to think about!
 
Hello, dear friend!

Let me share new photos about build of my project.

I finished the deck plating of the main gundeck.

Tried to imitate for real floor boarding using a pencil lead.

The edges of the floor boarding I covered the same with a pencil lead.

Main gundeck 1.jpg

Main gundeck 2.jpg

Main gundeck 3.jpg

Main gundeck 4.jpg
 
In my region summer has come for me it is frequent trips out of town, cicling, walking, but I promise what I will be contunie build my ship.

To be contunied...
 
Let me introduce myself. My name is Alexey.

I'm from Russian. I have some experience in ship modelling (3 ship I finished).

I'm looking for a new idea. And I found my new project!

This is La salamandre 1752, but it is not wood kit that you can buy in the internet.

This is my revision of the drawings, scalling, and longitudinal section in order to show the design features of the ship.

A time ago I found the ship drawings, bought suitable material, prepared file for laser cutter.

The during of this week the company will cut details of frames and keel.

After that, I will be ready to start!
Hallo @les621
we wish you all the BEST and a HAPPY BIRTHDAY
Birthday-Cake
 
Hello, friend!

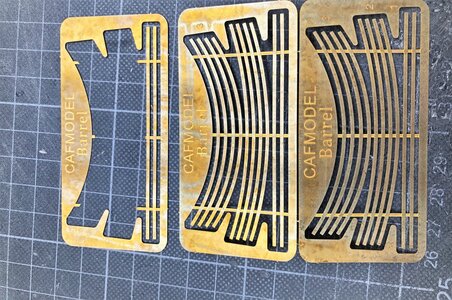
Now I finding information how placing hoops on barrels and what I can use for hoops

View attachment 412815
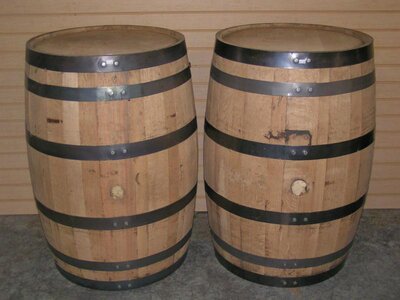
Usually they have 6 iron rings
New__Bourbon_Barrel.jpg

smaller ones maybe only 4 rings / hoops

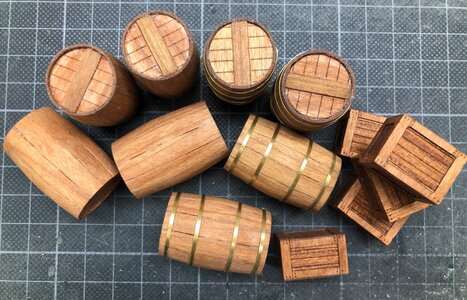
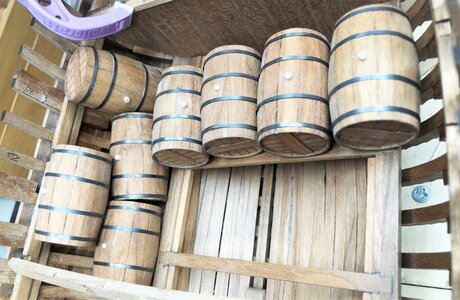
You can try to use shrinking rubber tubs, cut in short segments - but best looking is a blackened brass curved rings (but they have to have such a form

IMG-5964.jpg IMG-5958.jpg

IMG-6060.jpg photos taken from my Coureur build
 
Hello, everyone, happy new year!

Let me share some photos:
Prepered windlass for my project.

2.jpg
 
Hello, my dear colleagues!
I started to do planking a wood hull.
I like this stage!
I planned do planking outside around 40 % from surface.

Before I did fairing all frames, for that I used my engraver.

3.jpg

Обшивка.jpg
 
A million thanks to Salty for shared some photos from instruction.
I found a lot interesting details.

I would like ask one things.
Usually I use only steam iron for make need shape and bending angle for all planks.
I found anothor method to use a hot water for that. But I didn't use it.

Guys, how do you usually do this?

Please shared your experience.
 
Last edited:
From a post I made earlier:

I definitely recommend an electric plank bender, specially for beginners. When you start out building, you don't have a good feel for how to support a wet plank while you bend it, and how far you can bend a wet plank before it breaks. Breaking a lot of planks on your first ship model is very discouraging, and plank bending is a risky thing for beginners. If you soak the planks wet, then carefully press them into a concave form, then apply heat with an electric plank bending iron, you have a great chance of making bent planks without breakage. The heated planks hold their new shape better than planks that are wet, pressed into a form, and then let dry naturally, plus you can get sharper curvatures using the electric heater.

The trick when pressing the plank into the concave form is to support the plank along as much of the planks surface as you can using your fingers. Applying pressure only in the center of the plank with one finger will snap it for sure. You can us clamps to hold the plank along the entre length of the bend in the form and allow it to dry naturally, or use the electric plank bender to press the wood into the form. When using the electric planks heater, press and hold the heater end only as long as it takes to generate steam, and then roll the bender along the length of the plank over the wetted portions until the curve is made. Do not hold the heater to the wood too long, or the water in the wood will evaporate and then the wood will begin to scorch. If you boil away too much water, and the plank dries to the point of scorching the wood, the plank will become very brittle and may break under the slightest bend. Practice with a few scrap strips until you get a feel for how much heat to apply.

To achieve a slight twist in a plank in addition to a curve, which is needed for some planks at the bow half way down to the keel and further down, place the wet strip at an angle relative to the axis of curvature in the form, and then apply heat to fix the plank into the new shape. Make sure you get the twist in the right direction, or you will get a plank that is shaped for the port side of the hull instead of the starboard side, or vice versa.

With practice, you will be able to know how much heat to apply, how deep a form you need to achieve a certain amount of curvature in the plank, and be skilled enough to make planks to the desired shape without having to re-soak and re-form the plank a second or third time. Also, you will be able to control how sharp the curvature is and vary it along the strip of wood such that it will fit the hull very well and you won't have to rely on pins and glue to hold a springy plank to the frame. You will also know when you need the plank bender for sharp curves and when you can get away with just bending the plank dry or just soaking it wet and bending it without heat.

This is the plank bender I use, and you can get it on Amazon for $40.00 USD.
1701607226098.png
 
Last edited:
From a post I made earlier:

I definitely recommend an electric plank bender, specially for beginners. When you start out building, you don't have a good feel for how to support a wet plank while you bend it, and how far you can bend a wet plank before it breaks. Breaking a lot of planks on your first ship model is very discouraging, and plank bending is a risky thing for beginners. If you soak the planks wet, then carefully press them into a concave form, then apply heat with an electric plank bending iron, you have a great chance of making bent planks without breakage. The heated planks hold their new shape better than planks that are wet, pressed into a form, and then let dry naturally, plus you can get sharper curvatures using the electric heater.

The trick when pressing the plank into the concave form is to support the plank along as much of the planks surface as you can using your fingers. Applying pressure only in the center of the plank with one finger will snap it for sure. You can us clamps to hold the plank along the entre length of the bend in the form and allow it to dry naturally, or use the electric plank bender to press the wood into the form. When using the electric planks heater, press and hold the heater end only as long as it takes to generate steam, and then roll the bender along the length of the plank over the wetted portions until the curve is made. Do not hold the heater to the wood too long, or the water in the wood will evaporate and then the wood will begin to scorch. If you boil away too much water, and the plank dry to the point of scorching the wood, the plank will become very brittle and may break under the slightest bend. Practice with a few scrap strips until you get a feel for how much heat to apply.

To achieve a slight twist in a plank in addition to a curve, which is needed for some planks at the bow half way down to the keel and further down, place the wet strip at an angle relative to the axis of curvature in the form, and then apply heat to fix the plank into the new shape. Make sure you get the twist in the right direction, or you will get a plank that is shaped for the port side of the hull instead of the starboard side, and vice versa.

With practice, you will be able to know how much heat to apply, how deep a form you need to achieve a certain curvature in the plank, and be skilled enough to make planks to the desired shape without having to re-soak and re-form the plank a second or third time. And, you will be able to control how sharp the curvature is and vary it along the strip of wood such that it will fit the hull very well and you won't have to rely on pins and glue to hold a springy plank to the frame. You will also know when you need the plank bender for sharp curves and when you can get away with just bending the plank dry or just soaking it wet and bending it without heat.

This is the plank bender I use, and you can get it on Amazon for $40.00 USD.
1701607226098.png
well speaken Thumbsup
I can fully underline your words
 
Back
Top