Scratchbuild Creole Queen

Yes, about the same amount. They have a strange way of charging for shipping. When I submitted the order for the plans, I was charged $15 US. And they said I would get an invoice later for the shipping amount. I still don't have that invoice and hope it will be reasonable.

This was to be my winter project (maybe several winters), but now I can hardly wait to get started and will start ordering some plywood and drive components.

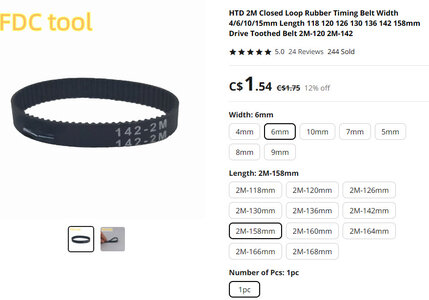
I have a question about toothed drive belts: I think I should get 6mm wide with 2mm tooth spacing. Because I want the motor fairly far forward in the boat, I need a long belt. In the picture below, does the 158mm length refer to the distance around the circumference of the belt? If so, this belt would be way too short.

belt.jpg
 
The belt questions are crazy involved, and I'll answer when I can later. Basically 6mm seems too wide, and I could only find 3mm, which I have ordered. I think that is rather narrow but might work for me as I have 2 drive belts, motors, pulley sets. I see you have found 4mm - maybe that or 5mm would be ideal for you? Length measurement is more involved, more on this later.
Regards, Paul,
 
Yes, about the same amount. They have a strange way of charging for shipping. When I submitted the order for the plans, I was charged $15 US. And they said I would get an invoice later for the shipping amount. I still don't have that invoice and hope it will be reasonable.

This was to be my winter project (maybe several winters), but now I can hardly wait to get started and will start ordering some plywood and drive components.

I have a question about toothed drive belts: I think I should get 6mm wide with 2mm tooth spacing. Because I want the motor fairly far forward in the boat, I need a long belt. In the picture below, does the 158mm length refer to the distance around the circumference of the belt? If so, this belt would be way too short.

View attachment 395546
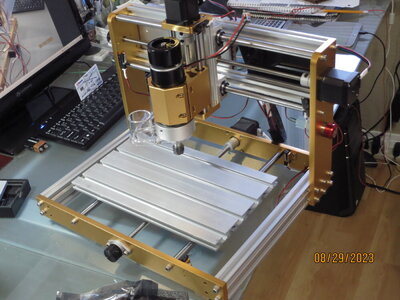
I get my belts and pulleys from McMaster-Carr, and they do metric and imperial sizes. For the number of teeth : add half the number of teeth on pulleys at each end, then use number of teeth per inch (mm) of belt and multiply by twice the center-to-center distance. Add the two counts to get belt length (in teeth number) If that's not clear, let me know. Are you going to build at 1:40 scale (the same as me)? If so we could combine some resources - I hope to cut the paddle wheels out with CNC machine .

IMG_8490.JPG
 
Yes, your belt measurements make sense. Thank you, Paul.
I will be building 1:48 (48" long). I will have enough trouble launching it at that size. (My muscles are 73 years old!)
I found some info on making the paddle wheel from styrene (ABS) and it sounds quite doable, even for me. I have no CNC or 3D printer.
My plans are supposed to be on their way.
Fred
 
Paul, I have been doing a lot of reading on other forums about the Creole Queen. I found these two references related to its weight. Of course, adding steam, sound, etc. will also add some weight.

"Build the frame on a board as instructed. I used a laser level to line everything up. Weight is an issue; Dumas said their finished model was 10#s and water would wash the deck. So, I have decided to seal the lower level with caulk and build a wiper seal for the belt drive to reduce water from entering the boiler room area."

"I am just finishing the CQ after approx. 10 months of building. It is complete with bow thrusters, smoke, sound (New Orleans Jazz), lights, rotating radar, and trying to work out having the front ramp raise and lower. Works great BUT - at
18 lbs. it rides very low in the water. Looking into adding 1/2" of foam on the bottom to see if that helps. If anybody has any experience doing this please let me know.
 
So, somewhere between 10 and 18 pounds. Is that for the Dumas scale? What site did you find this on, please?
That's a good start. I fear mine will be heavier. At my scale that works out 17 to 30 pounds. I added a 1/2" to the hull depth to help get the C. of G. as low as possible.
Most batteries are deeper than the draft, so they don't even help much with stability.
 
The first quote came from here. (Report #1)
I cannot find where I got the second quote, but I think it was from John Fryant, somewhere on RCGroups. He added many options to his model.

I will be adding 1/2" to 1" to my hull also, as many people have recommended. My reason is to get more freeboard, so it won't get swamped by another boat's wake. That will take some modifications to the bulkheads and sides of the model. If mine has a stability problem, possibly in the wind, I may even add some ballast below the hull as a last resort.
 
So, somewhere between 10 and 18 pounds. Is that for the Dumas scale? What site did you find this on, please?
That's a good start. I fear mine will be heavier. I added a 1/2" to the hull depth to help get the C. of G. as low as possible.
Most batteries are deeper than the draft, so they don't even help much with stability.

The first quote came from here. (Report #1)
I cannot find where I got the second quote, but I think it was from John Fryant, somewhere on RCGroups. He added many options to his model.

I will be adding 1/2" to 1" to my hull also, as many people have recommended. My reason is to get more freeboard, so it won't get swamped by another boat's wake. That will take some modifications to the bulkheads and sides of the model. If mine has a stability problem, possibly in the wind, I may even add some ballast below the hull as a last resort.
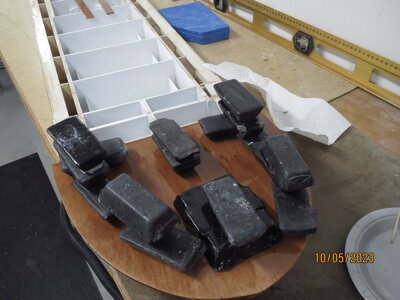
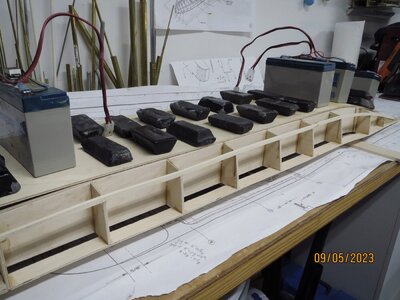
Looks like we are all on the same page! I wanted the center 6 inches of the hull to be flat and unobstructed by a keel, (my batteries are 6" wide!) So my bulkheads have flat centers, then a slope to bring things back to the original chine edge. Actually made life quite a bit harder, the flat center board was same width as center-to-center distance of the jigs. Essentially that means I have 2 chines! ! The back and front ends took extensive calculations to satisfy me that there was enough strength despite the lack of a center keel.

IMG_8506.JPG
 
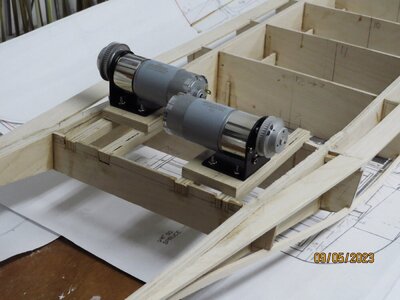
I realized the problems you mention with low freeboard. I will make the main deck permanently attached to the hull, and lift off the rest ( including boiler deck). This should prevent any swamping, although it will be a bit harder to access the insides. But that also means I can mount the motors higher and so keep water from draining in with the belt drive. I also putting the motors between bulkheads 14 and 13, not 12 and 13, to keep the belt short and contain any water into that last section. I have epoxied all inner surfaces in the 13 - 14 bay, so that any water will be harmless. Gee, so much to think about ! !

IMG_8504.JPG
 
Paul, I found an ad for a Genmitsu 3018 CNC router. I don't know anything about these, but apparently this one is best for wood & plastic, not so much for aluminum. Since you have a CNC machine, how useful is this for building models? What sorts of things could it do to make work easier?
 
I got the almost identical model, the Lunyee all-metal 500W CNC machine, 3018 ProMax from Amazon. It was completely assembled in just 2 pieces! It was well under $400 and then got $70 additional discount. Too good to turn down, especially with the prospect of making the paddle wheels. Instead of double thickness 1/16 wood wheels, I am going to try double thickness 1/16 Printed circuit board. I found some single sided copper-clad PHENOLIC boards. When glued back-to-back they should be stronger and more rigid than wood or even styrene. Additionally, the paddle blades can then be soldered to the wheels making a really bullet proof assembly! The phenolic is easier to mill than fiber glass, and I got pieces about 7" square which should do for my 6" diameter wheels, with enough over for the paddle blades.
The nice thing about these CNC machine is that even though it has only 300 x 180 mm work table, by moving the work back on the table you can mill indefinitely long work pieces. Useful for this long model, although re-registering the work to continue repeat milling requires a lot of care! No need for bigger/more expensive machines! Over 20 years ago I scratch built a CNC machine to make battleship superstructure parts. It worked well but took a lot of programming. These new models are a lot easier to use. I hope, as I have completely forgotten everything I knew about G-codes, isolation routines, etc. I have started looking for free software to get started again.

 
Thanks for the info, Paul. I found a used one that includes a laser, but I'm not sure how useful the laser would be. Do you know?
I was also thinking about cutting the windows out. Would your machine easily cut through 1/8" plywood?
 
Yes, easily, I hope. I will be aiming at cutting out all the vertical parts (probably using 1/8 Basswood) , and expect to do windows fine. There are lots of different 'bits' available, including tungsten carbide, which are really only needed for fiber glass. Plywood should be no problem, although it may give rough edge to windows. I don't have cutting speed or depth-of-cut yet. Let me know what you find works. I've never used a laser. I expect to start in a week or so. regards, Paul
 
Thanks for the info, Paul. I found a used one that includes a laser, but I'm not sure how useful the laser would be. Do you know?
I was also thinking about cutting the windows out. Would your machine easily cut through 1/8" plywood?
Hi Fred, did you get any CAD / CAM software with your mill?
I have no idea how to get started. Most YouTube videos seem to assume you already have the geometrical files and just need to get them read into the machine I want to draw the side walls with windows included to cut out. Can you help? Paul
 
Sorry, Paul, I have no experience with these machines. I am supposed to be picking one up tomorrow. It will take some time before I can do anything with it. I'll need to learn it from the start.
 
Hi again, Paul. I finally received my CQ plans from Dumas today. They were ordered September 19, shipped on September 27. The plans look good. I will be studying them for a while before starting any building. Since it may take time to get the motor, pulleys, etc. from China, I will order them soon. How is yours coming along?
 
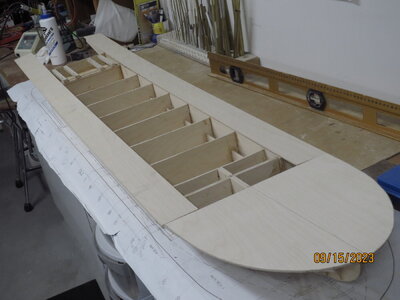
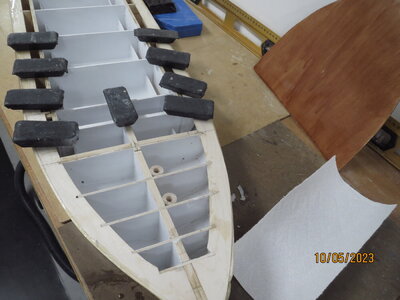
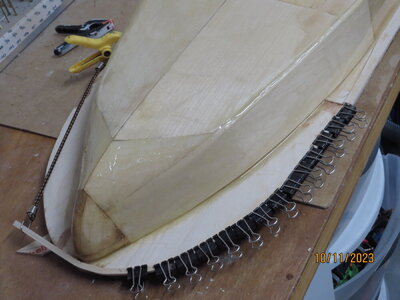
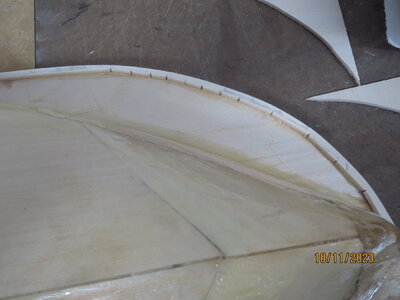
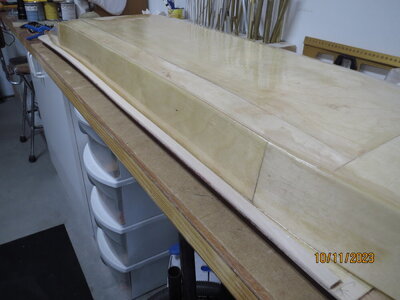
HI Fred, glad you got the plans in good shape. I have been skinning the hull with 1/8 ply, and covering it with several coats of epoxy. I don't like to do fiber glass clothe on my own, as I only have 2 hands ! I've got the deck on and am now re-enforcing the edges with 1/8 Basswood. My present problem is the CNC machine. I think I will go with 'Easel" software, but I just don't know how to get started. All the YouTube stuff assumes you have everything installed and running. I have a thumb drive that came with the machine, which has hordes of files, but I just can't get things started. I'm making a spoil board for it on the assumption that eventually things will work out. So far just a lot of time with nothing to show for it ! Damn computers ! ! ! Have you had any success so far?

IMG_8537.JPG

IMG_8514.JPG

IMG_8529.JPG

IMG_8531.JPG

IMG_8534.JPG

IMG_8536.JPG
 
I will be taking some time to figure out the hull structure from the plans and adding some freeboard to the hull sides. Also, the plan sheets are different scales for the bulkheads and other hull parts, so I want to make sure I end up with the proper scale.

As for the CNC, I read about different software, and I think I will use the free version of Easel. Most people say its one of the easier and more basic programs.
If your machine is new, it would need some firmware installed first so it can understand the G-code. Mine was used and I asked the seller to show me that it would cut 1/8" plywood. He did and it should be ready to run without much setting up.

Currently, The CNC is sitting in the garage because I think it's going to be much too noisy to operate in the basement. I'm hoping to learn how to create the files on a desktop in the house and then transfer them by an SD card to the offline controller on the CNC. This will likely be put on the back burner for a while as I take care of the fall leaf raking and other outdoor chores before it freezes out there. I hope to try the CNC in the next week or two and I will let you know how it goes.
 
Back
Top