Scottish Maid Artesania Latina [COMPLETED BUILD]

Joined
Sep 3, 2021
Messages
4,256
Points
688

Hello all,

Between the rebuilding of my late father's Bluenose schooner (not quite finished yet (still waiting for some accessories on order)) and the arrival of the POF YQ Bluenose kit, I found a small side project that requires some TLC.
It concerns a model of the Scottish Maid from Artesania Latina, which I build many, many years ago. I would guess it would have been build in the same period of time my father build the Bluenose model, so some forty odd years ago.
This model came without sails and I build it as such. After years on display, currently in my music room annex modeling office, it shows it's years. So I'm trying to get rid of the accumulated dust and dirt, simultaneously taking care of the standing- and running rigging, which also suffered from age and some minor repairs.
As I'm writing this, I occasionally look over my screen and see the beautiful lines of the Bluenose, with all sails set.
And that's where my questions stems from. I am seriously considering to make a set of sails for the Scottish Maid. May be not all of them, maybe just two or three; I'm undecided yet, but I was wondering if anyone has a set of sail plans/drawings available (or a link to a website) for the Scottish Maid, the scale is not an issue, that's easily scaled up or down.
A work-around the lack of plans would be to take measures from my model and guestimate the dimensions of the sails, but it would be nice to have some more reliable plans/drawings.
So I would highly appreciate it if someone could help me out on this one.

Johan

PS I will post some pictures of my model shortly, haven't taken any yet...
 
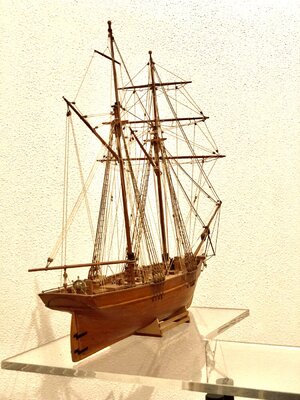
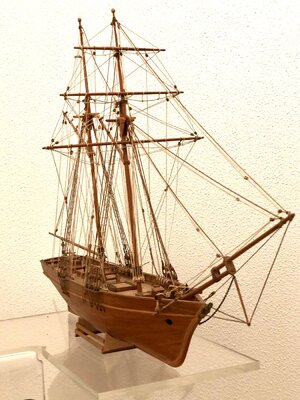
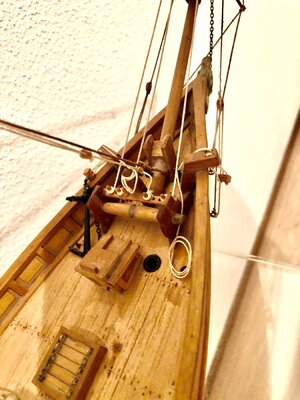
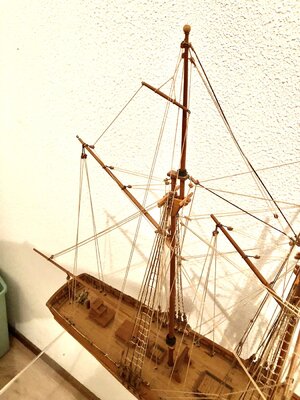
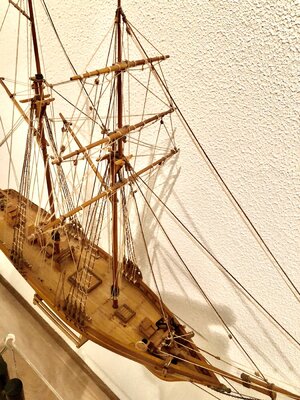
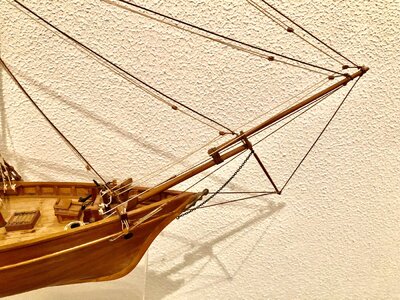
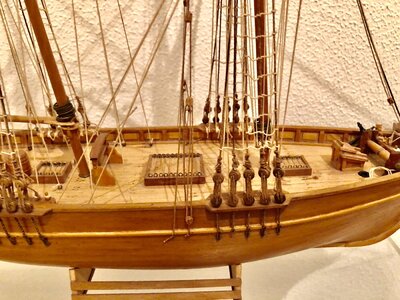
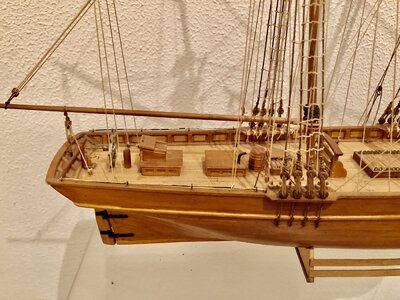
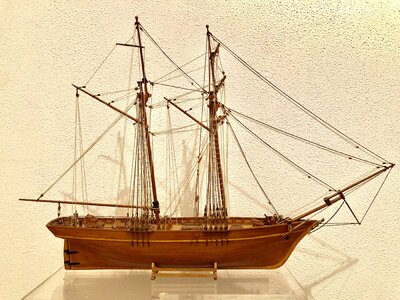
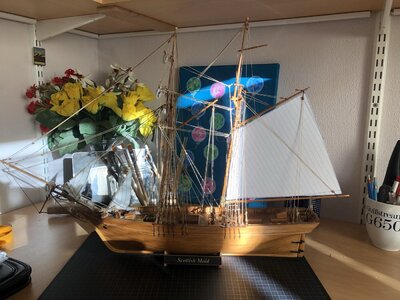
As promised earlier, herewith a couple of pictures of my try at the Scottish Maid.
What's clear in those photo's is that basically all standing- and running rigging is sagging and I wanted to keep the rigging intact, whenever possible.
Any ideas how one can retighten the rigging, without redoing it all?DF206ACA-938E-4149-82AE-2D0CD7D164BE.jpeg6DC42AEF-C47C-4BF3-B73D-4109228D38B2.jpegBA26FFEB-E701-463B-9837-BCDAAB40E0EF.jpeg2991DE2D-33E9-4FF6-9101-B87839E1176A.jpeg09ECC43D-7D24-479B-AB0E-6694ADA198F1.jpeg0FD06857-FBC8-4BFE-8A2D-81A4533C2605.jpegC2651D08-9C53-4157-BD93-B8B9B80BA5FD.jpeg8D28C182-A25F-4B78-A42D-54022157253A.jpeg42332765-CED0-43D7-A68F-10CE9EE5ADB3.jpeg

I just did a fairly superficial cleaning, getting rid of the cobwebs and dust, using a soft, shorthaired brush. Don't dare using anything more solid...
 
It's been awhile since I posted something on my side project, simply because there was not much to show for.
I have been cleaning the model, which was a royal pain, because all the standing and running rigging was obstructing almost every area I needed to access. On top of that a lot of the rigging is not as tight as I would like. Starting a complete re-rig was not an option, so I had to thread carefully.
After having removed a couple of years worth of dust, I applied two layers of a semi-gloss varnish, which greatly improved the looks.
The model originally came without sails. The lack of sails gives a beautiful impression of all the rigging, but... I find it lacking some body. I know, I know, not everybody shares this point of view and that's okay.
So I decided to add so e sails. Not all of them, since I don't have sufficient access to set the sails properly. Four sails will be added; both upper- and lower fore topsails, the jib and the fore staysail. The choice is exclusively driven by accessibility. Furthermore, and that's where the Admiral put her (more than) two cents in, the sails will have to be furled. Never done that before...
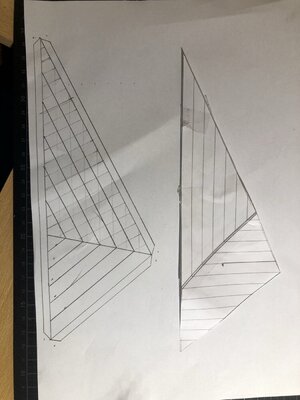
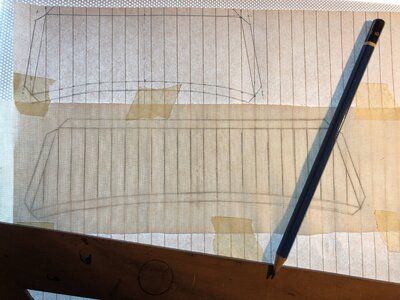
So I made some paper sails, test-fiitted and transferred the lines to some sail cloth.
The raw cut-outs have been made and now it's time for some action on a sewing machine, however that's for another day.

On the right, the first try of the jib. The left shows the template, used to transfer the lines to the cloth.

69874DE9-66F3-4069-B3E3-3A7A2CCCA087.jpeg

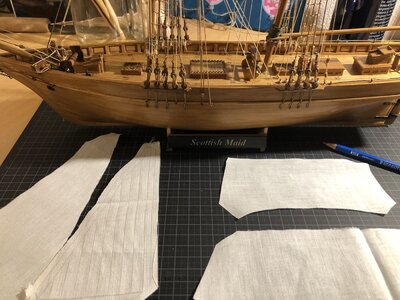
Transferring the lines of the fore lower topsail to the cloth.

212FA974-C207-4B87-B9ED-AB226C405622.jpeg

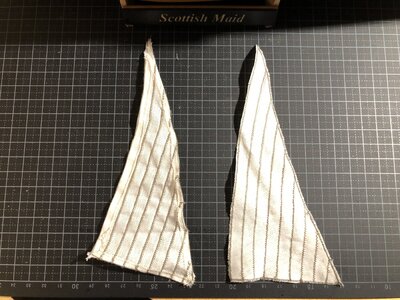
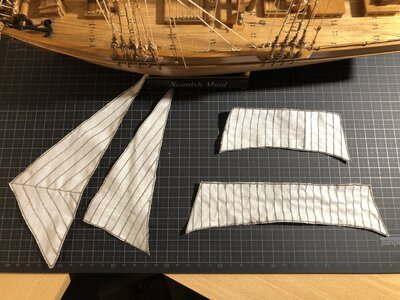
Four sails, raw cut and ready for the sewing machine.

5EED411E-A4FD-4F56-8D50-03CAB8DC3A5B.jpeg
 
Completed the sewing of the sails today. A lot of trial and error went into the process.
I basically made two sets of sails; one for the dustbin and one usable.
I'm not really sure about the end results though, I found it quite difficult to get the sails looking okay. Whether it had to do with my sewing experience (none) or with the cloth being very thin and unraveling very easy, I'm not 100% sure...
I read and watched some available resources and I think it's my inexperience that's giving me acceptable results, but nothing more than that.

Left the first trial, with folded and sewn edges, big fail!
Right the second trial, no folded edges, but sewn and applied some diluted wood glue on the edges to prevent fraying. Some stretching action took care of most of the curved edges of the sails ( unless the curvature was a deliberate design... ;)

7AEF8A18-F2E0-47E6-9A8F-7D10967111F2.jpeg

Below a "complete" set of sails. As I mentioned before, these are the only sails I can safely install on the model, without risking too much damage to the rigging.
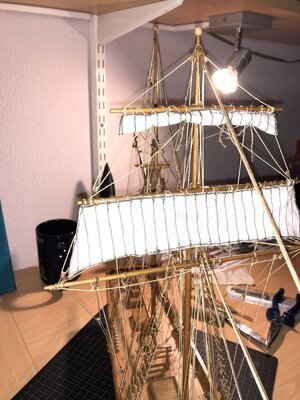
Now I am busy installing the sails, furled, and so far so good.
Tip: punch the holes for the rigging with a needle, prior to attaching the sails to the model.

83E93AF2-C1BC-4DDA-9B85-2A6CF211FA9D.jpeg

The first two (top) sails attached and the upper topsail furled. Still need done tweaking to get it convincing.34C566A3-5B95-4FCF-9011-26F3C13AAC95.jpeg
 
Last edited:
Three sails up and furled. One more to go.
The other day I asked my son whether or not he would like to have this model for his office at home.
The answer was yes. So now I plan to give him this model as a Christmas present.
What's this giving away models to ones children? (@Dean62).

CD5639B7-B086-4B4F-A375-8CF4A4C9C989.jpeg
 
The sails are looking great. Like I mentioned earlier to Dean, you guys must be happy that you can give your models to your sons. Mine has told me in no uncertain terms that he is not in the least bit interested.
 
Three sails up and furled. One more to go.
The other day I asked my son whether or not he would like to have this model for his office at home.
The answer was yes. So now I plan to give him this model as a Christmas present.
What's this giving away models to ones children? (@Dean62).

View attachment 265424
What better gift than one you built! ;)
 
The sails are looking great. Like I mentioned earlier to Dean, you guys must be happy that you can give your models to your sons. Mine has told me in no uncertain terms that he is not in the least bit interested.
That could also have been an outcome and one I would have accepted...
 
Oh bugger, I stated in my previous posts that I would stick to four furled sails.
Once I met that goal, I was not convinced by it's looks and decided to add the main sail as well, again furled. The picture shows a paper mockup, loosely fitted, held in place by the rigging, but not furled
Attaching the sail to the gaff and mast will be a major pain, since access is, as I said before, limited.
The cloth has been cut, now off to the sewing machine..
(The Admiral is talking about how nice the Maid would look by adding buckets, etc...)

BDA60167-1533-4873-908D-4A47C5EE9678.jpeg
 
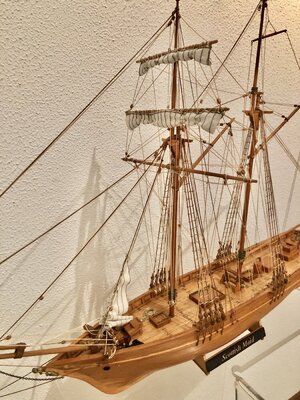
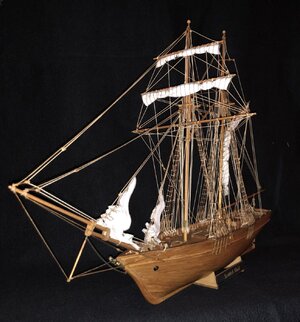
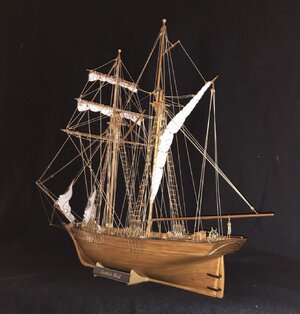
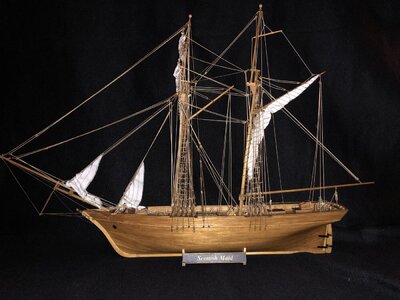
The main sail made it from the sewing machine to the gaff and main mast. After careful and extensive guidance from the Admiral I managed to sew the sail myself, with an acceptable main sail as result.
Getting the sail attached to the mast and gaff was a tedious job. I started attaching the sail to the mast hoops, from the bottom up. After that the sail was attached to the gaff. In itself not complicated, the job only required some TLC and a lot of patience. The "holes" for the ropes were made in advance, it took a lot away from on-model piercing, which is not may favorite thing to do.
After attaching the sail, it was furling time. That also took a lot of patience ánd input from the Admiral.
The way I show the furled mainsail may not be historically correct, but in that case I invoke AL-FI. ;)
Now it's time to stop tinkering and declare the patching-up done, the only open actions are to wrap it and to present it to my son coming Christmas.

4A393767-1E02-4876-B3A5-64C64E021EA6.jpeg5EC3B6CE-E25B-4B58-9FEE-FBBAE152C66B.jpeg4EECA18F-8146-47FB-A3E9-EF3F4D1DC2CA.jpeg
 
Congratulations for finishing your great model - the furled sails are looking very good.
And I am sure, that someone will be extremely happy on Christmas .....
 
Congratulations on finishing her Johan, You have done yourself proud and the sails are looking very good. I agree with @Uwek - someone should be very happy and honored this Christmas.
 
Back
Top