Running Rigging Beginners Request for help

Joined
Aug 23, 2020
Messages
6,033
Points
738

Location
Wadsworth, Illinois, USA
Hello Experienced Ship Builders,

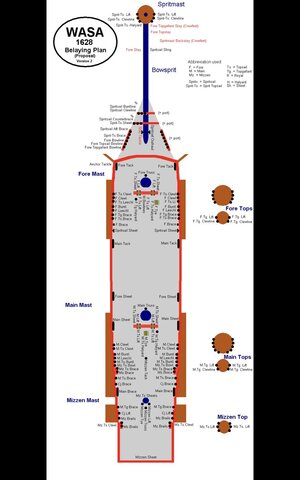
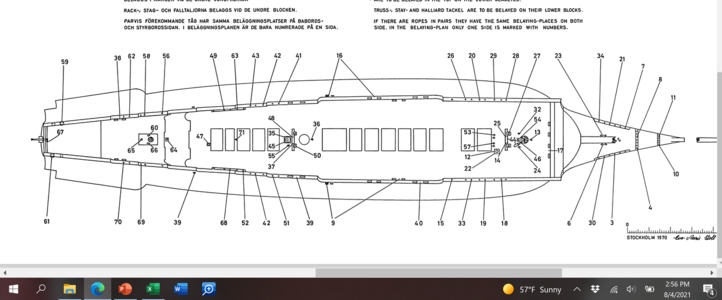
Here is a drawing of the belay points for running rigging on the 1628 Vasa.
Screenshot 2021-08-04 14.56.39.png

I understand I will be using pins along the headrails. My question is: what is being depicted with the belay locations on the deck? For example, locations 60, 65, 66, 55, 36, 53, 57, etc.? Are those locations for eyebolts? Or are they showing where blocks will be attached? If they are blocks would they be doubles? I'm trying to sort this out and install some of these things before the deck gets crowded.

Sorry for the elementary question - and thanks for any information you might be able to provide.
 
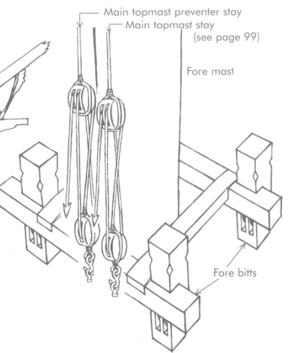
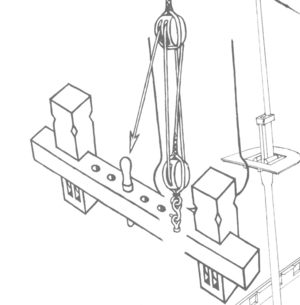
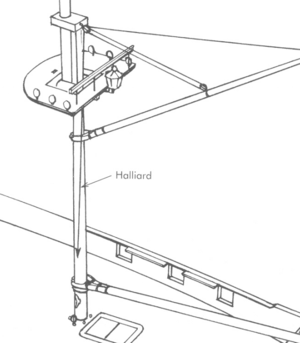
Hello, Dr. Paul. Not pretending to be an experienced, modeler, but it looks like the diagram shows both the belying pin rack points and their corresponding starting points for various Stays, Backstays, Prevent Stays, and Halyards. They are usually attached thru hook blocks to the eyering bolted to the deck (see below)

1628294885707.png 1628294965875.png

1628295091190.png
 
Most deck belay points such as the ones you highlight are eyebolts on the deck. So drill holes and add scale eyebolts to all of these locations. How lines are attached to eyebolts can vary. Most are as illustrated above in Jimsky’s post. Some are simply threaded through the eyebolt and seized as a loop. Hope this helps…
 
Paul,

I have been doing some research on the belaying diagram and will post a new diagram (Post #259). There are some differences with the various authors of the belay diagrams for the Vasa which I hope to resolve.

That said, the comments above regarding on-deck belay points are all valid.

PeterG
 
Last edited:
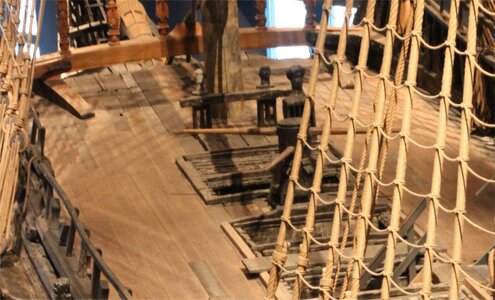
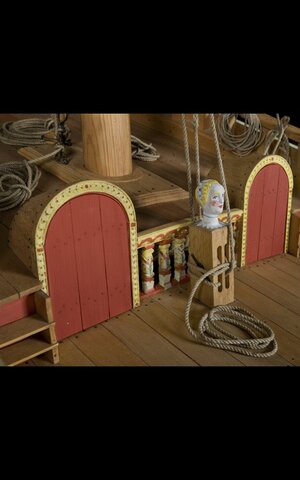
One other point Paul, the belay rack at the base of the masts (also called bitts), have NO holes for belaying pins on the Vasa. I will try and post a photo which shows these as solid timber and the lines wrapped around them to secure.

PeterG
 
Last edited:
Paul,

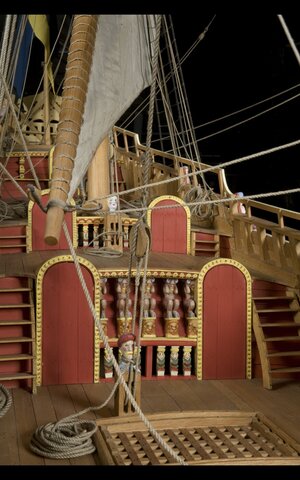
Following on from above, I show below a photo of the Vasa in the museum with the fore belay rack (the fore bitt). Note that there are NO belaying pin holes and only a solid piece of timber which was used to attach the various halyards and lines.

Deck_1.jpg

Hope this helps. I have some other photos somewhere, and will try and post these.

PeterG
 
Last edited:
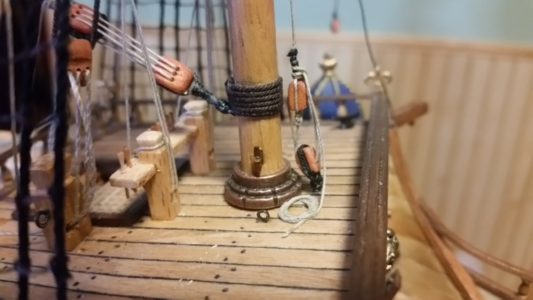
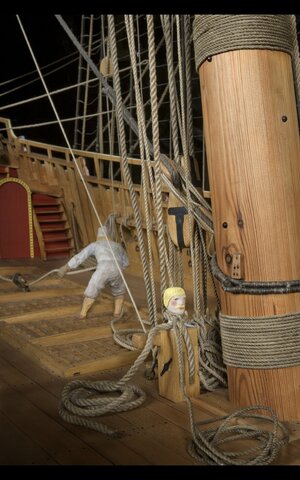
It is common for a line that requires adjustment, such as the nave line shown here in front of the foremast, to have a block and tackle attached to the deck by an eyebolt. The lower block typically has a hook which is hooked to the eyebolt. The line shown here is the toprope, which is used to hoist the fore topmast up, telescoping it upwards so that it may be secured in position in the masthead. A yet unused eyebolt awaiting later rigging steps can also be seen on the starboard side of the mast.

1628408095407.png


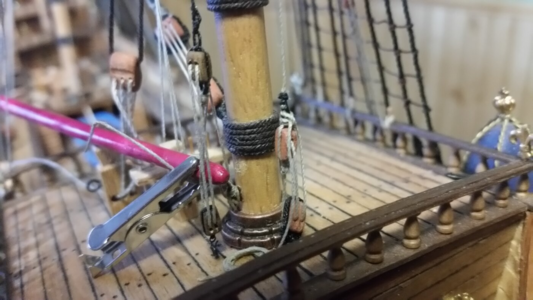
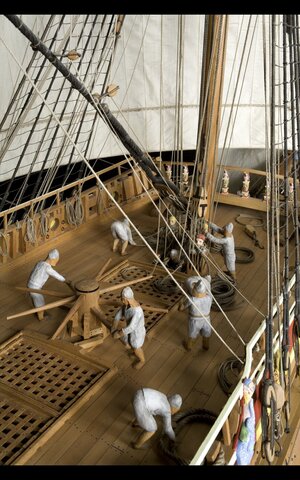
Show below, that previously unused eyebolt is now used to secure the tackle for the main course yard parrel's nave line. This line tightens the parrel to secure the yardarm to the mast. It is loosened to allow the yard to be repositioned up or down the mast.
1628409079295.png
 
Last edited:
One other point Paul, the belay rack at the base of the masts (also called bitts), have NO holes for belaying pins on the Vasa. I will try and post a photo which shows these as solid timber and the lines wrapped around them to secure.

PeterG
Thank you for that information Peter. The DeAg instructions for rigging are completely incomplete so I need all information I can get.
 
It is common for a line that requires adjustment, such as the nave line shown here in front of the foremast, to have a block and tackle attached to the deck by an eyebolt. The lower block typically has a hook which is hooked to the eyebolt. The line shown here is the toprope, which is used to hoist the fore topmast up, telescoping it upwards so that it may be secured in position in the masthead. A yet unused eyebolt awaiting later rigging steps can also be seen on the starboard side of the mast.

View attachment 248757


Show below, that previously unused eyebolt is now used to secure the tackle for the main course yard parrel's nave line. This line tightens the parrel to secure the yardarm to the mast. It is loosened to allow the yard to be repositioned up or down the mast.
View attachment 248758
Wonderful Kurt. These images have helped me visualize this very nicely. Ringbolts with hooks and blocks it shall be. Where did you source the tiny hooks from?
 
Small hooks You could easily made by youself... use plier, wise, couple of drills different diam and soft iron or copper wire, and good nails cutter...
and to fitt drills parallel to each other inside wise, to pass wire around drills, shaping a hook, with small and big eye, to cutt excess wire by good nail cutter...and blackening ready made hook - and You have hooks as much as You need!
There are a few pictures of that process
 
Last edited:
Wonderful Kurt. These images have helped me visualize this very nicely. Ringbolts with hooks and blocks it shall be. Where did you source the tiny hooks from?
The hooks are etched brass from HiS Model, Historical Ship Models, out of Czeck Republic. <-- Click on name for link. You should see all the incredible etched fittings he has for rigging! Radimír Beseda runs the store and he is VERY good at communicating with individual modelers, and eager to help find you the parts you want. Go there and browse. Buy some of those very tiny etched eyebolts he makes and use them on your cannon carriages.
 
Back
Top