Resumed Build Log: Model Shipways Constitution: Standing Rigging

Joined
Dec 31, 2023
Messages
122
Points
78

Location
Harvard, Illinois
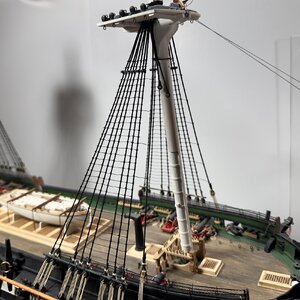
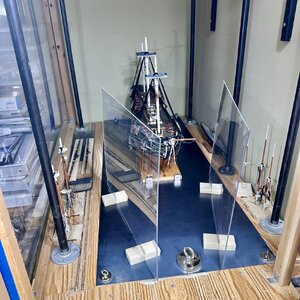
Happy New Year to all. It is time for me to get my Constitution out of the dry dock and finish her up. I am currently on the Rigging part of the model using Bob Hunt's Practicum. I hate to say it but I have been at this model for over 10 years and I am ready to finish the standing rigging and get her done. This is the enclosure I have on my work bench to try and see[ her clean and the dust off. So far so good. I am a retired farrier/blacksmith so the working base for the model is 16 gauge sheet metal with magnets holding the model base in place. It makes it easy to to slide the model in and out while working on it. It also makes sure my cat does not play with it.
IMG_0855.jpeg
 
I am at the point of attaching the beatnik rigging and staves to the foremast. I have made all my rigging line myself using the Byrnes Ropewalk. I used about 8 different thread manufactures using cotton thread. That way I get 8 single strands, 8 three strands, and 8 triple strand sizes for 24 different thread sizes. This is an improvement over the few thread sizes given with the kit. I feel it gives a more realistic look to the rigging.

IMG_0862.jpeg

IMG_0853.jpeg
 
Nice work. Will keep watching how you are doing. My Old Ironsides is waiting to get started later this year.
 
take a look here:
 
Very good job on rigging. There is still a long way to go before I reach this stage, but I will follow your structure with interest. There will definitely be things I will learn.
 
Thanks Mustafa, I am still doing a lot of mock ups and figuring things out. Sometimes it is hard to stop figuring and just get it done.
 
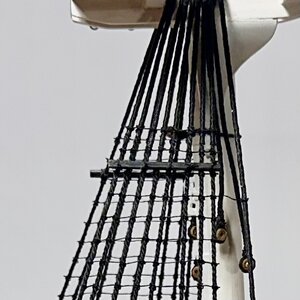
Sometimes when you don't post for several weeks, it doesn't mean you were not working on your model. In my case, it was several weeks of mistakes and figuring out how to do things. I decided to scrap several plans of rigging the futtock and bentinck shrouds on my Conny. After doing lots of research and viewing the pictures from the internet I decided to go a different way. My main plan was to rig as much as I could off the model. When you view the photos on the real Constitution, the area of rigging under the fighting tops looks like a big spiderweb. Then if you figure in all the seizings it just looked clunky.

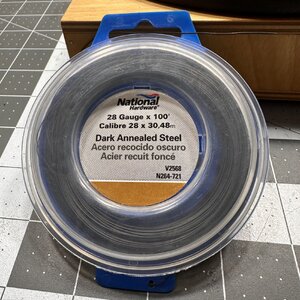
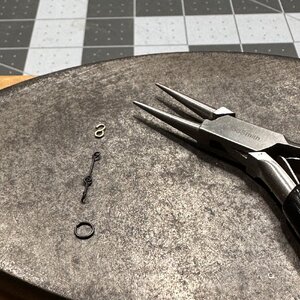
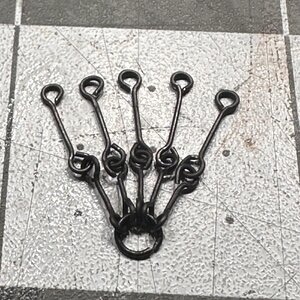
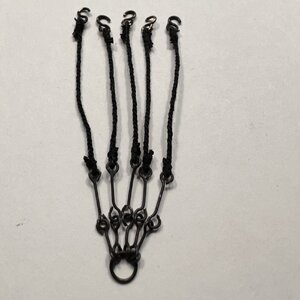
I decided to replace some of the rigging rope with metal rings and rod. I made all the metal parts using 28 gauge black annealed wire. My main tool was my needle nose pliers The end of my pliers was the diameter of my ring. There was a little learning curve, but it all went well. I even tried to simulate the serving on these parts with line. But, it was beyond my pay grade. I feel this gave me a less cluttered look and it looks more realistic. The real trick was to get these parts made and make them look close to scale. Please realize I have some paint touch up on the rings and metal parts.

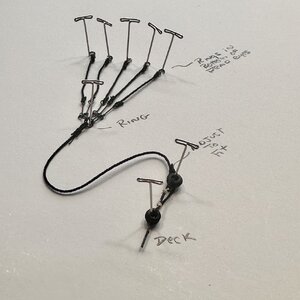
Now I will be working on the bentinck shroud from the bottom ring to the deck. Once I have that figured out the whole assembly will be one piece. I will just slip the hook part of the rigging through the shrouds. And the bottom seizing on the deck thimble will be my final adjusting point. Once I have bentinck shroud made it will be easier to see the concept.

IMG_0934.jpeg

IMG_0936.jpeg

IMG_0902.jpeg

IMG_0944.jpeg
 
I have finally made my goal. I can fully rig the futtock and bentinck shrouds off the model. All I have to do is fish the hooks through the ringing and attach them to the bottom of the deadeyes. Then glue the pin in the bottom of the bentinck rigging in the deck. And lastly use the seizing at the top thimble to make the final adjustment, glue it place with diluted white glue and snip off the end. Now all I have to do is make four of these subassemblies and I am good to go.

IMG_0971.jpeg
 
Back
Top