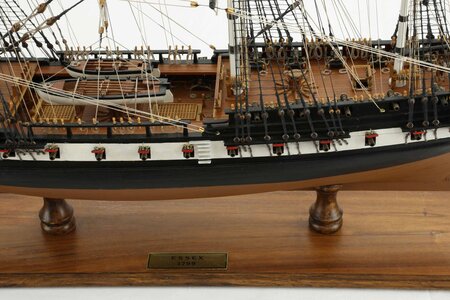
Questions about Model Shipways "Essex"

Joined
Jan 3, 2022
Messages
23
Points
48

Location
Los Angeles, CA, USA
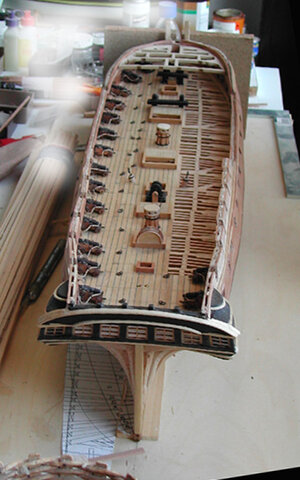
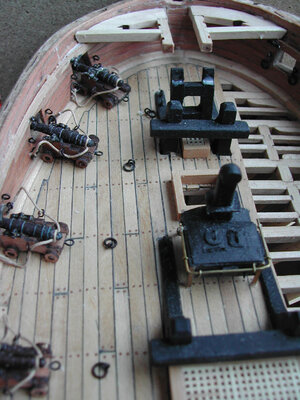
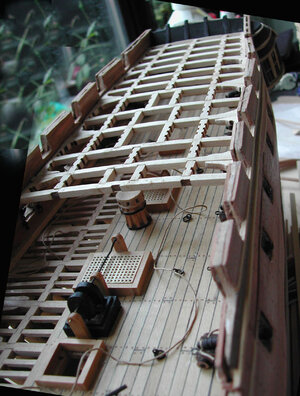
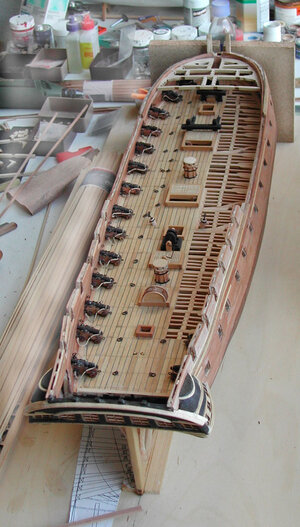
I'm building the "Essex" in part because it was built (in 1799) with funds subscribed by the people of Salem, MA, where my father was born 115 years later. I'm confused by images on p. 18 of the manual, which show part of the hull former removed in several places between the bulk heads. I cannot find any reference to this step in the instructions and cannot figure out what purpose is served by removing part of the former.
I was surprised also when I realized the model did not have parts for a full representation of masts. Happily, the plans include a version of the 1799 dimensions, which with a little arithmetic I can scale down for a fully masted ship. I am also working on HMS Surprise (at a different location), which is of similar scale and size, so I hope to capture some of the dimensions from it as a guide to what will be appropriate for the Essex.
I would appreciate any guidance from folks who have worked with this ship.
 
Pockets for masts doesn't make sense to me. The open spaces are half the width of the ship and just as long bow to stern, while the masts are 1/2" or so. It's not like the short masts anticipated by the plans (but not by me) need such a robust foundation. Other ships I've built don't have such massive structures. And later instructions about installing the masts don't refer to what's below them to suggest those spaces are involved.
 
Possibly, though I can't detect anything in the instructions or diagrams to suggest anything like that will happen. It looks like the gun deck is solid all the way, with gratings and such, but nothing that would require development of space below. Unless there's an expectation that there would be detail in an enclosed space, which seems very odd, I can't find a reason for these spaces nor a discussion of them later in the instructions.
Thanks to you and dockattner for helping with this puzzle.
 
The language of the instructions seems to indicate that the model builder should be familiar with how to reinforce the hull using blocks or pieces of wood between the bulkheads and using filler blocks at the stern and bow. The instruction suggest using filler blocks, but does not give you specific instructions on how. I am not surprised that one view shows some reinforcements and the other does not, because sometimes instructions use photos out of sequence for illustrating some steps in building.

I recommend you add spacer blocks throughout the lower hull between the bulkheads. This will proved needed stiffness which keeps you hull from twisting or having individual bulkheads warp out of position relative to the keel. Use soft wood filler blocks for areas that have complex or sharper curvature. Make them out of basswood or balsa. Make as many reinforcements as you want. Just make sure they are out of sight below the deck. Balsa is softer and faster to shape, but easily dented. Basswood is firm but takes much longer to shape. I like balsa for speed. If you sand off too much, glue some chunks on as re-shape the area of concern. You can make all this mistakes you want on this stage except let the bulkheads rotate or the keel to twist, because you can always add wood or reshape things, because you will cover the entire hull with finish wood anyway.

Whatever you do, make darn sure that when you fair the hull, sanding the edges of the bulkheads and shaping filler blocks, work carefully to preserve the symmetry from port to starboard sides.

As for the masts, consult the instructions and look to see if there are slots in the frames for accepting the bases of the masts, or reinforcements added later to take the bases, or if the model just relies on holes in the decks to position and angle the masts (but that would be very low quality and not proper reinforcement). If the masts are not supported properly, make supports from scrap wood a incorporate them into the hull structure. Remember: if something on a kit appears to be missing or oversimplified, make it yourself. You can add a lot to the model with simple tools, pieces of wood, and some books to guide what you should add in order to add details.
 
Everything Kurt said...

But also, if you click on the SEARCH thingy in the upper right hand corner of the screen and enter Essex indicating you only want to see where it appears in titles you may find build logs of the Model Shipways version (or not).
 
Thanks for very detailed response. I have put in spacers along the top of the former and will now do so lower as well. I've finished the faring, or so it seems, with apparent symmetry port and starboard.
Paul, I've tried the search function for Essex build logs, but have not found any that use this kit and address the issue I raised. Although as a digitally challenged older person, I may have missed something. Will retry.
Just checked. You are correct - there's only a kit review. Pictures shown there present a build with some open decking - that might be the answer to your question.
 
Got it. I'm going to stick with closed deck approach and adjust from there.
Thanks for backing up my research.
The book for the build from scratch version looks intimidating. I thought the 100-page instruction manual was Model Shipways was a tome...
You will find that while building your model, you will accumulate many books. 100 pages of instructions are a pittance compared the library of ship modelling books you will build. These will serve as a resource for adding details not found in kits, and as a learning tool. All the members here can suggest books that pertain to your particular ship and time period, including rigging, ship fittings, and hull timber structure and design. The kit is just the beginning. Essex doesn't have any rigging, but you can add a lot of details to the deck fittings and hull from book research.
 
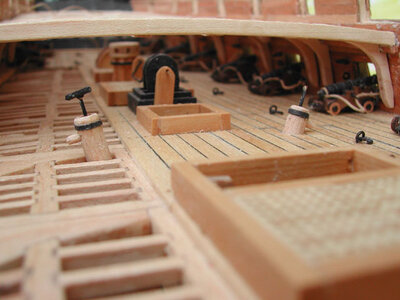
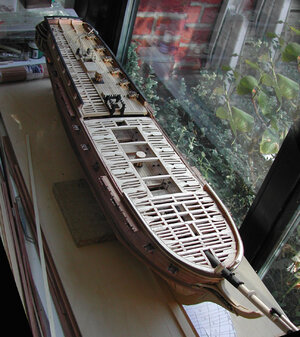
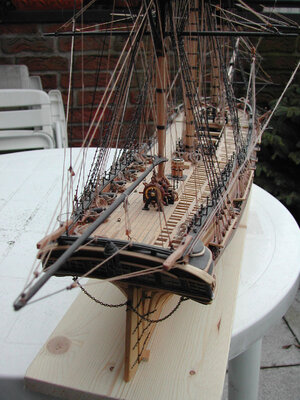
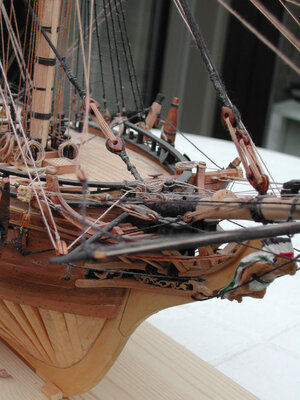
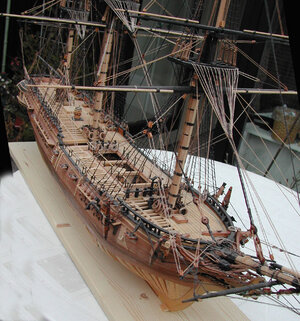
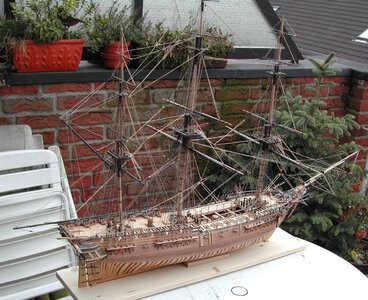
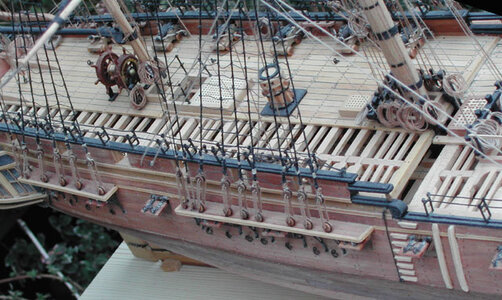
Thanks for this. I've seen those images too on a build log somewhere, probably here. The level of detail and craftsmanship of this model is superb, but it doesn't look like the Model Shipways kit. It has full length masts, which are not in the Model Shipways kit. My inclination is to build the ship as it would have looked in its own time, with decks completed. I've read the monograph on the Essex and nothing there suggests the decks were incomplete or otherwise had the gaps shown in these images. I'll figure out the masts from the 1799 specifications that are part of the plans provided in the kit.
That said, I'm early in this project and will adjust as I learn more about the ship, the kit, and my own abilities and shortcomings.
 
The level of detail and craftsmanship of this model is superb, but it doesn't look like the Model Shipways kit.

that model is scratch built from plans by Portia Takakjian
 
My inclination is to build the ship as it would have looked in its own time, with decks completed. I've read the monograph on the Essex and nothing there suggests the decks were incomplete or otherwise had the gaps shown in these images.

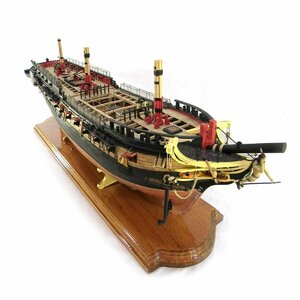
i do not think it is a question of incomplete decks the Essex was built with the center open to the lower gun deck with a catwalk on the sides. Many frigated were designed and built this way. Built from Model Ship ways kit shows it open to the gun deck

s-l1600.jpg

once again just a catwalk along the sides

dEL4A5103.jpg
 
If you are building the ship without masts or rigging by scratch building the parts from plans, it would look fine with complete decks. The model without masts was suppose to copy the method ship models were made back in the say when used as proposals for potential building of the ship itself. They didn't bother with the extra work of the rigging since the important features they wanted to promote were all in the hull. Which type of model would you like to build? The MSW cutaway model has the advantage of having detailed internals, unlike kits designed to simulate the exterior only. At your stage, you have lots of time to decide where you want to go. We all want to see what you come up with! Thumbsup
 
I know I'm late to the party. My input is not specific you r Essex question/issue directly, but more a general point relevant to kit instructions and documentation.

Whenever I review kit instructions for the first time I read them cover to cover, more than once. While I'm not suggesting you do that, I would suggest when you run into direction that are not clear to you, read on. Many times we see something, like a cut out in bulkheads for mast steps or another reason and you may see it clearly illustrated 2 or 3 chapters ahead in the instructions and BOOM!, the clouds part and everything is clearly seen!:cool:

With that said, the collective knowledge of the SoS community is DEEP and everyone is happy to help. You came to the right place! Good luck on your shipwright adventure!

Ken
 
Last edited:
Back
Top