Question on Plank Bending

Joined
Dec 26, 2023
Messages
12
Points
13

Location
Geelong, Australia
As I study the various techniques to overcome the challenges of building a POF model, many questions arise. This one relates to plank bending.

I am favouring the method offered bythe MicroMark device that allows you to place "pegs" on a board to shape your plank to any curvature.
As most of the planks need to be bent to different profiles to cope with the changing shape of the hull, how does one determine the precise shape to bend to, given they all differ. Is there a device that allows you to set/copy the shape from the model and use it like a template to set the correct curvature on your jigs?
 
I have used water and a tea-light (small candle) as a source of heat, this requires a little care to ovoid scorching your planks, but I find the tea-light more convenient than trailing cables everywhere.. A splash of household ammonia in the water helps - if you don't mind the smell.
 
In response to your question, " Is there a device that allows you to set/copy the shape from the model and use it like a template to set the correct curvature on your jigs?".

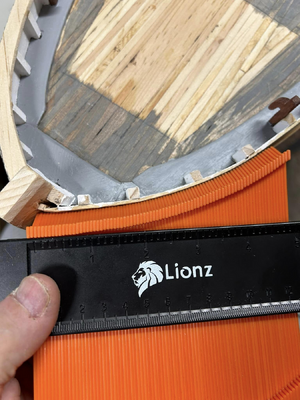
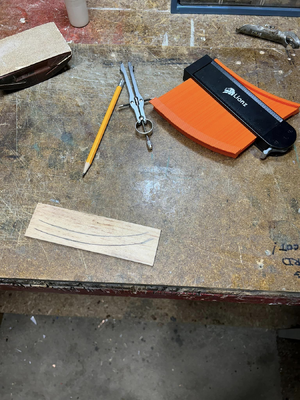
A contour gauge is a handy tool for copying curves and making templates, jigs. They come in a variety of sizes, a common woodworking tool.

1712053230401.png


1712053166933.png
 
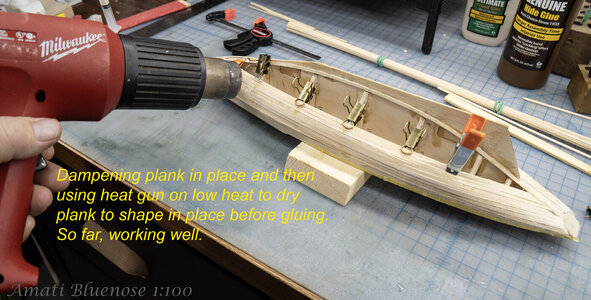
I usually use the frame itself to bend the wood, and let it dry there. It's been on mind a while to create multiple frames at the start: one for the model, and a few others to let wet and bent wood dry.

And I use the counterguage as well for other situations
 
Soak, steam, cut from a chunk of wood, buy or make wood shavings, laminate or leave off. Finally get someone else to do it. You can use card to linoleum… plastic or metal (cans or sheet like copper)…. Jigs to … hold planks in place. Elastic bands with blocks to the old way…
Whatever way it’s a painful / headache / fiddly process. I’ve take off and drawn each strake to making a flat 2D picture… in the end time gives you experience, tips and a feel. No one can give you that accept time. All the gadgets I’ve seen. Still I spill the plank, card to banding lines. It works. No mistakes. Patterns easily seen. Incorrectness obvious.
One tip. Chamfer the edges.
Yes. I use a shooting board to hand disc sander to parallel metal edges to cut initial lengths.
Tip 2 use only shark tools.
Tip 3 know the grain of wood.
Tip 4 Patients!
Tip 5 Throw clock out of window.
Tip 6 Drink : Tea to ? Water better due to spillage
 
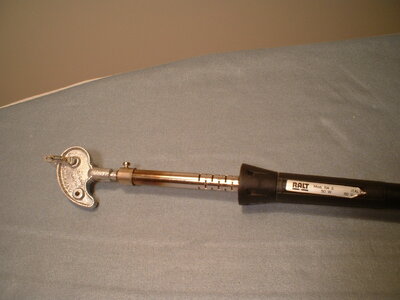
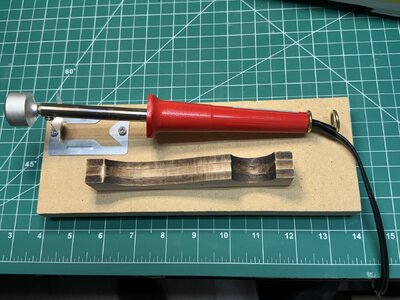
I found this photo on another forum, but it's the same item as I use... I'm just being lazy to not take my own photo to post here:
1712417768520.jpeg

The first thing I did was remove the useless (IMHO) spring roller thing that you see sitting on top of the curved head of the iron. I never really found it to be practical. But the heating iron itself I think is wonderful. I wet the plank liberally with a sponge and let the water soak in for five or ten minutes.... then holding the strip on a thick piece of wood, I apply the curved head of the tool against the plank, and rock it back and forth longitudinally along the part of the strip I'm trying to curve... while gently lifting up on one end of the strip. As I work to produce the curve, I remove the strip to test fit it against the hull of the ship, and then adjust as required. It works quickly and quite efficiently.

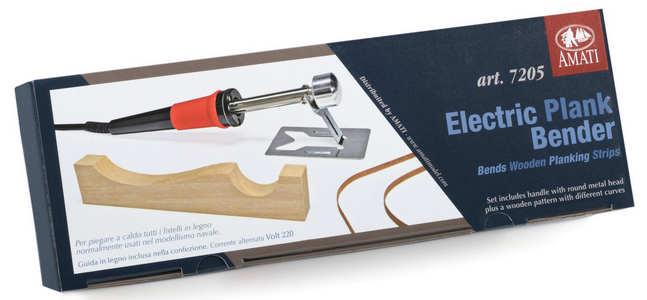
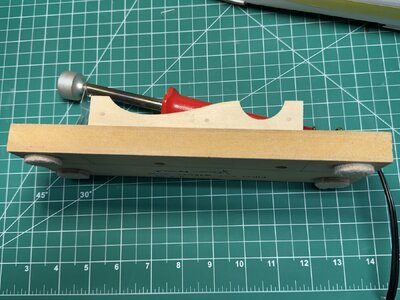
I haven't been able to find this particular item listed for sale anymore, but there's a different version that has a big round head instead of that ogee curve head that's on mine. That tool comes with a bunch of wood forms of various curves shapes, but I think doing the curve freehand is much easier. The key to success is soaking the strip, and ensuring the head of the iron is heated well before beginning. As you work the wood with the iron, it literally cooks the moisture out of the wood as well, so you're able to place the strip quite soon after curving it. Here's a link to the manufacturer's site for the product: Amati Electric Plank Bender

Here's an image of the tool I'm talking about:
1712418319933.png
 
The secret of bending wood is that the cellulose fibres in wood become pliable at approximately the same temperature of boiling water and will hold whatever shape you require when it cools. I heat the wood in a tall electric kettle for 20-30 seconds then put it in place and hold it there with strips of masking tape. If you use this method, let the wood dry overnight to dry and cool. Alternatively, I’ve heated the wood for 20-30 seconds in the microwave so as soon as it cools it can be glued in place. Don’t be afraid to experiment.
I learned this process from ship builders who were working on a full size boat. They had a furnace with one long, straight flue where they would slide a long length of wood into the flue, turn up the temp. of the furnace, go home, get a good night’s sleep and in the morning they would pull the heated wood out of the flue and hold it against the frame of the hull. Actually, I seem to recall that they had large clamps to pull the wood against the frame while it cooled.
Phil
 
It also depends on the wood of course. In England a lot of clinker-built inshore fishing boats used larch planking, because it was easy to steam bend and light in weight, particularly useful when you had to drag a boat up the beach at the end of the day, Larch also retains some flexibility which helps it to cope with being hauled onshore daily.

This is a quote from a UK fly-fishing forum about 10 years ago.

"I built a praam about 13 1/2ft,out of larch but there's larch and larch, the hybrid Japanese larch is useless, as was said fresh water is terrible for rotting a boat, I repaired larch boats for a local estate, and the big problem was a bracket fungus round all the deadwoods when I built mine each plank was put in with a coating of clear cuprinol and linseed, I didn't use pins I used the shetland style Kabes and Hummlibands, worked a treat and easy to make and replace, My larch came from the woods at Cawdor, and I made the thwarts of western yellow cedar grown locally,I went away on a shipwright improver course to west Dean college, mainly to make sure I was doing it OK"
 
As I study the various techniques to overcome the challenges of building a POF model, many questions arise. This one relates to plank bending.

I am favouring the method offered bythe MicroMark device that allows you to place "pegs" on a board to shape your plank to any curvature.
As most of the planks need to be bent to different profiles to cope with the changing shape of the hull, how does one determine the precise shape to bend to, given they all differ. Is there a device that allows you to set/copy the shape from the model and use it like a template to set the correct curvature on your jigs?
I soak in clear ammonia for time required based on thickness, only experience will give you the correct time. For my current build using 1/8”x 3/4” clear pine planks it’s hours depending on where on the boat it’s going. For much twist and bend it’s at least 6 hours then clamp in place. When dry trim to fit and glue and clamp in place. I don’t have experience with very small planks but water and heat sound right.
 
I soak in clear ammonia for time required based on thickness, only experience will give you the correct time.
There is a German? company who sell a system for bending quite large timbers by heating them in very strong Ammonia under high pressure. Their signature piece was a length of hardwood about 30x30mm in cross-section tied in a compact half-hitch.
 
I have been using the Amati electric plank bender. This tool has helped take out some of the problems I was having with bending the planks.
 
If I understand your question, you are wondering about how much curvature is needed rather than how to make the curves The best approach I've found is to lay the plank you are placing on the outermost frame (usually midships) and that will tell you where the bends have to go because at midships the planks are the closest to flat they will be anywhere. As you cover more of the hull, you will have to trim bits off at each end of the plank so it's flush with the previous one. By test fitting the plank as described above, you will also see where it needs to be cut and can mark the lines for the trimming. Good luck.
 
There is a German? company who sell a system for bending quite large timbers by heating them in very strong Ammonia under high pressure. Their signature piece was a length of hardwood about 30x30mm in cross-section tied in a compact half-hitch.
Thanks. That’s very interesting. I’m old school (I’m old) and almost always use the kiss principal. (Keep it simple stupid) I carefully consider what will make my life easier as opposed to how much it costs and do I want to manage another tool? In my younger days it was always about accumulating stuff, no matter the task. Not now. I enjoy applying old methods even if it’s more work. Sometimes it is. Sometimes it isn’t.
 
Thanks. That’s very interesting. I’m old school (I’m old) and almost always use the kiss principal. (Keep it simple stupid) I carefully consider what will make my life easier as opposed to how much it costs and do I want to manage another tool? In my younger days it was always about accumulating stuff, no matter the task. Not now. I enjoy applying old methods even if it’s more work. Sometimes it is. Sometimes it isn’t.
Oeh, I recognize that. I increasingly like simple stuff, even if it is more work.
 
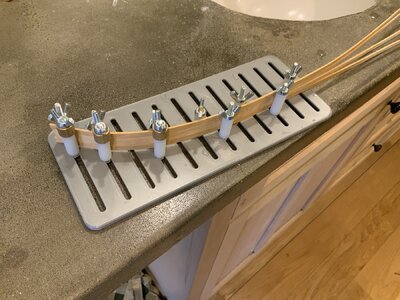
Ooh I really like the contour gauge in post #5. I just use a piece of bendable wire to approximate the curve for my home made plank bender. I had my kid 3D print the base and spent about $10 on parts from the hardware store; also using stuff found in my workshop. It definitely needs some refinement.

IMG_1672.jpeg
 
Back
Top