Planking question

Joined
Nov 2, 2022
Messages
24
Points
48

Good day, looking for some help on techniques/methods. Started working on my fourth model the OcCre Endeavour. On my previous models I‘ve been taperIng all my planks to a point on both first and second planking. Don’t mind doing it on first planking but wanted to create a more realistic planking as done on real ships. Being a much thinner word veneer used on final planking, what‘s the best way to taper these? Hard to get right shape using knife & straight edge and hard to shape with sandpaper as the plank wants to twist and turn!
Any advice would be great appreciated. Thank you.
Another great source is a book called Planking Techniques for Model Ship Builders.
Planking Techniques for Model Ship Builders
 
there are a few topics on the subject
check out a couple links under my name to start also look at the sultans build
i will see if i can find you more

what‘s the best way to taper these? Hard to get right shape using knife & straight edge and hard to shape with sandpaper as the plank wants to twist and turn!

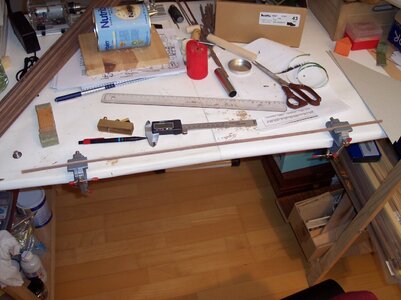
between two pieces of steel clamped in a vice gives you a perfect tapper every time

pcut1-jpg.68295
 
Last edited:
Hello Richard, I do much of the above comments, I like to do two planks at a time. (port -starboard are the same. I think most planks have 2 pins to hold it to ribs, if this is true then a tapered plank should be no less than 1\2 its width to allow for 1 pin. I would not go to a point just a though, hope it helps.

Ragnar
 
Go to the Home page in upper left column. Click on MSB journal on right side of page. Cannot miss it. All kinds of planking answers in there such as stealer planks and such. You do not want to taper a plank to a point.
 
Have you checked out the postings in the help section, there are several good posting with references on planking.
Thanks. I’ll sift through them, had many pages of hits on searching “shaping planks”.
 
Last edited:
I just finished a double plank hull that turned out really nice. Once determined the starter vinneer location I taped the first strip in place I use simple thin CA glue and wick along the top edge allowing it wick in. Since the first plank will have a gentle curve that will set the stage for the following courses. The planks Will take a gentle curve so I work from stem to stern I progressively wick the glue in to lock down the plank. I continue down to about 1/3rd deep along the hull. Then I start at the garboard plank and work upward until the plank fights you and a steeler is necessary.

On mine i only needed a few of these. Spend time to be sure ends like the stern is well glued. This allows you to cut and sand at edges for a nice look.
You will get glue on the surface but this is easily removed with acetone. It will take mutiple rags to wash glue away. The wood will turn white from dissolved CA. But this will disappear with additional washes and leave the wood ready for satin clear finish. If it is was. Washed enough you can stain it if you wish.

Here is a trick, if small buckles happen along the run wet that area with water then use a plank bender to flatten the buckle out just be carful not to creat too steep of curves. I followed along the cannon openings to set the first run but I did find that the last cannon opening was requiring too much too steep so I follow the deck line to get it right.

Cutting tapers is very difficult with .5ml veneer. I draw a straight line on my work table place a strip along the line and tape down. I take small ruler to mark the cut then gently cut along this line. Sanding along the edge is very difficult as well but it is possible
Thanks very much for your detailed methods.
 
Good day, looking for some help on techniques/methods. Started working on my fourth model the OcCre Endeavour. On my previous models I‘ve been taperIng all my planks to a point on both first and second planking. Don’t mind doing it on first planking but wanted to create a more realistic planking as done on real ships. Being a much thinner word veneer used on final planking, what‘s the best way to taper these? Hard to get right shape using knife & straight edge and hard to shape with sandpaper as the plank wants to twist and turn!
Any advice would be great appreciated. Thank you.
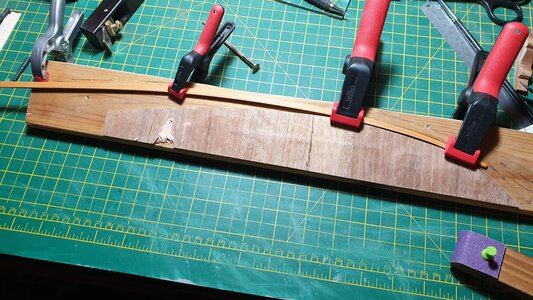
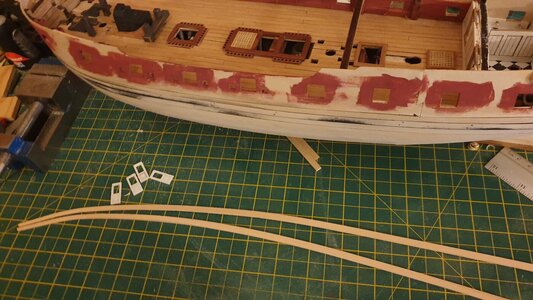
Many kits use a 2mm basswood first and a 0.6 walnut veneer, which is near impossible to edge bend (see photo, the only really essential bend) You can make things easier using a 1.5 base layer and 1mm outer plank. If you do go down the route of getting more timber stock20221206_210721.jpg20221210_175826.jpg I would recommend you replace the walnut with something like cherry to avoid splitting while bending.
 
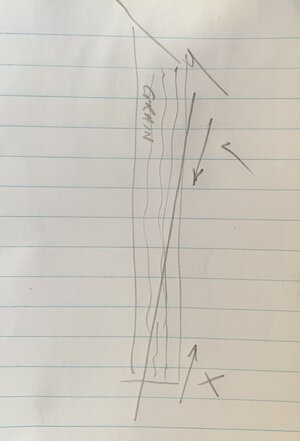
Mmmm. Second planking uses a veneer. This should be fairly straightforward to taper using a straight edge and Sharpe knife/razor. I use No 11 scalpels for this. Placing the veneer strip on a softish surface like a sitting mat or flat silicon matt and using a metal ruler will help you from straying. Also look at the way the grain runs through the veneer. You want to cut down across the grain Refer diagram. The other way will likely tear the grain and not give you a straight line.
Bending veneer is simple but edge setting is near impossible with the material provided in kits. If you do manage to edge set it is unlikely to be even and will not give you a good result.
Consider spiling. If you know the veneer wood used, get a sheet of the veneer and spile the bow and stern sections of planking rather than using full length planks (which is not prototypical.

IMG_0557.jpg
 
Many kits use a 2mm basswood first and a 0.6 walnut veneer, which is near impossible to edge bend (see photo, the only really essential bend) You can make things easier using a 1.5 base layer and 1mm outer plank. If you do go down the route of getting more timber stockView attachment 358304View attachment 358305 I would recommend you replace the walnut with something like cherry to avoid splitting while bending.
Thank you Bob. The more I’m reading, the more I understand that the veneer supplied in kits would be difficult for me to duplicate the true planking methods as used in actual ship building. I’ve started working on OcCre’s HMB Endeavour, a rather large model (my fourth model) and will probably proceed with their “simpler” way of planking. To teach myself these methods, I’d probably want to work on a much smaller hull and develop my skills.
 
Good morning.
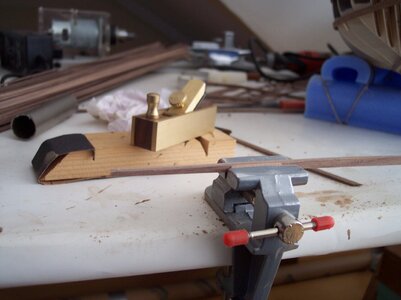
The method I use is similar to the one shown by Dave. With two vices I keep fasten a couple of planks and taper them with a mini-plane, taking care not to reach the jaws of the vice. This way I have two exact planks for both sides of the hull.
Hughs
Jaime rsz_100_2871.jpgrsz_100_2847.jpg
 
Good day, looking for some help on techniques/methods. Started working on my fourth model the OcCre Endeavour. On my previous models I‘ve been taperIng all my planks to a point on both first and second planking. Don’t mind doing it on first planking but wanted to create a more realistic planking as done on real ships. Being a much thinner word veneer used on final planking, what‘s the best way to taper these? Hard to get right shape using knife & straight edge and hard to shape with sandpaper as the plank wants to twist and turn!
Any advice would be great appreciated. Thank you.
1. No planks were ever tapered to a point.
2. Search amazon and other sites for books on planking:there are lots'. The smallest you taper is about 50% of plank width.
 
Mmmm. Second planking uses a veneer. This should be fairly straightforward to taper using a straight edge and Sharpe knife/razor. I use No 11 scalpels for this. Placing the veneer strip on a softish surface like a sitting mat or flat silicon matt and using a metal ruler will help you from straying. Also look at the way the grain runs through the veneer. You want to cut down across the grain Refer diagram. The other way will likely tear the grain and not give you a straight line.
Bending veneer is simple but edge setting is near impossible with the material provided in kits. If you do manage to edge set it is unlikely to be even and will not give you a good result.
Consider spiling. If you know the veneer wood used, get a sheet of the veneer and spile the bow and stern sections of planking rather than using full length planks (which is not prototypical.

View attachment 358402
Personally I only use the .6mm for cosmetic purposes such as lining inner hulls, cabins. Use a 1mm facing plank for the hull, it gives better allowance for sanding. The walnut veneer is also too poor a timber and prone to easy splitting when edge bending (the only bend that is really necessary). I assume it's dirt cheap since the old school manufacturers supply it with every kit as a finishing timber. If you opt for spiling you need to buy sheet timber, you may as well buy 1mm milled in something like cherry and make edge bending more successfully achievable
 
Back
Top