Panart: San Felipe 1:75 Scale Build Log [COMPLETED BUILD]

Nice Catch, looks great - Yep Panart change bits but leave in old bits. The Section between decks had different parts for the photos instructions and the plan instructions and supplied both. Only diff was the plans had you shape parts rather than being lazed or CNC' d At least either way you chose gave the same result. Just different parts,

Excellent job.
 
Thank you Frank, Paul, et al.

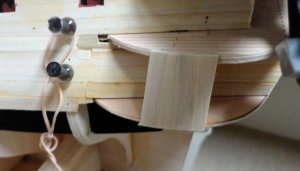
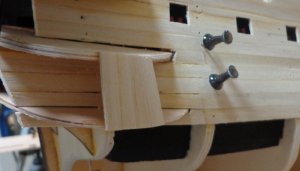
Actually, I probably didn't really need to fill in that gap.
When these items listed are installed, probably, the opening or gap will be covered up anyway.
  1. the Lazer cut outer Bulwark is installed.
  2. the Trim Mouldings at the base of the Gallery where it meets the "gap"
  3. The windows and brass Moldings

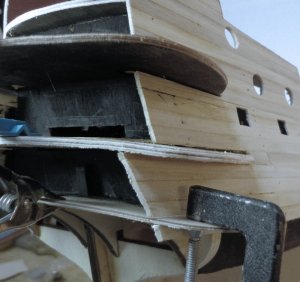
I am sure that at this point, most of it will be covered. So, why did I do this. I just wanted a firm base to work with as I continue to construct the Gallery. Another builder could just cut out a triangle piece of plain stock to fill in. I just too the extra "pains" I guess to make the planking seemless as much as I could.

Frank, I understand how you feel and this is the exact reason why I am documenting all of this, so that folks that are a little apprehensive can go ahead and avoid the pitfalls by using my log. I am not a master builder. I am not a scratch builder. I kinda fit into the intermediate builder I guess.

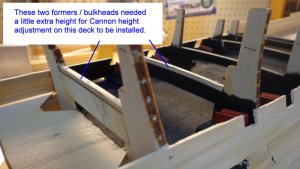
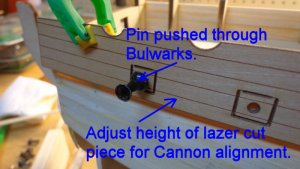
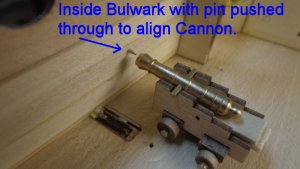
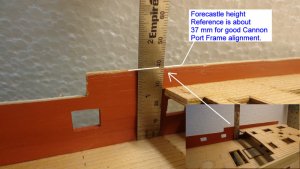
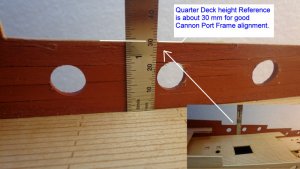
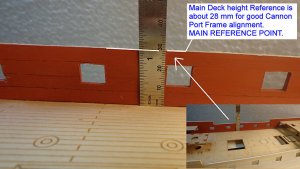
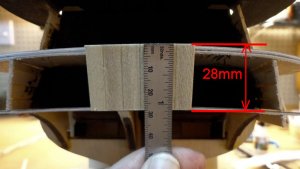
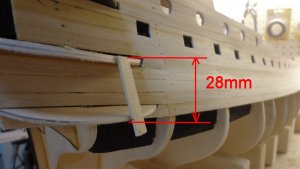
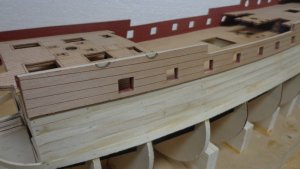
There is only ONE measurement that needs to be taken very seriously and that is at MID SHIP from the Deck to the top of the Lazer cut Bulwark piece. This is the reference for all the Cannons to have perfect alignment. I have done a lot of research and looking at other forum build logs all over and everyone of the builders DID NOT take into consideration the Cannon problem. If you build it going by the "reference" point that Panart says, then your Cannons will woefully not line up to the Port Openings. I have seen one builder on a site that had to grind his Carriage Wheels down to almost the axle - whereas another builder on another forum just scratch built all his Cannon Carriages to a LOWER profile so the Gun will make nice alignment to the port openings.

I will include previous picture here to make sure you get this ONE measurement correct. After this, there is NO reason why you not go ahead with your San Felipe - I encourage you to do so. You will be pleased with the results.

If you follow this carefully, the rest of the build will go together fine. (or at least, I have not had another major problem). But all in all, it is up to you if you wish to pursue the SF. If you have any questions, just contact me - I can help. I am sure that the rigging will pose problems as well, but I am not there yet.

23577

23578

23579
 
Last edited:
I know we should not use capital letters and I am not shouting - but I want to emphasize this very important element:
THIS STEP IS VERY IMPORTANT AND REALLY NEEDS TO BE MENTIONED AT BEGINNING OF BUILD. In order for the Cannons to have proper alignment in the the Port Frame openings, please observe the height measurements taken at Deck level to upper edge of Bulwark. Three different measurements have been made. At the Forecastle, Main Deck, and Quarter Deck.

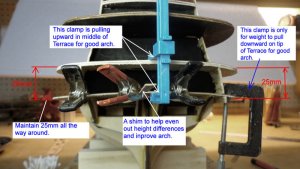
The latter part of this post deals with the correct amount of arch as I could get and making sure it is symmetrical (even) on both sides and has a good smooth arch from end to end.

23580

23581

23582

23583

23584

23585

 
Last edited:
Moving along fast

FYI thought you might like this

http://www.modelships.de/San_Felipe_1690_authenticity/San_Felipe_1690_authenticity.htm

Also there is the ZHL one here

https://translate.googleusercontent.com/translate_c?depth=1&hl=en&rurl=translate.google.com&sl=auto&sp=nmt4&tl=en&u=http://model.airgroup2000.com/viewtopic.php%3Ff%3D33%26t%3D4277%26sid%3D00497723a1e96cd9c42d6e86fcc2bc9b%26start%3D15&usg=ALkJrhhUGEIrdYi3vv6kaCNXPVSLSl_Dsw
 
Paul,
thank you very much for that info. As much as I have tried to find info on the SF, I have not come across these links. Thank you again.

Donnie
 
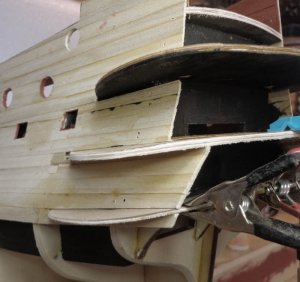
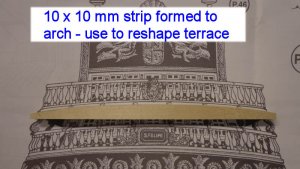
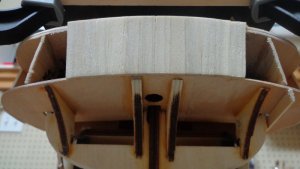
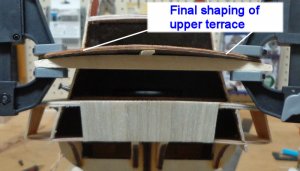
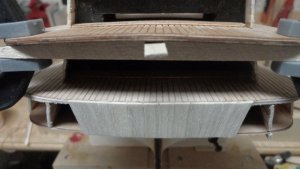
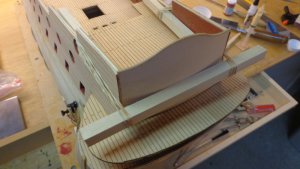
Ok, so the Stern needs some work done to it. Just adding the planked terrace pieces is not enough. I want the terrace to have a good arch to them.

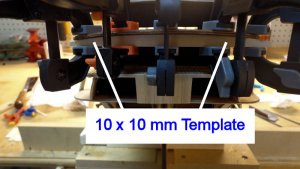
From the plans view of the Stern, I copied the arch onto a 10 x 10mm stick and sanded it (using bench type sander) and made a near exact copy of the arch of the upper terrace. The upper terrace has a little uneven warp to it. This is a quick fix I guess. I used a cotton ball loaded with water and soaked the terrace a little - did not want to overload it as I do not want the two terrace pieces (sandwiched) together by glue to come unglued.

The lower terrace is covered up with 28mm strips. Interesting the plans show to cut "8" mm strips ???? No - not correct. I think they did not add the "2" to make it "28" mm. So it is obvious NOT to follow the plans.

I want to maintain that 28mm all the way around if I can. I have seen some spectacular builds that I could tell the builder put a lot of extra effort into the stern to make sure it was symmetrical in shape.

23586

23587

23588

23589

 
Last edited:
A little more work on the Stern and Terraces before the evening expires. This is about the third treatment (wetting and bending) to the upper terrace as it is a little stubborn. The image shows a lot of arch, but it really isn't - just the angle of camera.

Those are 1.5 x 7mm Limewood strips. I wet them and bend them a little with fingers for the curvature of the Terrace. I used the rubber bands to support each one until dry. Then I glue on using regular wood glue. The CA really hasn't turned out to be that good on this part.

23590

23591

23592

23593

23594
 
Last edited:
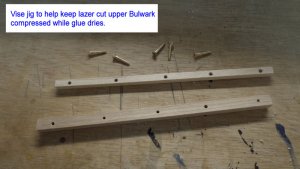
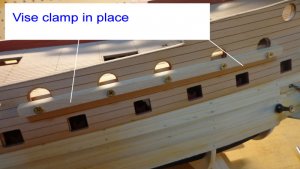
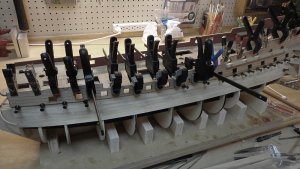
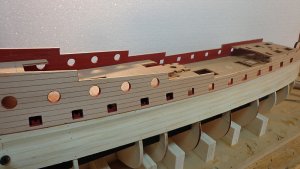
The instructions want you to complete the Hull Planking, but instead, I opted to install the upper Bulwark lazer cut piece. Yes, I know..A lot of clamps. but there were a lot of areas that needed compression.
I made a simple jig to keep the bulwark piece compressed in an area that would be hard to get to with clamps.

23595

23596

23597

Donnie
 
Last edited:
Hi Donnie,I found these links for you

http://suchac-martinsuchy.blogspot.ca/2017/02/panart-san-felipe-spanish-104-gun-man.html?m=1

http://sanfelipe1690.blogspot.ca/?m=1

http://forum.model-space.co.uk/default.aspx?g=posts&t=7440

http://www.lazuli.com/projects/san_felipe/sf_frame_set.html
 
Thank you Zoltan - I really appreciate this very much !!!

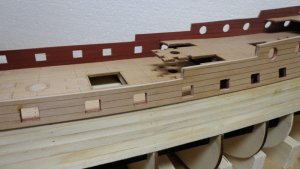
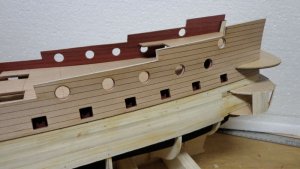
I thought I would clean up the Gun Ports. They do not have to be painted, as the brass ornamentation will cover most all of this, but I like to paint. A little more work on the stern piece making sure it will fit nicely with no major problems. I use a little water to soften things up so that pieces will flex better and seat better. Then I will remove the rubber bands and glue final.

23601

23602
 
Last edited:
I love how clean your work is Donnie, being into weathering and particularly the use of graphite I tend to get everything mucky and think, eeew look at that mess, I wonder if I can do anything to make it look interesting. It is the differences in how we all work that helps to keep it all interesting.
 
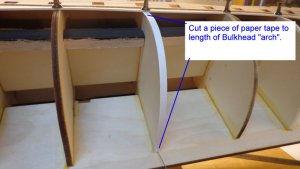
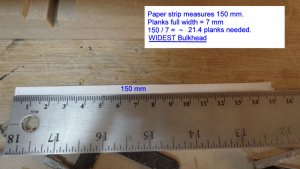
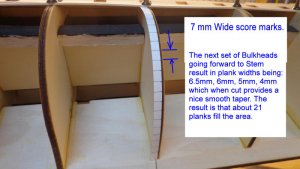
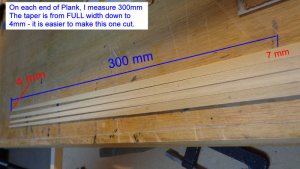
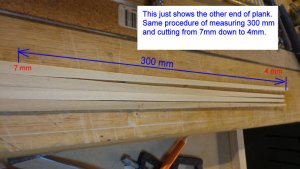
Thank you all for the support and encouragement. I am kind of apprehensive about showing these planking steps because I am trying something new "to me". I am not sure if I am doing this correctly, but it can be changed up a little if I need to. I measured the largest Bulkhead which actually were the two (2) in the mid ship. The Strip measured exactly 150mm. So therefore my planks being 7mm wide, I did the math: 150mm / 7mm = (about) 21.4 Planks to fill in the area at Full width Planks -- and at Mid Ship. (Naturally, the planks will get more narrow as they go fore and aft.) The first Bulkhead was 90mm in length for paper strip. So therefore 90mm / 21.4 planks = about 4 mm width in order to accommodate the area. (that is in a perfect world situation. Roughly 21 planks are going to be used regardless so at the most narrow bulkhead, I am looking about 4mm really on each end. On the left end of plank I measured a width of 4mm. I then measured length 300 mm and put a score mark as this is "Full Width Plank" - I then cut the taper. I repeated for the right side of plank. The hull is basically so symmetrical, it does not matter at this point for at least 10 planks on each side to be cut like this. Then I will re evaluate the situation when I have about 10 planks installed with this same cut taper.

23603

23604

23605

23606

23607

 
Last edited:
HI Donnie

Do the bulkheads go all the way down to a false keel or bottom. The photo looks like they only go part way down.

The planking should go all the way to the keel ( the gar board plank).

Also no bearding or rabbet ?

Sorry but the bulkhead ends appear very far from the keel ( assuming that's the middle one)

Paul
 
Brilliant Donnie, nice clear explanation. I'm aiming to document my first go at planking.

Can anyone help with a question about the taper? I have read conflicting things about it. Or perhaps my confusion comes from the fact the hull is usually upside down when we plank...

Assuming the hull is the right way up, generally would the material to form the taper be taken from the top edge of the plank or from the lower edge?
 
Top edge, the top being the edge that faces the deck, not the keel

The intent is to keep the bottom edge parallel to the keel.

When you hold one plank against and under the other the bow end the full width plank will nearly always overlap at the top and will sometines under lap( hah new term..) at the stern, hence the need for stealers.
I normally cut one plank at a time just in case.
 
Hi Donnie, congratulations you are doing very good job. Which method do you use to taper the planks? Sanding, cutting? How do you do that? Do you use any special jig for tapering? Thanks.

Mustafa
 
The tapers should be symmetrical i.e. if the strip is 5mm wide and the tip/end has to be 2mm wide, 1.5mm needs to be taken off either side from the edges of strip. The roaring question is just how far down the strip must one cut 25, 50, 75mm, that depends on the shape of the bow. Someone, and I think it was Donnie, said they use a strip of card to work out the amount of taper, it is a "suck it and see" situation. I tapered only one side of the strips I was using on my Sovereign and found that there was too much curvature of the strips one way or the other.
I wouldn't suggest tapering all 60 or 80 strips at once, do a few at a time, make sure you have a surgically sharp scalpel for trimming and also take into account beveling the edges of the strips where necessary. paulv1958 said "Just take your time, its a slow process, and apart from rigging is the longest part of the build."
Strips of 1.5mm and thicker, one can be a bit rougher with the cutting/trimming and sanding as there is plenty of "meat". Less than 1.5mm much care is needed.

Hope this is not too much off topic Donnie.

Regards
Eric
 
Back
Top