Nina by Amati

Joined
Aug 26, 2020
Messages
324
Points
238

Location
UK Dorset
Why?
I am fast running out of shelf space! Large, square-rigged models (e.g. Vasa) have such long main yards that they require a shelf so deep that they could share it with a 1950s television set. My first thought was to go for a fore-and-aft rig ship but could not find one that took my fancy. When I looked at the dimensions of the trio Nina, Pinta and Santa maria they seemed to make modest demands on shelf space - especially Nina in her original lateen rig. I have a tall bookcase that stops 550mm short of the ceiling so that could accommodate all or some of these models - thank you Columbus for not adding topgallants.
Several manufacturers offer kits for these models including Artesina Latina, Dusek, Amati and Mantua. I have opted for Amati on the basis of scale, price and appearance. I have not built one of their models before.
Unpacking.
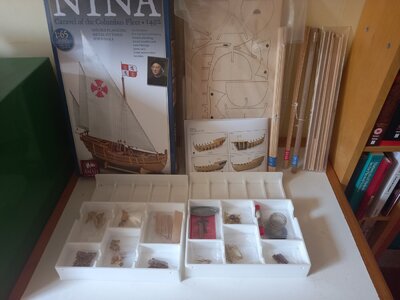
No great surprises in the box: strips, cut plywood, dowels and fittings.
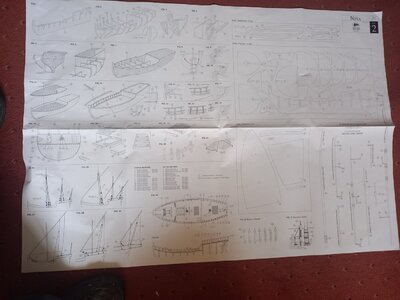
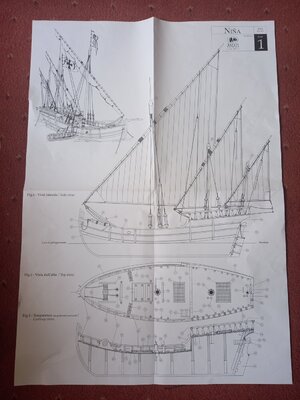
I like the way the strips are labelled for deck, first layer and second layer. Not really necessary for this kit but I remember being confused by the plethora of unlabelled planks of various woods in the Corel Vasa kit. There is a compact, colourful instruction booklet and some 1:1 scale plans that will be useful for taking measurements from. The supply of rigging thread looks rather frugal: a short coil of anchor rope. a coil of black rope for the stays and a bobbin of fine rope for everything else. I hope there is enough. At least there are no ratlines!
Box.jpg plans1.jpg plans2.jpg
 
First Stage planking
Measuring the distances along the edge of the bulkheads from deck to keel showed that they varied almost linearly between 43mm (at bulkhead 2) to 65mm (at bulkhead 7). This suggests that a simple tapering of the planks over this range will require the same number (about 16) on each bulkhead. With the full plank width (4.2mm) on bulkhead 7 the width at bulkhead 2 reduces to 2.8mm. In the horizontal plane the curvature approaching the stem is very modest so the planks do not need to be soaked before bending. This is a pleasant contrast to the problem of bending planks round the bluff bows of "Revenge" in my previous build.
The Amati instructions suggest using small nails to hold the planks while the glue sets but are too penny-pinching to supply any. Fortunately OcCre are more generous and I have plenty left over from Revenge. The instructions suggest using the Amati pin pusher - AKA pin bender. No thanks.
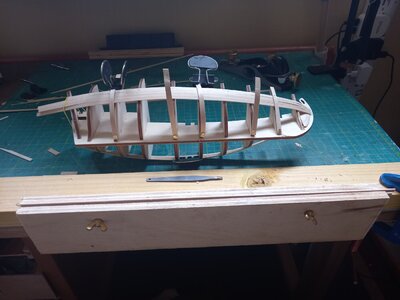
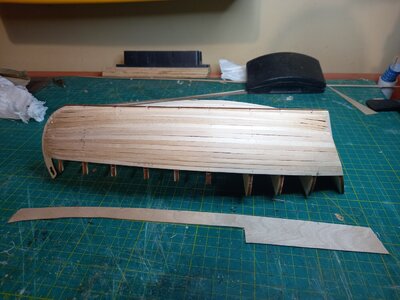
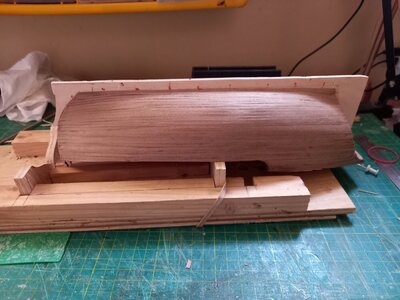
Generally I have used 1mm x 4mm strips of plywood to act as straps to hold the planks in place with occasional use of pins.The first picure below shows the assembled keel and bulkhead structure with a few planks added. In the foreground is the clamp I use for securing the strips for tapering. A spacer inside supports the plank so that only the part to be removed by planing is exposed. The small black tool is part of a manicure set (!) I bought some time ago as a source of rigging tools. I don't know what unspeakable action it performs on a finger nail but it acts as an excellent miniature claw for extracting pins after glue has set.
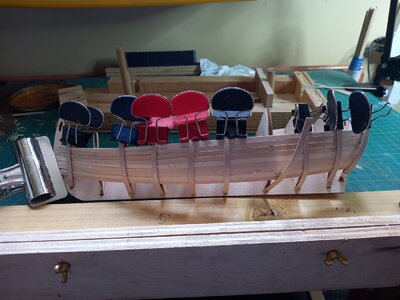
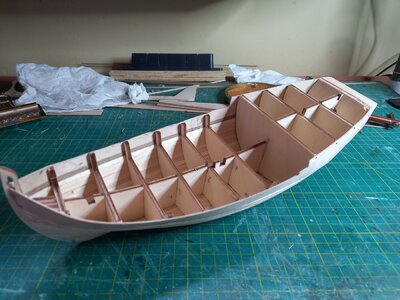
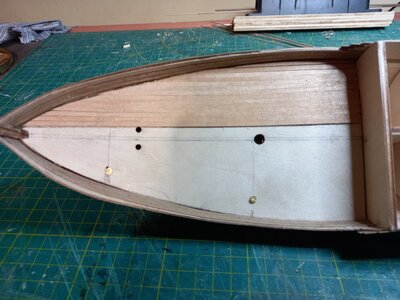
The scond picture shows the continuing process. The predicted tapering worked well until within a few planks of the garboard where a bit of tailoring and shaping was necessary. Aft of bulkhead 7 the planks seemed to fit well without much processing; a minimal amount of sshaping was done as the keel was approached.
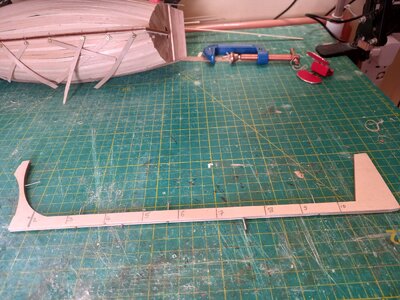
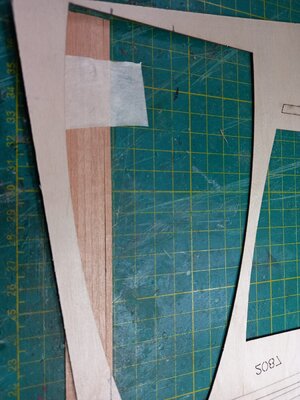
The instructions indicate that the bulwarks above the main deck are formed from three planks that are not glued to the bulkhead extensions - these are subsequently be broken off. Three planks only secured edge to edge over most of their length seemed a bit fragile. Instead I took the option used in all previously built kits of using a shaped piece of 1mm plyywood instead. The roughed out piece is shown in the third picture below.
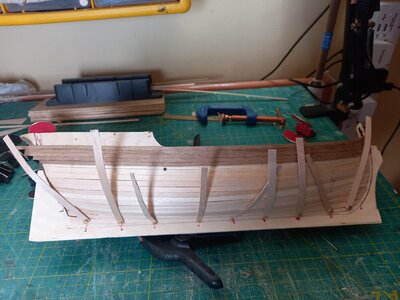
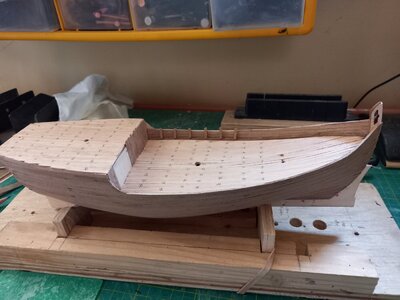
The fourth picture shows the completed first stage planking. There is a strip second stage planking (0.5 x 3 mm) glued along the bottom edge of the plywood bulwalks to give a better match to the thickness of the first stage planks.
firstplank1.jpg firstplank2.jpg

firstplank3.jpg firstplank4.jpg
 
Second Stage planking and deck
There is very liitle keel below the bottom of the bulkheads. After adding the first stage planking there is virtually none. To provide something to which to clamp I cut a section of the plywood sheet from which the keel was extracted and pinned it back to the keel as a temporary false keel. First two pictures below.
The lines that the second stage planking strips naturally wanted to follow on the hull approaching the bow coincided conveniently with where I wanted them to go - with an occasional bit of tapering. Some inserts were needed amidships as the keel was approached but otherwise it was all straightforward. With hindsight I realised that I had forced the planks to turn up a little more than they wanted to towards the stern This led to a bit of "clinkering" that could not be completely removed by sandpapering as the strips are only 0.5mm thick.
After using about sixty planks to cover the hull, line the bulwarks and clad the transom I had only two complete strips left over. This was a bit tight and led to concerns that I might not have enough. A minor stress that would be avoided if Amati were not so parsimonious in their supply of materials. (Never a problem with OcCre!) I don't think I was wasteful and, fortunately (see later) I kept all the trimmings from the ends. It reminded me of the scenario where one is painting a room and contantly comparing the area covered with the area left and the level in the tin - shall I have to buy another can just to finish off?
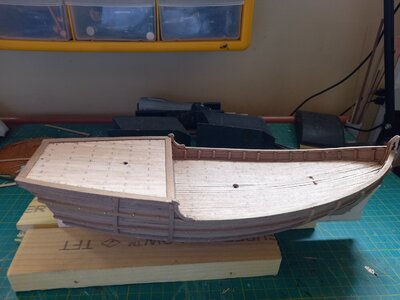
The deck planks are laid on a pre-cut piece of 1mm plywood. Ideally I would have planked it on the bench, trimmmed the edges and then fitted it. However, the deck curves upwards significantly towards the bow and I thought it might be a bit too stiff to bend with planks added. It also needed pressure to hold it while the glue set. In the end I glued and screwed the plywood in place and planked it in situ after removing the screws. I used the hole in the sheet from which the deck was cut to trim the planks before adding them.
The instructions say to clad the break of the quartedeck bulkhead with 1x4mm strips but the only strips with this profile are first stage planks. I used the trimmings from the second stage planking instead so as to present a walnut face. The last picture below shows the ongoing process of marking up the decks and cladding the bulkhead.
keel.jpg 2ndplank1.jpg

2ndplank23.jpg deck1.jpg

deck2.jpg Deck3.jpg
 
Great log, but this build seems a bit 'nip & tuck' with the materials provided and a beginner would be struggling. Looking great.
 
Good looking ship you have under construction, keep the photos coming.

I love to build the small battle stations and cross sections as they take less space on the shelf.
 
It all looks good to me. Fortunately for me I never throw a scrap of wood away and buy an assortment of extra whenever I can so I always have a pretty diverse stash on hand. My shop looks like the cat-lady hoarder's hideaway. Fortunately, no cats.
I am very impressed with what I see and can't wait to see the finished model. Very nice thus far!
 
I like the way you used the hole left by the false deck as a template for the deck planks. Thumbsup
The obvious is seldom apparent to me unless somebody else sees it first. Thanks for the tip!

Pete
 
Second Stage planking and deck
There is very liitle keel below the bottom of the bulkheads. After adding the first stage planking there is virtually none. To provide something to which to clamp I cut a section of the plywood sheet from which the keel was extracted and pinned it back to the keel as a temporary false keel. First two pictures below.
The lines that the second stage planking strips naturally wanted to follow on the hull approaching the bow coincided conveniently with where I wanted them to go - with an occasional bit of tapering. Some inserts were needed amidships as the keel was approached but otherwise it was all straightforward. With hindsight I realised that I had forced the planks to turn up a little more than they wanted to towards the stern This led to a bit of "clinkering" that could not be completely removed by sandpapering as the strips are only 0.5mm thick.
After using about sixty planks to cover the hull, line the bulwarks and clad the transom I had only two complete strips left over. This was a bit tight and led to concerns that I might not have enough. A minor stress that would be avoided if Amati were not so parsimonious in their supply of materials. (Never a problem with OcCre!) I don't think I was wasteful and, fortunately (see later) I kept all the trimmings from the ends. It reminded me of the scenario where one is painting a room and contantly comparing the area covered with the area left and the level in the tin - shall I have to buy another can just to finish off?
The deck planks are laid on a pre-cut piece of 1mm plywood. Ideally I would have planked it on the bench, trimmmed the edges and then fitted it. However, the deck curves upwards significantly towards the bow and I thought it might be a bit too stiff to bend with planks added. It also needed pressure to hold it while the glue set. In the end I glued and screwed the plywood in place and planked it in situ after removing the screws. I used the hole in the sheet from which the deck was cut to trim the planks before adding them.
The instructions say to clad the break of the quartedeck bulkhead with 1x4mm strips but the only strips with this profile are first stage planks. I used the trimmings from the second stage planking instead so as to present a walnut face. The last picture below shows the ongoing process of marking up the decks and cladding the bulkhead.
View attachment 389817 View attachment 389818

View attachment 389819 View attachment 389820

View attachment 389821 View attachment 389822
Rudder fittings.
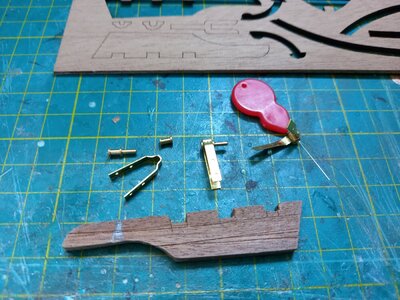
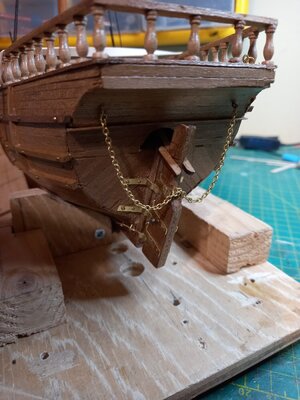
The rudder fittings in this kit are superb and better than any I have encountered in previous builds. The straps are robust but still thin enough to bend to the required shape. Pintles are supplied. they are solid brass with flanges to keep them in place under the straps. A marked contrast to the usual expectation that one should make one's own pintles out of fiddy bits of cut wire. There are even some breass bushes, also flanged, to fit under the hull straps. I gather these fittings can be bought from a model shop for about £1.50 per pair. Worth considering for future build of kits with lesser fittings.
The rudder itself is formed from two layers from a pre-cut sheet of 2mm oak. Not avery good match for the walnut hull. I used one layer from the sheet sandwiched between two 1mm layers of walnut trimmed to shape. The rudder restraint is a length of rope in the instructions but I chose to use a prettier length of (OcCre leftover) chain.
Rudder1.jpg rudder2.jpg
 
This is a great log with lots of useful information, generally and universally. Thanks for the detailed coverage.
 
Hull and deck trim
I think there may have been an emboxing error with this kit. It contained four strips each of 2x2 mm and 3x2 mm walnut. The former is used for two strakes on each side, 26 posts reinforcing the bulwalks and four belaying rails. I ran out well before completing these. The 3x2 is used for one wale on each side; the remaining two pieces were unused. A 6/2 distribution of thse strips would have been better than 4/4. OcCre to the rescue with some left overs.
The perimeter of the quarter deck is framed with 1mm thick strips to form the base of the surrounding rails. The side and stern pieces are pre-cut from plywood. This would leave a line of plywood edge visible round the top of the quarter deck. Ugly! The strip across the fwd end of the quarterdeck is a piece of first stage plank. I chose to cut the entire frame from 1mm solid walnut.
On the outside of the hull the 'fenders' (vertical srips crossing the wales) are to be built up from 2 or three layers of deck planking. Nah! I plundered my walnut supplies so as to match tha wales. The illustrated instructions show the wales studded with brass pins - not supplied in the kit.
The top of the bulwalks and the rails round the side and stern of the quarterdeck are formed from pre-cut pieces from a sheet of 2mm thick oak: very nice. But the fwd end of the quarterdeck rail is a piece of first stage panking! I managed to salvage a substitute from the remains of the precut sheet. Amati could easily have included this as a precut piece.
Gratings
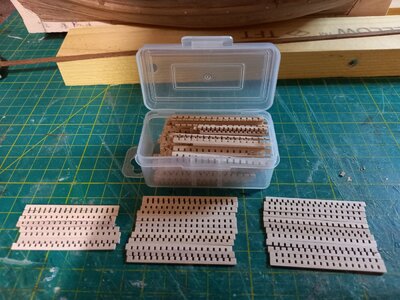
The instructions depict a main deck grating with 12 slats athwartsips and 7 fore and aft; The quarterdeck grating has 12 slats athwart and 9 fore and aft. Total strips 40. Strips supplied = 30. The problem would be soluble by cutting twelve strips into two unequal parts and using the shorter part on the main deck and longer part on the quarterdeck. What a faff!. In the foreground of the picture below is the supply of grating strips in the kit. In the background the plastic box contains generous left overs from previous kits - same size and pitch. I assempled the gratings from whole strips and then trimmed to size.
Wales.jpg Gratings.jpg
 
I very much like all your wood choices and substitutions. She's making up into a very attractive, aesthetically pleasing model. Great kit bashing.Okay
A little hoarding compensates for a multitude of factory fresh errors. Thumbsup
 
Rigging.
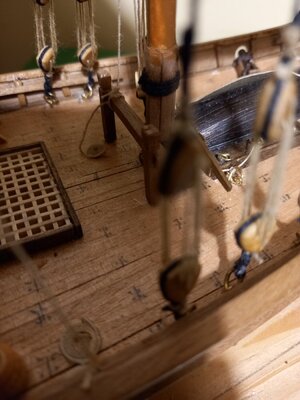
The fixed ends of most rigging lines, including the shrouds, are secured to rings passing through the eyes of ringbolts inserted into the deck. The rings are made of very thin, soft brass wire: they can easily be opened with a fingernail. I was concerned that any rigging under tension would pull through the gap so I closed them up with a small overlap beteen the ends. Attempts to apply solder were a failure. For the shrouds I made some rings from thicker wire.
Warned by SOS member Itwbluey about a possible shortage of thread (thanks!) I used lookalike thread from stock where uniformity is not an issue (e.g bindings and robands) and reserved the kit supply for the running and standing rigging.
This ship has a very simple rig with three lateen sails and no ratlines. There are just haliards, sheets, tacks and vangs.
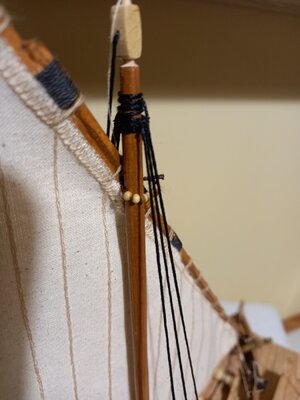
The tiny parrel beads are impressively turned from wood rather than being glass beads as provided in all previous kits I have built.
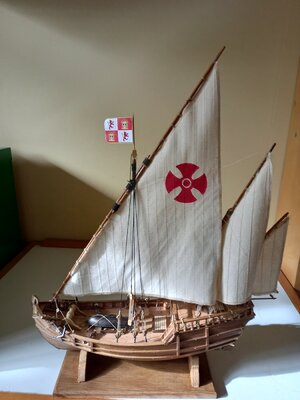
Accordingto the illustrations there should be eighteen beads: 6 per mast. The parts list states 12; the packet contained 11. The bonaventure mast will have to make do with a simple strop. Like all the other materials, the sails were of good quality with well defined stiching to mark the seams. The cross on the mainsail was marked by a printed outline to be filled with paint - see final pictures later.
The appropriate omission of belaying pins from a model of this era made tensioning and tying the ends of rigging lines very easy.

eyebolts.jpg Parrel.jpg
 
I've become a doting fan of this build, this little ship and its' historic period. Something that had hitherto escaped my interest. You have really captured my attention, both for the elegant simplicity of this small, seaworthy craft, and for the high quality of your equally elegant craftsmanship.

I will continue to follow with the greatest interest. And to see where you go next!Thumbsup

Pete
 
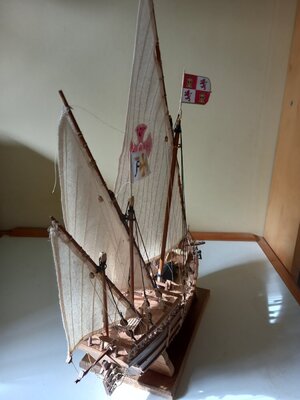
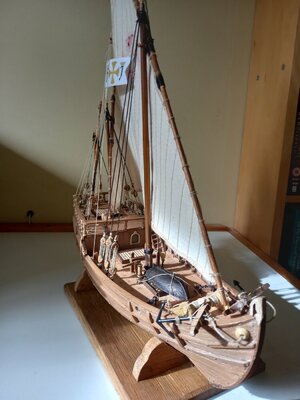
Nina Completed
Warning: Viewers of a historical accuracy tendency may find some images in this post distressing.
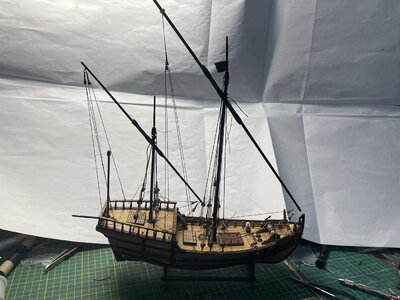
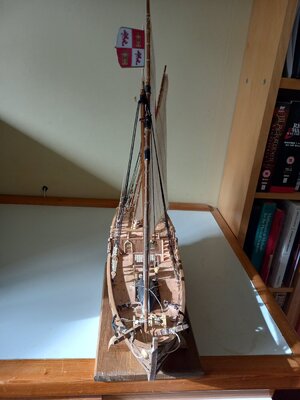
The model has a plywood keel; below the deck the bulkheads are solid; the ship is held together with glue: it is a display model, not a small scale replica. I shall lose no sleep because, under the paint, the ship's boat is metal, not wood. The brass fittings have not been blacked to simulate iron. I have, however, replaced the cast metal cannon carriages with wood. For me, the bottom line is that I enjoyed the building. There was very little repetetive work: no ratlines and only two cannon. The absence of a bowsprit was convenient; they get a bit vulnerable on my small workbench.
This is a very pleasant kit with good quality fitting and materials. It is let down by the paucity of some items. For a few cents more it could have included a more generous supply of second stage planks and an adequate supply of 2x2 mm walnut strip. One strip each of 3x1 and 4x1 walnut for some hull trimmings would have been better than having to use first stage planks or deck planks. There were no pins: £1.30 for a packet of 100 would not have broken the Amati bank.
Fortunately I could make good these deficiencies with left-overs from other builds. Amati almost lost about £200 of future sales as a result of these niggles but were saved by my discovery of the inferior quality of an opposition kit..
Done1.jpg Done2.jpg Done3.jpg
Done4.jpg
 
Back
Top