I love the fact that it’s scratch. You gotta like the challenge.
You are using an out of date browser. It may not display this or other websites correctly.
You should upgrade or use an alternative browser.
You should upgrade or use an alternative browser.
My little Victory
- Thread starter Martin555.
- Start date
- Watchers 34
Great work so far Mike. I take my hat off to any builder who is ‘scratch building’. It takes considerably more skill than parts precut etc.
I’ll watch your build with interest- my next build is a Caldercraft Victory.
Regards
PeterG
I’ll watch your build with interest- my next build is a Caldercraft Victory.
Regards
PeterG
This build is going to be pure fun.
Thank you guys for the Likes and your wonderful comments.
Hi Hoss6262,Martin, Very nice work on your "mini Victory". I would not even know where to begin with a project with the level of miniaturism that you have taken on. Well done!
This build is only for a bit of fun.
As it is only a representational model of HMS Victory there will be details missing but hopefully it should still look descent.
Hi Guys,
I had to put a little paint on to see what the hull bottom would looks like, so a little copper paint had to do instead of proper copper sheet panels because, ‘Yes you guest it I don’t have the proper materials’.
I may do a little weathering on the copper later.
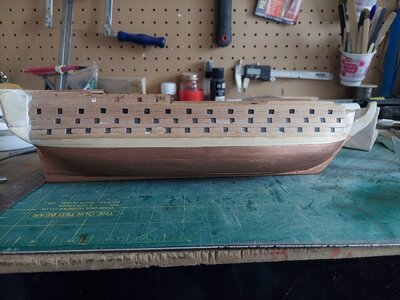
I hope to post a little more on this little project this afternoon.
I had to put a little paint on to see what the hull bottom would looks like, so a little copper paint had to do instead of proper copper sheet panels because, ‘Yes you guest it I don’t have the proper materials’.
I may do a little weathering on the copper later.

I hope to post a little more on this little project this afternoon.
Hi Guys,
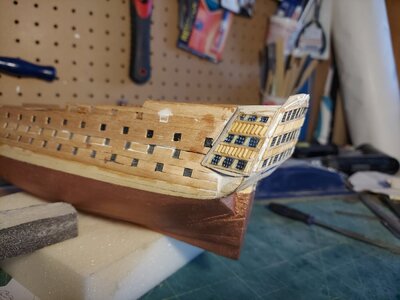
I have now got to the part that decides if I can carry on with this build or not ‘ the stern and side galleries ‘ as this is quite an iconic part of the ship.
Again I have to make this with what ever materials I can find.
Firstly I drew out the shapes of the Transom and side galleries on a piece of paper then I googled Victory’s transom on the computer.
Then I placed the paper on the computer screen turned up the brightness so that I could see the image through the paper and resized the picture to match the shape as close as I could and then traced the main features on the paper. (just a little trick I use)
Then transferred some lines onto the wood.
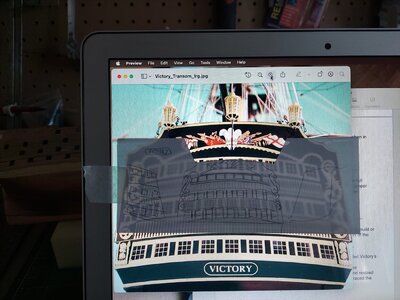
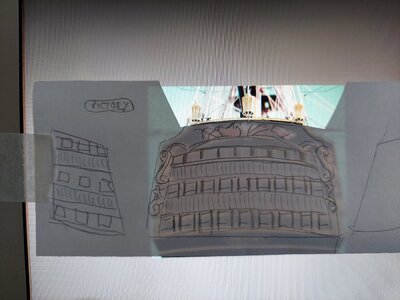
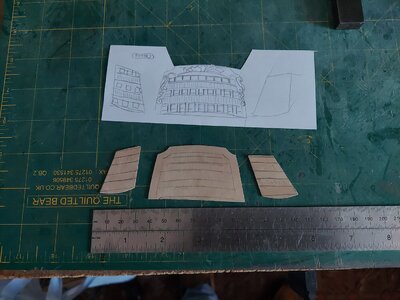


Hi Guys,
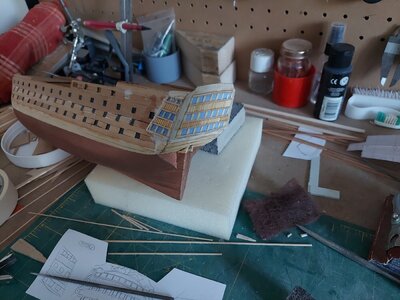
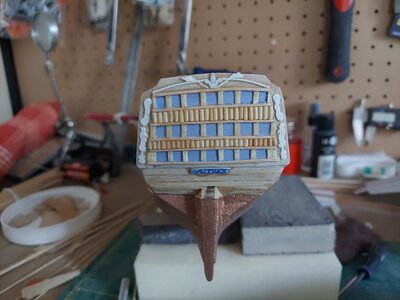
Now the fun begins how do I replicate this iconic transom.
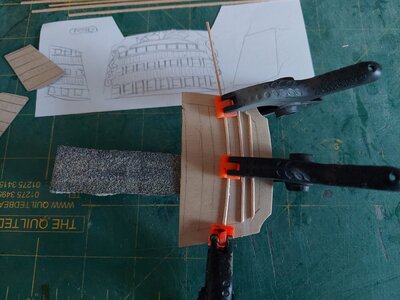
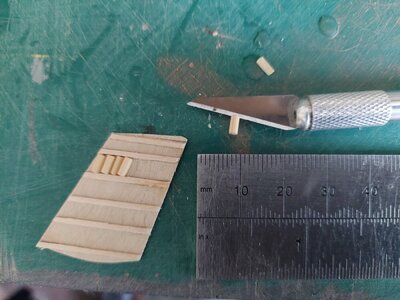
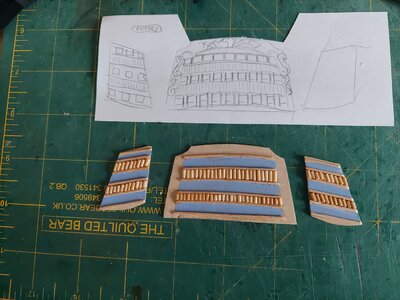
I cut and fitted some thin strips of wood to separate the windows from the other bits.
To make the Balustrade’s (I think that is what they are called. I cut small lengths of cocktail stick then split them down the middle then trimmed and fitted them.
They do not look correct but if you close one eye and look at it from a distance with the lights out it then look’s right.
As you can see I painted where the windows would be so that I did not get confused.
It should look ok when this bit gets finished (hopefully)


Hi Guys,
Now the next tricky bit is to make the windows frames.
I cut and fitted some strip’s of wood to make the spaces in-between the windows then I tried all sorts of things to make the window pain frames out of but no matter what I could not get them small enough so I thought I would leave them as they were until I think of something.
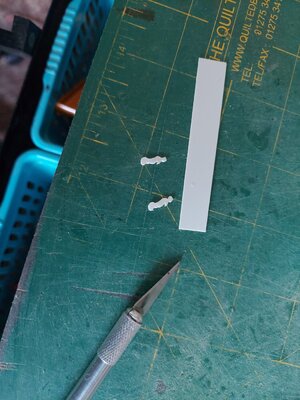
The next job was to make some sort of fancy edging around the Transom for this I cut a strip of plastic from a Yogurt pot and tried to make something that looked similar to Victory’s carvings.
Still more work to do on this Transom but I am getting there.


No printer huh?Hi Guys,
I have now got to the part that decides if I can carry on with this build or not ‘ the stern and side galleries ‘ as this is quite an iconic part of the ship.
Again I have to make this with what ever materials I can find.
Firstly I drew out the shapes of the Transom and side galleries on a piece of paper then I googled Victory’s transom on the computer.
Then I placed the paper on the computer screen turned up the brightness so that I could see the image through the paper and resized the picture to match the shape as close as I could and then traced the main features on the paper. (just a little trick I use)
Then transferred some lines onto the wood.
View attachment 336123View attachment 336124View attachment 336125
Hi Phil,No printer huh?
Unfortunately I do not have a working printer.
In fact I do not even have any electrical tools.
Everything I do is by hand.
Maybe one day I will be able to afford such luxuries

Hi Guys,
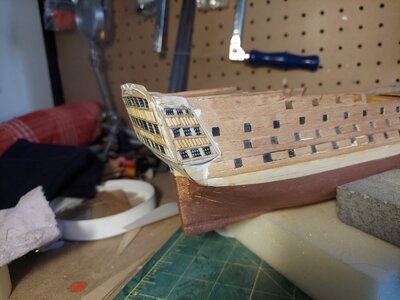
Back to the windows.
I could not believe my luck when I discovered that a Net Curtain had the square mesh that would do the trick.
I thought to myself ‘how do I cut the small pieces out of the curtain without the wife noticing'.
And then I came up with a plan, if I cut them out all jagged then it would look like the curtains had been eaten by moths LOL!!
All joking aside my wife had some spare net curtain with the same size squares.
So I painted it black and then cut and fitted them.
Also twisted some thin electrical wire and fitted around the outer edge of the Transom.
I think it is looking something like it should, maybe it will look better when it is painted.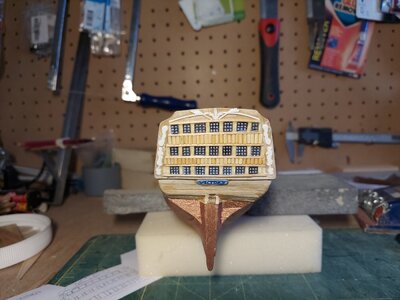
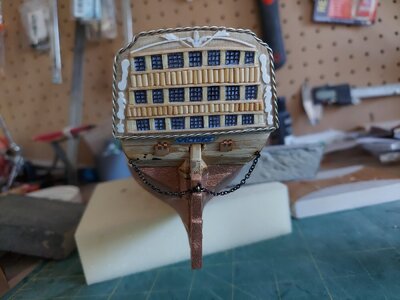
Now on to the rudder.
My spares box came in handy again as I needed some small chain and some brass strip for the hinges.
This was also painted black.
The main paintwork will be done later as I want to get this tricky stuff done and out of the way.
Back to the windows.
I could not believe my luck when I discovered that a Net Curtain had the square mesh that would do the trick.
I thought to myself ‘how do I cut the small pieces out of the curtain without the wife noticing'.
And then I came up with a plan, if I cut them out all jagged then it would look like the curtains had been eaten by moths LOL!!
All joking aside my wife had some spare net curtain with the same size squares.
So I painted it black and then cut and fitted them.
Also twisted some thin electrical wire and fitted around the outer edge of the Transom.
I think it is looking something like it should, maybe it will look better when it is painted.


Now on to the rudder.
My spares box came in handy again as I needed some small chain and some brass strip for the hinges.
This was also painted black.
The main paintwork will be done later as I want to get this tricky stuff done and out of the way.
Hello Martin, your victory will be nice. For one thing, I think the 1/200 scale is way too small for me, so hats off. I also find it admirable to build such a beautiful model without electrical aids. Just great.
Hi Tobias,Hello Martin, your victory will be nice. For one thing, I think the 1/200 scale is way too small for me, so hats off. I also find it admirable to build such a beautiful model without electrical aids. Just great.
Thank you for your nice comment.
Altho I may have bitten off more than I can chew with this model.
I used to have some electrical tool but I have not replaced them as they packed up one by one.
I suppose I should save some money and purchase some new electrical tools but then again I seem to manage without them.
Hi Guys,
It was at this stage I thought I had better make a stand for the boat.
I did not want to make anything that be over the top as I thought minimum is the way to go.
After looking at the stand that I had made I thought it looks a bit bland.
‘It needed something’.
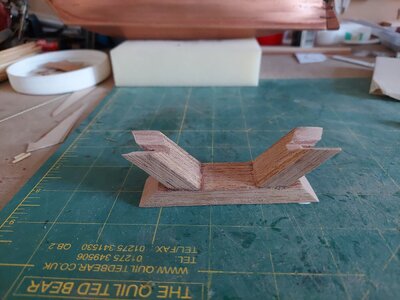
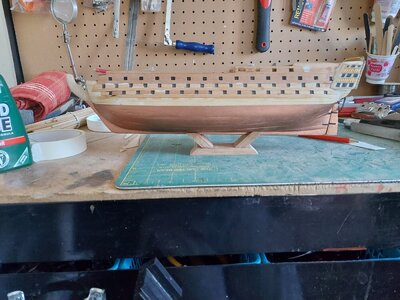
looking around for simple ideas I then thought a Dolphin will do the trick.
I drew around the shape of the stand then using my computer screen trick Found a Dolphin to copy, placed paper with the shape of the stand onto the screen and enlarged the Dolphin to fit.
Drew the Dolphin shape onto the paper, cut it out transferred it to the wood.
Cut it out with a fret saw and shaped it and glued it to the stand.
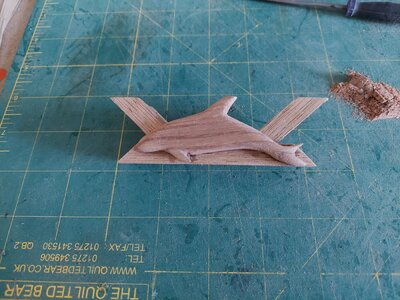
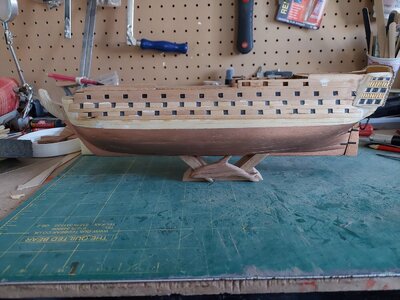
A quick coat of Varnish and thought to myself ‘that will do’.
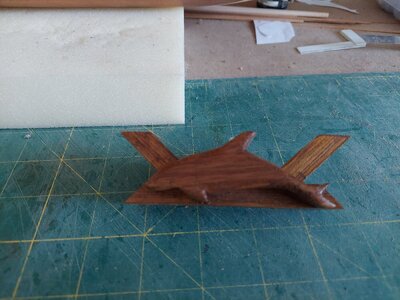
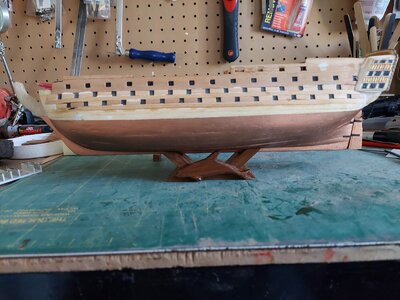
It was at this stage I thought I had better make a stand for the boat.
I did not want to make anything that be over the top as I thought minimum is the way to go.
After looking at the stand that I had made I thought it looks a bit bland.
‘It needed something’.


looking around for simple ideas I then thought a Dolphin will do the trick.
I drew around the shape of the stand then using my computer screen trick Found a Dolphin to copy, placed paper with the shape of the stand onto the screen and enlarged the Dolphin to fit.
Drew the Dolphin shape onto the paper, cut it out transferred it to the wood.
Cut it out with a fret saw and shaped it and glued it to the stand.


A quick coat of Varnish and thought to myself ‘that will do’.


Hi Guys,
Now to do a little on the front end sorry Bow.
Not a very productive day model wise as I had to make an outdoor planter box for the wife.
But I did manage to do a little bit of model making.
Using some grating wood from my spares box and some strip wood I made and fitted the lower bow grating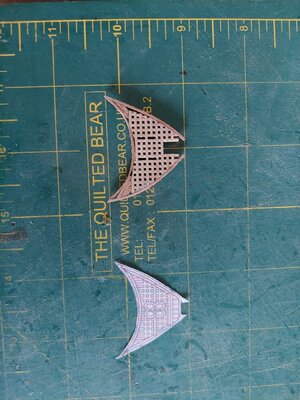
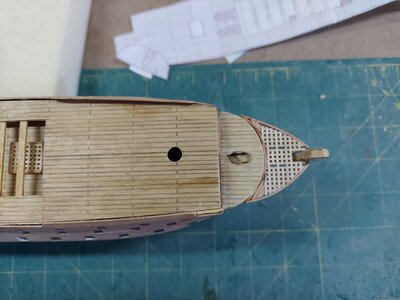
(I don’t know what this part is called.)
Now to do a little on the front end sorry Bow.
Not a very productive day model wise as I had to make an outdoor planter box for the wife.
But I did manage to do a little bit of model making.
Using some grating wood from my spares box and some strip wood I made and fitted the lower bow grating


(I don’t know what this part is called.)
Thank you rtibbs.Nice touch with the dolphin
Hi Guys,
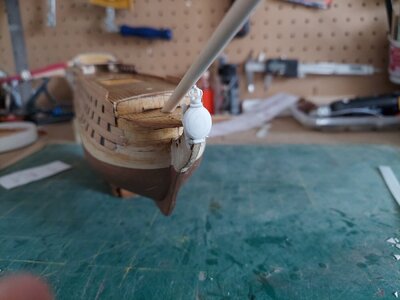
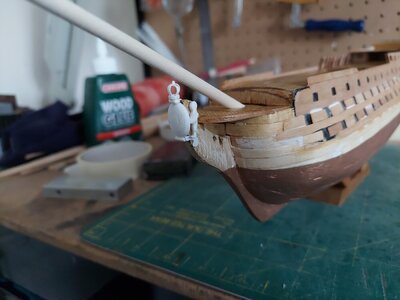
Now the bit I have been looking forward to having a go at.
HMS Victory’s Figurehead.
I had to glue layers of Yogurt pot together to get the thickness required.( this time Cherry Flavour )
)
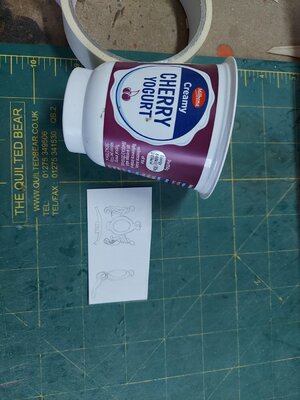
Then I sanded down to get the shape of the shield then cut out layer of Yogurt pot again to make the little guys.
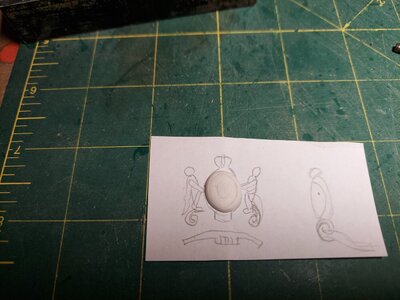
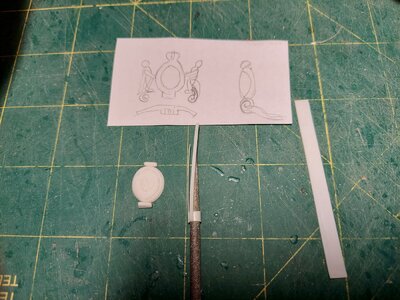
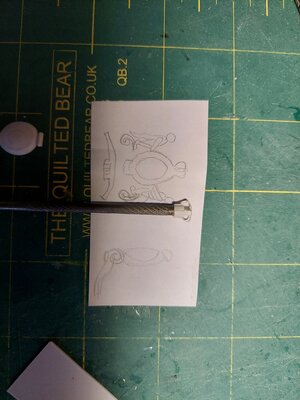
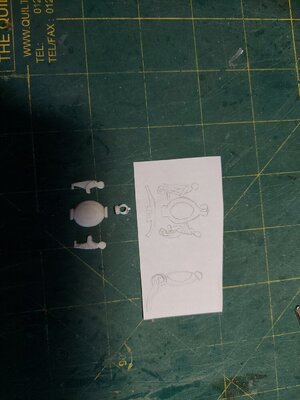
After a bit of tinkering a managed to make something that looked like the Figurehead.
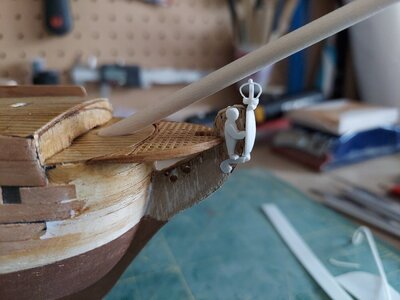
Added some twisted fuse wire around the outer edge of the shield.
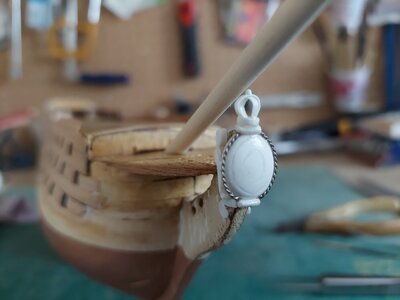
If this had been a bigger model I would of put more effort into trying to get this ship more detailed and to scale.
I might do a bit of tweaking later.
The stick poking out where the Bowsprit will be is a bit of a wooden knitting needle that will be used as the lower end of the Bowsprit, it is only in place at the moment to protect the Figurehead crown from getting damaged.
Again I will do the painting at a later date.
Now the bit I have been looking forward to having a go at.
HMS Victory’s Figurehead.
I had to glue layers of Yogurt pot together to get the thickness required.( this time Cherry Flavour

Then I sanded down to get the shape of the shield then cut out layer of Yogurt pot again to make the little guys.


After a bit of tinkering a managed to make something that looked like the Figurehead.


Added some twisted fuse wire around the outer edge of the shield.

If this had been a bigger model I would of put more effort into trying to get this ship more detailed and to scale.
I might do a bit of tweaking later.
The stick poking out where the Bowsprit will be is a bit of a wooden knitting needle that will be used as the lower end of the Bowsprit, it is only in place at the moment to protect the Figurehead crown from getting damaged.
Again I will do the painting at a later date.
It's so difficult making details in such a small model with such course grained wood.


