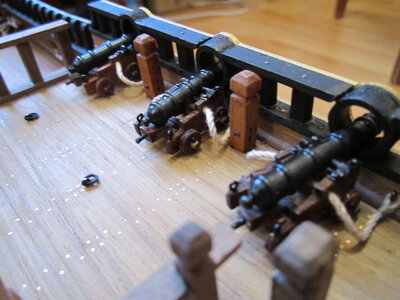
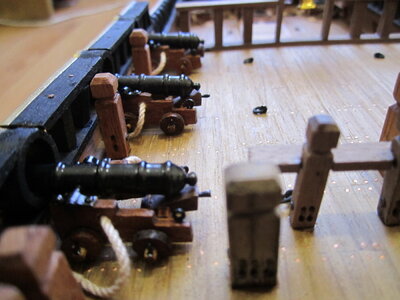
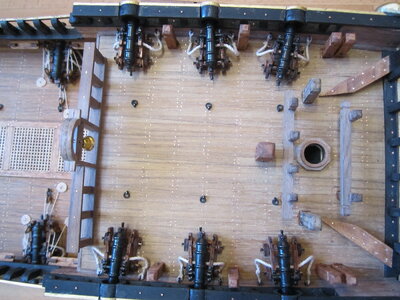
I personally preferred red carriages. This was, after all, Louis XIV's ship, and he was the Sun King. The ship is named after him. Red is typically the color for artillery. And this was a blingy ship. Bronze barrels were expensive, but lighter, which would be a great commodity on a ship, especially for a ship carrying so many guns. I've read somewhere that the SR had bronze guns.
You are using an out of date browser. It may not display this or other websites correctly.
You should upgrade or use an alternative browser.
You should upgrade or use an alternative browser.
Longlegs55 builds ZHL Soleil Royal
- Thread starter Longlegs55
- Start date
- Watchers 14
- Joined
- Mar 12, 2021
- Messages
- 97
- Points
- 88

cheers vic
probably go that way then, will see what carriages look like if I get them from Max!
Thanks again,
Neil
probably go that way then, will see what carriages look like if I get them from Max!
Thanks again,
Neil
Are you buying different carriages? Or were you shorted some?cheers vic
probably go that way then, will see what carriages look like if I get them from Max!
Thanks again,
Neil
- Joined
- Mar 12, 2021
- Messages
- 97
- Points
- 88

vic,
I have no carriages at all!! But Max is posting some to me.
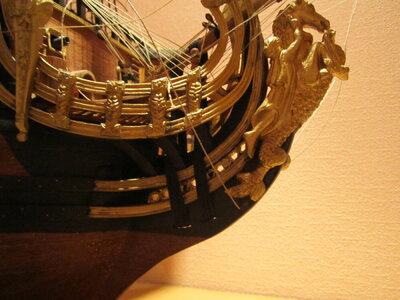
Whilst i'm on, am I correct that part 53 on the bow has no supporting framework? Does it just "float" in the air?
Looks like i might have to buy some sheet to make some frames if that is the case. And I was just going to "build out the box"!
Are the cannons with "tails" correct? I've never seen anything like them before but if correct I'll keep them if not, expenses are starting to run away as I've already bought a load of "little" upgrades that I had no intention of buying!
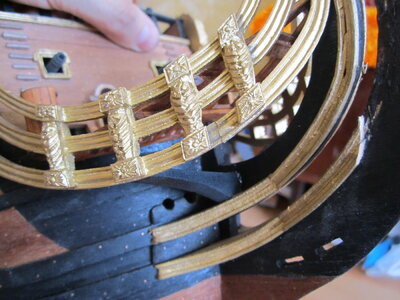
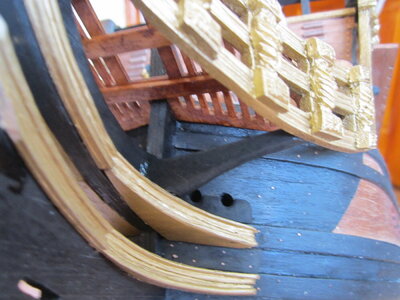
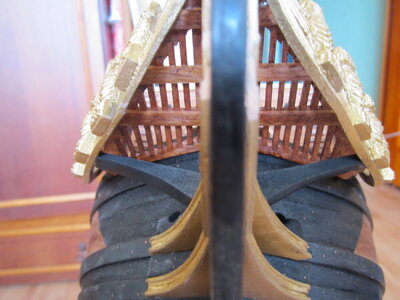
It’s hard to believe that they didn’t include the walnut sheet with laser cut carriages. Can you take a picture of part 53? Is it the grate or the swooping metal pieces? The head grate did not have a support structure from ZHL. I believe the two swooping metal pieces attach to the head grate and provide some support. Andrey @Mr.Deep did Build some supports for his SR. You might find that somewhere in my log. I don’t think he had an SR build log. But he did respond to mine and I think at @paulb. Again, a picture would be handy.
When you add the swoops to the sides of the bow, make sure you use the heat gun. Six seconds and they’re pliable enough to bend.
Concerning the tails on the upper deck guns, a lot has been discussed concerning them. I think Andrey and Paul may have cut off the tails. I read somewhere they were 8 pounders. Several bought new carriages and guns. I couldn’t afford to make any more changes after adding sails and a bunch of blocks for the extra sail rigging. Both Gilbert and I went with the kit supplied guns and carriages. I’m sure Kurt @DARIVS ARCHITECTVS would have changed them all out. If you keep them and bend the tails, by all means, please use the heat gun you will have to buy. The tails WILL break.
- Joined
- Mar 12, 2021
- Messages
- 97
- Points
- 88

thanks Mr Deep and Vfordyce, you are both correct about the frames i was talking about it just seems strange that none are included in the kit
I thought it was just a step (another) that was missed on the instructions but thats been cleared up now thanks.
Mr Deep, did you just cut off the tails and then make your own carriages? They look really good and if my assumption is right then i would have no need to buy any different barrels.
Thanks everyone for the continued advice. On a side note, I have just received a load of 7mm fleur de lis for the gunport doors. they a REALLY small!
They are small, but I personally like the way they look.thanks Mr Deep and Vfordyce, you are both correct about the frames i was talking about it just seems strange that none are included in the kit
I thought it was just a step (another) that was missed on the instructions but thats been cleared up now thanks.
Mr Deep, did you just cut off the tails and then make your own carriages? They look really good and if my assumption is right then i would have no need to buy any different barrels.
Thanks everyone for the continued advice. On a side note, I have just received a load of 7mm fleur de lis for the gunport doors. they a REALLY small!
- Joined
- Mar 12, 2021
- Messages
- 97
- Points
- 88

sorry this is such a slow build!!
Finally started the first planking which is slowly coming along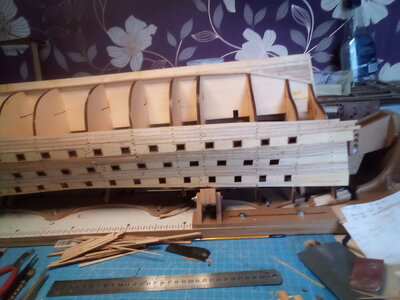

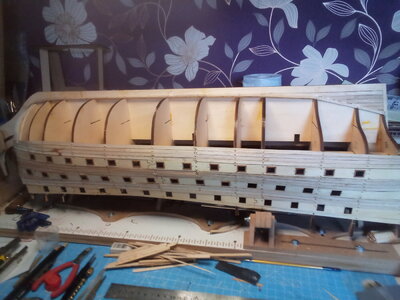
things havent really been helped by a 4 year old who is frightened of every noise and will insist on sitting on my lap when I am trying to work on the model!!
This is the 4 year old in question . she is a rescue dog who had been battered to an inch of her life and then abandoned with no food or water for about 3 weeks.
we got her at a year old and she is the most loving creature you could imagine!
Finally started the first planking which is slowly coming along


things havent really been helped by a 4 year old who is frightened of every noise and will insist on sitting on my lap when I am trying to work on the model!!
This is the 4 year old in question
 . she is a rescue dog who had been battered to an inch of her life and then abandoned with no food or water for about 3 weeks.
we got her at a year old and she is the most loving creature you could imagine!
- Joined
- Mar 12, 2021
- Messages
- 97
- Points
- 88

as a foot note. Big up to Max at ZHL. sent me the missing gun carriage sheet striaght away and I received them within a week.
Brilliant customer service!
Brilliant customer service!
Good service is good advertising.as a foot note. Big up to Max at ZHL. sent me the missing gun carriage sheet striaght away and I received them within a week.
Brilliant customer service!
- Joined
- Mar 12, 2021
- Messages
- 97
- Points
- 88

so, first planking completed up to gun port level, now just need to trim fill and sand several times.
Now gentlemen and ladies, we need to discuss the HUMPS! Are there any actual dimensions anywhere, I can't find any, or is it just a case of suck and see and hope for the best.
I know there are some small, very, structures that are built to into the gallery structure but that seems to be about it.
Any advice on the best way to go about building them would really be helpful. I have built some copy parts and attempted building off ship but trying to bend the 2mm, i'll call it balsa, over the structure even after soaking and steaming is useless.
Please help,
Cheers,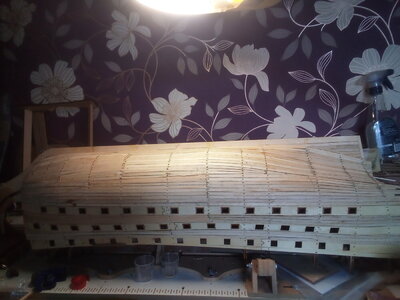 Neil
Neil
Now gentlemen and ladies, we need to discuss the HUMPS! Are there any actual dimensions anywhere, I can't find any, or is it just a case of suck and see and hope for the best.
I know there are some small, very, structures that are built to into the gallery structure but that seems to be about it.
Any advice on the best way to go about building them would really be helpful. I have built some copy parts and attempted building off ship but trying to bend the 2mm, i'll call it balsa, over the structure even after soaking and steaming is useless.
Please help,
Cheers,
 Neil
Neil- Joined
- Mar 12, 2021
- Messages
- 97
- Points
- 88

sadly not a lot of progress made this week. Mainly through my own stupidity!
thought that i had bought the ideal blemish filler in Ronseal Ultra Smooth Finish filler.
What a mistake! Was very wet when i applied it which means that you can apply a relatively thin coat over the hull which i did. to make it a very even finish I applied it over the complete lower section of hull as i said in a thin coat. this filler is supposed to be quick drying but i left it over night just to be safe.,
That was the second mistake. It dried as hard as concrete and was about as easy to sand as the same. Dremel, palm sander ,numerous pieces of sandpaper, metal file, rasp you name it, i used it. 12 hours drying over 60 hours of trying to sand.
So, if you want a fine finish on a wall this is the stuff, for modellers steer well clear!
started my deck "hedgehog" between attempts at sanding. at least that went ok!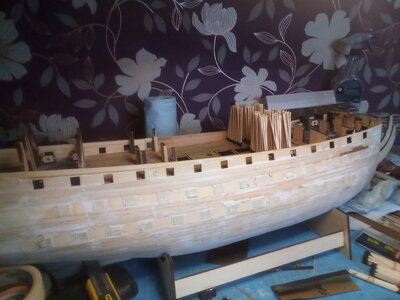
simple wood filler for the later stages!!!!
thought that i had bought the ideal blemish filler in Ronseal Ultra Smooth Finish filler.
What a mistake! Was very wet when i applied it which means that you can apply a relatively thin coat over the hull which i did. to make it a very even finish I applied it over the complete lower section of hull as i said in a thin coat. this filler is supposed to be quick drying but i left it over night just to be safe.,
That was the second mistake. It dried as hard as concrete and was about as easy to sand as the same. Dremel, palm sander ,numerous pieces of sandpaper, metal file, rasp you name it, i used it. 12 hours drying over 60 hours of trying to sand.
So, if you want a fine finish on a wall this is the stuff, for modellers steer well clear!
started my deck "hedgehog" between attempts at sanding. at least that went ok!

simple wood filler for the later stages!!!!
Did you try a rotary sander? I’ve used one of those to great effect. Are you making treenails on the deck? It looks like an awful lot of them.sadly not a lot of progress made this week. Mainly through my own stupidity!
thought that i had bought the ideal blemish filler in Ronseal Ultra Smooth Finish filler.
What a mistake! Was very wet when i applied it which means that you can apply a relatively thin coat over the hull which i did. to make it a very even finish I applied it over the complete lower section of hull as i said in a thin coat. this filler is supposed to be quick drying but i left it over night just to be safe.,
That was the second mistake. It dried as hard as concrete and was about as easy to sand as the same. Dremel, palm sander ,numerous pieces of sandpaper, metal file, rasp you name it, i used it. 12 hours drying over 60 hours of trying to sand.
So, if you want a fine finish on a wall this is the stuff, for modellers steer well clear!
started my deck "hedgehog" between attempts at sanding. at least that went ok!View attachment 371872
simple wood filler for the later stages!!!!
- Joined
- Mar 12, 2021
- Messages
- 97
- Points
- 88

hi vic, yes tried the rotary sander too. think i let it set too long but wont be using it again. the decking treenails look ok when sanded down. know it looks a lot but will take a photo when sanded. think they will look ok.
On a positive note, just received some ak interactive true metal old bronze paint. going to see what it looks like on a couple of the cannons before i decide on the final paint scheme.also got my heat gun so I will be able to bend the metal parts, including the front cannons, into the correct shapes.
I know i'm flipping about a bit between different parts but thats just the way i find it easier to keep my concentration rather than following the instructions (ha ha) to the letter.
thanks to all for looking. More to come soon...
Sorry about how the sealer turned out. That's a lot of extra work. I just used pencil for my deck treenails. It turns out it's hard to see with all the stuff on the deck and the sails and rigging.
- Joined
- Mar 12, 2021
- Messages
- 97
- Points
- 88

hi everyone, sorry no pictures to post this week but, surprise surprise i do have another question!
For the second planking, what length planks is everyone using? I was looking at the easy solution of making them 250mm, basically half the length of the supplied wood which scale up to about 17.5 m.
anyone have any opinion?
For the second planking, what length planks is everyone using? I was looking at the easy solution of making them 250mm, basically half the length of the supplied wood which scale up to about 17.5 m.
anyone have any opinion?
That seems like a long piece of wood in real life. Sometimes I found it easier to work with some that were shorter. My daughter has the one I made, so I can't look to see what I did. Don't forget to taper the boards toward the stem; otherwise, they tend to buckle as you try to bend them. I think I tapered them on the bottoms of the plans to no smaller than half the width. I also had to put in some planks with triangular points, cutting out a spot in surrounding planks. I forget what they're called. But I be Kurt @DARIVS ARCHITECTVS could name them. Whether they are in the front of the ship, or the aft, the pointy ends point toward the front.


