Le Fleuron 1729 - 64 Gun Ship PoB Scratch Build in 1:48 - (Ancre Monograph-J. Boudriot/G. Delacroix)

Thanks you ALL for the well wishes! As we grow older our world shrinks in many ways. We tend to make fewer friends as well, with the exception of SoS. ;)

Hallo @Hoss6262
we wish you all the BEST and a HAPPY BIRTHDAY
Birthday-Cake
Enjoy your special day
Thanks for leading the way for us Uwe!

Stephan, I really appreciate your sense of humor. My first year in high school I met my very first girlfriend....wait for it.... her name was Barbara, the truth! My sister was the one with a Barbie doll and made the connection and for the life of the relationship with my girlfriend, about 8 months referred to us as "Barbie and Ken".

I distinctly remember not being happy about it. :rolleyes: It started to catch on with others, specifically with my 5 younger brothers. When they wanted to get under my skin, they'd do a, "Hey Ken, where's Barbie.", start laughing and run away. I'd chase them for about 20 feet and give up. But hey I was a 14 year old guy who was too cool to be referred to as a doll who wore PINK. Once I reached adulthood, I realized my sister meant what she said in a loving way. Every once in a while it comes up during family get togethers and we all have a laugh.:)

Best wishes for a wonderful birthday celebration Ken. I'm looking forward to seeing progress on this one-of-a-kind build when you're feeling the time is right.

Thanks Paul. I'm glad you mentioned my project. I have made progress on the Le Fleuron, although not as much as I'd like. Life has slowed things down a bit, which I must accept. That's the progress aspect. The lack of posting from me is more related to "how" I've progressed. My default method, like most modelers I imagine, is linear. Work on one element or structure, start it, finish it, post the progress. What I didn't consider at the time, due t the nature of my construction choice, much of what I need to know is not in the Ancre monograph and requires discovery from disparate sources, which has slowed me down considerably. One example; how do I construct stable hawse holes and bowsprit cradle with no hawse timbers to cut them in? As a result, I'm finding that I'm multitasking spreading my efforts on 3 different work streams at the same time, researching 2 while constructing the 3rd. Not yet comfortable to share progress. Soon, soon. ;) Thumbsup

Hi Ken happy birthday, enjoy your day with family and friends. Stay the way you are, a great and humorous guy. I wish you many more healthy and great years.

Thank Tobias! Thanks for the very kind comment. Life is so much more enjoyable when we laugh. :)
 
Last edited:
Hello All,/
It's been quite some time since I posted on my project. Progress has been slow for a number of reasons, which I will not bore everyone with. Let's just say, life's problem solving needs trumps those of ship modeling. I enjoy the latter a great deal more as well as a welcome distraction.

Back to the problems that ship modeling present. There have been a few for me, mostly due to my inexperience; 1) first scratch build, 2) the
non-conventional PoB method. Well, I asked for it. I'm getting a lot of experience now!ROTF

Updates
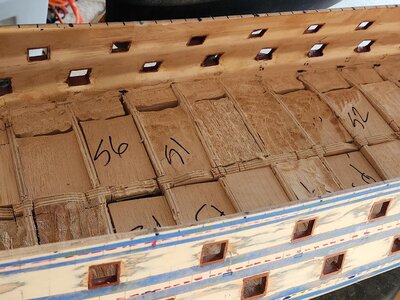
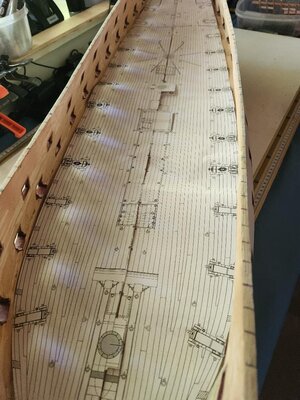
I decided to fill the ugly compartments between the bulkheads on the first gun deck. Why do that when they will be covered up by the deck? To use the opportunity to learn and build some knowledge on filling materials, application and results.

The "ugly".
thumbnail (16).jpg

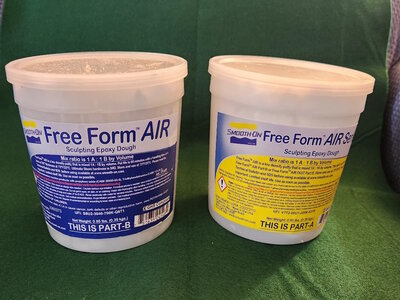
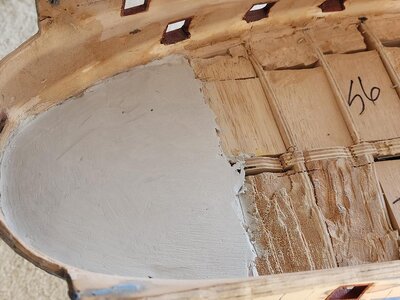
After: I tested 3 different filling agents. The light grey colored material is a two part air clay, which gets massaged together thoroughly and pressed into the voids. This stuff is super strong, airy light and sands easily. The total weight added to the model was less than 7oz.
thumbnail (29).jpg,

thumbnail (15).jpgthumbnail (2).jpg
Future Work
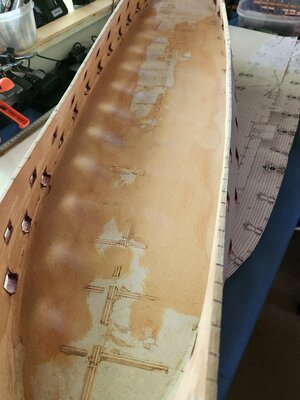
The plan is to add riders to support deck beams to support a false deck. This work will be revisited once higher .priorities have been completed.

thumbnail (1).jpg
More on this area later...
 
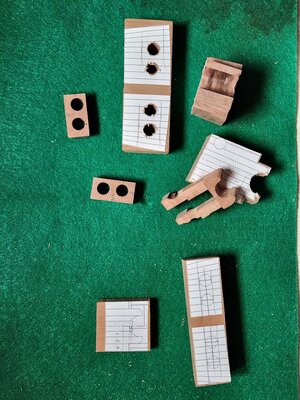
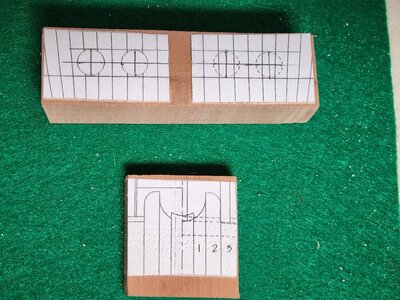
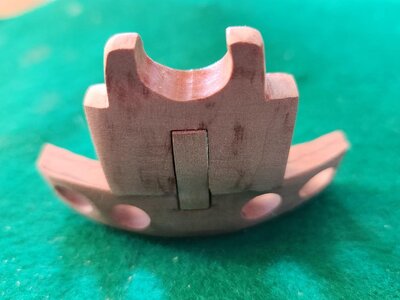
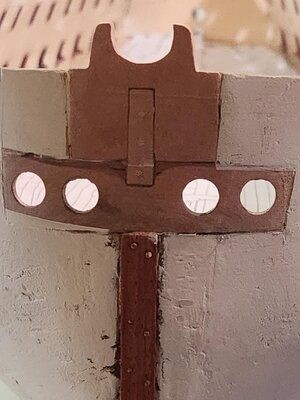
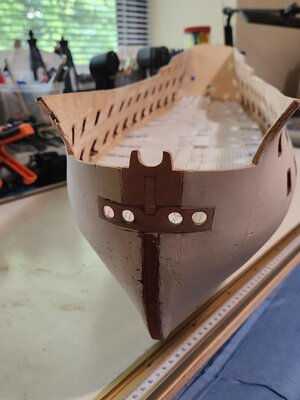
My next challenge was how do I create the Hawse holes and Bowsprit saddle when there are no Hawse Timbers on my model. This was made even more challenging as the width of the model's shell was a thin 6mm. I tried a few different ideas, which created more pearwood scrap than I would have liked. :confused:

thumbnail (6).jpg

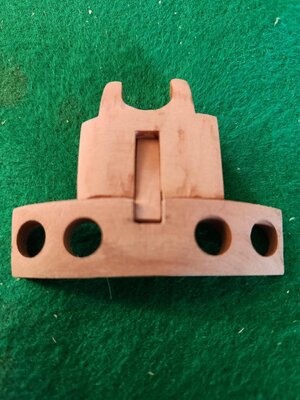
I decided to on creating 2 elements, the Bowsprit saddle and the Hawse holes separately rather than one piece. I needed to lock them both together in the correct relationship and then that assembly to the model. So I made a "key" to hold the two pieces together and then secure the assembly to the model by anchoring it to the model's plywood center keel/spine and not to the shell itself.

thumbnail (3).jpg

thumbnail (10).jpg

thumbnail (7).jpg
thumbnail (8).jpg

After doweling the unit to the model.
thumbnail (19).jpg

Overall, I'm satisfied with the result. Keep in mind all of this structure will be covered with hull planking up to the saddle. All of the dimensions and their relationship to each other are where they should be.

That's it for this chapter....

thumbnail (21).jpg
 
And just one last small update and one additional challenge.

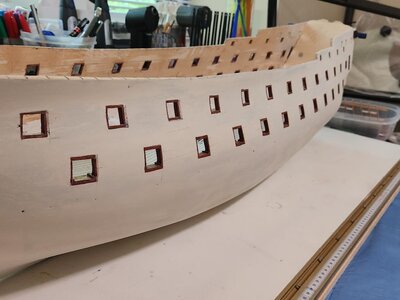
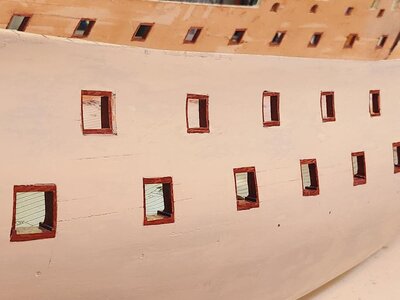
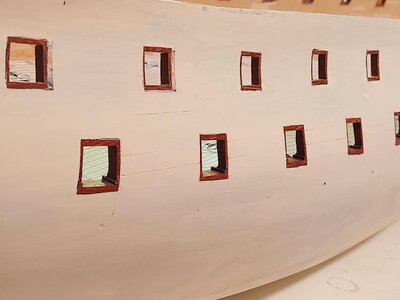
The gun port linings and sills have been completed. Another lesson learned, as someone mentioned early in the build that the grain in the wood for the port sill should run bow to stern and not port to starboard I made this change, not that it would ever be noticed. After I reworked the sills correctly I found out, post installation, that the wood being used had very little strength cross grain and a few of the inner sills have broken off. I will repair when building the inner works.

Some updated pics.
thumbnail (22).jpgthumbnail (24).jpgthumbnail (26).jpg

Challenge
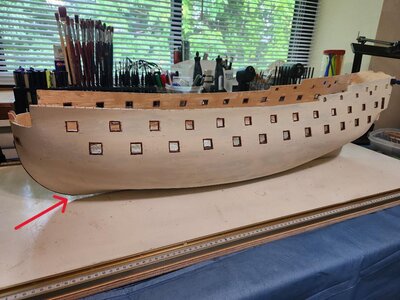
I'm not sure how I did this, but when removing the false keel from the structure I somehow drifted upwards. This resulted in a gap where the ship does not sit flat. I need to fix this and currently spit balling the best solution.
thumbnail (222).jpg
I'll come up with something.

That's it for this area.

Work currently in progress;
Stern structure and keel together. Of course this requires the fix for the gap at the bottom of the hull.

Hopefully, I will have more opportunity to work on this thing and updates will follow with more regularity.

Till next time.
 
Hello Ken
That's a lot of work done. I'm happy to see you back om modeling.As for all the mistkes(challenges) I'm sure you'll handle them. Some re-dos and everything will be fine ;)

If you want to continue your work with deck I can suggest a video from Mr Kudin. Actually whole his chanel can be helpful as he is(was?) scratch bulding whole- and I mean whole-with full interior Le Fleuron

 
Happy to see you back scratching. Always thinking what the h#ll is he doing, and in the end I'm always surprised by the result. This going to be a great deck, for sure.

About the keel. Put the ship on a stand and it is a great possibility you can't notice the gap.
 
What a nice surprise! When I opened SOS this morning: Ken is building again!

I'm with Stephan...your unconventional approach is genuinely interesting, and the results are always impressive. Right now the deck infrastructure looks like the dog's breakfast so I can't wait to see what happens here ROTF.

Welcome back my friend!
 
Last edited:
And just one last small update and one additional challenge.

The gun port linings and sills have been completed. Another lesson learned, as someone mentioned early in the build that the grain in the wood for the port sill should run bow to stern and not port to starboard I made this change, not that it would ever be noticed. After I reworked the sills correctly I found out, post installation, that the wood being used had very little strength cross grain and a few of the inner sills have broken off. I will repair when building the inner works.

Some updated pics.
View attachment 394429View attachment 394430View attachment 394432

Challenge
I'm not sure how I did this, but when removing the false keel from the structure I somehow drifted upwards. This resulted in a gap where the ship does not sit flat. I need to fix this and currently spit balling the best solution.
View attachment 394435
I'll come up with something.

That's it for this area.

Work currently in progress;
Stern structure and keel together. Of course this requires the fix for the gap at the bottom of the hull.

Hopefully, I will have more opportunity to work on this thing and updates will follow with more regularity.

Till next time.
Hi Ken,

I guess you still have to fit your keel, I would just incorporate this into your keel design, then you can cut the rabbet into the keel like it should and cover this issue with your final planking. Nobody will ever see this again.
 
Hello Ken
That's a lot of work done. I'm happy to see you back om modeling.As for all the mistkes(challenges) I'm sure you'll handle them. Some re-dos and everything will be fine ;)

If you want to continue your work with deck I can suggest a video from Mr Kudin. Actually whole his chanel can be helpful as he is(was?) scratch bulding whole- and I mean whole-with full interior Le Fleuron

Hi WojtasS,

Thanks for sharing this. Andrey Kudin's application constructing a false deck is actually one that I am considering. My first choice is to create deck beams aligned with each bulkhead and then lay thin plywood + deck planking. The only other solution I would consider would be creating every deck beam in the plans and then deck planking without the plywood. I'm still working out which would be the best solution, for me considering, my skill set, effort and quality of the finished work.

I need to look deeper into Mr. Kudin's masterful work.

Thanks again for your help!
 
What a nice surprise! When I opened SOS this morning: Ken is building again!

I'm with Stephan...your unconventional approach is genuinely interesting, and the results are always impressive. Right now the deck infrastructure looks like the dog's breakfast so I can't wait to see what happens here ROTF.

Welcome back my friend!
Hahaha Paul,

Actually, if my dog, Shia(wase), saw my deck infrastructure in her dog bowl she would most certainly starve! ROTF I can't let that happen. Even with my novice skill, I'm confident the finished deck won't look like dog food. ROTF Well, pretty confident.
 
Hi Ken,

I guess you still have to fit your keel, I would just incorporate this into your keel design, then you can cut the rabbet into the keel like it should and cover this issue with your final planking. Nobody will ever see this again.
Hey Maarten, I like your idea. It may be the easiest solution for me. Thanks mate!
 
Happy to see you back scratching. Always thinking what the h#ll is he doing, and in the end I'm always surprised by the result. This going to be a great deck, for sure.

About the keel. Put the ship on a stand and it is a great possibility you can't notice the gap.
Hey Stephan,

You may be correct. If I put the ship on a stand, off of a flat surface it might not be noticeable by 90% of the viewers. Unfortunately, I would be one of those people in the 10%. ROTF Most certainly every time I looked at her my eye would go right back to that area. It's kind of like a little 1mm ding paint chip on a vehicle door that you always look at. Or maybe that's just me. :(

In any case, it gives me a good feeling to be back working on the ship. I haven't had much time to catch up on all of my favorite builds. I look forward to seeing your progress and actually everyone's.

Cheers!
 
Great to see you underway again Ken. I may not comment much I but always enjoy popping in and out of your build log. You have some really interesting approaches and clever solutions.
 
Back
Top