Lady Isabella by Vanguard Models 1:64

Joined
May 22, 2022
Messages
520
Points
308

Location
Broomfield, Colorado
I've built several Scottish fishing vessels and decided to build the last of the sailing fishing vessels. I find these to make wonderful displays with the construction and sails so picking the most unique design for interest. Working on difficult models these sailing vessels are a great respite from the more tedious.

Enclosed is a description of a ZULU from the Vanguard instructions.
The Zulu was an innovative hybrid which fused the extreme rake of the sternpost of the ‘Scaffie’ and the near straight stem of the ‘Fifie’. This produced a unique and highly successful class of fore and aft rigged fishing vessels during the last decades of the herring sail fishery.

Tillers gave way to the steering wheel, operated via a worm screw gear system. The sail area was large for the size of vessel, and the Zulu’s could reach 10 knots with little problem, and it is of this pinnacle of Zulu development that the Lady Isabella is based upon.

Interestingly, the Zulu had no standing rigging on its fore and aft masts, instead relying on support entirely upon their sail halyards and a burton stay tackle, set up to windward. This did mean that any failure would have been catastrophic.

The name Zulu was derived because the boat was first made during the British Zulu wars and I can't find why someone would pick calling the unique design a Zulu. At its height there were thousands of sailing drifters in north eastern Scotland and because of the Zulu's speed many were used until the advent of steam drifters. Today there are no remaining Zulu beyond wrecked decaying keels.

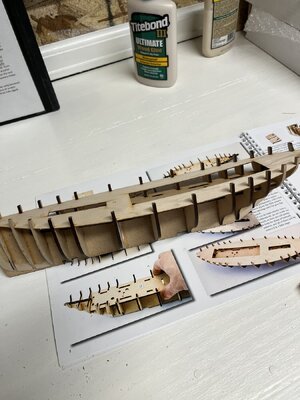
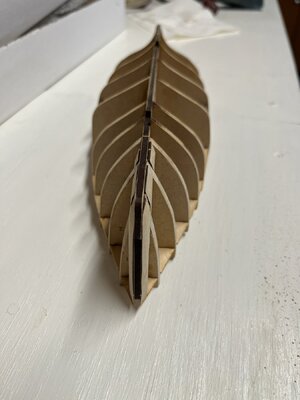
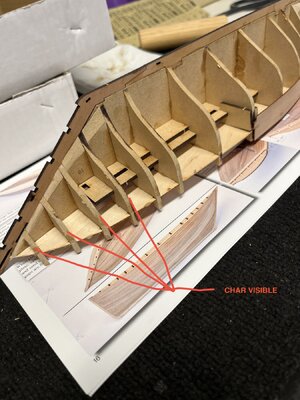
This the only photo I took after starting dry fitting the ribs and backbone. Notice the laser char and the internal structures are a very dense MDF. On the forward (blunt) and aft end laser lines giving the location of how much to fair. The balance of the kit is quality hardwood of pear and walnut dowels.
IMG_1513.jpeg

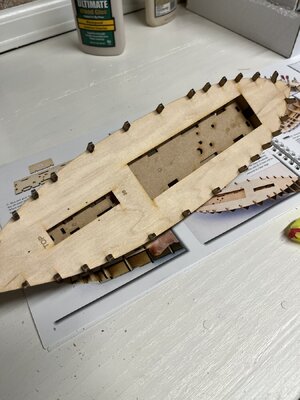
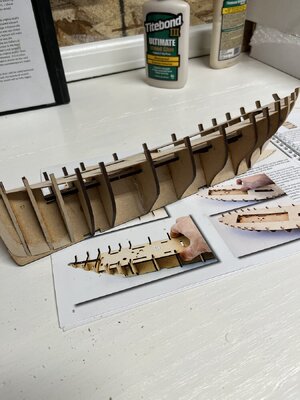
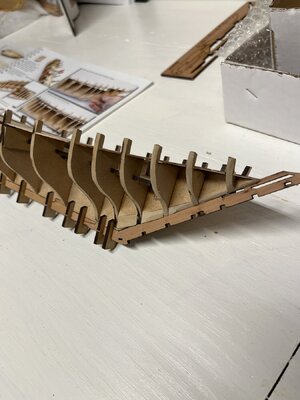
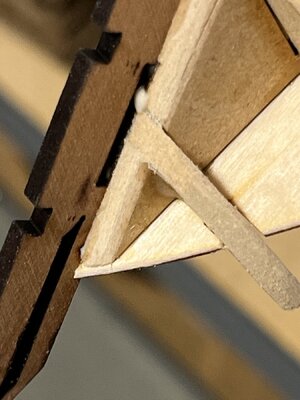
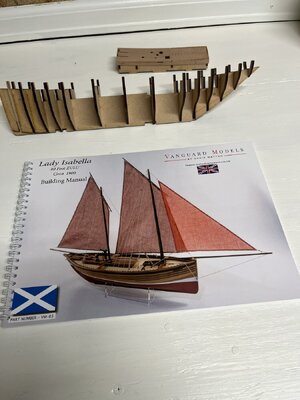
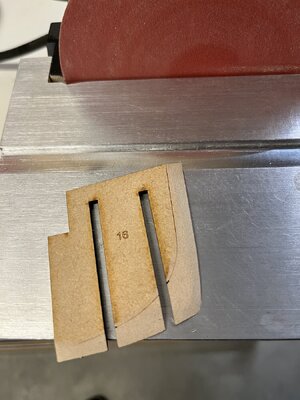
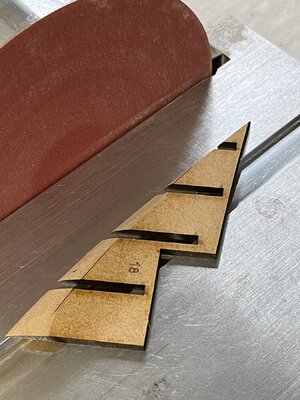
Today I built the frame structure with reinforced ends. This kit is of amazing quality as shown when you slot the frames into the backbone and lower deck slotted into the frames the fit is so snug there is no movement. In the above photo I mentioned the laser lines to ease the fairing limits and using the disc sander I faired the forward and aft reinforcements and glued them in place along with the frames.
IMG_1555.jpegIMG_1554.jpeg

IMG_1558.jpegIMG_1557.jpegIMG_1556.jpeg
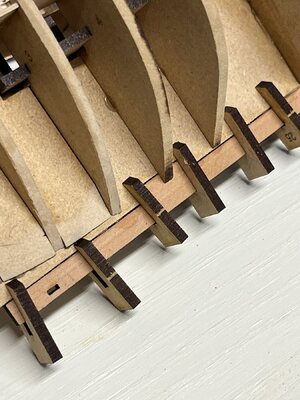
Another nice thing about Vanguard is how they mark each piece it really helps in assembly. Now that it's all together I've set it aside to allow the glue to set overnight as the next step is fair the frames.
 
very interesting model - and I think it is the first time I see a building log
Many thanks for starting - I will follow with big interest
 
I've built several Scottish fishing vessels and decided to build the last of the sailing fishing vessels. I find these to make wonderful displays with the construction and sails so picking the most unique design for interest. Working on difficult models these sailing vessels are a great respite from the more tedious.

Enclosed is a description of a ZULU from the Vanguard instructions.
The Zulu was an innovative hybrid which fused the extreme rake of the sternpost of the ‘Scaffie’ and the near straight stem of the ‘Fifie’. This produced a unique and highly successful class of fore and aft rigged fishing vessels during the last decades of the herring sail fishery.

Tillers gave way to the steering wheel, operated via a worm screw gear system. The sail area was large for the size of vessel, and the Zulu’s could reach 10 knots with little problem, and it is of this pinnacle of Zulu development that the Lady Isabella is based upon.

Interestingly, the Zulu had no standing rigging on its fore and aft masts, instead relying on support entirely upon their sail halyards and a burton stay tackle, set up to windward. This did mean that any failure would have been catastrophic.

The name Zulu was derived because the boat was first made during the British Zulu wars and I can't find why someone would pick calling the unique design a Zulu. At its height there were thousands of sailing drifters in north eastern Scotland and because of the Zulu's speed many were used until the advent of steam drifters. Today there are no remaining Zulu beyond wrecked decaying keels.

This the only photo I took after starting dry fitting the ribs and backbone. Notice the laser char and the internal structures are a very dense MDF. On the forward (blunt) and aft end laser lines giving the location of how much to fair. The balance of the kit is quality hardwood of pear and walnut dowels.
View attachment 434568

Today I built the frame structure with reinforced ends. This kit is of amazing quality as shown when you slot the frames into the backbone and lower deck slotted into the frames the fit is so snug there is no movement. In the above photo I mentioned the laser lines to ease the fairing limits and using the disc sander I faired the forward and aft reinforcements and glued them in place along with the frames.
View attachment 434582View attachment 434583

View attachment 434584View attachment 434585View attachment 434586
Another nice thing about Vanguard is how they mark each piece it really helps in assembly. Now that it's all together I've set it aside to allow the glue to set overnight as the next step is fair the frames.
Good afternoon. I have pulled up a chair. Enjoy. Cheers Grant
 
I want to thank all you guys looking and hope I can make the journey informative and pleasant.

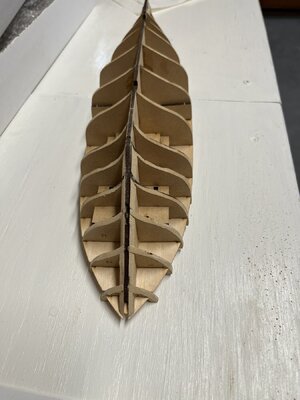
With all the frames securely in place it was time to start the first fairing. Using 120 grit sandpaper along the edges of the frames making sure they aligned with the false deck that had been slotted to fit into frame notches. This is a great feature of this kit where the false deck fits into frame notches and to do this the false deck is made of plywood so it can be bent down the length. With it bent it just snapped into place in perfect position. Now with in place the sanding was easy to just remove the char making sure everything was flush.
everything faired on the first pass
viewed from aft looking forward
IMG_1562.jpeg
viewed from forward looking aft
IMG_1563.jpeg
First sanding done it was time to add the keel and rudder post. This almost too easy that I find myself not taking the time to really understand what needs to be done. The keel sits on top of the backbone and is aligned into notches. Vanguard really likes notches. The same with the rudder post sitting on the backbone and aligned into yet more notches. Another trick of Vanguards is the use of alignment spacers along the keel and rudder post. These keep everything in alignment while the notches keep fore and aft in place.
IMG_1564.jpeg
IMG_1565.jpeg
You can see how the aft stiffeners extended beyond the backbone and the rudder post sitting between being held in place.
IMG_1565.jpeg
Now with everything securely in place I'll remove the char making the pear wood look good.IMG_1567.jpeg
A closeup with the rudder post between the stiffeners.
It feels good to be working with wood again not to say I don't enjoy plastic but wood feels good to my hands.
 
Will, My wife is of Scottish decent and I love the "Fifie" which she wants me to build. It is on my "to do" list after I finish the Emma C. Berry. I'm enjoying your build. Keep up the great work! Magic Mike
 
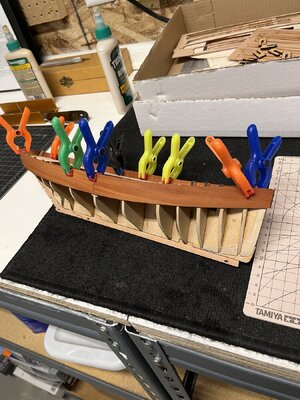
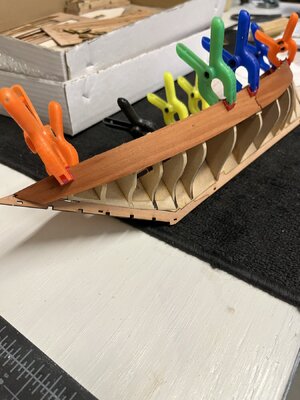
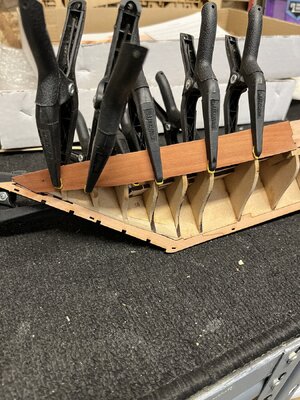
With the keel and rudder post firmly attached the next step is the bulwark planking. This using preformed bulwarks that have etched lines on the inboard side that simulate actual frames. To form these is is recommended to soak them until pliable. With the soaked bulwarks it was a matter of clamping them to the frames until dry. After drying they retained much of the bends making them easier to use while glueing. Starting at the rudder post you insert the bulwark into a precut slot and start clamping to the frames. Because the above deck etched lines are visible so care must be taken not to get glue above the deck lines.
Fitting wet bulwarks
IMG_1569.jpegIMG_1570.jpeg
Here you can see the beautiful pear wood in its wet color
Below the frames glued to frames and held in place with a copious use of clamps
IMG_1572.jpegIMG_1571.jpeg
 
After taking the clamps off it was time to start the first layer of planking. There are several methods to planking but I'll study both that I'm aware of. During this I realized this model has no provisions for rabbets so this adds another issue as I've never planked without rabbets. Right now I cannot imagine how I'd be able to get clean flush finishes at the keel, rudder post and stem. Something to noodle on. While test fitting the first plank it showed that the bulwark strips at frames 11, 12,13,14 did not sit flush. As the frames made the curves toward the keel there was a gap the thickness of the planking strip. What I'm trying to say is there is gap between the bulwark and frame. First thought 'OMG I over faired the frames' but I could still see remnants of the char on the frames. Using my fingers pressing on the bulwarks they laid flat on the frames.
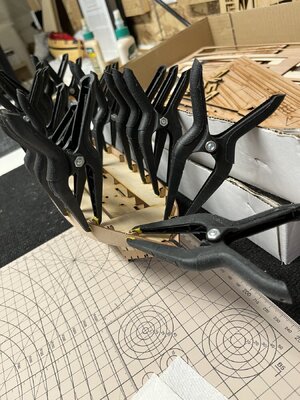
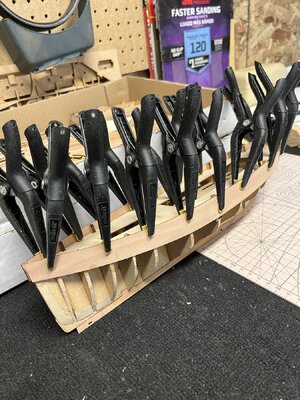
How to get the after bulwarks off without damage? More studying revealed the bulwarks will be planked during the 2nd planking so if damaged I'd still have a fix. Taking a new #11 blade I carefully slipped the blade between frame and bulwark and slowing it started popping the frames. Once off the frames the residual glue was scrapped until a clean surface. Back to soaking is warm water for half hour and clamping using another method that kept the bulwarks flush.

Bulwarks removed
IMG_1575.jpeg

New clamping method
IMG_1576.jpeg
Tomorrow we will see how much of the bend remains after drying overnight.
 
Back
Top