You are using an out of date browser. It may not display this or other websites correctly.
You should upgrade or use an alternative browser.
You should upgrade or use an alternative browser.
La Belle Poule 1780 by Thomas
- Thread starter Thomas Marocke
- Start date
- Watchers 35
Your experience shines at every step of the construction. I can only imagine the lessons you have learned that have brought you to this level of expertise...View attachment 350378
The further assembly with stabilizing blocks.
View attachment 350379
The bulkheads were finally glued.
View attachment 350380
All necessary components are firmly glued. After the attachment of the keel, the hull would be ready for planking.
View attachment 350381
I am bothered by the distance of four centimetres between the bulkheads. I want a firmer and pressure-resistant contact surface for the planking and therefore I got myself an additional six millimeters of plywood.
View attachment 350382
The dimensions can be drawn on the existing widest neighbouring bulkhead and then the wood can be sawn out and inserted. This results in very little grinding work later on.
View attachment 350383
Now there is only a blank space of 14 millimeters between the frames.
Best regards
Thomas
Last edited:
Good evening Thomas. You are meticulous in your approach to building these models. An example to all of us. Cheers GrantView attachment 350378
The further assembly with stabilizing blocks.
View attachment 350379
The bulkheads were finally glued.
View attachment 350380
All necessary components are firmly glued. After the attachment of the keel, the hull would be ready for planking.
View attachment 350381
I am bothered by the distance of four centimetres between the bulkheads. I want a firmer and pressure-resistant contact surface for the planking and therefore I got myself an additional six millimeters of plywood.
View attachment 350382
The dimensions can be drawn on the existing widest neighbouring bulkhead and then the wood can be sawn out and inserted. This results in very little grinding work later on.
View attachment 350383
Now there is only a blank space of 14 millimeters between the frames.
Best regards
Thomas
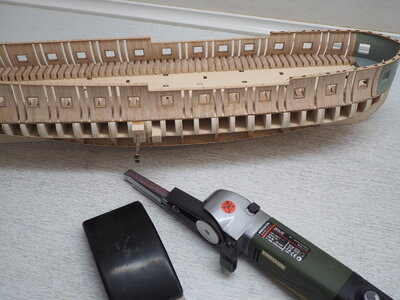
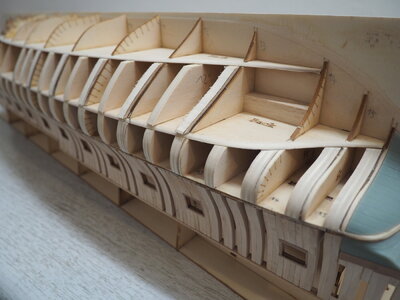
This is what a light bulkhead filling looks like. This is a version I came up with for this model. Between the bulkheads are two mobile spacers. The tools for sanding are hand grinder and belt sander.
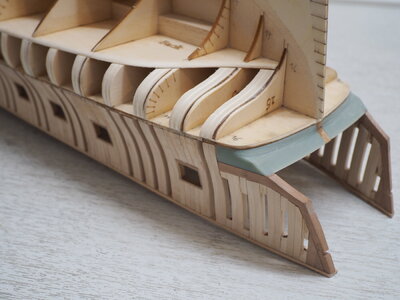
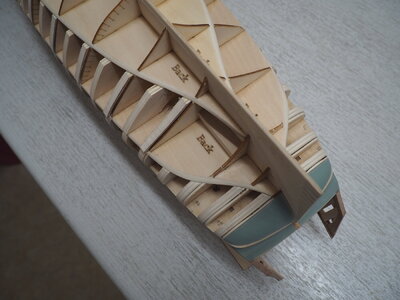
Now there is a stable and pressure-resistant support for the planking. When grinding, make sure to still retain some of the laser charcoal on the bulkheads. It marks the exact course of the ship's lines. After planking, they are no longer visible.
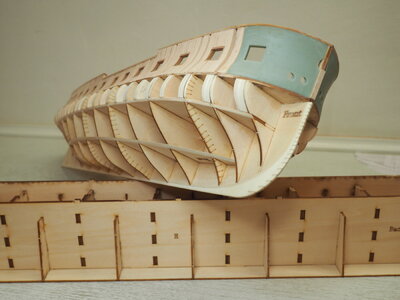
The plastic moldings at the bow and stern are still missing for completition.
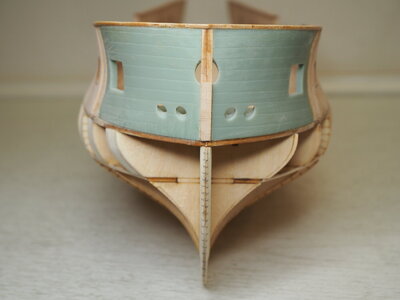
Here you can see the wonderfully curved ship shape of the frigate.
Now "only" the remaining filler pieces have to manufactored, installed and sanded. This will take some time.
Best regards
Thomas
You are doing a nice job, Thomas. Nice personal ad-ons for a better planking support.View attachment 350537
This is what a light bulkhead filling looks like. This is a version I came up with for this model. Between the bulkheads are two mobile spacers. The tools for sanding are hand grinder and belt sander.
View attachment 350538
Now there is a stable and pressure-resistant support for the planking. When grinding, make sure to still retain some of the laser charcoal on the bulkheads. It marks the exact course of the ship's lines. After planking, they are no longer visible.
View attachment 350539
The plastic moldings at the bow and stern are still missing for completition.
View attachment 350540
Here you can see the wonderfully curved ship shape of the frigate.
Now "only" the remaining filler pieces have to manufactored, installed and sanded. This will take some time.
Best regards
Thomas
Regards, Peter
Very good idea with the additional spacers - they will be of big help during planking
Looking very good - enough meat but not too much - so Happy Sanding 
Very impressive, Thomas, neat work, the grinding was worth it.
- Joined
- Apr 20, 2020
- Messages
- 5,163
- Points
- 738

very accurate & clean work my friendView attachment 351767
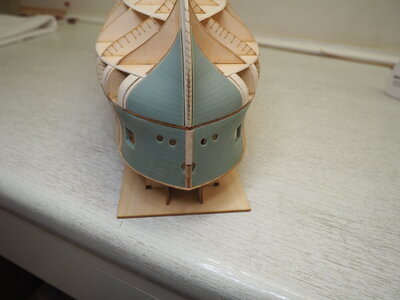
The opposite side of the ship is finished. Photo with plastic moldings placed on a trial basis.
View attachment 351764
View attachment 351763I continue with the underlaying plane. It is easy to see that sanding the filler wood is easier than a completely filled hull.
Best regards
Thomas

Great idea with the filler wood. Perfectly executed.
Hi Heinrich!
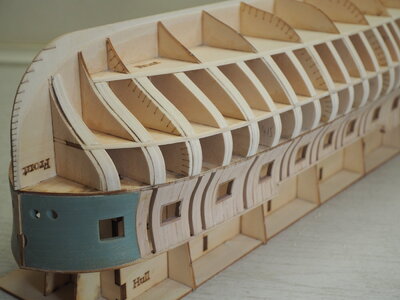
The above-water ship is composed of 296 frames. The underwater ship consists of 16 thin bulkheads with four horizontal stiffing boards and the keel. The whole structure of the model is very stable. And that planking can be done on the existing structure shows the models of the manufacturer and Zoly and Donnie.
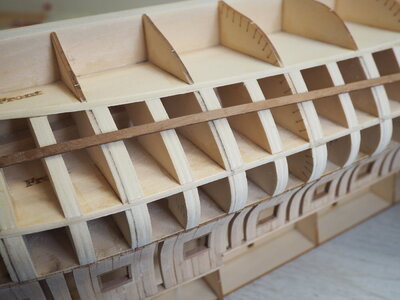
The additional reinforcements of the bulkheads soothe my model-building soul and of course provide a geat bearing surface for the planks. In the current state of construction, everything is still possible and I like modeling and gladly accept the extra work. Such a beautiful kit of the Belle Poule should of course be appreciated and sometimes requires a little extra work.
Sorry for the uncleaned model, but it still goes on with dust and sawdust.
Best regards
Thomas

The above-water ship is composed of 296 frames. The underwater ship consists of 16 thin bulkheads with four horizontal stiffing boards and the keel. The whole structure of the model is very stable. And that planking can be done on the existing structure shows the models of the manufacturer and Zoly and Donnie.

The additional reinforcements of the bulkheads soothe my model-building soul and of course provide a geat bearing surface for the planks. In the current state of construction, everything is still possible and I like modeling and gladly accept the extra work. Such a beautiful kit of the Belle Poule should of course be appreciated and sometimes requires a little extra work.
Sorry for the uncleaned model, but it still goes on with dust and sawdust.
Best regards
Thomas
- Joined
- Jan 9, 2020
- Messages
- 10,378
- Points
- 938

Hi Thomas. You can absolutely plank using only the bulkheads - like you say, Donnie and Zoly have done that, but filling in the spaces just makes it so much easier and provides a much larger area for the glue to adhere to,
How do I process bulkheads in an already existing hull?
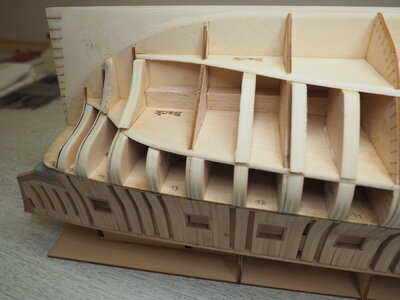
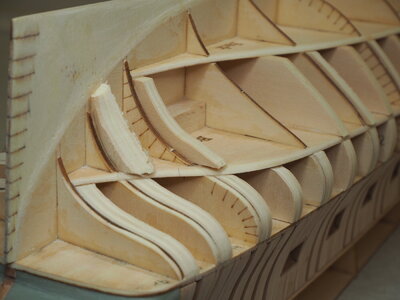
I use as a guide once the most difficult position of installation parts. Here, plywood parts made with oversize were glued in place.
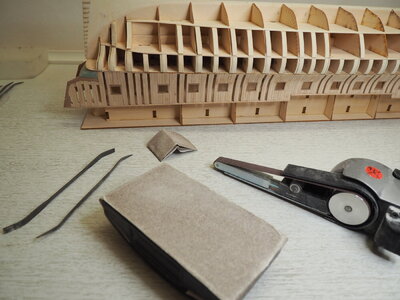
The most difficult part is the processing of these components, because here no straight files, planes or other tools can be used due to the inward curved bulkheads. With the belt sander running, excess material is carefully removed with the tip at the appropriate angle. The finer work is then done with bend files and final sanding with sandpaper. Very tight curves are sanded by hand with folded sandpaper. Such complicated shapes can only be achieved with patience and sensitivity. Constant checking with a test plank for a perfect shape is necessary.
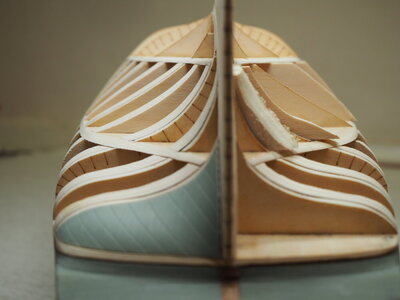
The reward is a flowing hull contour.
I wish everyone a good weekend
Thomas


I use as a guide once the most difficult position of installation parts. Here, plywood parts made with oversize were glued in place.

The most difficult part is the processing of these components, because here no straight files, planes or other tools can be used due to the inward curved bulkheads. With the belt sander running, excess material is carefully removed with the tip at the appropriate angle. The finer work is then done with bend files and final sanding with sandpaper. Very tight curves are sanded by hand with folded sandpaper. Such complicated shapes can only be achieved with patience and sensitivity. Constant checking with a test plank for a perfect shape is necessary.

The reward is a flowing hull contour.
I wish everyone a good weekend
Thomas
A very nice and solid approach, Thomas. Check, check, double check.How do I process bulkheads in an already existing hull?
View attachment 352758
View attachment 352759
I use as a guide once the most difficult position of installation parts. Here, plywood parts made with oversize were glued in place.
View attachment 352761
The most difficult part is the processing of these components, because here no straight files, planes or other tools can be used due to the inward curved bulkheads. With the belt sander running, excess material is carefully removed with the tip at the appropriate angle. The finer work is then done with bend files and final sanding with sandpaper. Very tight curves are sanded by hand with folded sandpaper. Such complicated shapes can only be achieved with patience and sensitivity. Constant checking with a test plank for a perfect shape is necessary.
View attachment 352760
The reward is a flowing hull contour.
I wish everyone a good weekend
Thomas
Regards, Peter


