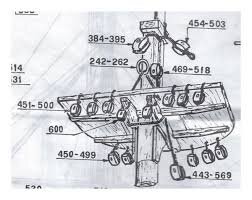
At this very moment, I am helping a newcomer to start the riggen. This is not an easy part. It can take half a year or more- only the standing riggen.
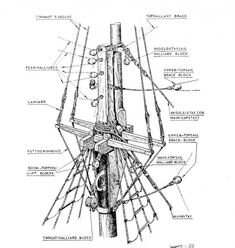
As I have already prepared material for the newcomer, there may be more with the same doubt. It is very important to start with the lower shrouds first- do NOT glue the topmast at this moment. As not everybody is UK-speaking, the 1Th image will a little info about the mast parts in English
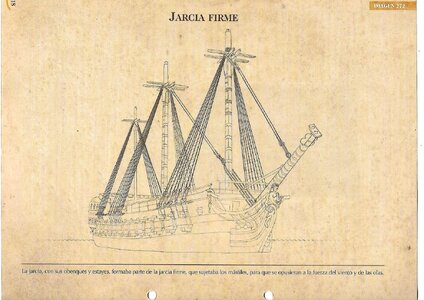
2 Nd will be a ship with all lower shrouds shown
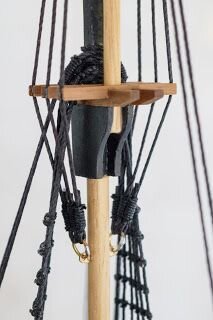
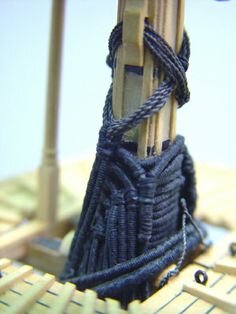
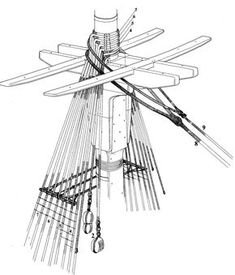
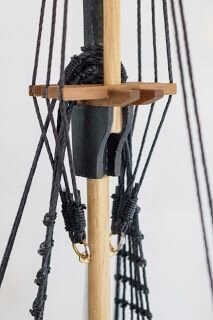
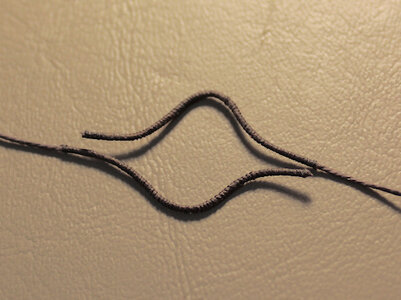
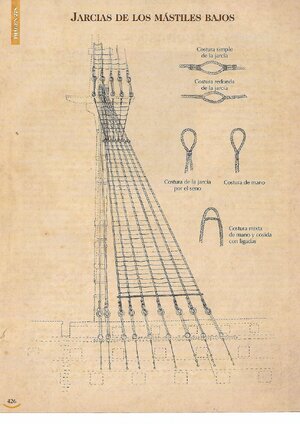
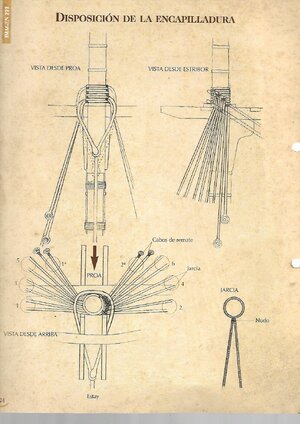
Here the first problem starts: The first lower shroud -en fact two halves seised together around the masthead img3-4 has to be seised completely. from top to bottom, as it can come in contact with the lower sails. All the rest shrouds- normally uneven 5-7-9, although there are some even. now all the shrouds from now on are in pars. One pare left then the next right and so on. The knots on each one, are going backwards img nº.5.
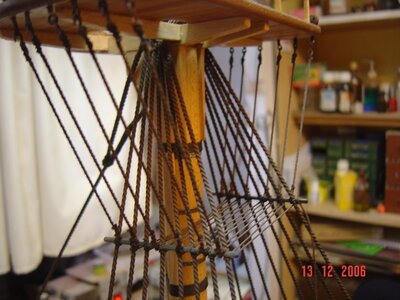
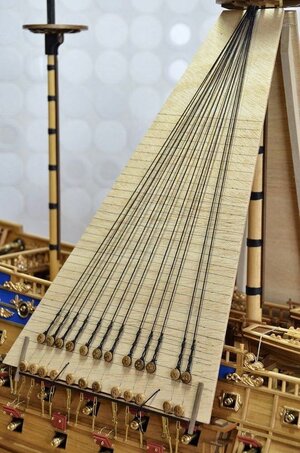
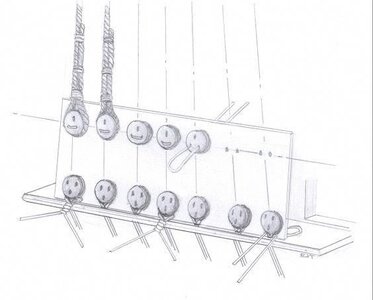
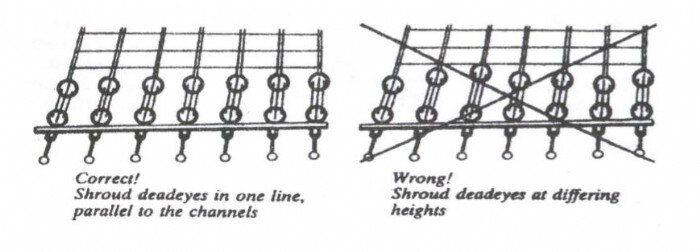
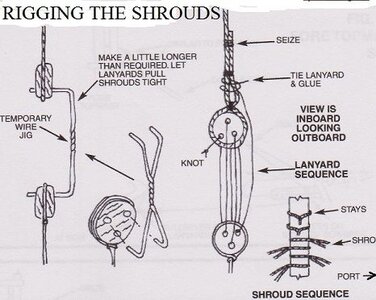
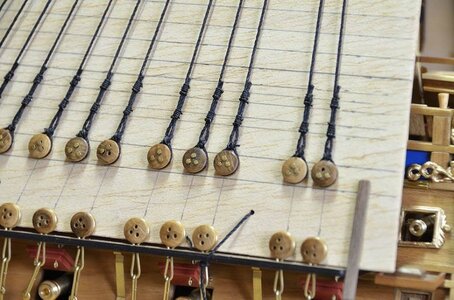
Each shroud has to be set around a deadeye on the lower end and connected with the outboard deadeyes and set fast - they will all have to be parallel -there are several cheap methods to asure this.I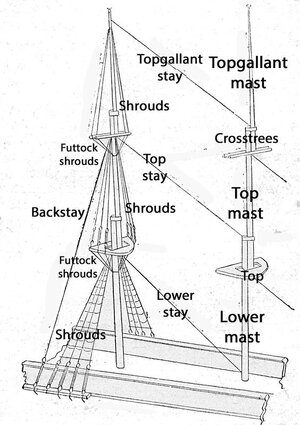
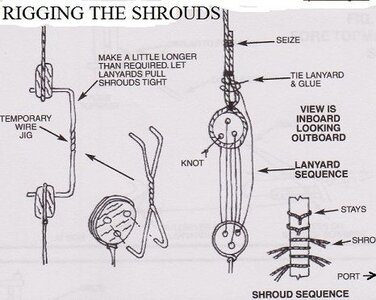
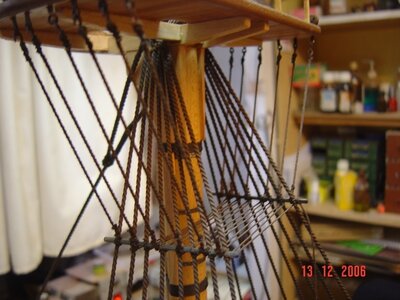
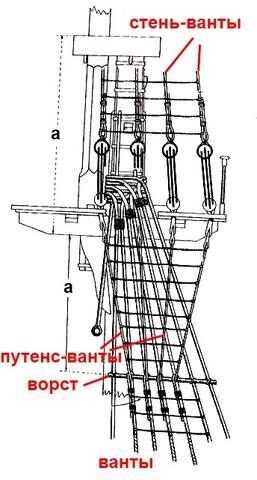
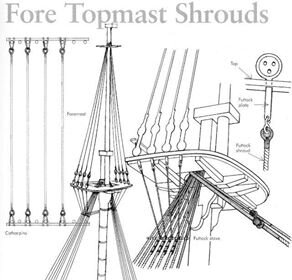 used the one in Fig. 12, others nº11- carton with a complete drawing and where and distance and set fast with a double seised tape.
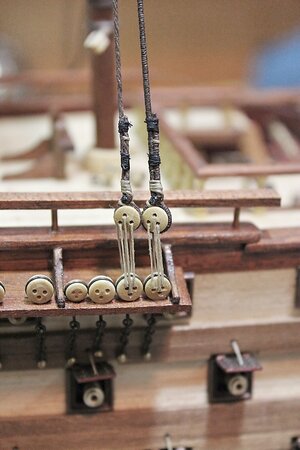
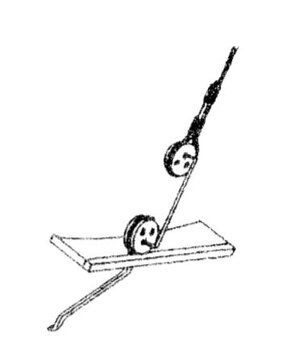
when the shroud is done, the fuetoch shroud will have to be added. Also, a piece of wood on the bottom and top see. nº 4 and 5 ( to avoid the deadeyes twisting) For the moment no need to do the Footsteps (webling?) now.
next step is to add the stays-coming
As I have already prepared material for the newcomer, there may be more with the same doubt. It is very important to start with the lower shrouds first- do NOT glue the topmast at this moment. As not everybody is UK-speaking, the 1Th image will a little info about the mast parts in English
2 Nd will be a ship with all lower shrouds shown
Here the first problem starts: The first lower shroud -en fact two halves seised together around the masthead img3-4 has to be seised completely. from top to bottom, as it can come in contact with the lower sails. All the rest shrouds- normally uneven 5-7-9, although there are some even. now all the shrouds from now on are in pars. One pare left then the next right and so on. The knots on each one, are going backwards img nº.5.
Each shroud has to be set around a deadeye on the lower end and connected with the outboard deadeyes and set fast - they will all have to be parallel -there are several cheap methods to asure this.I


 used the one in Fig. 12, others nº11- carton with a complete drawing and where and distance and set fast with a double seised tape.
when the shroud is done, the fuetoch shroud will have to be added. Also, a piece of wood on the bottom and top see. nº 4 and 5 ( to avoid the deadeyes twisting) For the moment no need to do the Footsteps (webling?) now.
next step is to add the stays-coming


