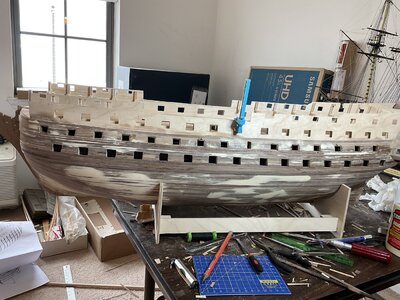
If you have not done so already, I strongly suggest that you mount your cannons on this deck before youn install the ipper deck or you will find it very difficult to get them in later. I learned this the very hard way with my Mamoli kit. There was no instruction in the kit's plans to do this and I had a very tough time installing 30 -40 cannons.Time for the update,, I need some help. I have completed the middle gun deck gunport linings, I think it worked out really well doing the wales first and the linings before dropping the upper gun deck into place. I was able to access both sides of the gun ports to put the linings in and I think it went well. I screwed up a little using 1X16 mm plank for the first 3 before I released my error but rest were done with 1X6” as instructed. Hopefully I wont run out of the 1X16 now. I am looking at other builds and noticing they had to “level out” the upper gun deck holes so the bases were level with the ground. I am concerned if I do that like others it will creat an uneven flow on the inner bulwarks and the cannons will not be level,,, At this point I think it is a matter of which problem do you want,, (Pick hours poison). I will take a break and start the upper gun deck planking now, I find that to be very zen and relaxing,
View attachment 353341
View attachment 353342
View attachment 353343
You are using an out of date browser. It may not display this or other websites correctly.
You should upgrade or use an alternative browser.
You should upgrade or use an alternative browser.
Hms Victory by Caldercraft - Build Log
- Thread starter traumadoc
- Start date
- Watchers 50
-
- Tags
- caldercraft jotika victory
Thanks for the warning, exactly the kind of stuff I am looking for!!!!If you have not done so already, I strongly suggest that you mount your cannons on this deck before youn install the ipper deck or you will find it very difficult to get them in later. I learned this the very hard way with my Mamoli kit. There was no instruction in the kit's plans to do this and I had a very tough time installing 30 -40 cannons.
Bob
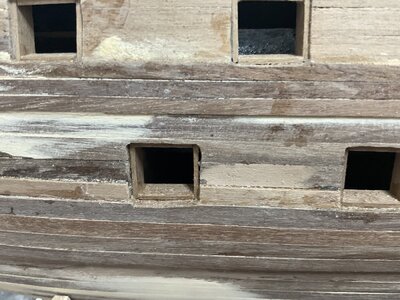
Another update. Struggling with the upper gun deck linings.. The inner bulworks and the outer skin don’t seem to line up correctly even though I spent EXTRA time making sure outer skin was correct (1mm above top of ribs) and the inner bulworks fits correctly on the height. As others have shown I am cutting out the bottom of the inner bulworks to correct for the height difference, my complaint is that I think the guns on the deck will now not be level with the run of the outer gunport, and I don’t think it is correctable, nor do I know what I could have done to fix it in the first place. I am lining the ports slightly differently, doing the horizontal first as it fits the 1X16 mm plank perfectly and I only have to custom fit the verticals after this. I will continue to make adjustments, but for the perfectionist surgeon in me, I am little disappointed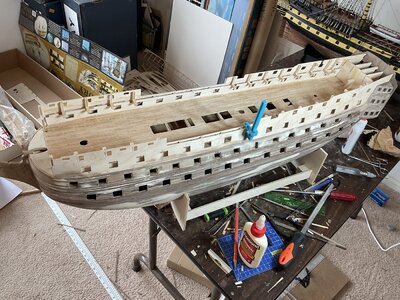 . I made up a sample gun and put it in to the different ports and you can see what I mean. The middle and lower gun deck linings are going smoothly, I am using a dental too and pick to place them and they seem to be all going in well.
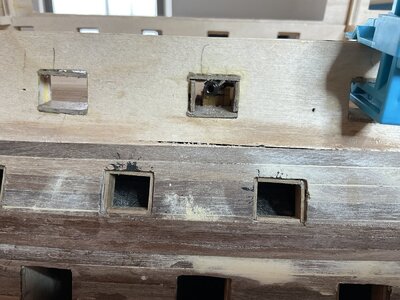
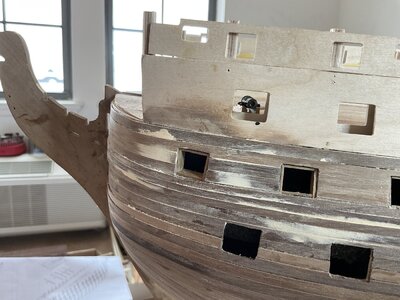
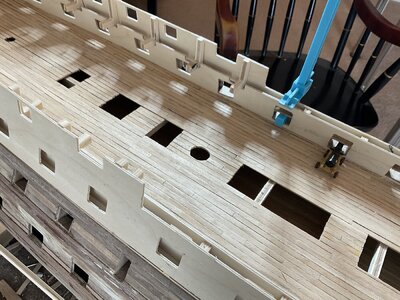
 . I made up a sample gun and put it in to the different ports and you can see what I mean. The middle and lower gun deck linings are going smoothly, I am using a dental too and pick to place them and they seem to be all going in well.


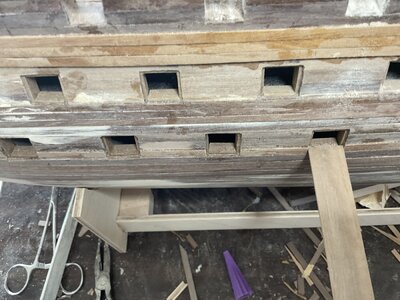
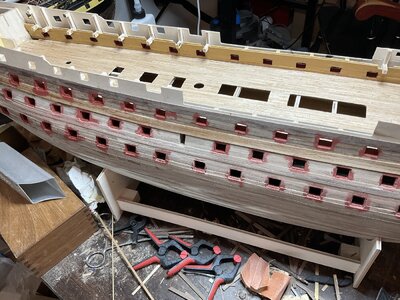
 , have been not feeling well for a week or two so things slowed down, but have made some progress, the upper, middle and lower gun deck ports are now lined, I have to trim the inner aspects of the upper gun deck. I am not happy, but okay with the way they came out. Not all perfectly symmetrical, and having to adjust the inner form/recut the inner aspect of the gunports fouled things up, I am going to have to lower some of the cannons to not be at the very top of the gunports. I figure I will sand down the wheels next to the wall and adjust that way, no one is going to see under the quarterdeck.
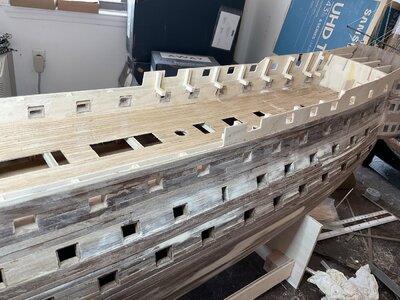
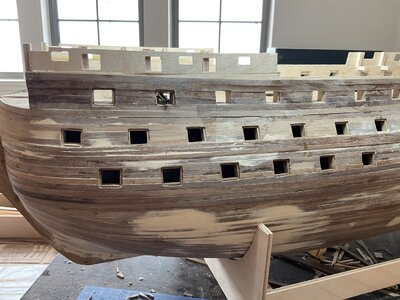
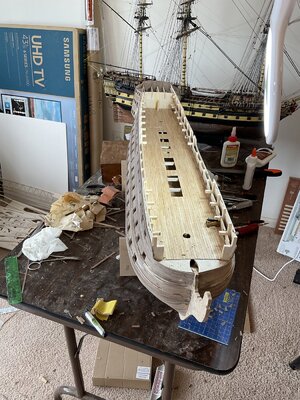
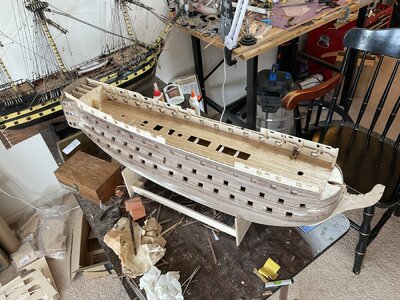
Considering where things are with the deck, and gun port vertical positions, that's the best solution., have been not feeling well for a week or two so things slowed down, but have made some progress, the upper, middle and lower gun deck ports are now lined, I have to trim the inner aspects of the upper gun deck. I am not happy, but okay with the way they came out. Not all perfectly symmetrical, and having to adjust the inner form/recut the inner aspect of the gunports fouled things up, I am going to have to lower some of the cannons to not be at the very top of the gunports. I figure I will sand down the wheels next to the wall and adjust that way, no one is going to see under the quarterdeck. View attachment 358548
View attachment 358547
View attachment 358549
View attachment 358550
- Joined
- Jan 25, 2023
- Messages
- 133
- Points
- 113

I bought this same kit a long time ago and have been trying to build my skills up to the point where I'm ready to start. So I will be following your build closely.
P.S. Just curious but why does everyone call it the Caldercraft Victory when Caldercraft is the line but JoTiKA is the manufacturer?
P.S. Just curious but why does everyone call it the Caldercraft Victory when Caldercraft is the line but JoTiKA is the manufacturer?
Good morning Doc. We are our own worst critics. From what I see this is turning into a fantastic Victory build. Lining around a 100 gunports is quite a project. Cheers Grant, have been not feeling well for a week or two so things slowed down, but have made some progress, the upper, middle and lower gun deck ports are now lined, I have to trim the inner aspects of the upper gun deck. I am not happy, but okay with the way they came out. Not all perfectly symmetrical, and having to adjust the inner form/recut the inner aspect of the gunports fouled things up, I am going to have to lower some of the cannons to not be at the very top of the gunports. I figure I will sand down the wheels next to the wall and adjust that way, no one is going to see under the quarterdeck. View attachment 358548
View attachment 358547
View attachment 358549
View attachment 358550
I honestly don’t know the reason for the different names, perhaps one is a subdivision of another, but I really don’t know. Good luck with your kit, I would suggest getting started, I know it is daunting, and you will make mistakes,, but the beauty of a wood kit is the ability to fix them and make adjustments. None of these kits come out perfect I am convinced. As a surgeon, I learned you that you learn more from your mistakes than you do your accomplishments so I would suggest wading in and making some mistakes!!!!I bought this same kit a long time ago and have been trying to build my skills up to the point where I'm ready to start. So I will be following your build closely.
P.S. Just curious but why does everyone call it the Caldercraft Victory when Caldercraft is the line but JoTiKA is the manufacturer?
Making some progress,, I am done with the upper gun deck bulworks,, the gunport are okay,, not perfect, but I can live with them. I am going to start painting now,, as per the directions and then after that it will be time to start making the guns for the gun deck. I lost the bag of black dome head nails that were in the kit , tried to reorder them from Caldercraft and got the wrong nails even after I asked for confirmation that I was ordering the right thing. I am so anal about things like that, not sure how to proceed with replacing the lost black round head nails that were in the kit. (Sigh). Not sure the best way to proceed with the painting, I am thinking the gun port linings in red, then the inner bulworks in yellow, then the hull yellow,, then I will tape up the lines and use the airbrush to put on the black for the hull.. have some more sanding to do, it will be enough when my tolerance ends I think. I am weirdly looking forward to the coopering, but will have to get some help with that, had a lot of problems coppering my vanguard, the superglue spilled onto the outside of the plates and I could never get it completely clean and nice the way I wanted. Again, thoughts, advice, etc, always welcome. Lastly the case for my vanguard will done in a week or so, so the Vanguard will be vanishing from my workstand and officially done..
Thanks for all the support and advice!!!
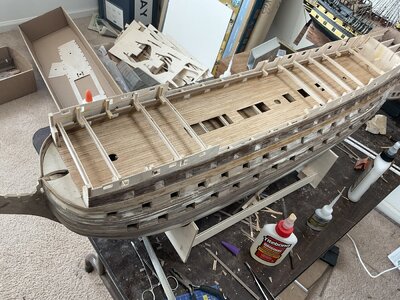
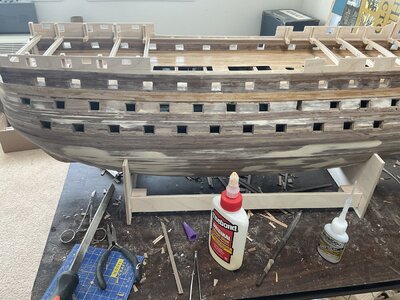
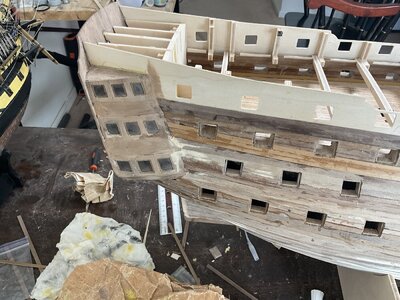
Thanks for all the support and advice!!!


Doc, looking good and you are making fantastic progress. Some medical issues have slowed me down a little on my Victory project but I am now at the point where it is time to line the lower gunports. Am trying to decide whether I should install the horizontal sills first and then do the vertical pieces or vice versa. Would appreciate any suggestions based on your recent experience. CheersMaking some progress,, I am done with the upper gun deck bulworks,, the gunport are okay,, not perfect, but I can live with them. I am going to start painting now,, as per the directions and then after that it will be time to start making the guns for the gun deck. I lost the bag of black dome head nails that were in the kit , tried to reorder them from Caldercraft and got the wrong nails even after I asked for confirmation that I was ordering the right thing. I am so anal about things like that, not sure how to proceed with replacing the lost black round head nails that were in the kit. (Sigh). Not sure the best way to proceed with the painting, I am thinking the gun port linings in red, then the inner bulworks in yellow, then the hull yellow,, then I will tape up the lines and use the airbrush to put on the black for the hull.. have some more sanding to do, it will be enough when my tolerance ends I think. I am weirdly looking forward to the coopering, but will have to get some help with that, had a lot of problems coppering my vanguard, the superglue spilled onto the outside of the plates and I could never get it completely clean and nice the way I wanted. Again, thoughts, advice, etc, always welcome. Lastly the case for my vanguard will done in a week or so, so the Vanguard will be vanishing from my workstand and officially done..
Thanks for all the support and advice!!!
View attachment 361327
View attachment 361328
View attachment 361329
I did the horizontals first because it was the natural fit for the 16mmX1mm plank that I used for the lining, then custom fit the side ports. I used a dental too to help and found it was great. Actually went alot easier than I thought it would. The third picture shows how the 16mm fits into the port perfectly.Doc, looking good and you are making fantastic progress. Some medical issues have slowed me down a little on my Victory project but I am now at the point where it is time to line the lower gunports. Am trying to decide whether I should install the horizontal sills first and then do the vertical pieces or vice versa. Would appreciate any suggestions based on your recent experience. Cheers
Thanks very much for the quick response and the info and photos. You are making great progressI did the horizontals first because it was the natural fit for the 16mmX1mm plank that I used for the lining, then custom fit the side ports. I used a dental too to help and found it was great. Actually went alot easier than I thought it would. The third picture shows how the 16mm fits into the port perfectly.
View attachment 361332
View attachment 361333
View attachment 361334
Continuing to make progress, I have the upper gun deck bulworks done, and the gun decks lined and painted. A few touch of places to go as I continue, but I try to keep things in blocks otherwise I am constantly chasing my tail. While paint is drying I also started working on the upper gun deck guns and think I finally have that understood. Some more sanding on the hull and it will be ready to paint. When I did my vanguard I used a paint sealer that I wasn’t very happy with, then a primer (see pictures). I am going to use the Humbrol yellow for the yellow stripes as I like that color and I want it to be consistent with my vanguard if they end up together. Does anybody have any suggestions for primer/prep coats as my last venture didn’t seem to work well?
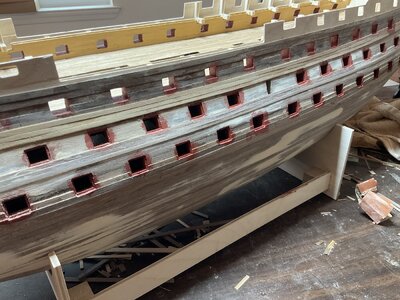
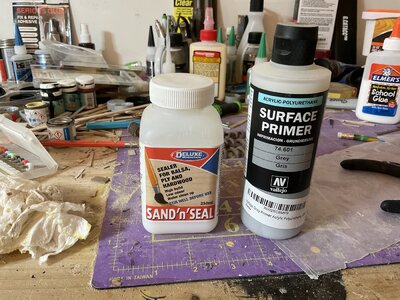
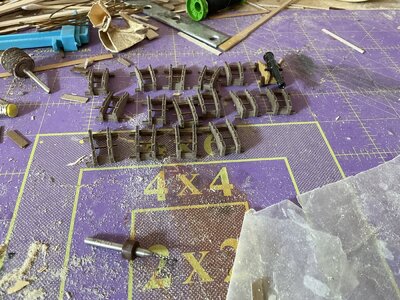


Here we go. Got sidelined by COVID so work stopped for a few weeks but I am back. Started painting the hull and realizing all the mistakes so far. Not sure if the primer coats helped or hurt. Don’t remember my vanguard being like this. May go back to sand and fill. Will think about it. Does anybody have any suggestions for good painting tape for clean edges. Haven’t found any I like
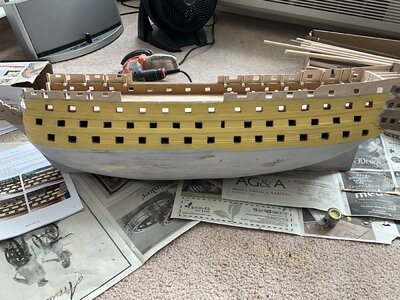

Here we go. Got sidelined by COVID so work stopped for a few weeks but I am back. Started painting the hull and realizing all the mistakes so far. Not sure if the primer coats helped or hurt. Don’t remember my vanguard being like this. May go back to sand and fill. Will think about it. Does anybody have any suggestions for good painting tape for clean edges. Haven’t found any I like
View attachment 369500
Amazon.com : tamiya model tape
www.amazon.com
Sorry you have been under the weather, glad you are feeling better. I tried the 3M painters tape with the edge sealing feature that I cut into roughly 3/4 inch strips. Didn't work great but wasn't too bad. Have some Tamiya tape enroute so I hope to agree with Docattner's post. I have started most assemblies/painting on the port side so I get lessons learned to apply to the port side. Just finished the copper plating on the port side and will be posting that separately.Here we go. Got sidelined by COVID so work stopped for a few weeks but I am back. Started painting the hull and realizing all the mistakes so far. Not sure if the primer coats helped or hurt. Don’t remember my vanguard being like this. May go back to sand and fill. Will think about it. Does anybody have any suggestions for good painting tape for clean edges. Haven’t found any I like
View attachment 369500
Hi a little tip I found from a post the other week regarding getting a nice crisp edge on the tape, is to paint the edge of the tape with the same colour as you are trying masking off and let it dry. Any bleed under the tape will be the same as the colour you masked off and will not notice when you pull the tape off . I get very crisp edges now with no horrible tape bleed.
Currently building panart victory so a lot of black on yellow. Hope this tip helps.
Currently building panart victory so a lot of black on yellow. Hope this tip helps.
Sounds like a great idea. Will give it a try, thanksHi a little tip I found from a post the other week regarding getting a nice crisp edge on the tape, is to paint the edge of the tape with the same colour as you are trying masking off and let it dry. Any bleed under the tape will be the same as the colour you masked off and will not notice when you pull the tape off . I get very crisp edges now with no horrible tape bleed.
Currently building panart victory so a lot of black on yellow. Hope this tip helps.
- Joined
- Nov 28, 2020
- Messages
- 160
- Points
- 88

Sin duda lo probaré, pero la pintura del cascos no se pega a la cinta tratada como tú dices?Hola, un pequeño consejo que encontré en una publicación la otra semana con respecto a obtener un borde nítido en la cinta, es pintar el borde de la cinta con el mismo color que está tratando de enmascarar y dejar que se seque. Cualquier sangrado debajo de la cinta será del mismo color que enmascaró y no se notará cuando retire la cinta. Obtengo bordes muy nítidos ahora sin sangrado de cinta horrible.
Actualmente construyendo la victoria del panart, así que mucho negro sobre amarillo. Espero que este consejo ayude.
Lo siento, no hablo espanol.Sin duda lo probaré, pero la pintura del cascos no se pega a la cinta tratada como tú dices?


