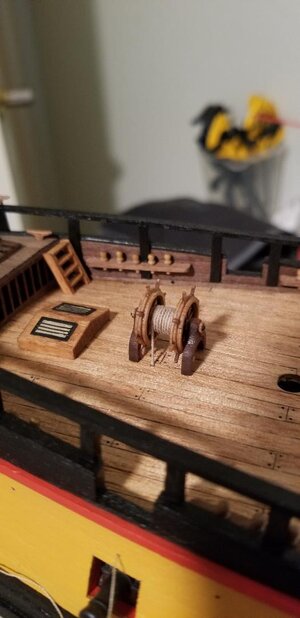
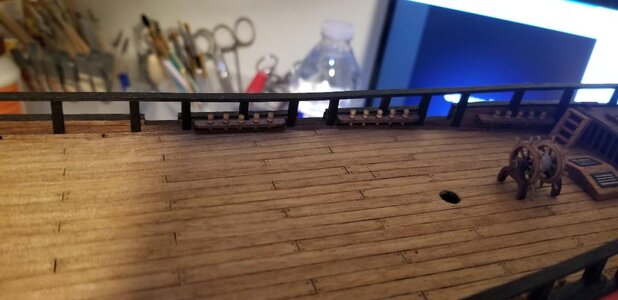
well done sailorThanks again TKAM. The trennals looked so uniform I thought maybe they were factory done or with some sort of jig. And I have to agree with you there is nice wood grain on your planking. I will use your technique on my Bounty when I start deck as soon as I finish second planking.
You are using an out of date browser. It may not display this or other websites correctly.
You should upgrade or use an alternative browser.
You should upgrade or use an alternative browser.
I finished up the three gratings that go on the gun deck underneath the longboat as well at the longboat cradle. All these pieces are made from Walnut so even with a neutral clear stain they are of a very dark hue. When placed on top of the gun deck the starkness in colors between the deck planking and the gratings was extreme and I didn't like it one bit. So I "watered down" some Minwax Golden Oak and applied another coat on the deck planking. I sure Forrest Gumped my way through this part of the project, the end result I really like. I also added some shot racks along the side of each large grating, this feature is not on the plans. I'll install the cannon balls after planking the hull and Surprise is right side up again.
The second picture is the kit provided cast longboat which I won't use. I just ordered another Falconet longboat that I just finished for my Rattlesnake build, this is picture three. It's 5mm longer than the kit provided boat but it'll fit just perfect in the longboat cradle.
The last picture is an example of the supports for the deck immediately above the gundeck, forecastle up front and quarterdeck in the rear, notice the camber that the false deck and then deck planks will follow. The plans call for the center pillar being 21.5mm long. I found the camber to be very pronounced and so I shaved a bit off that central pillar, it's more like 20mm long now.
View attachment 170088View attachment 170089View attachment 170091View attachment 170092
The deck es really well done with its accessory. I LIKE IT VERY much that you are making the deck curves-It is generally not seen in kits, normally vertical.
Manoly is sold in Spain through AMATI (Italy) European Distributor ??That's how I got my Bounty on sale about four years ago, a going out of business sale. Not sure what's going on but yeah Model Expo has many Mamoli kits in nice shiny new boxes.
That is Well done. The only difference here between you and I, is that Keel, False Keel Bow and Stern Part is the 1Th I build in- looks perfectImagine my Surprise (pun intended) when I realized I still had not installed the keel nor the stern post nor the bow stem. I'm beating my self up over it but found a solution that is so far working. All of the above mentioned parts are laser cut from walnut. The bulkheads extend, in some cases, well down into the keel proper which for me suggested the rabbit should be cut into the walnut keel rather than the central structure that holds each bulkhead like normal. ?Design flaw? To be clear nothing in the directions mention anything about a rabbit or installation of the keel, stern post, and bow stem, all of that is left up to the builder.
I dry fitted each piece of keel/post/stem and traced out where each bulkhead ended. Then I just cut the rabbit into the keel according to the marked lines. Glued in with carpenter's glue and clamped. Then I drilled holes and sunk nails through the keel and into that central piece. I'm pretty confident it is one of the most solid keels I've ever made. I've been setting a first-layer plank up against my rabbit at various locations and so far what I cut out is working pretty well. Tomorrow is the last keel section and stern post.
View attachment 170282View attachment 170283View attachment 170284
Your Planking is really GOOD. Both from top to Bottom -a 10 out 10.Here on the model you can see that the groove runs parallel to the keel.Covering boards are negated in the area of the sternpost.In the keel at this point, you need to cut out the quarters, the thickness of the first skin.In the nose of the ship, you also need to select a groove.The front ends of the planking boards are laid there.I after gluing the first skin, the engraver makes another groove on its edge.But already for the insertion of the second skin there.
View attachment 170540View attachment 170541View attachment 170540View attachment 170541View attachment 170540View attachment 170541View attachment 170540View attachment 170541View attachment 170540View attachment 170541View attachment 170543
After the first four layers of hull planks right below the gun ports are installed, customary is to install the garboard plank against the keel. Again, I must have learned something on my previous builds as this is going smoothly so far.
View attachment 172814View attachment 172815
doing well. It seam to me that you have through the Planking Bible.Your Planking is really GOOD. Both from top to Bottom -a 10 out 10.
I find tapering very difficult when using shorter strips. Generally, I divide up a plank run in three sections. The middle section needs no tapering and I make that one as long as possible. Towards the bow I'll start the strip the same width as that untapered middle strip and trim it 1/3 to 2/3 that width. Towards the stern if tapering is necessary I'll do the same.
I agree this part can be fun but that open gap gets harder and harder to get right without twisting a strip too much and having it splinter. I think however that this limewood provided in the kit is better for a first planking than basswood. Basswood splinters way too much.
Starking correctly equal half done
OK, so the deal is....after a judicious sanding I'm finding almost nothing to complain about. No hollows after all, no spots standing proud. Only minor cracks that I don't even have to fill, the second planking will cover those spots over with no problems. Frankly I'm astonished that the first planking came out so well. I guess I faired well after all!
The only big flaw I can see is towards the stern post the flare from hull to keel is not quite symmetrical. I don't think there is any chance that will be spotted but I know (and now you know) that it is there. It'll stick in my craw in any case. But, I'm pleased. Time to move on to installing all the gun port frames then first planking up to the sills.
Before sanding:
View attachment 178438View attachment 178439View attachment 178440
After sanding (no filling).
View attachment 178442View attachment 178443View attachment 178444View attachment 178445View attachment 178446
still good apart from some minor problems at the stern.
For work and effort of course like.But!View attachment 178474View attachment 178475View attachment 178476Who taught you how to sew up the stem?Cut the skin along the entire length of the stem.It wasn't like that.If there is a second skin, imagine what will be the thickening in the area of the stem and keel.Covering boards are stacked in a pile on stunnah and Kiel.
this looks better
Final sanding for the upper hull (first planking) and flushing the gun ports. I ended up placing some sticky tape on the inside of each gun port and that caught most of the sawdust, what ended up on the gun deck I blew away with compressed air. Problem solved. Two of the gun ports to my eye are looking a bit crooked and I can't tell if that's just my Covid talking (just kidding) or what I don't know. I'm confident I can solve this problem with some shaving of the gun port frames and with the final planking.
The left of the first pic shows the gun port before sanding, the right side shows after sanding flush. Bear in mind the hardwood second planking will be flush with each gun port frame on all four sides and no part of the frames showing out will be seen, and the inner frames will be painted red.
View attachment 184053View attachment 184054
you could have made these metal gunports yourselves and maybe better
no further comment from my side, as the build has some tome on its back. anyhow have made copies of the build. Anyhow allways ready to answer quiestions -not only from you. This is the way I build now. My Shop has been closed 8 Years ago aprox.you could have made these metal gunports yourselves and maybe better
- Joined
- Mar 27, 2019
- Messages
- 819
- Points
- 403

I hope anyway, that you have made a Copy of each Bulkhead? or Frame, false Keel, etc, so if something goes wrong, you have a reserve. You can even insert halt bulkheads on each side to get more. do a copy of all possible wood material and number it. S far I can see, it generally looks good. Only missing the Keel, bow, and Stearn parts, so you can make the Cardboard. (BOU THAT IS ONLY PERSONAL TO ME)
I always save the plywood sheets where the bulkheads were before I cut them out. I save them just on the off chance I break a bulkhead and can't fix it. After the hull planking is finished I toss the plywood blanks.
- Joined
- Mar 27, 2019
- Messages
- 819
- Points
- 403

The plans don't show a mast coat for the portion of the mainmast that shows on the gun deck, but it seems something needs to trim it up. Only three hardwood mast coats were included in the kit so I scratched one up.
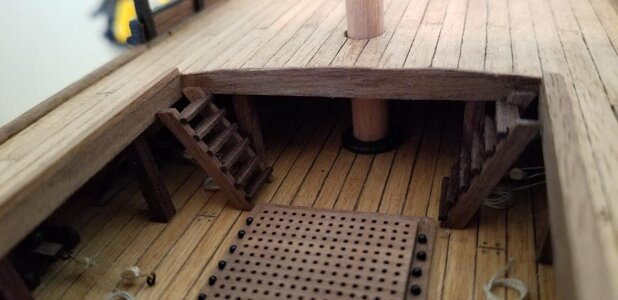
Gun deck bitts.
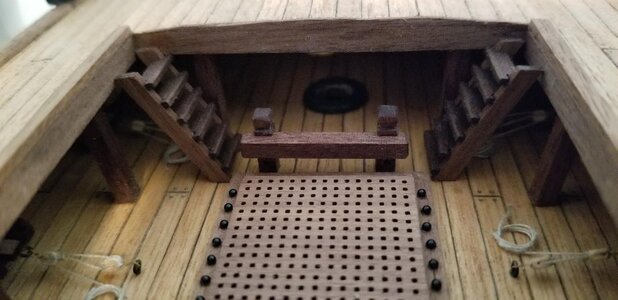
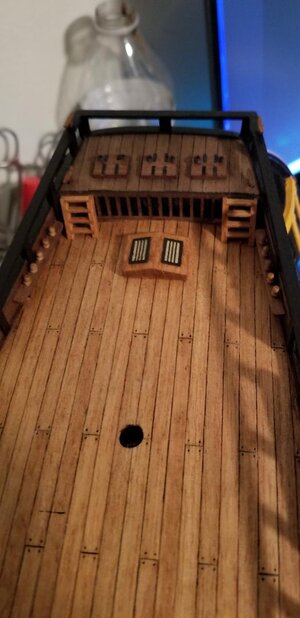
Pin racks for the mizzen mast along the rail, some belaying cleats, a skylight, and some hatches on the upper poop deck. I cannot for the life of me figure out what these hatches are for. Perhaps the area beneath the hatches are some sort of storage? There aren't any doors leading to the quarterdeck from this area, only the hatches.
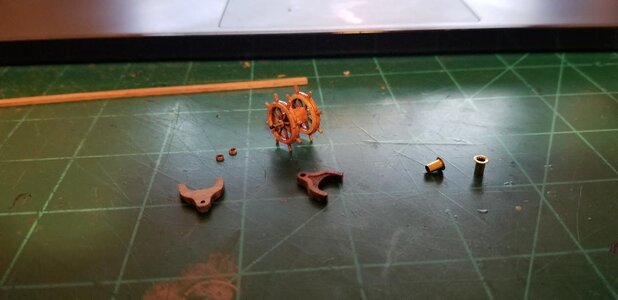
Working on the ship's wheel.

Gun deck bitts.

Pin racks for the mizzen mast along the rail, some belaying cleats, a skylight, and some hatches on the upper poop deck. I cannot for the life of me figure out what these hatches are for. Perhaps the area beneath the hatches are some sort of storage? There aren't any doors leading to the quarterdeck from this area, only the hatches.

Working on the ship's wheel.

- Joined
- Mar 27, 2019
- Messages
- 819
- Points
- 403


