HMS Blandford 1:48 POF Modelship Dockyard [COMPLETED BUILD]

For me, using a ready-made deck and these poor imitation nails makes no sense. Modellship dockyard should seriously work on this or remove it. I bought wood for my hoy and I'm making the sheathing, deck and some of the equipment from scratch. It's a matter of choosing the right color of wood and a bit of will and time.
 
For me, using a ready-made deck and these poor imitation nails makes no sense. Modellship dockyard should seriously work on this or remove it. I bought wood for my hoy and I'm making the sheathing, deck and some of the equipment from scratch. It's a matter of choosing the right color of wood and a bit of will and time.
I completely agree, this is the first kit I’ve made with these pre made decks and I instantly disliked them, I’m sure that most others at this level feel the same. Surely it can’t cost more to have separate planks
 
Yes, we are aware of this issue. In the later production batches, all the prefabricated nail holes of POF kits have been removed
Good news. Your models are very pleasant to build. Think about these ready-made decks, it looks bad. It will be better if you add a template to cut yourself, instead of these artificial lines connecting the boards.
 
Ken, Nice job bouncing back from all of the challenges. I think no one is exempt. I am impressed with your progress and rate at which you build. Do you sleep more than 5 hours per night, eat lunch and tea while you build? Impressive progress.
Hi Ken, Thanks for the kind comments. Yes I eat, sleep and even do a bit of housework. I think my quick progress has much to do with keeping the build simple, no fussing about worrying about perfection, detail or accuracy, as long as it’s neat and looks ok that’s all I want, I just enjoy sitting at my small bench and whittling wood, a pleasant way to pass the time.
 
Ken there have been scores of wonderful comments, suggestions and praises about your workmanship! You are truly a master that most of us novices dream about be coming one day. I have enjoyed every step of your progress, your photographs, and your attention to detail. What a beautiful model! Congratulations, Magic Mike
 
Hello and thanks for being here. Today I’ll bring you bang up to date, some of the photos I took this morning.

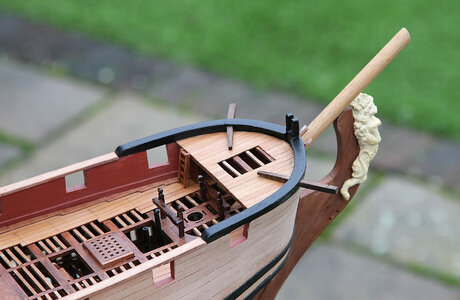
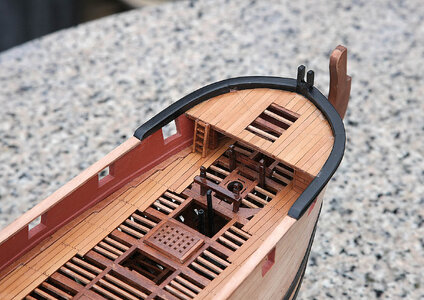
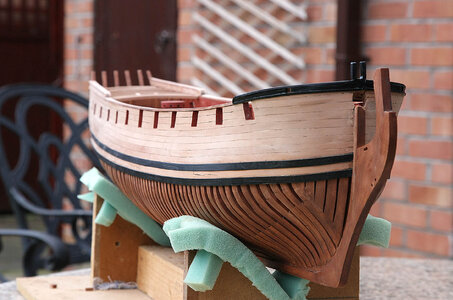
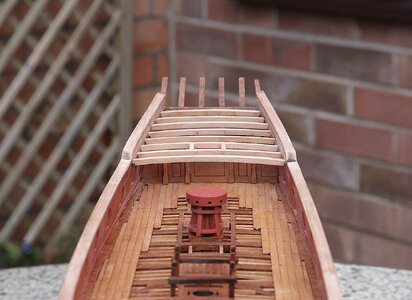
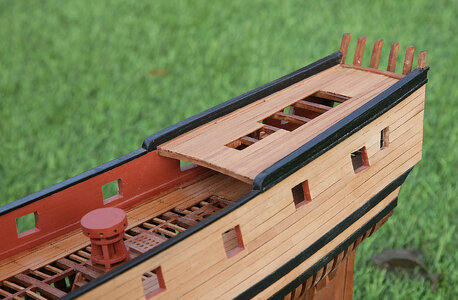
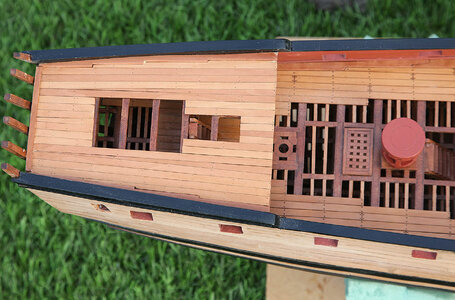
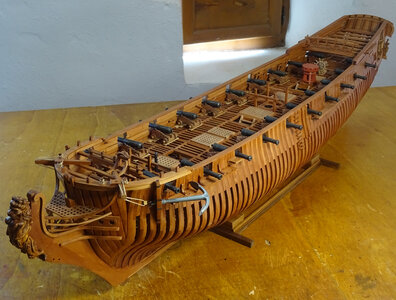
Things I’ve done, I fitted the forecastle beams, and its deck as well as the bulkhead. The deck was a pre made piece with etched planking, it fitted well but it seemed a different textured pear from the other planking and when after fitting and oiled it turned a muddy brown colour, completely at odds with the other planking. It was so bad that I ripped it out, cut new planks from scrap and re made the deck, when oiled they matched the deck planking perfectly, a redo worth the effort. I made up the raised bow part and fitted the capping, a surprising amount of work doing this, fourteen parts alone. I made cut outs for the davits which are shown dry fitted, I re-made the knights head for a better fit and prepared the stub bowsprit. The Lion figurehead didn’t fit the prow which was too wide, others have tapered the prow but I didn’t trust myself to do that neatly, instead I widened the recess in the lion by about a mm. each side, it then slid over the prow nicely without any sign that it had been altered. I have painted the wales, it’s probably a bit early in the build to do this but I just wanted it to look nice on my bench. Finally I made up and fitted the bitts, these were a bit awkward as they were made to pass through the upper deck and then fixed to the lower deck, I don’t see how this could have been done unless they had been built into the beam yokes when they were being made up, I adapted the supplied ones and unless you looked closely you wouldn’t know. That’s it, a lot of work done and now that some of the detailing has been done I think it’s starting to look pretty good, to me anyway.

View attachment 414173

View attachment 414174

View attachment 414175

View attachment 414177

View attachment 414180

View attachment 414178
Good morning Ken. With each photo she becomes more beautiful. Stunning work my friend. Cheers Grant
 
Ken there have been scores of wonderful comments, suggestions and praises about your workmanship! You are truly a master that most of us novices dream about be coming one day. I have enjoyed every step of your progress, your photographs, and your attention to detail. What a beautiful model! Congratulations, Magic Mike
Hi Mike, Thank you for your very complimentary comments, I think that you give me too much credit, I see better and more comprehensive builds on the forum that I wouldn’t compare mine to. I think what make mine look good is that I keep things simple and within my abilities but make sure that what I do is clean and neat. People probably won’t notice incorrect detail but they will notice poor joints, painting etc. so I just concentrate on the basics Ken
 
Hi Mike, Thank you for your very complimentary comments, I think that you give me too much credit, I see better and more comprehensive builds on the forum that I wouldn’t compare mine to. I think what make mine look good is that I keep things simple and within my abilities but make sure that what I do is clean and neat. People probably won’t notice incorrect detail but they will notice poor joints, painting etc. so I just concentrate on the basics Ken

And that right there is some of the wisest advice I’ve read. Of all the model planes, tanks, etc that I’ve built, only the 0.01% of the “experts” will know that the bolt pattern on that transmission or the rivet pattern on that wing is not correct… but everyone will see if it’s sloppily done. I’m just enjoying my build and hope to have something I’m proud of at the end of the journey.
 
Hello and welcome. Again thank you for adding your comments to my posts, they make the log much more interesting.

I’ve made a little more progress, you’ll see that I’ve added a little more detail and started to paint the forecastle rails. I’ve also started to fit the caps to the top of the hull as well as beginning to make up the quarter deck frame and bulkhead. Next will be the need to cut down the ribs to size. This is a bit of a worry as once trimmed down it would be difficult to correct if wrong, again the instructions didn’t give much of a clue, no measurements or drawings just a low res computerised image. I did contact Modelship Dockyard again for confirmation before I cut and was again answered promptly. One good thing with the kit is that the parts are so accurate that once you start to fit them it becomes apparent how they should go and the shape and dimensions pretty much take care of themselves. Now just the pictures.


Screenshot (7).png

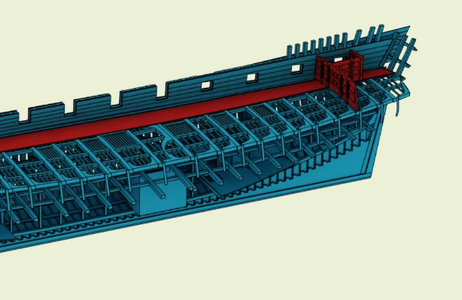
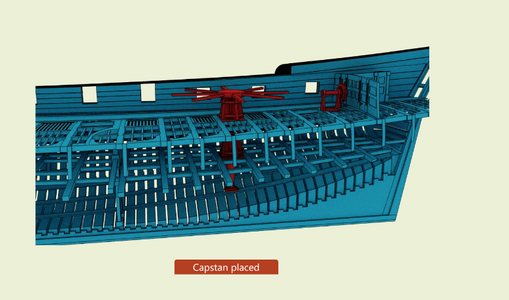
These are the images relevant to the height of the of the quarter deck walls

Screenshot (8).png

362.jpg

363.jpg

365.jpg
 
For me, using a ready-made deck and these poor imitation nails makes no sense. Modellship dockyard should seriously work on this or remove it. I bought wood for my hoy and I'm making the sheathing, deck and some of the equipment from scratch. It's a matter of choosing the right color of wood and a bit of will and time.
True story
 
Hello and again welcome. Today’s episode shows the completion of the rails and the quarter deck beams. I held my breath and cut down to size the ribs, still not sure, the Anatomy book shows rails above them which looks more correct but nothing in the kit for these nor instructions, I'll have a think about this but will probably just leave it simple. Not much explanation needed just some pics. Next I’m going to paint the rails and add the waterways before planking.


366.jpg

367.jpg

368.jpg

369.jpg

370.jpg
 
Hello and welcome. Once more thank you all for following and for your many likes.

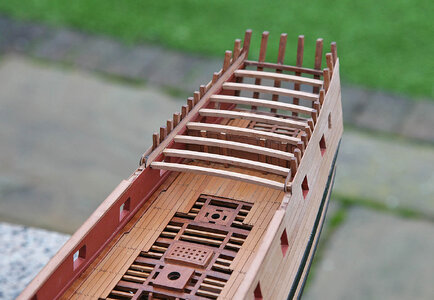
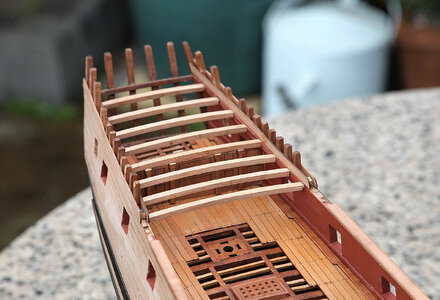
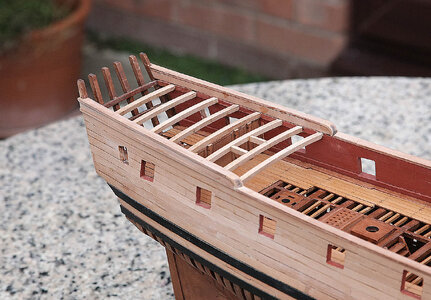
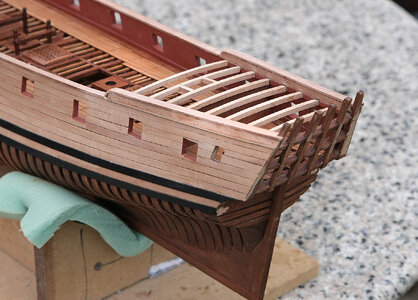
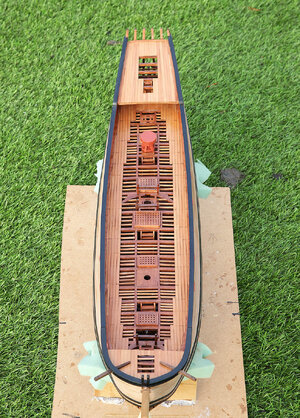
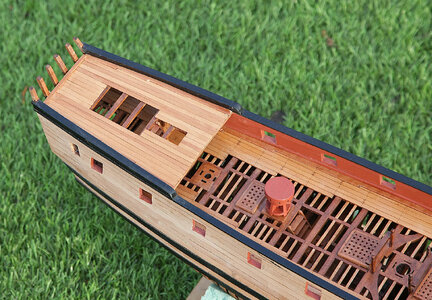
Today I’m showing my progress on the quarter deck, I fitted the waterways, planked, then installed a set of ladders. The waterways were provided and were a good fit but the deck planking was problematic. I had two sheets of pre shaped planks left so I assumed that these must be for the quarter deck, again nothing in the instructions to identify them, this time not even a computer image. Previously the initial planks had cut outs to fit into the steps of the waterways but not this time, there were three different widths, some curved and no matter how much I tried I couldn’t work out how they should fit, it’s as if they were for a different model. As before I then decided to make up my own pattern, I was faced with the same problem of lasered treenails and joints. This time I turned them upside down, sanded off the large amount of laser burn from the underside then filled the treenail holes with coloured filler, then I cut them all to the same width. When fitted and oiled the treenails were almost invisible, I’m not sure but I’ll probably add joints and a simple rendition of treenails. I don’t think that the quarter deck walls come up high enough there’s nothing in the kit so I’ll put my mind to making up some rails, these seem the norm for most frigates.


371.jpg

372.jpg

373.jpg

374.jpg
 
Hello and welcome. Once more thank you all for following and for your many likes.

Today I’m showing my progress on the quarter deck, I fitted the waterways, planked, then installed a set of ladders. The waterways were provided and were a good fit but the deck planking was problematic. I had two sheets of pre shaped planks left so I assumed that these must be for the quarter deck, again nothing in the instructions to identify them, this time not even a computer image. Previously the initial planks had cut outs to fit into the steps of the waterways but not this time, there were three different widths, some curved and no matter how much I tried I couldn’t work out how they should fit, it’s as if they were for a different model. As before I then decided to make up my own pattern, I was faced with the same problem of lasered treenails and joints. This time I turned them upside down, sanded off the large amount of laser burn from the underside then filled the treenail holes with coloured filler, then I cut them all to the same width. When fitted and oiled the treenails were almost invisible, I’m not sure but I’ll probably add joints and a simple rendition of treenails. I don’t think that the quarter deck walls come up high enough there’s nothing in the kit so I’ll put my mind to making up some rails, these seem the norm for most frigates.


View attachment 415478

View attachment 415479

View attachment 415480

View attachment 415481
Looking very nice and clean Ken. Great work as usual. The quarterdeck rails on my Blandford came out a lot higher. Maybe you cut the stern frames a bit too short.

DSC06341.JPG
 
Looking very nice and clean Ken. Great work as usual. The quarterdeck rails on my Blandford came out a lot higher. Maybe you cut the stern frames a bit too short.

View attachment 415577
Hi Keith, Thanks. I’ve made a slight error in not having enough upsweep on the quarter deck walls, it was difficult to judge as you will know with the very vague instructions. I have however benefited from my mistake as the rails that I’ve made today to compensate brings it much closer to how it’s shown in the Anatomy book and I think looks better for it.
 
That's the third time I've see that identical lion figurehead on three different models. Two Spanish ones and the Blandford. The "El Terrible" at the USNA museum (which, in Grant Walker's opinion, is an English made model from around 1800) And the one in Cuba. The original Cuban ship, apparently and model, were built in Cuba.
 
Last edited:
Back
Top