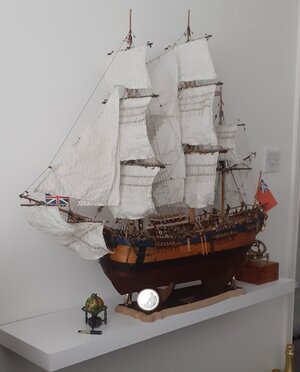
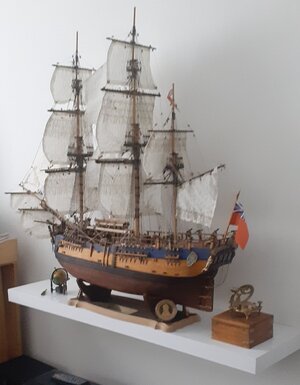
HMB Endeavour

Beautiful work, very imperesive. Have you considered the book Anatomy of a ship to help with the rigging? Also I think that because she was to sail in the South Pacific her lower hull was applied with "The White" to help safeguard against wood worm. I too left my lower hull unpainted to show off the wood supplied with the kit. When starting the rigging you should consider useing blocks supplied by "Dry-Dock" suppies featured here on this site. I have purchased and used them and found them to be excellent. Also the deck cleates and shroud cleats are exceptional. The line provided in the kit is out of scale, the line offered by Dry-Dock is laid correctly and sized correctly. Dry-Dock currently does not offer tan line for rigging but "the Crafty Sailor" models shop does and it has been a fine product.
 
Last edited:
Beautiful work, very imperesive. Have you considered the book Anatomy of a ship to help with the rigging? Also I think that because she was to sail in the South Pacific her lower hull was applied with "The White" to help safeguard against wood worm. I too left my lower hull unpainted to show off the wood supplied with the kit. When starting the rigging you should consider useing blocks supplied by "Dry-Dock" suppies featured here on this site. I have purchased and used them and found them to be excellent. Also the deck cleates and shroud cleats are exceptional. The line provided in the kit is out of scale, the line offered by Dry-Dock is laid correctly and sized correctly. Dry-Dock currently does not offer tan line for rigging but "the Crafty Sailor" models shop does and it has been a fine product.
Hi Dave. Happy new year.

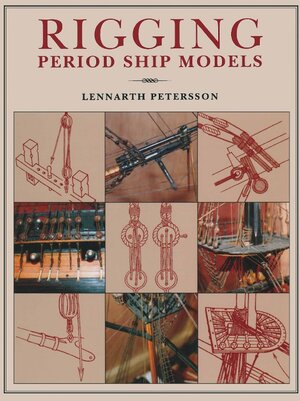
Thank you for your advice and pointers. I substituted the thread in the kit with scaled thread from a supplier in the UK. For the sizes I used a rigging scale spreadsheet, which is on the SOS website. I'm rigging the ship along the lines of Marquardt in his AOTS. I am referring also the Lennarth Petersson's excellent ebook "Rigging Periodic Ships"

Trevor.

Lennarth Peterssons Buch.jpg
 
Last edited:
Hi Dave. Happy new year.

Thank you for your advice and pointers. I substituted the thread in the kit with scaled thread from a supplier in the UK. For the sizes I used a rigging scale spreadsheet, which is on the SOS website. I'm rigging the ship along the lines of Marquardt in his AOTS. I am referring also the Lennarth Petersson's excellent ebook "Rigging Periodic Ships"

Trevor.

View attachment 279708
Hi Dave,
Could you help me with the following:
I am in the throes of attaching the preventer stays on the three masts.
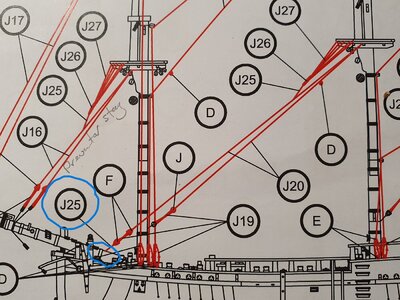
Unfortunately, OcCre doesn't say anywhere on their drawings or instructions where the preventer stay (J25 on the drawing) for the fore mast is fixed to the ship. They indicate near the bowsprit, but where the heart is fixed, they don't say.

Anfrage OcCre J25.jpg

Where should the preventer stay be attached to the ship?
I was wondering, shouldn't the deadeyes at J and at the mast be a heart, as used elsewhere for the stays?
I left the dry dock yesterday feeling a bit frustated. I attempted a dry run of attaching the yards to the masts. How did you accomplish the task of attaching the yards to the masts with the tracks and glass beads?

I appreciate any info you can provide.
Many thanks,
Trevor.
 
I had to remedy an ommision last evening. OcCre, on their drawings, forgot to indicate where the lower preventer stay for the main mast is attached to the deck. I enquired by OcCre and the manufacturer sent me the information required.
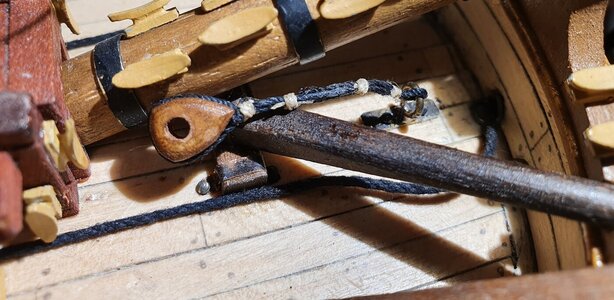
I created the fixing plate by taking a 4 mm brass strip, drilled two holes for the nails and a centre hole for the ring. I soldered the two together, burnished them and, after I had tied the heart into position off the ship, mounted the fixing plate to the deck.

The result of my effort below:
Deck fixing plate for preventer stay.jpg
 
I am growing in confidence with the rigging and with the experience I am gaining along the way, I decided to remove and redo some earlier bits of rigging, which I felt weren't up to scratch. Still some way to go and with Maruqardt's help I'll get there.
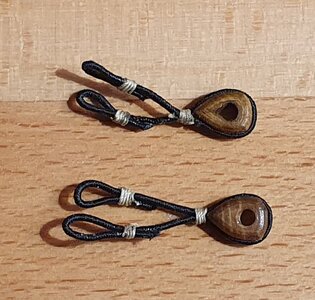
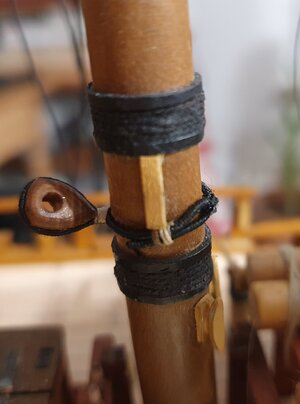
I didn't like the manufacturer's instructions to use deadeyes on the masts to tie the preventer stays, so I replaced them with hearts and bound them to the mast as Marquardt indicated in his AOTS.

Hearts for preventer stays.jpgHeart on the mast.jpg
 
Continuation of my build log.......
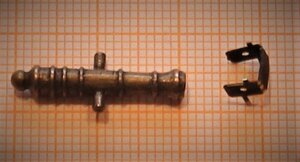
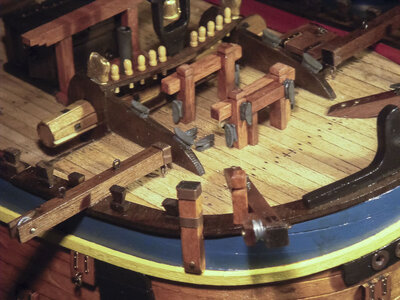
Making the hand cannons or falconettes. The supports supplied by Occre, I felt, were not particularly good, so I decided to make my own. To do this I made fixtures to bend the wire (0,8 mm Dia.) and to hold the three elements of the support for soldering. I noticed after burnishing the supports, the solder would not adhere to the wire. Another lesson learnt. Photo below shows the original support .
1.Original support from the kit.jpg


View attachment 175023View attachment 175024View attachment 175025

For the knob on the end of the handles I cut off the top of railings I had from a RC model I built years ago and soldered them in place.
View attachment 175027
Nice work. I used the originals brass supports but had to drill the holes wider as they were too small for the canons to fit through.
 
I am currently also building Occre Endeavour, and the information I find here is very useful. Also I'm inspired by your meticulous approach. I'm only at the beginning - just finished first planking - but it's good practice to look ahead. Are you still working on this ship?

Endeavour_a06.jpg
 
Hi to all,
I hope someone will read this post who has experience in building the Endeavour.
The kit I'm building from contains only 2 anchors and provisions for the anchor ropes running into the deck are made for these two.
However, the Endeavour carried a minimum of 4 anchors and, having procured a further two anchors, I'm wondering how the additional two anchors would have been secured to the hull and where the additional holes in the deck for the anchor ropes would be.
Can anyone give me some pointers? It would be greatly appreciated.
THESE ANCHORS WERE MAINLY AS RESERVES. TO SUBSTITUTE ONE THERE HAVE LOST. es tute Wir wee, das ich nur Heute dein build log gefunden habe. Mein Endeavor -1994 -was from Artesania Latina, weil Ich haette ein anwort von viele diene fragen, aber das ist jetz zu spaet
bin freund mit - Karl Manche-Wir sind beide in the 80 jahre. ich habe 50 jahre plus in shiff bau
 
Hi Dave,
Could you help me with the following:
I am in the throes of attaching the preventer stays on the three masts.
Unfortunately, OcCre doesn't say anywhere on their drawings or instructions where the preventer stay (J25 on the drawing) for the fore mast is fixed to the ship. They indicate near the bowsprit, but where the heart is fixed, they don't say.

View attachment 281377

Where should the preventer stay be attached to the ship?
I was wondering, shouldn't the deadeyes at J and at the mast be a heart, as used elsewhere for the stays?
I left the dry dock yesterday feeling a bit frustated. I attempted a dry run of attaching the yards to the masts. How did you accomplish the task of attaching the yards to the masts with the tracks and glass beads?

I appreciate any info you can provide.
Many thanks,
Trevor.
IMG_1958.jpeg
 
I am currently also building Occre Endeavour, and the information I find here is very useful. Also I'm inspired by your meticulous approach. I'm only at the beginning - just finished first planking - but it's good practice to look ahead. Are you still working on this ship?

View attachment 389886
Hi,
yes I am still building the ship. I took a long break from building, as I had so many other pressing things to do. I will return to the yard in autumn, when the house and garden will allow. So much work.
 
THESE ANCHORS WERE MAINLY AS RESERVES. TO SUBSTITUTE ONE THERE HAVE LOST. es tute Wir wee, das ich nur Heute dein build log gefunden habe. Mein Endeavor -1994 -was from Artesania Latina, weil Ich haette ein anwort von viele diene fragen, aber das ist jetz zu spaet
bin freund mit - Karl Manche-Wir sind beide in the 80 jahre. ich habe 50 jahre plus in shiff bau
Hi Elcapi,
never too late. I am still building the Endeavour. Any info much appreciated.
es ist nie zu spät. Ich arbeite noch an der Endeavour.

Trevor
 
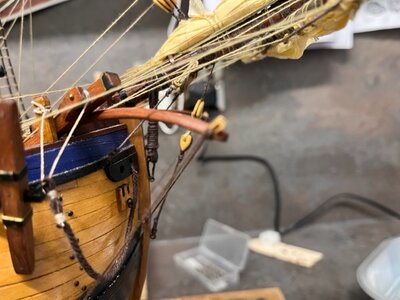
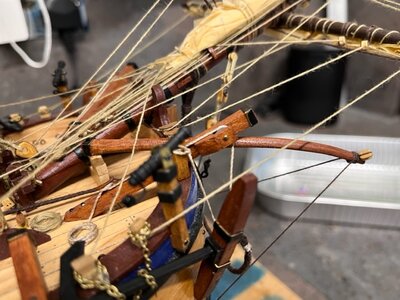
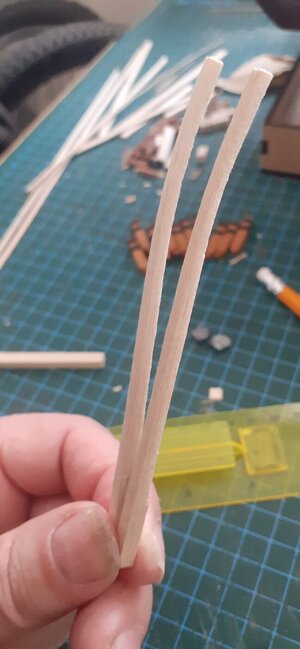
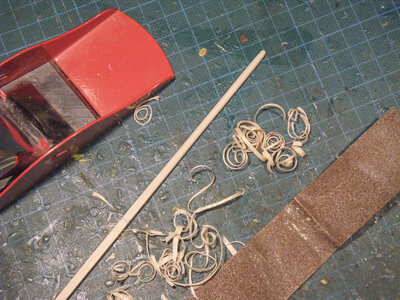
Moving on to the bow work adding the forward pair of anchors and the bumkins before venturing on to commencing the bowsprit. The bending of the bumkins proved quite difficult, as the wood would curve unnaturally instead of forming a continous curve. I had to make 3 pairs, as the first two weren't right.
The kit says to drill two holes in the deck for the anchor ropes. I found this to be non-satisfatory and so therefore I added a ring to each hole, as this would have been the case on the real ship. I am sure the anchor ropes would have chafed the wood if a strenghening ring had not been added. I also added rings to the holes in the bow where the anchor ropes exit the bow.
View attachment 219449
View attachment 219448
View attachment 219446View attachment 219447
According to the books on maritme history, ships started using chains on their anchors around the mid 18th century. The Endeavour was built around this time, so the question was, use rope or chain to tie the anchors to the hull. I hope I have made the right choice using chain. The rope held by sticky tape in the image below is for the anchor bouy, which will be fixed with its bouy to the shroud later. I'll have to redo the deadeye at the port davit. I missed a hole!

View attachment 219455
View attachment 219456

I have alread started work on the masts and bowsprit with boom and details will follow. I will also post some photos of the method I will use to taper the masts and yards.

Hello Luigi,

Maybe you can help me out. I was wondering what kind of wood you used for the bumkins. Was it the 4x4 limewood supplied with the kit? How did you go about bending them in the right shape, and did they remain in that shape over time? Did you first taper and then bend, or vice versa? I'm considering using a different kind of wood, pear wood for instance because of it's pliability, but I do not have any experience with this.
Below is a picture of the present state of my forecastle, without the bumkins that is. The cleats will be painted in a brownish colour, on second thought.

Kind regards, Hatteras (Mike)

boomkins_01.jpg
 
Hello Luigi,

Maybe you can help me out. I was wondering what kind of wood you used for the bumkins. Was it the 4x4 limewood supplied with the kit? How did you go about bending them in the right shape, and did they remain in that shape over time? Did you first taper and then bend, or vice versa? I'm considering using a different kind of wood, pear wood for instance because of it's pliability, but I do not have any experience with this.
Below is a picture of the present state of my forecastle, without the bumkins that is. The cleats will be painted in a brownish colour, on second thought.

Kind regards, Hatteras (Mike)

View attachment 405455
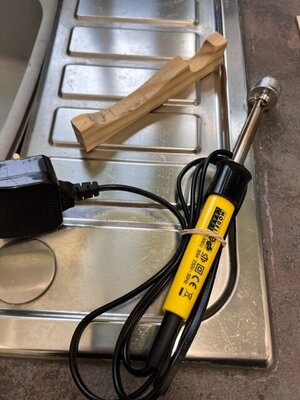
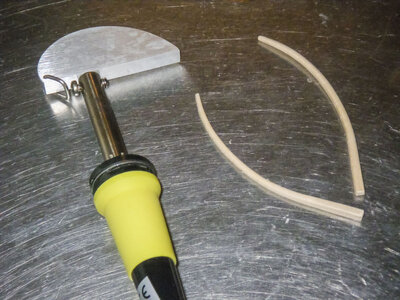
Hi Mike, I also had issues with the bumpkins. I shaped them first prior to curving using an electric bending tool and associated template. In the end I could not get the bend from the deck so I raised the ends, possibly not historically accurate but given the bowsprit hides most if it, it was an acceptable workaround. Hope that helps. P.s. I also painted my cleats brown.

IMG_5386.jpg

IMG_5387.jpg

IMG_5388.jpg
 
Hello Luigi,

Maybe you can help me out. I was wondering what kind of wood you used for the bumkins. Was it the 4x4 limewood supplied with the kit? How did you go about bending them in the right shape, and did they remain in that shape over time? Did you first taper and then bend, or vice versa? I'm considering using a different kind of wood, pear wood for instance because of it's pliability, but I do not have any experience with this.
Below is a picture of the present state of my forecastle, without the bumkins that is. The cleats will be painted in a brownish colour, on second thought.

Kind regards, Hatteras (Mike)

View attachment 405455
Hi there

I also tapered and shaped these accordingly, soaking them in hot water for at least 1hr, i didn't have any issues, I also used the lime wood supplied in the kit for these, then obviously stained them after shaping them and they are still the same as they were done about 9 months ago.

20220422_080429.jpg

20220423_103942.jpg

20220625_194223.jpg

20230413_110948.jpg

20231021_111249.jpg

20231021_111544.jpg
 
Hello Luigi,

Maybe you can help me out. I was wondering what kind of wood you used for the bumkins. Was it the 4x4 limewood supplied with the kit? How did you go about bending them in the right shape, and did they remain in that shape over time? Did you first taper and then bend, or vice versa? I'm considering using a different kind of wood, pear wood for instance because of it's pliability, but I do not have any experience with this.
Below is a picture of the present state of my forecastle, without the bumkins that is. The cleats will be painted in a brownish colour, on second thought.

Kind regards, Hatteras (Mike)

View attachment 405455
Hi Mike,

I used the wood supplied in the kit. The reason for doing the bumpkins three times stemmed from the fact that I didn't like the first two I made. I built a simple fixture to hold the wet bumkins after tapering and set them to dry in to the forming fixture to form the curve. There was a bit of guesswork involved as to the amount of curvature required, as Occre doesn't mention this in their instructions.
Good luck with your build.

Trevor

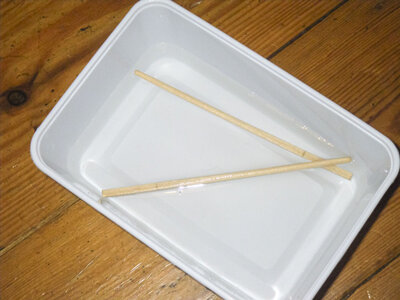
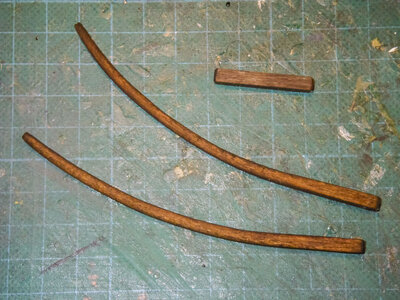
Thank you @LuigiSoft , @Rob. T. and @KeithLyall for your responses. I'll just give it a try then, and if necessary a second and a third one. At the moment the future bumpkins are being soaked.

Compared to the instructions for my first build, HMS Endurance (also by Occre), the Endeavour ones leave a lot to be desired. Sometimes the given measurements are downright wrong, or parts just don't fit. Examples of this are: the oversized width of the transom, the height of the capstan (no handspikes can de installed), the brackets for the swivel guns (as mentioned above by Trevor), the spacing of the columns and samson posts, the scale of the plans (not 1:1!), the passage for the rudder. Once you have determined this however you can anticipate and add it to the challenge. I wonder what I will encounter once the rigging has begun.

(PS: my apologies for calling you Luigi, Trevor)

boomkins_02.jpg

boomkins_03.jpg

Added some hours later:

boomkins_04.jpg

boomkins_05.jpg
 
Last edited:
Thank you @LuigiSoft , @Rob. T. and @KeithLyall for your responses. I'll just give it a try then, and if necessary a second and a third one. At the moment the future bumpkins are being soaked.

Compared to the instructions for my first build, HMS Endurance (also by Occre), the Endeavour ones leave a lot to be desired. Sometimes the given measurements are downright wrong, or parts just don't fit. Examples of this are: the oversized width of the transom, the height of the capstan (no handspikes can de installed), the brackets for the swivel guns (as mentioned above by Trevor), the spacing of the columns and samson posts, the scale of the plans (not 1:1!), the passage for the rudder. Once you have determined this however you can anticipate and add it to the challenge. I wonder what I will encounter once the rigging has begun.

(PS: my apologies for calling you Luigi, Trevor)

View attachment 405678

View attachment 405679
In my view the hull instructions are the good part, Oh you will love the instructions for the rigging … something to look forward to
 
Back
Top