Was wondering if anyone has discovered the secret for painting PE brass. I have tried many methods including washing and degreasing the sheets and then using primer followed by topcoat only to have if start to flake at the slightest touch. Any info on a better way would be most appreciated.
You are using an out of date browser. It may not display this or other websites correctly.
You should upgrade or use an alternative browser.
You should upgrade or use an alternative browser.
Help painting photo etched brass
- Thread starter Adiefenbach
- Start date
- Watchers 13
Have you tried to use emery paper first like 3000 grit?
hmm. I am working on a model with a lot of PE parts that I have to paint. Other than priming I really didn't do anything special and it seems to stick ok.
What did you use to clean off the oil? I didn't notice any oil on mine.
What did you use to clean off the oil? I didn't notice any oil on mine.
Last edited:
I agree with Jimsky, any time I've painted brass I always sanded first with a very fine paper and then cleaned it with lacquer thinner. You will see scratches through the paint if you use too heavy sanding paper. Never liked multiple coats of primer and paint on small scale or PE parts.
- Joined
- Sep 23, 2021
- Messages
- 137
- Points
- 113

I found that degreasing with some rubbing alcohol or acetone followed by an acid etch wash, rinse with clean water, dry and then apply a thin coat of self-etch primer such as U-POL #8 and paint over that works reasonable well on brass, copper and white metals.
Hi there. I guess I've been one of the lucky ones. I find that priming, usually with Tamiya Fine White or Grey, depending on what the final colour coat will be, followed by a couple of coats of the primary, usually seems to do the trick. What Jimsky suggest also makes perfect sense though, giving the PE a 'surface' to bond to.Was wondering if anyone has discovered the secret for painting PE brass. I have tried many methods including washing and degreasing the sheets and then using primer followed by topcoat only to have if start to flake at the slightest touch. Any info on a better way would be most appreciated.
Thanks for all the suggestions. Some great ideas. Have hesitated to use any sandpaper based on delicate shapes but will find some very fine sheets and give it a try. Thanks again to all
I usually degrease the PE in alcohol then put it in white vinegar for 30 minutes or so to kind of microetch it. I then wash it carefully, let it dry and apply primer. Rustolum primer is a good choice.
- Joined
- Oct 15, 2017
- Messages
- 986
- Points
- 403

I can second Jim's recommendation. I do degrease with acetone, then rinse under water and either air dry or oven dry. Using nitrile gloves or tweezers. The oils from our hands will cause issues later.
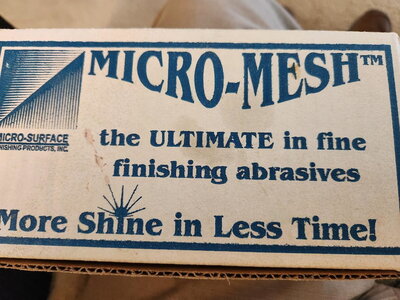
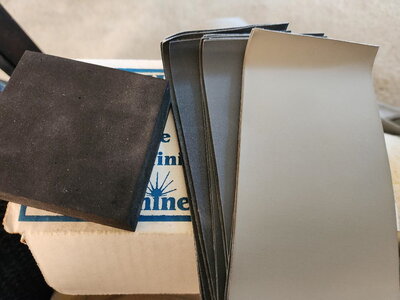
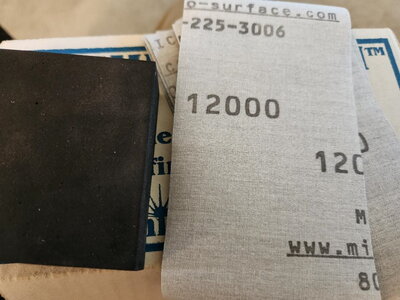
Once dry, I "rough" the surface that gives the primer something to grab onto. My personal favorite is Micro-Mesh, which is cloth based and can be cleaned and rinsed off to be used again.
Grits range from 1500-12000. As Jim recommended I would not go over 3000 or 4000 for the purpose of surface adhesion preparation . Anything over this grit and you actually start to polish the surface.
Good luck!


Thanks very much for the suggestions and info. Will experiment a bit with all the above. Hadn't seen Micro Mesh before, will track that down and give it a try. Thanks again
Being a novice at this shipbuilding stuff, I cleaned the surface with alcohol, let it dry and applied two to three coats of rattle can (Rustoleum combo of primer and paint). I’ve not noticed any problems.
I can only speak from my past experience working on aftermarket PE sets for 1/350 WW2 warships. 1/ bathe frets in Acetone but preferably with MEK (methyl ethyl ketone) as these remove release agents, oils, contaminants and any coating that may have covered the PE. this is done in the back yard so as to avoid fumes etc. Gloves necessary throughout. Gently wash over with a soft brush. 2/ second soak and wash in White vinegar. Air dry. 3/if necessary spray thin coating of commercial modelling etch. Usually I dismiss this third process, rely on the white vinegar etching and simply apply a thin light coating of, for argument sake, Tamiya "smoke" colour. This helps to hide or minimise the brass colour and gives easier coverage of final colour finishes especially of whiter/lighter colour shades. Where ever possible I avoid primers as they tend to obliterate the finer details on the PE. I take great care when working with PE to not directly handle surfaces because oils and fats from fingers/hands will cause cissing and possible delamination(s) of subsequence paint applications. If during the process dust, etc attaches to the fret, i lightly wipe over with a piece of well used 400grit sandpaper which is rubbed together to remove the possibility of fine scratches. All this is done before removing PE from the frets. My biggest failures have been finding bits that "Ping" and disappear forever into the great Carpet Monster. - not sure if this helps at all but thought to have an input. Best of luck.
In the case of my model, there are literally thousands of parts to work and paint and they are what I would call very small pieces. I can't see myself doing much other than painting the surfaces.
Hi Jack S, the idea is to degrease, etch and paint before removing pieces from the fret(s) that leaves minor touch-ups once the piece has been attached or formed.In the case of my model, there are literally thousands of parts to work and paint and they are what I would call very small pieces. I can't see myself doing much other than painting the surfaces.
You are probably encountering 'mold release agent' on the surface of the canon castings. These release agents are silicone based and therefore must be removed because nothing will adhere successfully to silicone. Try thoroughly washing with a dish washing liquid in very hot water..... it may be the solution your looking for. Also check out, for more information;A bit off topic here, but I had been trying to paint one of MS cannon kits. The carriage is all white metal and nothing I have tried to paint it with will stick, nothing. Put the kit up and ready to start an old Revell Constitution kit, 1/96.

How do I remove release agent from my cured urethane casting if I want to prime or paint the casting?
Removing a silicone-based release agent from your cured urethane casting is not easy.
best of luck. cheers from NZ
- Joined
- Apr 5, 2019
- Messages
- 1
- Points
- 0
Ciao. Immagino di essere stato uno dei fortunati. Trovo che il primer, di solito con Tamiya Fine White o Grey, a seconda di quale sarà il colore finale, seguito da un paio di mani del primario, di solito sembra fare il trucco. Anche ciò che suggerisce Jimsky ha perfettamente senso, dato che dà al PE una "superficie" a cui legarsi.


