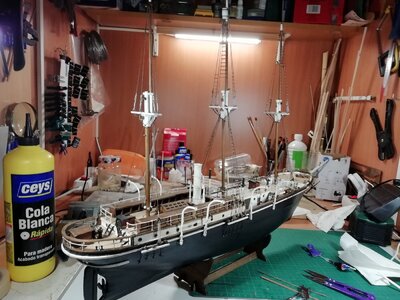
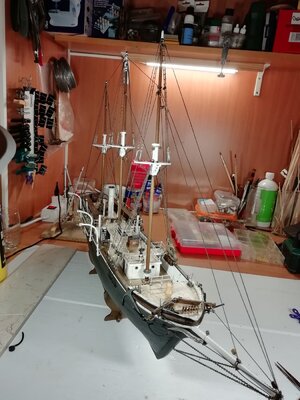
Endurance 2nd build

Thank you, Llaut for all the pointers.
Maybe you can throw some light on one of my problems.
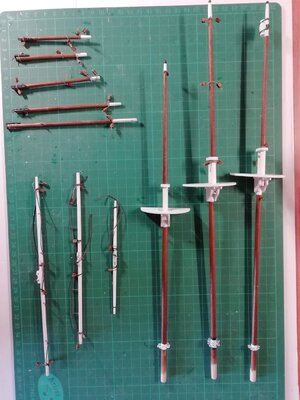
I have completed the assembly of the masts, booms and yards and will soon be fixing and rigging the shrouds.
I hope to be able to make it more authentic than the kit instructions by using batons, or rungs, for the rat lines (although I notice from photos that the foremast upper shrouds had them in rope). Also I will try to replicate the configuration of the upper main mast. I see that the mizzen mast had no upper rat lines at all but does have them in the kit.
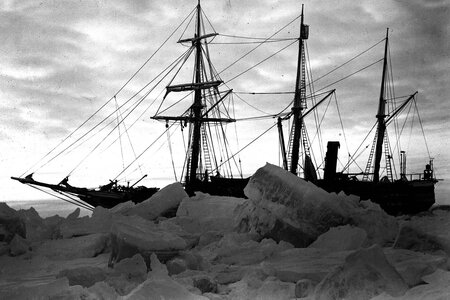
As Llaut pointed out the upper shrouds should not go through the pre-drilled holes but attach to the outer edge of the platform. My question is: how were these shrouds tensioned? The kit drawings give no clue. The kit photos show nothing there and the video instructions on YouTube show dead eyes. No photo I have seen shows the Endurance with dead eyes on the upper shrouds.
I have looked at dozens of photos but cannot see how the tensioning was done, maybe bottle screws but the images are not sharp enough to see them.
Any ideas anyone?
 
Hello
The shrouds are used to brace the masts and, by the way, climb the tops, yards, crow's nest, etc.
Therefore, as the mizzen mast only has a gaff sail, there is no need to climb higher and there are no ratlines.
The ratlines of the ENDURANCE, from what can be seen in the photo, are rigid (they have no arrow), they should be iron rods (or wood, less likely).
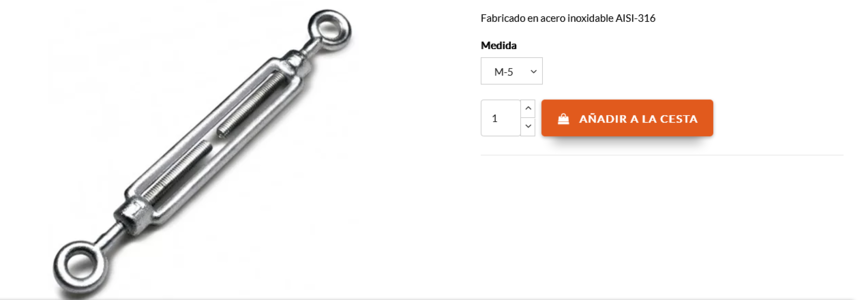
The way to tighten the shrouds in his time, should be by iron tensioners.
When the ship heels because of the wind, the leeward shrouds go without tension
Cheers
 
Last edited:
Hello
The shrouds are used to brace the masts and, by the way, climb the tops, yards, crow's nest, etc.
Therefore, as the mizzen mast only has a gaff sail, there is no need to climb higher and there are no ratlines.
The ratlines of the ENDURANCE, from what can be seen in the photo, are rigid (they have no arrow), they should be iron rods (or wood, less likely).
The way to tighten the shrouds in his time, should be by iron tensioners.
When the ship heels because of the wind, the leeward shrouds go without tension
Cheers
Thanks again for the help.
By iron tensioners you mean bottle screws? With LH and RH screw thread like in the picture you sent a lithe while back.
I'll do my best to replicate that.
Watch this space. It may take a while...
 
Absolutely.
I used to use them for tensioning and squaring up marquees (tents). There are two types, like you show and enclosed. You have to be careful with the latter type as you cannot easily see when you are coming to the end of the thread and then they suddenly release (I have the scars to proove it)
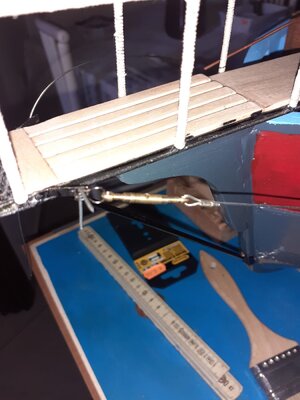
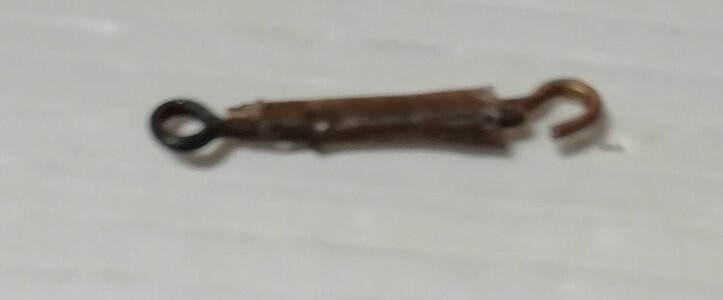
First attempt to replicate them:IMG_20221106_171712.jpg
18mm long, 1.25m to scale so need to be a bit smaller. I used 2 eyebolts as supplied with the kit and a plastic tube cut from a glue nozzle.
 
Absolutely.
I used to use them for tensioning and squaring up marquees (tents). There are two types, like you show and enclosed. You have to be careful with the latter type as you cannot easily see when you are coming to the end of the thread and then they suddenly release (I have the scars to proove it)
First attempt to replicate them:View attachment 338851
18mm long, 1.25m to scale so need to be a bit smaller. I used 2 eyebolts as supplied with the kit and a plastic tube cut from a glue nozzle.
 
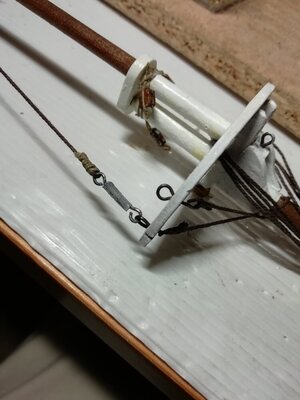
IMG_20221106_191949.jpg
A bit smaller this time (about 95 cm to scale) and I'm generally happy with the result.
I decided to take a double eye through the pre-drilled holes and attach each side to avoid the wear and chaffing that Llaut pointed out would happen otherwise.
I'll look at it again in the morning and if still happy will make the rest of the bottle screws another day.
 
Absolutely.
I used to use them for tensioning and squaring up marquees (tents). There are two types, like you show and enclosed. You have to be careful with the latter type as you cannot easily see when you are coming to the end of the thread and then they suddenly release (I have the scars to proove it)
First attempt to replicate them:View attachment 338851
18mm long, 1.25m to scale so need to be a bit smaller. I used 2 eyebolts as supplied with the kit and a plastic tube cut from a glue nozzle.
In the USA this is called a turnbuckle. They are used extensively on ships starting in the early 1900's when metal cable rigging replaced tarred rope.
 
Yes. That is the enclosed type. The only way to tell if you are not opening it to much is two little holes in the collar each end. Out in the field with horizontal snow hitting your face it's not so easy to see as with the open type.
Because they were not constantly adjusted outside the shipyard the enclosed type could be safely used for standing rigging I suppose. They are neater and less likely to clog. Anyway that's the type I found easier to replicate to scale.
 
Hello
Those tensors (turnbuckle) that you have made I think are the most appropriate, at least, I do them that way.
As a modeler friend said, not everything has to be exact in a model, it just has to look alike and not have big errors, especially in scale.
They look fine to me
 
Hello
Those tensors (turnbuckle) that you have made I think are the most appropriate, at least, I do them that way.
As a modeler friend said, not everything has to be exact in a model, it just has to look alike and not have big errors, especially in scale.
They look fine to me
Thanks for the endorsement.
I'm on with making the rest as of now.
 
Whilst waiting for daylight before starting rat lines I started ( for once in my life) to think ahead.
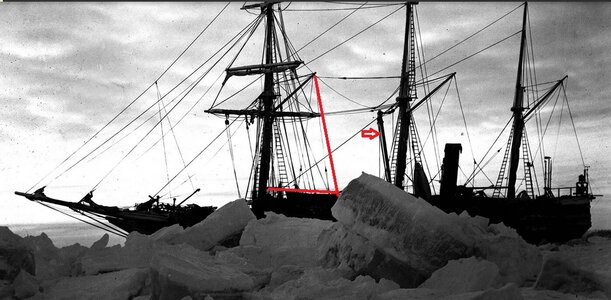
I am trying to get as much of the masts built off the ship before fitting them. I attached the large rings for the sails but see that they will end up above AND below the forward pointing boom of the main mast (presumably used for loading/unloading). That would make the operation of this sail difficult. I have found only one photo showing this boom in place and that was whilst the ship was in port. Was it lowered and stored while the ship was underway? If so it should not be fitted if I want to have the sails on my model. Or am I mistaken about how this works?
Help any one?
 
Hello
If you have stopped to think before starting to work on the model, you already have the SMA virus.
I would put that boom as it is in the photo, it is perfectly compatible with the foremast gaff sail.
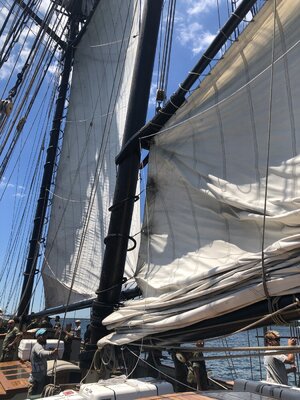
Regarding the rings that join the gaff to the mast, I'll put a photo
Cheers

IMG_1723.JPG

botavara.jpg
 
Hello
If you have stopped to think before starting to work on the model, you already have the SMA virus.
I would put that boom as it is in the photo, it is perfectly compatible with the foremast gaff sail.
Regarding the rings that join the gaff to the mast, I'll put a photo
Cheers

View attachment 339230

View attachment 339231
Yes that's it.
The boom is attached much lower down the main mast than the kit instructions show. When fitted as per Occre (more than 5m above the deck by scale) then you have rings both above and below the fix point which means the sail can't go all the way down or up.
I have seen photos of other models with the fixing in the lower position. I'll do the same when I get to that part of the build.
Meanwhile still making rigging screws and stays...
 
Started getting the upper shrouds attached to the masts and fixing the rat lines. I decided to make these with very thin wood strips to form solid ladder rungs as on the real ship rather than horizontal ropes suggested by Occre.
I'll post some pictures later but right now taking a break from the modelling, visiting family and friends on a road trip taking in France, Belgium, Holland and the UK before returning to Spain at the end of the month. About 4000 km I expect.
 
4500km behind us now but returned with colds as a souvenir of the UK. That made the last day's driving (600km) very unpleasant. As a result of feeling unwell I didn't get back to my websites right away but am now back in the "man cave" and progressing.
The main mast is now fitted, with the shrouds tensioned and the wooden slats (rat lines) in place. I have made the upper mast configuration per the real ship, not as the kit instructions suggest, so one central set of rat lines up to the crows nest, not one either side.
One pair of shrouds to tension on the missen mast and three sets of rat lines to complete before I move on to the rest of the standing rigging. IMG_20221214_200038.jpg
 
Standing rigging completeIMG_20221218_191746.jpg
But...
You may notice that some of the davits are missing, particularly on the port side. Disaster struck when I was reaching past to put my hand drill in its rack and caught the fore mast to bowsprit rigging and knock over the ship!
One of the davits broke, the others survived but became detached. I think I'll refix them after I have finished the rigging. One of the drawbacks of working in my restricted space and, of course being clumsy and stupid.
 
Back
Top