I'm working on a plastic boat kit of a missile patrol boat and there are several photo etched parts that I have no experience in dealing with. Looking for advice on how to remove the parts from the brass sheet without squishing it and what in the world would you use to make all those tiny little bends in the parts? I think I need a large magnifying glass to start with. Any advice will be greatly appreciated. Norgale
You are using an out of date browser. It may not display this or other websites correctly.
You should upgrade or use an alternative browser.
You should upgrade or use an alternative browser.
Kurt Konrath
Kurt Konrath
I have read that you should lightly sand the PE sheets with fine sandpaper to give them grip.
To cut use sharp blade ( # 11) on hard surface, like glass or steel top, you don't want soft bends under the knife edge.
File cut marks to get clean edge.
To bend use wide blade smooth pliers or buy a PE bending tool.
To bend small pieces grip at bend line, and roll pliers on glass or steel top, for longer bends do short sections with a little bit of bend and repeat up and down the length till final bend is done.
Wash parts to get oil and film off and prime with light thin paint.
Thanks for that Kurt. Hadn't thought about cutting on a hard surface. That will work great. I was thinking about side cutters for removing the parts but that seemed like it would mess up the part. PE could be a good thing or maybe drive me crazy. Have to wait and see what happens. Ha!
Hi Norgale,
If you are still interested, they make special shears for photo-etched pieces.
You can find them at many online stores as well as brick and mortar hobby shops.
Also, if you need to shape it, make sure you bend it around a form of some type. For smaller pieces with square corners I use a small pair of square jawed wide pliers. If you need to shape photoetched parts into a tube, you can use something like a drill bit or an exacto knife handle (large or small depending on what you need) I've even used a CA glue bottle cap to form a cone. The photoetch cutter is like a pair of scissors rather than a pair of side cutters.
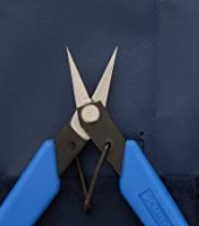
Hope that helps some.
If you are still interested, they make special shears for photo-etched pieces.
You can find them at many online stores as well as brick and mortar hobby shops.
Also, if you need to shape it, make sure you bend it around a form of some type. For smaller pieces with square corners I use a small pair of square jawed wide pliers. If you need to shape photoetched parts into a tube, you can use something like a drill bit or an exacto knife handle (large or small depending on what you need) I've even used a CA glue bottle cap to form a cone.

Hope that helps some.
That would help a lot. I've put the boat aside for the moment but will get back to it pretty soon. These PE parts are very "fiddly" as they say in the UK. I'd say they are a PITA. Ha!
Its just that it's different. With a little bit of experience, you'll get the hang of it pretty quickly.That would help a lot. I've put the boat aside for the moment but will get back to it pretty soon. These PE parts are very "fiddly" as they say in the UK. I'd say they are a PITA. Ha!
Glad I was able to help you. In case you can't find them locally in a store, I believe those pictured are available from Amazon and they are made by Xuron.
Good point Jimple. That is definitely an option as well. It depends on what the part is. For instance, I would have no problem annealing if it is a decorative part requiring some unique bends. However, I have built several kits that are totally photoetched and annealing a set of landing gear or a wing spar for an airplane could be a disaster. Another consideration is what the photoetched parts are made out of. Brass is pretty easy, but if the color of the photoetch is silver in color, then you may have some difficulties. Personally, I try to avoid annealing and I have only needed to use it very rarely. But I have used it so its good to keep in mind.
Well, what size parts are you dealing with? For the really small parts, I just use CA glue and a hypodermic needle to apply the glue to the part. I have never really had any issues with sticking. My issues occur with handling and losing small parts to what some call the carpet monster. In fact I am working on a model right now that has literally thousands of PE parts. I haven't washed anything or did anything special and so far so good.I'm working on a plastic boat kit of a missile patrol boat and there are several photo etched parts that I have no experience in dealing with. Looking for advice on how to remove the parts from the brass sheet without squishing it and what in the world would you use to make all those tiny little bends in the parts? I think I need a large magnifying glass to start with. Any advice will be greatly appreciated. Norgale
That's good. I need another pair of track cutters too. Thanks Corsair.Its just that it's different. With a little bit of experience, you'll get the hang of it pretty quickly.
Glad I was able to help you. In case you can't find them locally in a store, I believe those pictured are available from Amazon and they are made by Xuron.
I have another kit that has the silver colored PE parts. What is the silver color made from? Maybe aluminum?Good point Jimple. That is definitely an option as well. It depends on what the part is. For instance, I would have no problem annealing if it is a decorative part requiring some unique bends. However, I have built several kits that are totally photoetched and annealing a set of landing gear or a wing spar for an airplane could be a disaster. Another consideration is what the photoetched parts are made out of. Brass is pretty easy, but if the color of the photoetch is silver in color, then you may have some difficulties. Personally, I try to avoid annealing and I have only needed to use it very rarely. But I have used it so its good to keep in mind.
Last edited:
The size is small. I don't know how else to explain the size. One item is windshield wipers for a small coastal missile cruiser. My fingers are big and my eyes are bad so that's a combination that makes these tiny pats hard to handle. Sticking them on the model is not that hard but getting all the bends right without throwing the part across the room to feed the carpet monster is a whole other ball game. Until I can master the bending my frustration level will have to be controlled. Good thing I don't drink anymore. Ha! By the way how do you keep the hypodermic needle from getting clogged up with dried glue? Seems like the application of the glue with the needle would be ideal but not if the needle gets clogged up every ten minutes. I mostly use TiteBond 2-3 for wood and Testors styrene glue for plastic. The titbond is good as it's thick and it can be applied with a pin point but the styrene glue is tough to control.Well, what size parts are you dealing with? For the really small parts, I just use CA glue and a hypodermic needle to apply the glue to the part. I have never really had any issues with sticking. My issues occur with handling and losing small parts to what some call the carpet monster. In fact I am working on a model right now that has literally thousands of PE parts. I haven't washed anything or did anything special and so far so good.
Last edited:
I don't actually put any glue in the needle. I just use the tip to spread the glue. better than the tip of the glue bottle which gums up really easy.The size is small. I don't know how else to explain the size. One item is windshield wipers for a small coastal missile cruiser. My fingers are big and my eyes are bad so that's a combination that makes these tiny pats hard to handle. Sticking them on the model is not that hard but getting all the bends right without throwing the part across the room to feed the carpet monster is a whole other ball game. Until I can master the bending my frustration level will have to be controlled. Good thing I don't drink anymore. Ha! By the way how do you keep the hypodermic needle from getting clogged up with dried glue? Seems like the application of the glue with the needle would be ideal but not if the needle gets clogged up every ten minutes. I mostly use TiteBond 2-3 for wood and Testors styrene glue for plastic. The titbond is good as it's thick and it can be applied with a pin point but the styrene glue is tough to control.
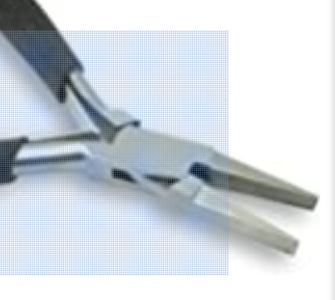
If you find a magic bullet I would be glad to read it. It's not easy. I use a mini pair of square pliers. For "really small" parts, I have a ceremony that I follow. First I swear at it, then I beat my head against the wall and finally I use my finger nails. Seems to work well for me. Just joking,. I actually don't mind the challenge. I just wish I wouldn't loose so many parts.
Last edited:
Ok Jack, I get the message and it's funny. Those pliers look good for the job and maybe I can get them with the scissors and the track cutter from the same place. Save some postage that way. Just using the tip of the needle sounds ok too. I'll have to try that.
All the best in your future endeavors.Ok Jack, I get the message and it's funny. Those pliers look good for the job and maybe I can get them with the scissors and the track cutter from the same place. Save some postage that way. Just using the tip of the needle sounds ok too. I'll have to try that.
Some of the silver parts I've seen are stainless steel. I don't think I've seen aluminum, but they may be out there.I have another kit that has the silver colored PE parts. What is the silver color made from? Maybe aluminum?
What Jack posted a pic of is what I was referring to as small wide nose pliers. And at the edge of the jaws, you have a nice 90 degree you can fold the photoetch part over if you need that bend.
As far as the "needle" for glue application, I was not able to keep it from drying out in the needle (I'm sure part of that is due to the long time between building sessions I experience), although I've read that some people have good luck sticking the needle portion into a damp sponge. What I was talking about for applicators are:
For CA thin glue:
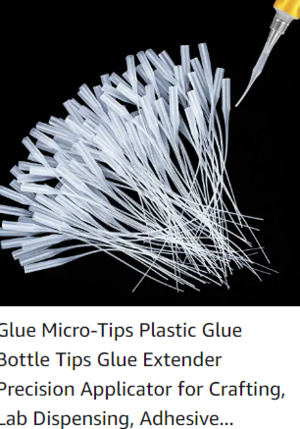
And for carpenters glue I got a pack of 10 bottles that are 2 oz each with a twist to open top:
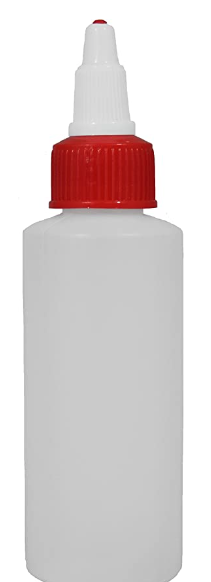
I hope that helps.
Jeff
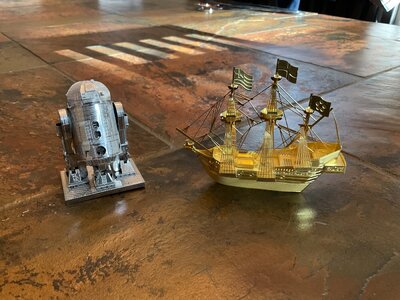
Here is another tip for working with photo etched parts. If you need it bent or shaped, form it around an object that is a similar shape. Remember that all metal has some spring to it, so shape it just a slight amount smaller than you need. The benefit to this is that you don’t put the part at risk like you do with annealment. How ever sometimes there is no other way than to anneal The metal. Here is a pic of a few photo etched models that I put together.

very classy looking pieces. congratulationsHere is another tip for working with photo etched parts. If you need it bent or shaped, form it around an object that is a similar shape. Remember that all metal has some spring to it, so shape it just a slight amount smaller than you need. The benefit to this is that you don’t put the part at risk like you do with annealment. How ever sometimes there is no other way than to anneal The metal. Here is a pic of a few photo etched models that I put together.
View attachment 348517
Thanks. There not a big deal, but I wanted to show I had experience.very classy looking pieces. congratulations
no glue stains. that's pretty good.Thanks. There not a big deal, but I wanted to show I had experience.


