I have to disappoint you, while I do want to greet you in person, I cannot sing in Dutch, but I will play guitar and sing the Pink Floyd song of your choice, even Comfortably numbThanks Jim, next time make a tiktok while your singing this song.
You are using an out of date browser. It may not display this or other websites correctly.
You should upgrade or use an alternative browser.
You should upgrade or use an alternative browser.
Clipper Newport Mamoli 1:57
- Thread starter Steef66
- Start date
- Watchers 16
-
- Tags
- clipper newport mamoli
- Joined
- Aug 8, 2019
- Messages
- 4,154
- Points
- 688

Even better to sing PF. And if I can choose, I go for "Mother"I have to disappoint you, while I do want to greet you in person, I cannot sing in Dutch, but I will play guitar and sing the Pink Floyd song of your choice, even Comfortably numb
- Joined
- Aug 8, 2019
- Messages
- 4,154
- Points
- 688

@Everybody thanks for the best wishes and likes. And of course the music
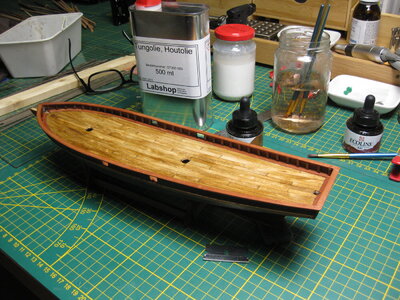
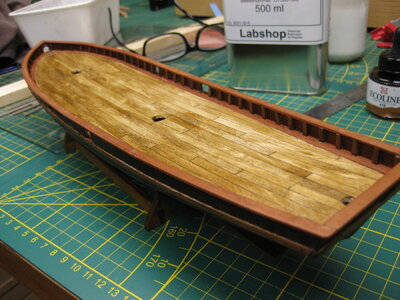
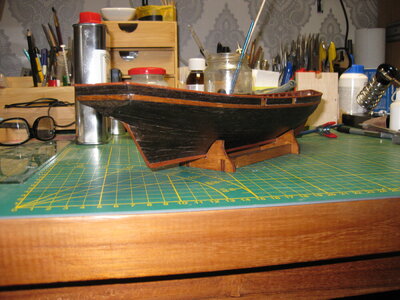
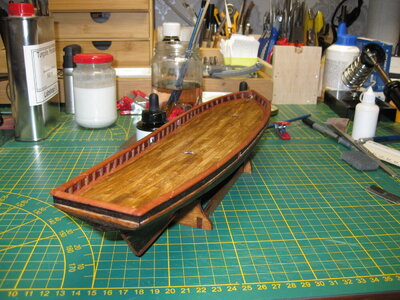
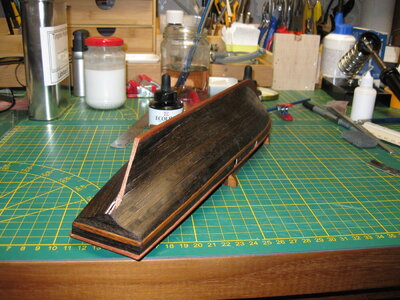
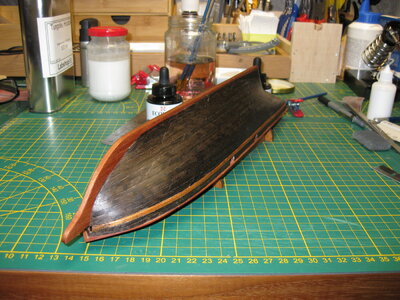
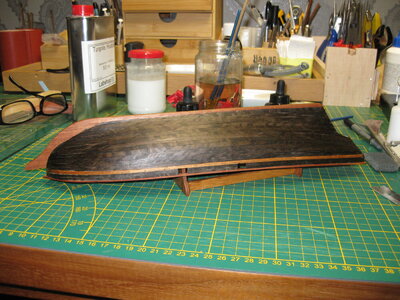
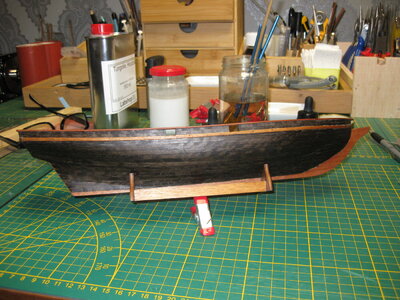
The deck, keel and planking is ready. don't like the pictures. Maybe when the sun is back I take some new pictures.
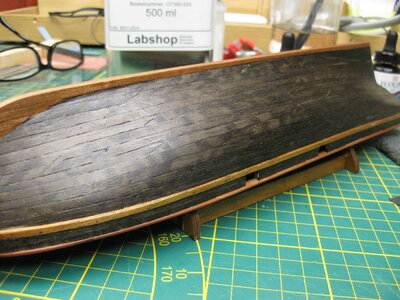
The hull is made of planks that I cut out of veneer of swamp walnut. (I think they call it swamp)
The bulwark of pear and nut.
The keel of Mahony veneer.
The deck is made of birch (coffee spoons)
Coloured with Talens Ecoline 416
The end oil is Tung oil.
The hull planks I glued with the hot iron method. Just put with white glue on both sides (25-75 water-glue), let it dry for a short while and the glue them together using the hot iron. This method is also used by hifi speaker builders.
Like I said, I'm not that glad with the pictures, it's difficult to take pictures of such a dark hull. The first 3 picture are the best compare to the colour in real.


An enjoyable little build to follow. Thanks for sharing this with us.
- Joined
- Aug 8, 2019
- Messages
- 4,154
- Points
- 688

Thanks Paul I'm gonna try to bashing it beyond believable boundariesAn enjoyable little build to follow. Thanks for sharing this with us.
I'm familiar with that notion. It's a bottomless pit...Thanks Paul I'm gonna try to bashing it beyond believable boundaries
- Joined
- Aug 8, 2019
- Messages
- 4,154
- Points
- 688

Yes, but you can't say, "there is no light on the end of the tu.... bottom"I'm familiar with that notion. It's a bottomless pit...
- Joined
- Aug 8, 2019
- Messages
- 4,154
- Points
- 688

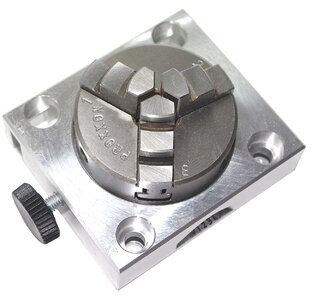
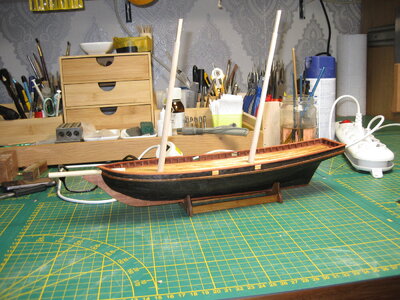
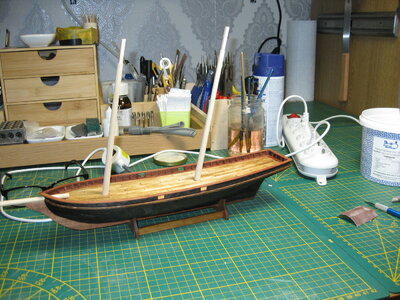
Today I made the masts and bowmast. Make them go from 8 mm to 6 mm. Use a small hand planer for this and sandpaper. The square and I made on my Proxxon MF70 I use part Proxxon 24264 for this. That makes the job easy and perfect square.
The mast in place, only have to glue them
About sandpaper. I always used budget paper of a budget store. But that was not always fun to use. It loses it roughnes very fast and wasn't sanding anymore after a few minutes of use.
Now I bought some quality paper on a roll, not with paper but with cloth.
I sanded the hole ship including the both masts with one piece.
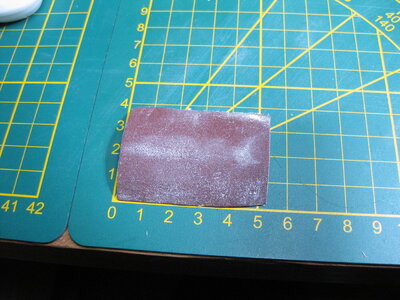
believe me it is still sharp enough to use.
So I can only advice to buy quality paper/cloth to do the job. It is the end cheaper and less work.

The mast in place, only have to glue them


About sandpaper. I always used budget paper of a budget store. But that was not always fun to use. It loses it roughnes very fast and wasn't sanding anymore after a few minutes of use.
Now I bought some quality paper on a roll, not with paper but with cloth.
I sanded the hole ship including the both masts with one piece.

believe me it is still sharp enough to use.
So I can only advice to buy quality paper/cloth to do the job. It is the end cheaper and less work.
Hello Stephan,
I'm sorry to ask such an elementary question - but could you please show me how to use the dividing tool to make the square end... Was it used horizontally?
I'm sorry to ask such an elementary question - but could you please show me how to use the dividing tool to make the square end... Was it used horizontally?
- Joined
- Aug 8, 2019
- Messages
- 4,154
- Points
- 688

I show you later a picture on how.Hello Stephan,
I'm sorry to ask such an elementary question - but could you please show me how to use the dividing tool to make the square end... Was it used horizontally?
It’s looking good, Stephan. And nice to see another Ecoline user.@Everybody thanks for the best wishes and likes. And of course the music
The deck, keel and planking is ready. don't like the pictures. Maybe when the sun is back I take some new pictures.
The hull is made of planks that I cut out of veneer of swamp walnut. (I think they call it swamp)
The bulwark of pear and nut.
The keel of Mahony veneer.
The deck is made of birch (coffee spoons)
Coloured with Talens Ecoline 416
The end oil is Tung oil.
The hull planks I glued with the hot iron method. Just put with white glue on both sides (25-75 water-glue), let it dry for a short while and the glue them together using the hot iron. This method is also used by hifi speaker builders.
Like I said, I'm not that glad with the pictures, it's difficult to take pictures of such a dark hull. The first 3 picture are the best compare to the colour in real.
View attachment 317631View attachment 317632View attachment 317633View attachment 317634View attachment 317635View attachment 317636View attachment 317637View attachment 317638View attachment 317639
Regard, Peter
- Joined
- Aug 8, 2019
- Messages
- 4,154
- Points
- 688

Thanks Peter, it was Maarten who effected me.It’s looking good, Stephan. And nice to see another Ecoline user.
Regard, Peter
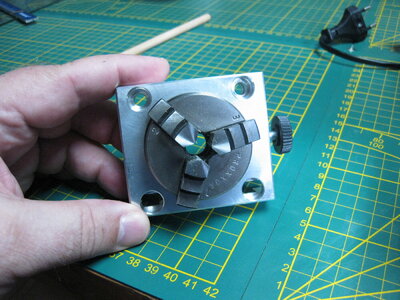
@dockattner Special for you how it works with the dividing tool.
This picture shows how it looks in the Proxxon MF70
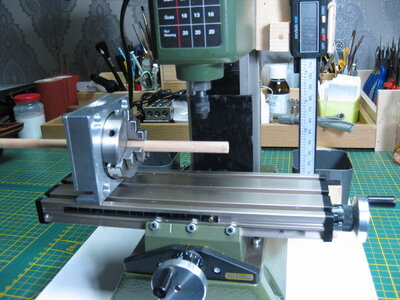
I use the scale to positioning each side of the round wood.
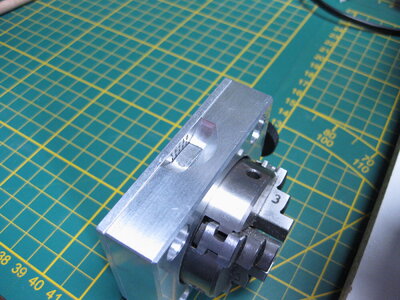
The black screw is to hold the claw in that position
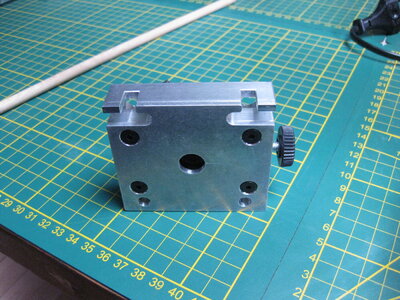
The back of the tool.
I love the Proxxon MF70 with the extra's. There is so much to do with it and it works so accurate.
It also helps to tapering the mast in a correct way.
I make incisions in the round wood. In certain places where the round wood needs to be planed away to make it tapered. this I can do very precisely to mill it in at the right thickness and by turning it do it all around. That way I have mark points to get it exactly tapered. I use a small plane for this. Works perfect in that way.
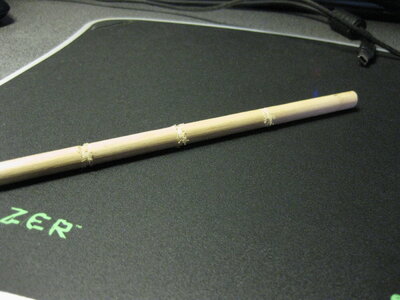
I hope I explained it well.
Thank you kindly, Stephan.
we are getting more and more Proxxon MF70 users, lovers! Anyone who has one should ask - "am I getting the most out of my Proxxon mill?" 
- Joined
- Aug 8, 2019
- Messages
- 4,154
- Points
- 688

@All thanks for the interest in my build log and the likes and comments.
After a while I started to work again on the Newport. First I have to some demolition on the parts that where already build and clean them and put them together again on my why.
First part I did:
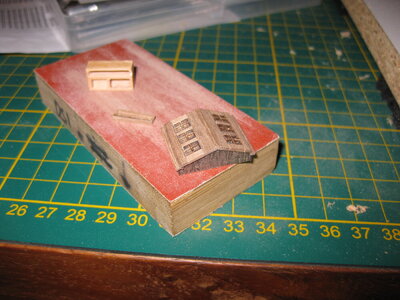
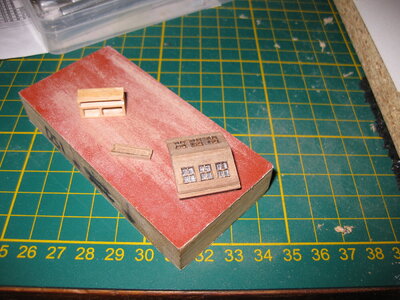
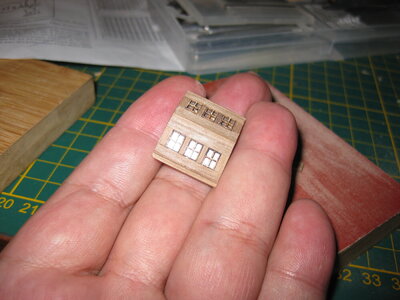
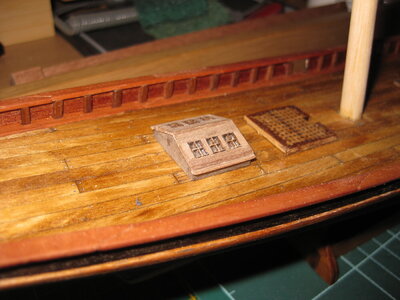
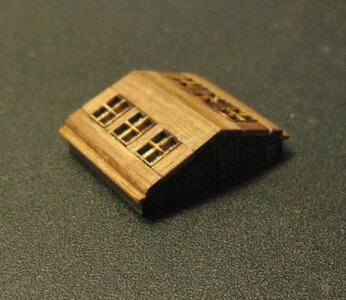
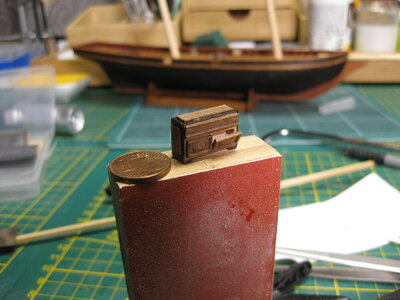
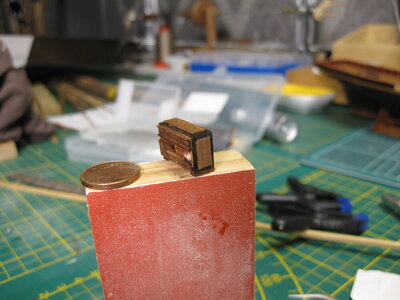
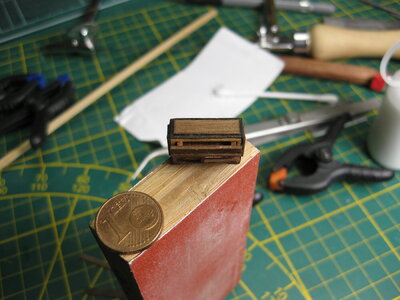
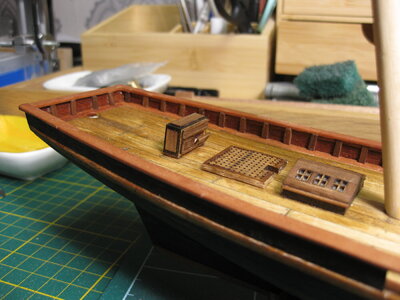
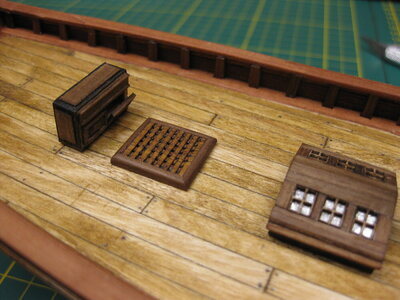
In the first 2 pictures you see the next project the cabinet. On the last picture you can see also the nails in the planking of the deck, I did this with a needle and a pencil. The windows I made silver with metallic paint.
The wood still needs to be paint with some Chinese oil (Tungoil)
Thanks for stopping by and see you on the next update.
After a while I started to work again on the Newport. First I have to some demolition on the parts that where already build and clean them and put them together again on my why.
First part I did:


In the first 2 pictures you see the next project the cabinet. On the last picture you can see also the nails in the planking of the deck, I did this with a needle and a pencil. The windows I made silver with metallic paint.
The wood still needs to be paint with some Chinese oil (Tungoil)
Thanks for stopping by and see you on the next update.
Nice tiny working attributes for the deck, Stephan.
Regards, Peter
Regards, Peter
- Joined
- Aug 8, 2019
- Messages
- 4,154
- Points
- 688

Thanks @ all for the likes and comments, they are appreciated.
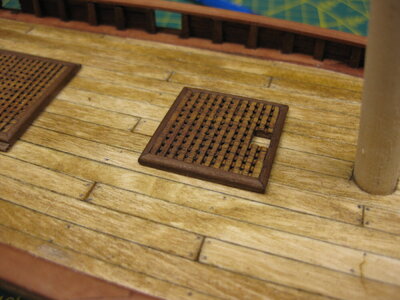
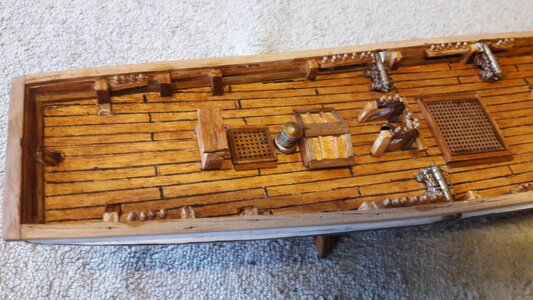
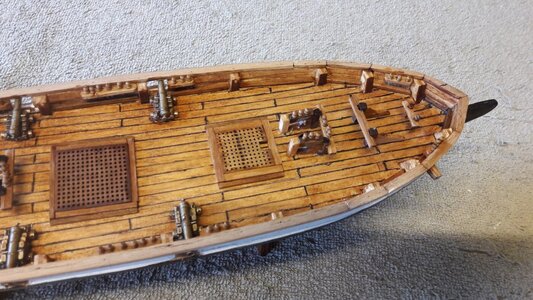
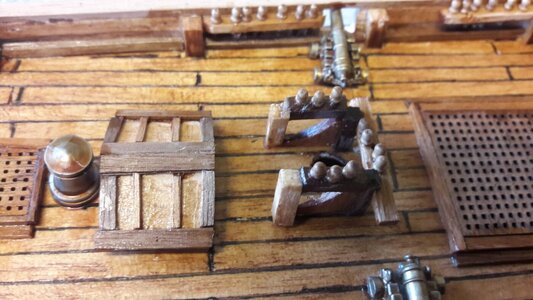
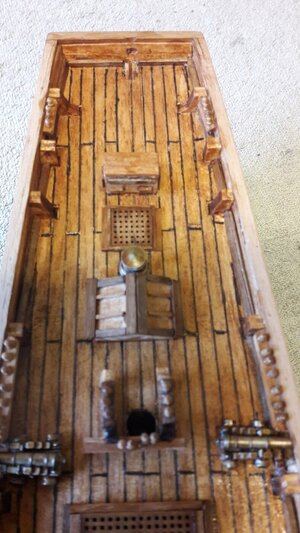
The gratings are ready. It was prefab, but I couldn't resist it to modify. New wood around and I did with a tiny file some little relief on the grating to let it look like separated wooden beams and not like a laser cut piece of wood. All in Tung Oil.
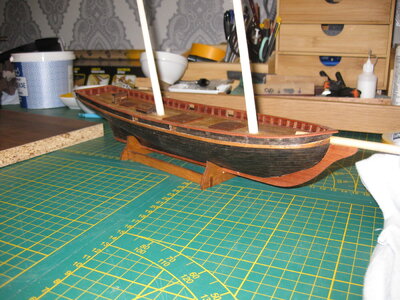
Everything is dry fit. The cabinet is hanging forward and needs a little adjustment.

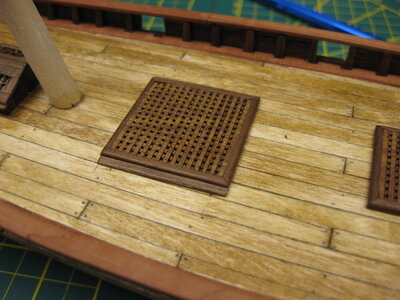
the rest of my time today I used to clean the models that go with me next week to the Dutch Model ship day in Duizel. I did mopped the decks with soap and water, yes I did
The gratings are ready. It was prefab, but I couldn't resist it to modify. New wood around and I did with a tiny file some little relief on the grating to let it look like separated wooden beams and not like a laser cut piece of wood. All in Tung Oil.
Everything is dry fit. The cabinet is hanging forward and needs a little adjustment.


the rest of my time today I used to clean the models that go with me next week to the Dutch Model ship day in Duizel. I did mopped the decks with soap and water, yes I did
- Joined
- Aug 8, 2019
- Messages
- 4,154
- Points
- 688

Maybe I post some pictures how the ship looks like before I started to work on her. I got this project from another modelbuilder who didn't finish her. I liked to start over and finish the project on my way
It was a lot of work to strip and clean the parts, mostly because of the strong glue what was used.
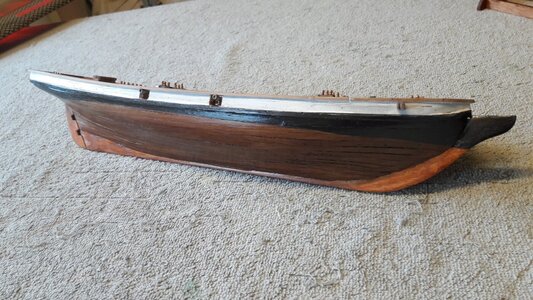
It was a lot of work to strip and clean the parts, mostly because of the strong glue what was used.


