Buccaneer 1:100 by Occre - Build log

Joined
Apr 8, 2023
Messages
185
Points
103

5/5/23 to 5/5
5FAC3F4B-9A6B-42EB-840E-58C301D7D04C.jpeg
Got this kit about a month ago and have been waiting to start it until I got to Vallarta, and I’m finally here. Since it is only my second build and my first not at home, I knew just getting everything to Mexico would be a bit of a challenge. After all, I’m still learning what tools and supplies I need at home, let alone trying to pack them up for Mexico. I was taking the approach of bringing whatever I thought I’d need and leaving it here. Adding to the challenge is flying not just internationally, but on Frontier.

Normally we fly here on Southwest, but this time we tried Frontier, and a 40 pound checked bag limit (Southwest is 50 pounds). You might think 40 pounds is plenty, but that one checked bag is for both my wife and myself. Luckily as we got close to the limit, my wife suggested pulling a few things out, and none of them were model making stuff. She’s definitely a keeper.

I know I said on my Bluenose build to not set tough goals on what to accomplish on the build, but that doesn’t mean to not set goals. I’m hoping to get the keel and bulkheads together, including some temporary battens attached to the bulkheads to reduce any warping or twisting that may occur in the hot and humid climate (completely opposite of what I’m used to in Denver, CO) and maybe the decking. I have about two and a half weeks here before heading home with our next trip down here in probably late October. It really isn’t too much work, so it should be doable.

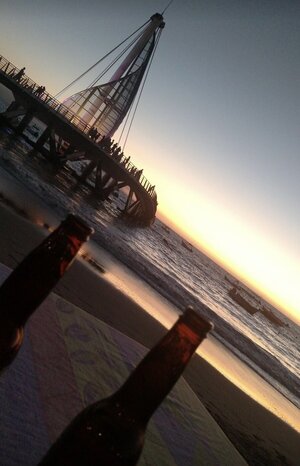
I expect at a minimum to have a couple of hours each morning (wrapped around my morning walk on the malecón/beach) as I wake up early and my wife sleeps in.

The view from my work place is definitely different than at home. Instead of looking out at my pine tree lined yard, it a tropical vibe overlooking the pool and courtyard.

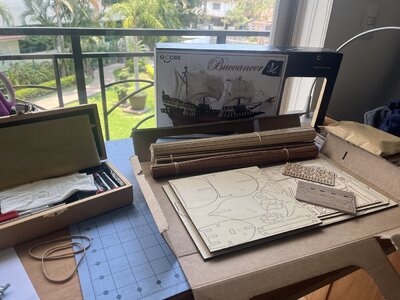
Now it’s time to settle in and make sure everything is in the box. Everything appears to be here. I was fearful of some of the metal pieces missing but they were layered in with the laser cut wood.
01E58611-6475-40D1-8508-37B7801B3265.jpeg
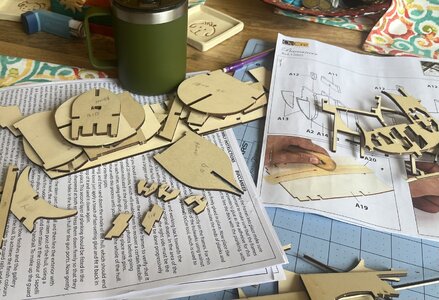
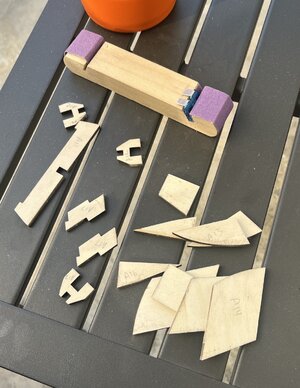
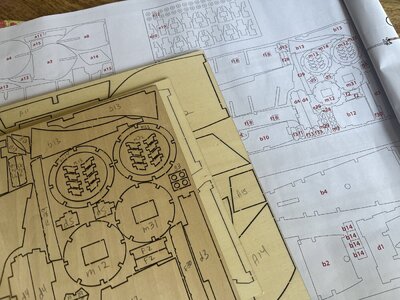
Today I labeled all of the pieces on the laser cut wood, and cut out all the keel and bulkhead pieces.
50ADDB89-008C-4FEC-9774-4E3E9BD7504D.jpeg
3C104682-AB4D-42FB-9368-D56BF6108894.jpeg

Next up, sanding and dry fitting the bulkheads.

Time for this portion: 1.5 hours
Total time to date: 1.5 hours
 
A fun job while on trip to the beech down south. Is this work or a vacation time away from normal home?
We have a place down here so it’s our 2nd home. Didn’t feel like home until I started getting bored and needed something to keep me busy. My joke was you can only drink so many beers on the beach. That was our last trip in March. That’s when I remembered that I liked building models and had one (Bluenose) sitting in my basement waiting (for 20+ years) to be worked on.
 
Is this actually a model of Sir Francis Drake's Golden Hinde ?

Although he is renowned for dispersing and effectively defeating the Spanish Armada on behalf of Queen Elizabeth I, he was actually a "privateer" and would have been classified as a pirate by the Spanish who lost many ships carrying bullion back to Spain from South America as a result of his adventures. While in the service of the queen he broke away from the main battle against the armada, in order to capture prizes in his own interest.
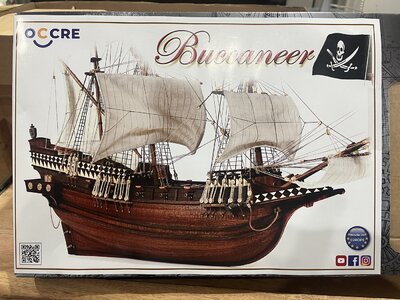
Nice info, and the Buccaneer is probably based on the Golden Hinde. A quick look and comparison on OcCre’s site shows the 2 ships looking very similar except for the flag(s) and overall decorations. And if you look into their info on the Buccaneer, it says the “Buccaneer ship as such did not exist. It is a model based on information from other galleon ships, but this one did not exist.”
When I was looking for a pirate ship to build, I searched for “pirate ship”. I am not disappointed, but had I researched, I may have purchased the Golden Hinde instead - only because it is a real ship. This is only my 2nd model and am learning quite a bit. This adds to my growing list of things I’ve learned.
 
5/6 to 5/8
75C2B241-0F77-4E5F-8481-6150A6DAC083.jpeg
Started work today by sanding the keel and bulkheads and I’m already seeing a number of differences from the Bluenose.
  1. Obviously they are different types of ships, but from a maker standpoint, the Buccaneer has more complex bulkheads meaning the sanding is more involved.
  2. Different manufacturers possibly meaning different philosophies on overall build. The Bluenose’s deck is planking on the tops of the bulkheads while the Buccaneer is planking on a board which then goes as one piece on the bulkheads.
  3. The Buccaneer’s instructions also have a “Q” code to a series of short videos (little to no audio) of someone building the ship. I’ve found build logs and videos of both ships, but these short Buccaneer videos are a nice touch.
  4. The Bluenose’s hull planking was thin boards glued onto the bulkheads while the Buccaneer has wider planks which are nailed (and glued I’m assuming at this point).
D5745FAC-87C1-4788-BD28-4707B12F8C69.jpeg
66B2321B-B3BE-47AB-88AC-3C61F43B00DE.jpeg
8CBB0E80-0E30-4CC9-B255-CC92AF27F07A.jpeg
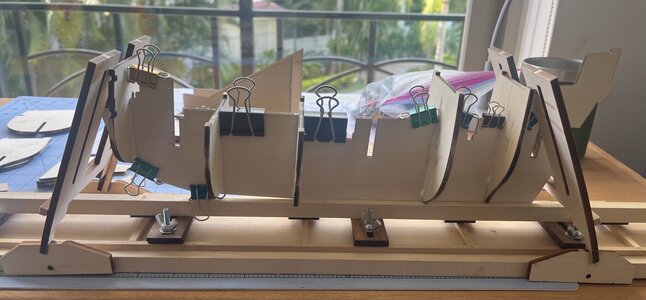
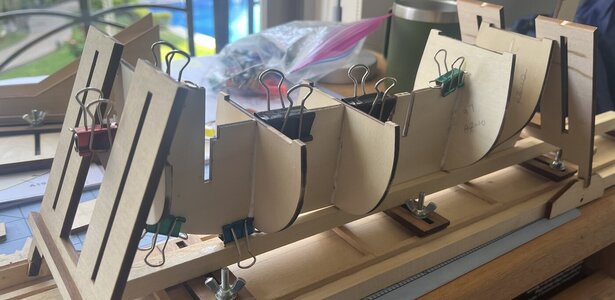
All the bulkheads are in place; next up are planking the five decks. As mentioned above, the decks are glued onto boards which are then glued onto the bulkheads.

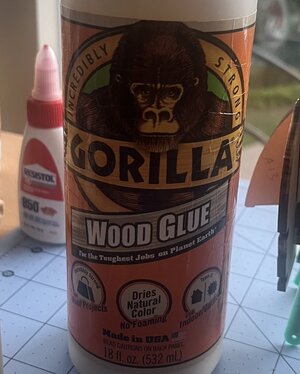
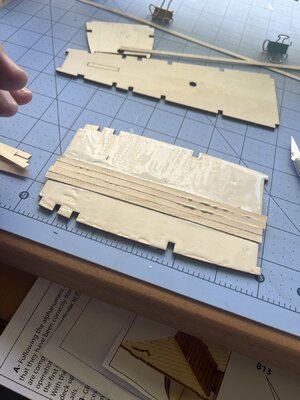
Realized a big difference in working down here… In Denver the glue dries VERY quickly. Down here (the same glue, out of the same bottle) dries not just slower, but differently. In Denver it dries to a fairly “hard” consistency. Here in the humidity of Vallarta, it dries to a soft pliable consistency.
A61B0FED-455A-4655-B818-44B868C1707C.jpegThis was one of the things I asked about but no one would/could confirm. I might try a regular white glue over the next few days to see if there’s any difference.
306639D2-CB2F-4576-82D5-54E2CDE08E53.jpeg
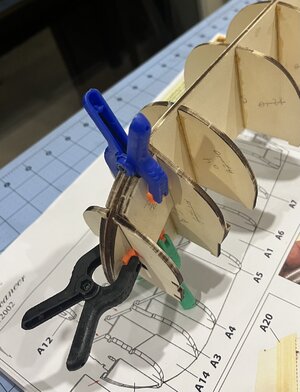
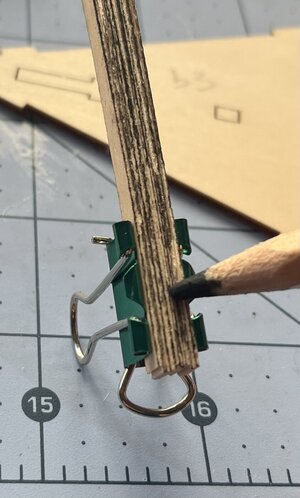
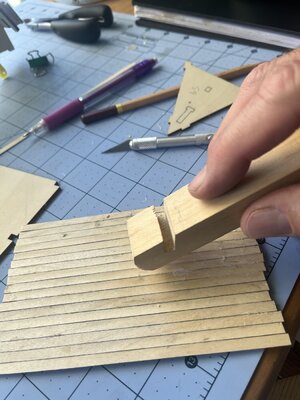
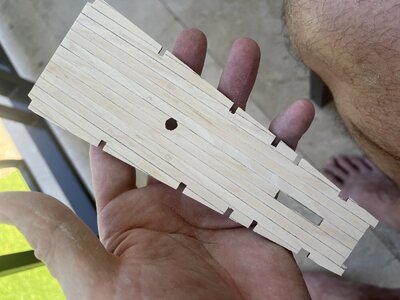
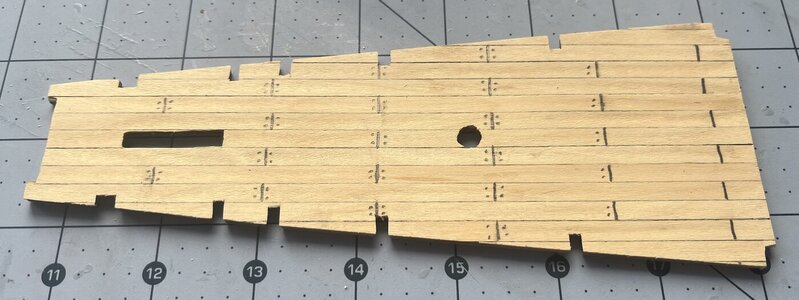
The decks are all plank on board construction. Putting the planks on the boards was very straight forward. I started by penciling the sides, but instead of one at a time I clamped several of them together and did many at the same time. Saw that on one of the OcCre videos. Nice time saving trick.

I’ll let them dry overnight and cut/trim them in the morning.
0568FEEB-9FBD-4150-A4D5-771000AD3FDA.jpeg
07551623-84C1-45F1-AC24-8D5EABC27F61.jpeg
AA1A9770-9053-4AB4-B3B5-42A7D7458F93.jpeg
Time for this portion: 5 hours
Total time to date: 6.5 hours

DAA3672A-06EC-445F-80CD-7EE7C393DE4A.jpeg
 
5/9
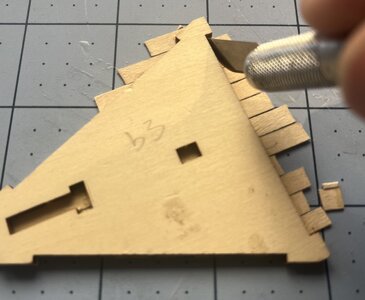
Woke up earlier than normal and started trimming the planked deck boards.
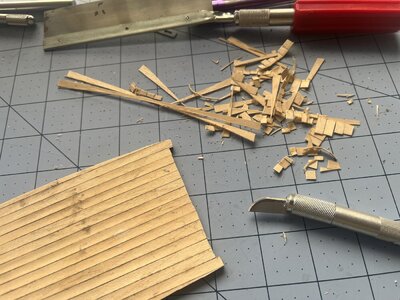
1079686E-0E07-44A5-A4A8-B590672B9240.jpegWith 5 decks and 3 masts, this process took longer that I expected. Trimming with the grain went fairly quick but cross-grain trimming was a bit slow. I took a bit extra care whenever the trimming was extremely close to an edge of a plank. All told, the trimming took about 2 hours.
E92C81AC-9FD3-4EDC-9B67-B77D7059ADD0.jpeg
F78B0C10-8F68-4EDD-A474-45AA759FA04E.jpeg
BE2ECB5D-3A18-4BAF-AECD-233E0B3FD626.jpeg
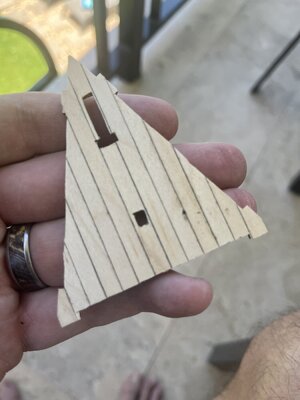
While not 100% symmetrical, I was pleased with how they looked, even before sanding. Last night I was somewhat apprehensive of what the finished product would look like, but as soon as I started trimming the edges, I knew I’d be happy. Amazing what one step can do. Can’t wait to see what they look like after sanding.
4EC7DA7D-0B65-4F54-9B0B-3F69FFEB9A49.jpeg
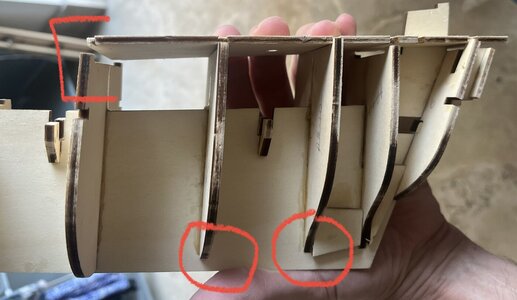
After a little more sanding, I “had” to see what the ship looked like with them on so I tried dry fitting them. And boy am I glad I did. I won’t blame it on my minimal experience, but somehow I did not seat 2 of the bulkheads all the way. The picture really doesn’t do it justice as there was no way the deck was going to sit properly.
C2603D9A-FB64-450A-80E2-7151B6065A69.jpeg
I felt I had 2 options
  1. Cut/carve the tops of the bulkheads and the add/shim to the bottom of them.
  2. Cut the 2 bulkheads away from the keel and re-seat them.
After contemplating this over a Pacifico con lemon, I decided to go with option 2.

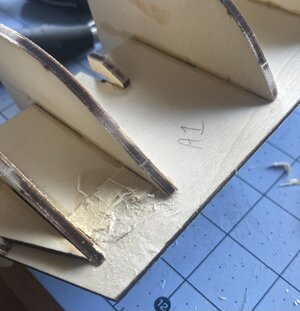
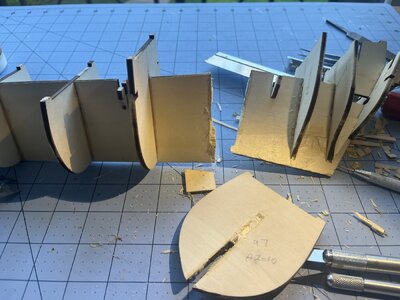
After 40 minutes of carefully cutting, scraping, picking, and moving the rear bulkhead back and forth, it was free and slid into it’s correct position.
AE322E27-907B-4C35-A00B-282B7B20B6CA.jpeg
Half way home.

Another 30 minutes on the other bulkhead had me a bit frustrated. I didn’t feel like I was progressing on it like I did with the other.

I still had a few minutes before I was supposed to meet a friend to watch the sunset and have a few beers at the beach and told myself that maybe I should just call it a night and head to the beach BUT I didn’t listen to myself and kept cutting and picking away.

And then SNAP - DISASTER! The keel snapped in half and my Buccaneer suddenly looked like the Titanic. All that was missing was Jack, Rose, and the Heart of the Ocean.
4AF89749-6785-4808-A4E4-0982175E711E.jpeg
If only I had listened to myself. Beach beers were calling so I took a quick look and told myself it was going to be ok. Clean up the break, reposition the bulkheads, and the deck planks will help align everything. Or so I hope.
6C0A61E9-373C-4417-94A0-E95185825C14.jpeg
Time for this portion: 5 hours
Total time to date: 11.5 hours
 
Last edited:
Try soaking glue with rubbing alcohol to soften joints to release glue.

When you decide how to stain or seal the decks one trick I learned was to scrap the deck instead of sand paper to smooth. Take a single edge razor hold near 90 degree to deck and draw along with soft pressure. It smooths the top very smooth and level
 
Hi.I found out on this forum that acetone helps.it's true.I bought nail polish remover for women.I took this liquid into a medical syringe and soaked the problem area.and the part was falling off.the main thing is not to rush and spill the place from the syringe many times.everything will be sorted out.thanks to this man for the science.be kind.
 
For such work I use wood glue which is water based - if you have to reopen something you need only some water (via a wet paint brush on top of hardened glue) - repeating this - and after some minutes usually you can separate the parts
 
I am watching with interest in how you glued the planking to the deck. Did you have to weigh it down while it dried?
 
To mend the broken false keel, glue it up and clamp in vise between a few other boards to hold flat, place thin plastic like bags parts come in between keep and braces to keep glue from spreading, and allow to dry for a few days.
 
I am watching with interest in how you glued the planking to the deck. Did you have to weigh it down while it dried?
Not really. I did put a clamp on the 1st one but that was more because I thought I needed to. After that, no clamps and they all seemed to be ok.
 
5/10 (Mother’s Day in Mexico)
Today was dedicated to making the ship whole again.

First up was cleaning up the various parts. The stern and bow of the ship, the 2 bulkheads, and the 2 small support pieces. Easy - just carving and sanding.

Since I plan on using the deck (I believe it’s the quarter deck) to align the stern and bow of the ship, I need to finish it.

Not much left to do other than mark off the planks into 6mm sections along with penciling in the tree nails.
15B1BDA0-8DB1-4D32-80D0-D53A5E64114F.jpegWhen planning out the decks, I thought about cutting the planks into 6mm sections but had decided not to since this was my first time building a deck like this. I also contemplated drilling and using toothpicks for the tree nails. Given what happened, I’m really glad I took the easy way this time.

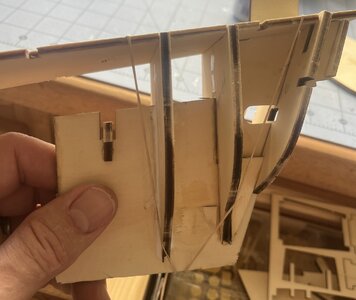
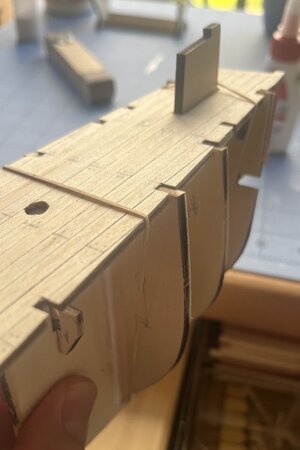
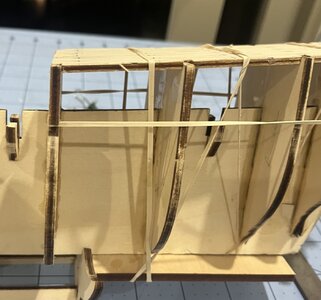
I dry fitted the rear bulkhead and the quarter deck above it and once I felt comfortable with the bulkhead’s placement, I added glue to the keel and bulkhead and wrapped a rubber band around them to hold them in place while the glue dries.
0DE279D0-C346-4B4C-A778-E30B2745A03E.jpeg
AD245C6C-7B74-41EC-9DAB-8A8819533622.jpeg
The next step is putting the 2nd bulkhead in place and aligning the keel, the quarter deck, and the bulkhead. Three parts, all with the opportunity to move around. I’m not sure if I’ll need to glue the quarter deck in place to complete this or if I’ll be able to keep it dry fitted in place with rubber bands and/clips. I’ll wait until the glue on the 1st bulkhead dries.

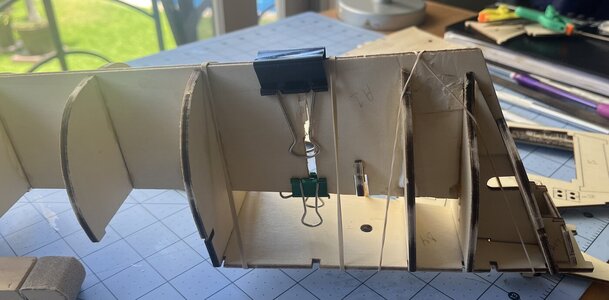
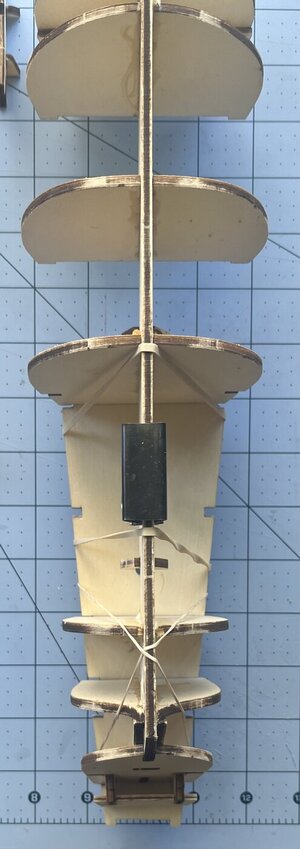
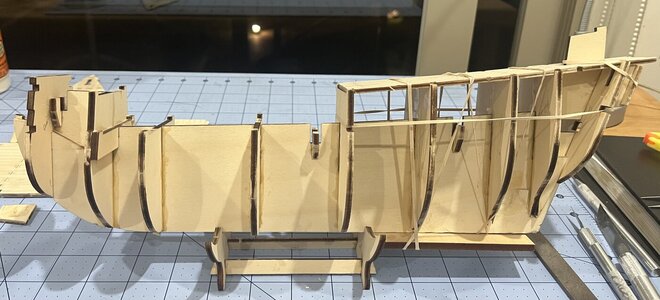
Didn’t turn out as difficult as I thought it might be. I was able to hold the keel together using only the quarter deck and a couple of clips for alignment. Quite happy that I didn’t need to glue the deck in place to help. It’s starting to look like a ship again.
D5F02AEE-500C-4C44-B788-FBD387016B1D.jpeg
6169B57E-1311-4991-8E57-9E64B874407C.jpeg
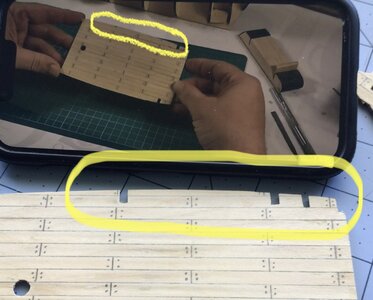
While working on the deck I noticed another error of mine. This one I’m going to put on the instructions and videos… when building out the decks, there are a number of small cut-outs in the board that the planks are glued on to. These cut-outs are for where the bulkheads line up. I cut all of them out after glueing the planks and now realize that I should have only cut a few of them out. The picture below is my deck next to the video playing on my phone. Not a big mistake and I can add a small piece of the planking over the bulkhead if I think it will look better. Ahh, the joys of the instructions and silent videos. Just means I need to slow down a bit more and not assume even small things.
6F76BDF3-8658-4909-99FD-236CFFAB7C40.jpeg
Next up on the repair are to carefully remove the rubber bands and clips and re-install the bulkhead. Then put the quarterdeck on and reposition the rubber bands and add glue. Putting the rubber bands back on was a bit stressful since I knew the keel had a major weak spot, but I got them on and am currently waiting for the basketball game to start and tomorrow I’m back to building (instead of fixing).
A0E1BF89-441C-421B-A55B-69EC986ADA43.jpeg
1AA7871C-445B-4193-838D-FC0322ED8527.jpeg

Looking back at my goals for the build for this trip down here… I probably won’t need to put on a temporary batten on the bulkheads, or if I do, I’ll only need to put one in the lower bottom half of them. Since I’ll be leaving the ship for a couple of months (in whatever state I get to before leaving), I had thought battens would be needed to help reduce any potential warping. Now after seeing how the decks holds the bulkheads in place, I’m not sure this will be necessary.

So a day (5 hours actual build time) lost, but I’m in Mexico and have plenty of time.

Time for this portion: 5 hours - not counting drying time
Total time to date: 16.5 hours
 
Last edited:
Back
Top