Black Pearl - Zhl 1:50 by Rowboat

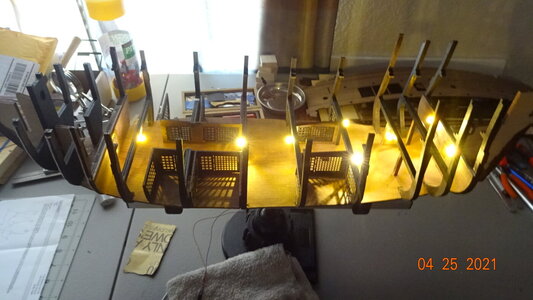
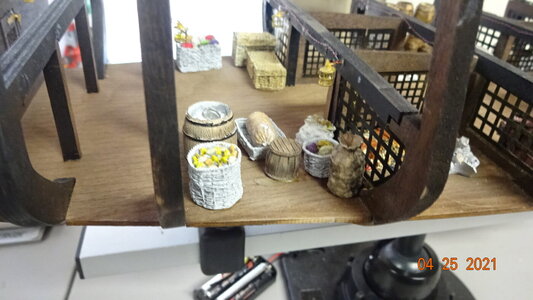
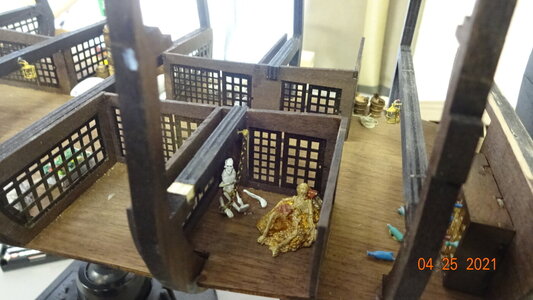
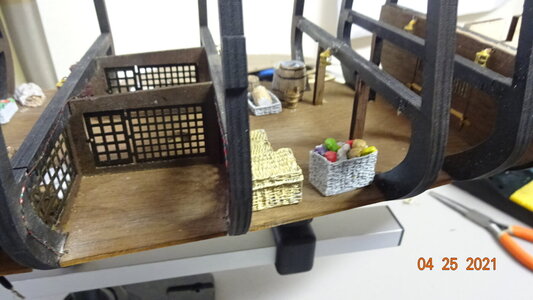
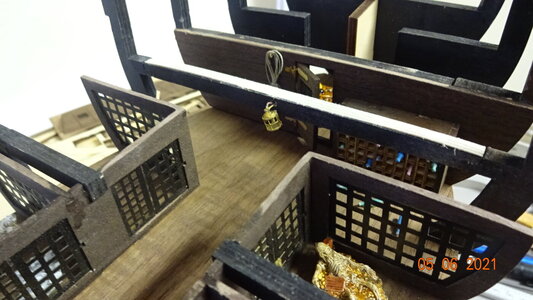
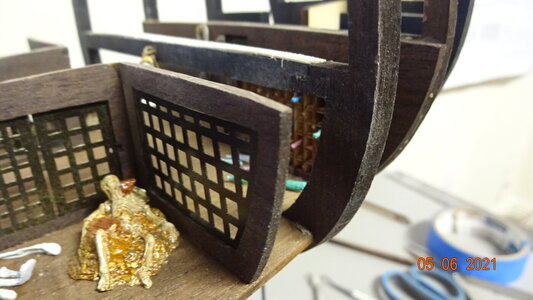
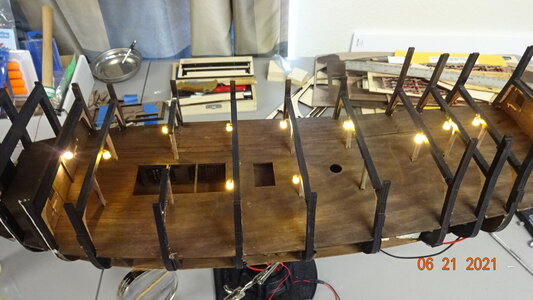
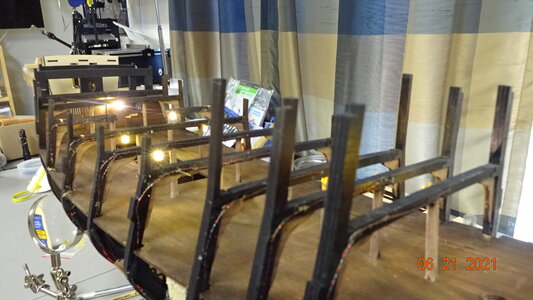
It's taken a while but I finally got the lights on the bottom deck installed.

Much of the time was spent soldering extension wires to the LEDs.
If someone decides to use the Evan Designs LED's call and get the 14 inch wire, the 8 inch is just more work.
Tried using shrink tube to cover the exposed wire but nothing I had was small enough.
Ended up using black electrical tape. Also I just glued the wire to the beams above deck.

Here's a pic of the soldered wires.
View attachment 229750

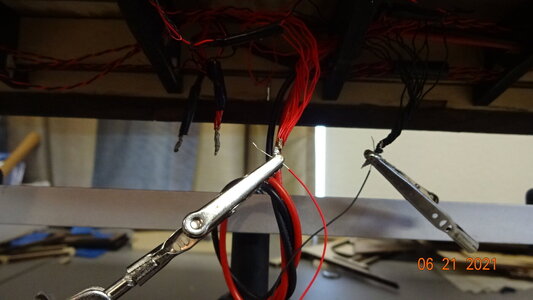
After wrapping the wires and running them through the hull, I soldered all the red wires together and all the black wires as well.
Those 2 wires in the pic below are the result.
By the way, I tested every step of the way so in the end all worked.
View attachment 229751

I did use those little hanging rods to hold the lights ( some one mentioned they were not strong enough) but because the wire I used was already holding the lights it was mostly for appearance. Which turns out one can hardly see them.
View attachment 229752

Gotta run there's lots of projects in the backyard calling me.
Liquid tape worked well for me....
 
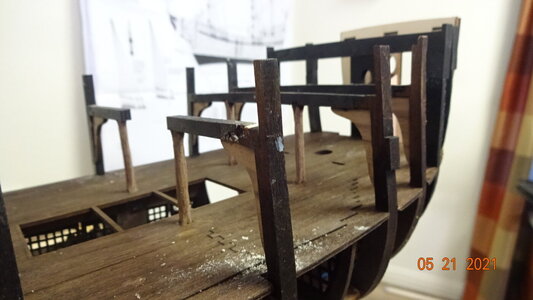
When test fitting the 2nd deck I noticed it did not rest on all the beams,some to high some to low.
So I sanded where needed and added where needed.
The beam with the white top added is shown below.
Basically found a piece of extra 6mm wood then cut, glue and sand.DSC02045.JPG
DSC02046.JPG

After test fitting again I was ready to glue in the 2nd deck. I only wanted to do the port side.
Once I'm happy with that I proceed to the rest of the deck.

DSC02047.JPG
DSC02048.JPG

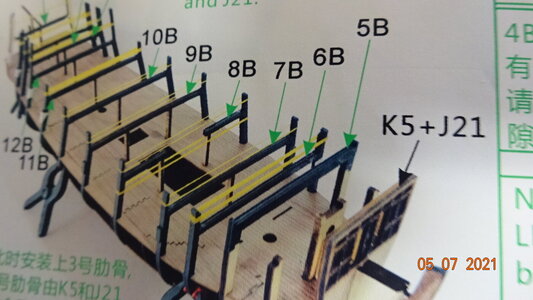
Started thinking ahead for the next part, adding the beams to the 2nd level.
Edit: Pieces found :)
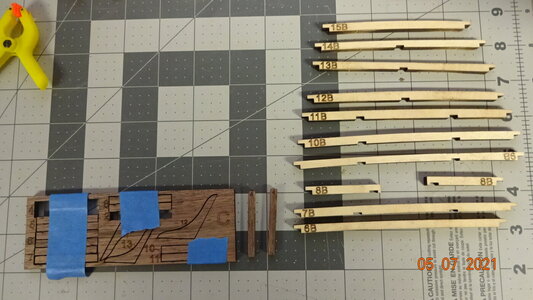
Cut everything out from their template and was disappointed to find some missing pieces.:mad:
In the pick below I'm missing the 5B beam.

DSC02050.JPG

Here's what I found
DSC02051.JPG

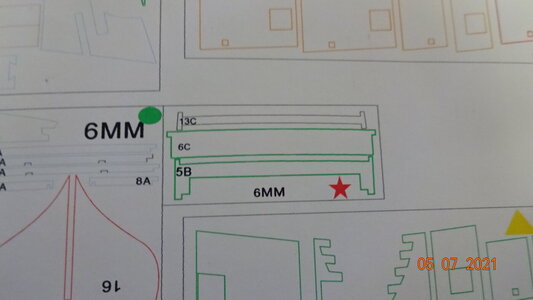
The manual shows a 6MM part with a Star on it and 3 pieces embedded, one of them is 5B.
DSC02049.JPG

Thus, I'm actually missing 13C, 6C and 5B :mad::mad::mad:.

I'll stop here before I blow a gasket.
 
Last edited:
When test fitting the 2nd deck I noticed it did not rest on all the beams,some to high some to low.
So I sanded where needed and added where needed.
The beam with the white top added is shown below.
Basically found a piece of extra 6mm wood then cut, glue and sand.View attachment 231851
View attachment 231852

After test fitting again I was ready to glue in the 2nd deck. I only wanted to do the port side.
Once I'm happy with that I proceed to the rest of the deck.

View attachment 231853
View attachment 231854

Started thinking ahead for the next part, adding the beams to the 2nd level.
Cut everything out from their template and was disappointed to find some missing pieces.:mad:
In the pick below I'm missing the 5B beam.
View attachment 231855

Here's what I found
View attachment 231857

The manual shows a 6MM part with a Star on it and 3 pieces embedded, one of them is 5B.
View attachment 231856

Thus, I'm actually missing 13C, 6C and 5B :mad::mad::mad:.

I'll stop here before I blow a gasket.
Rowboat,
5B is in the second box of the kit, not with the others on small Walnut panel! I think others too! Check it out!
 
I've thoroughly gone through both boxes multiple times and get the same result, the piece is missing :(.

There are not to many 6MM walnut pieces so I'm confident that one (holding the 5B part) is not in the kit.

Now I have to decide whether to make my own or see if I can get the piece from ZHL in a reasonable time.

I've started the process of making my own 5B but may still see if I can get the pieces from ZHL.

Luckily I dealt with much worse when building the Enterprise 1779, so I have high confidence I can build the parts.Thumbsup

Can anyone tell me if both 4B and 5B are the same height at the ends and middle? I know the length will be longer and the width will be 6MM just not sure on the height of the ends and middle.
I don’t remember that far back. That would be tough not being able to find that particular part. I’m thinking it needs to be pretty precise because of where it is and its function.
 
Well do I feel like and idiot :rolleyes:.

I was in the process of making the 5B part when a friend dropped by.

I asked him if he wouldn't mind looking for a part for me ( even though I had thoroughly searched 3 or 4 times).
He agreed.

I just showed him the picture and handed him a box.

He opened the box , looked about 30 seconds and said "Here it is".

ME: WTFrick ! , I was dumbfounded :eek:.

The part was not made of walnut, for some reason I thought the manual wanted walnut because there is a red star on the picture.
Now I'm wondering what all those different colored symbols mean. Anybody know please let me in on it.

I guess I have tunnel vision when I set my mind to looking for something, same thing happens when looking in the frig for snacks.
Conversation goes something like this,
"Honey, there is no grape jelly"
" look on the bottom shelf"
"Oh, there it is".

"Honey, no grape jelly in the pantry"
"Look on the top shelf in the back"
"I already did"
She walks over to the pantry, reaches in the back on the top shelf and pulls our a jar of jelly.
"That's the big jar I was looking for the small jar" , I say embarrassingly.

Refrigerator blindness she calls it.
 
Last edited:
Well do I feel like and idiot :rolleyes:.

I was in the process of making the 5B part when a friend dropped by.

I asked him if he wouldn't mind looking for a part for me ( even though I had thoroughly searched 3 or 4 times).
He agreed.

I just showed him the picture and handed him a box.

He opened the box , looked about 30 seconds and said "Here it is".

ME: WTFrick ! , I was dumbfounded :eek:.

The part was not made of walnut, for some reason I thought the manual wanted walnut because there is a red star on the picture.
Now I'm wondering what all those different colored symbols mean. Anybody know please let me in on it.

I guess I have tunnel vision went I set my mind to looking for something, same thing happens when looking in the frig for snacks.
Conversation goes something like this,
"Honey, there is no grape jelly"
" look on the bottom shelf"
"Oh, there it is".

"Honey, no grape jelly in the pantry"
"Look on the top shelf in the back"
"I already did"
She walks over to the pantry, reaches in the back on the top shelf and pulls our a jar of jelly.
"That's the big jar I was looking for the small jar" , I say embarrassingly.

Refrigerator blindness she calls it.
Been there, done that: both refrigerator and build.
 
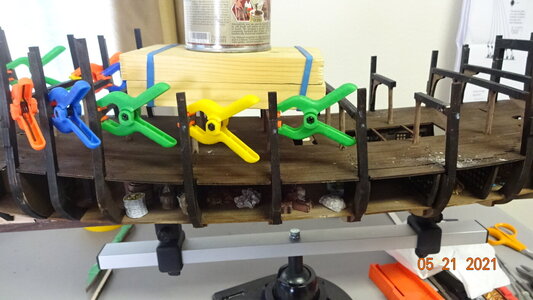
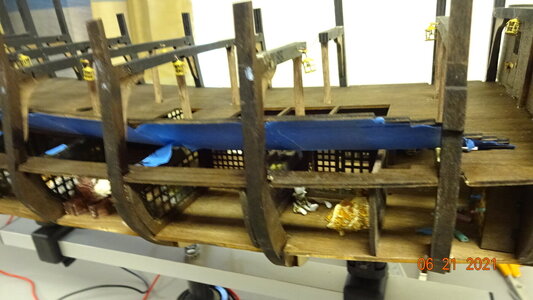
Put in the 2nd deck.
Took trimming around almost all the bulkhead beams.
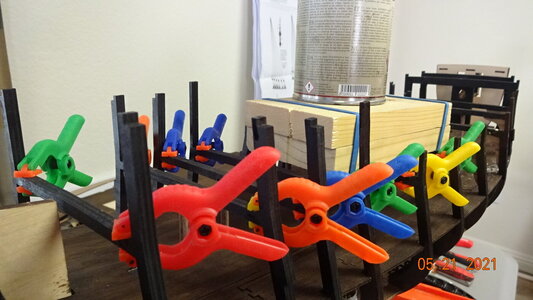
I did put tape on the back side of the removal deck sections.
I saw this was suggested by a fellow member.

I incorrectly stained the deck to dark, did this for the top deck as well.:(
Don't know why, just grabbed the nearest can of stain thinking it must have been the one I used last time. Wrong!
You can see the color difference in the image below.
DSC02054.JPG

Started adding the beams for the 2nd level.
I began test fitting the top deck and it looks to need lots of trimming as well.

Notice I did round the interior beams like the manual suggested.

DSC02052.JPG

Things moving slowly as the weather is nice outside so we are doing outside stuff.

Next up is to solder the wires to the lengthen the LED wires and then install them.
This may take awhile, till then go out and enjoy the nice weather Beer
 

Attachments

  • DSC02053.JPG
    DSC02053.JPG
    179 KB · Views: 1
Alrighty mates, I have solder the second deck wires.
Took some time but in the end all the lights were working.
Connected all the red wires together and black together underneath the ship, then ran power to the wires using alligator clips to connect them.

DSC02065.JPG

Wahla, magic ...
DSC02064.JPG
DSC02063.JPG

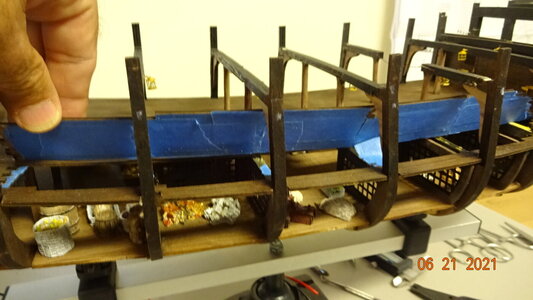
Next I decided to take out the removal deck section, I had put masking tape on the bottom initially when I glued them down.
Now was the time to see if that technique worked.

Not to bad, came apart fairly easy and only needed some minor sanding.
DSC02067.JPG
DSC02066.JPG

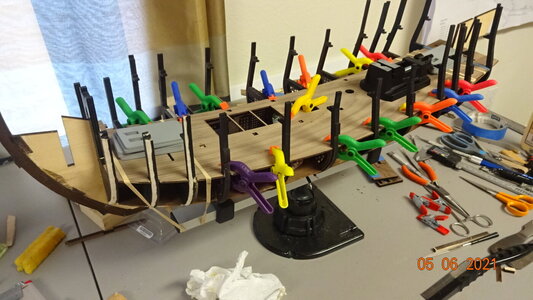
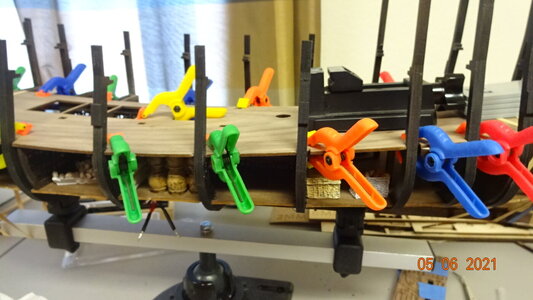
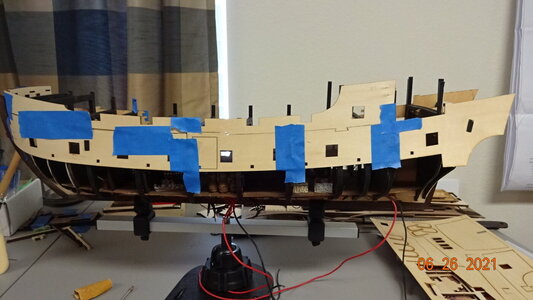
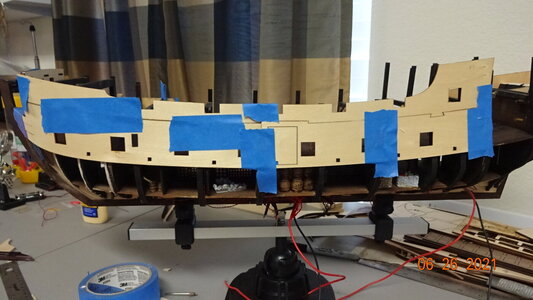
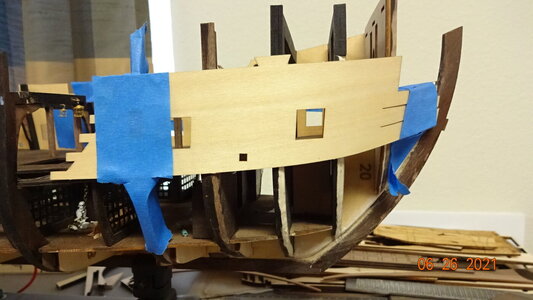
Next I started to dry fit the hull skins.
First thing I noticed was the rear hull bulkard had twisted.
Here's a picture.
DSC02074.JPG
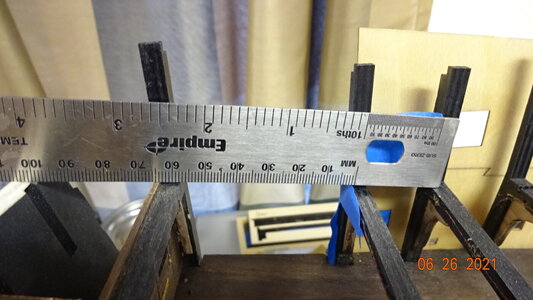
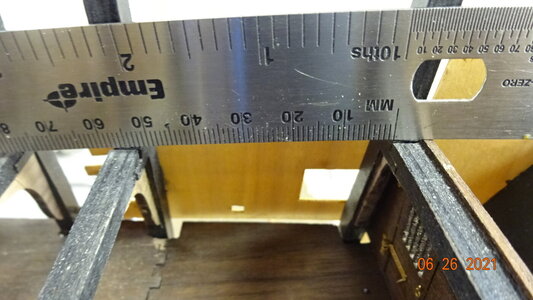
I measured the distance to the next bulkhead, one side measured 56mm and the other 52mm.
I think when I set the 2nd deck that maybe that bulkhead had not fully glued in place.
DSC02072.JPGDSC02073.JPG


I wanted to see if this was going to be and issue with fitting the hull skins.
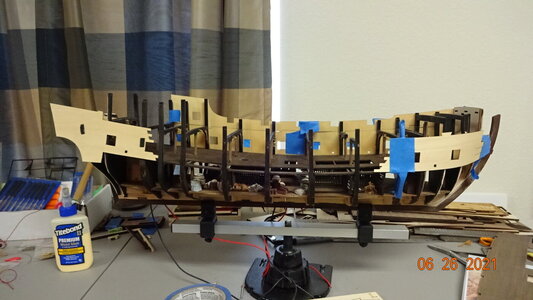
I taped the hull skins in place and only needed minor trimming.
Seems like things will work out.
The bow.....
DSC02068.JPG

.....Starboard side...
DSC02070.JPG
......Port side..
DSC02075.JPG

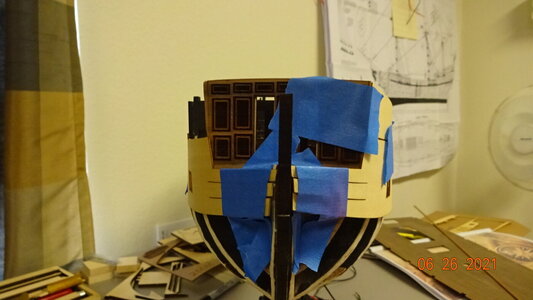
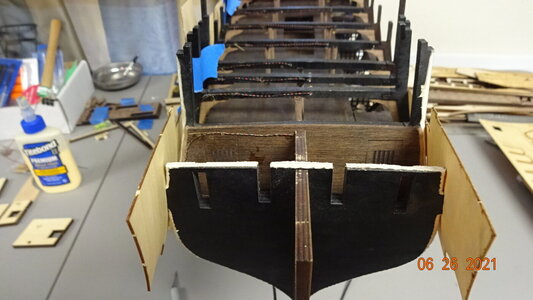
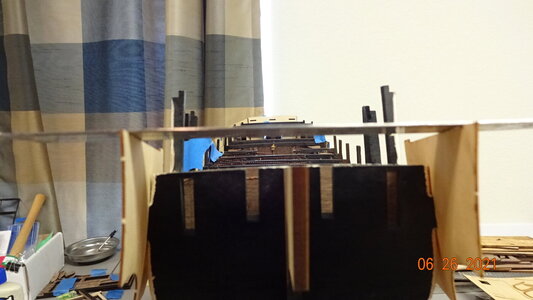
Doubled checked the stern to see if the skins were level.
DSC02076.JPG

The ship is leaning slightly to the left only because of the way I have it mounted on the holder.
The straight edge across the tops of the stern skins is level .
DSC02077.JPG

Building going slowly but I'm in no hurry.
Cannons are being worked on and I should have some pictures next time I post.

I am spending some time reading other member's builds'.
This is definitely helpful but time consuming.

Till next time, sail on ....Ship-1
 

Attachments

  • DSC02069.JPG
    DSC02069.JPG
    171.4 KB · Views: 1
  • DSC02071.JPG
    DSC02071.JPG
    163.8 KB · Views: 1
Last edited:
Alrighty mates, I have solder the second deck wires.
Took some time but in the end all the lights were working.
Connected all the red wires together and black together underneath the ship, then ran power to the wires using alligator clips to connect them.

View attachment 240875

Wahla, magic ...
View attachment 240874
View attachment 240873

Next I decided to take out the removal deck section, I had put masking tape on the bottom initially when I glued them down.
Now was the time to see if that technique worked.

Not to bad, came apart fairly easy and only needed some minor sanding.
View attachment 240877
View attachment 240876

Next I started to dry fit the hull skins.
First thing I noticed was the rear hull bulkard had twisted.
Here's a picture.
View attachment 240890
I measured the distance to the next bulkhead, one side measured 56mm and the other 52mm.
I think when I set the 2nd deck that maybe that bulkhead had not fully glued in place.
View attachment 240878View attachment 240879


I wanted to see if this was going to be and issue with fitting the hull skins.
I taped the hull skins in place and only needed minor trimming.
Seems like things will work out.
The bow.....
View attachment 240883

.....Starboard side...
View attachment 240885
......Port side..
View attachment 240889

Doubled checked the stern to see if the skins were level.
View attachment 240887

The ship is leaning slightly to the left only because of the way I have it mounted on the holder.
The straight edge across the tops of the stern skins is level .
View attachment 240888

Building going slowly but I'm in no hurry.
Cannons are being worked on and I should have some pictures next time I post.

I am spending some time reading other member's builds'.
This is definitely helpful but time consuming.

Till next time, sail on ....Ship-1
Hi mate, it looks like you keeping moving forward without too many problems! Good job, rowboat! Great job on the lights. Don’t kid yourself, to get all those little buggers to light isn’t an easy chore! Take your time with the planking! If it becomes tiring, give it a break for a couple days! Patience!
 
Last edited:
Thanks gentlemen for the support.

I did end up using "liquid tape" on the solder wires (a member suggested that).
Much easier than wrapping with electrical tape.

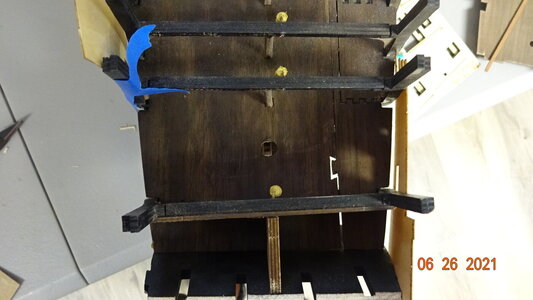
To jump back in time a bit regarding the installment of the corner braces on the 2nd level beams, pieces J11 through J20.
The instructions are on page 134 and it states "It is up to you to install J11 and J20 or not."

What they fail to mention is that if you do install J20 then the doors will not open :oops:.
That would have been pertinent information to know.
I ended up cutting away much of those two corner supports as I wanted to open the doors.

Another note: Make sure to align the mast holes between each deck.
Now, I know that doesn't need to be stated but I've found that the deck can shift slightly when the glue is setting.
This happened to me and my mast holes were off center line about 1mm or 2mm. Rather than pull the deck up I enlarged the holes.
Hopefully this doesn't come back to bite me in the a$$ :rolleyes:.


Rowboat out.
 
This version of the BP definitely requires cleaner wiring and light placement than the closed hull version. Nicely done.
Your Golden BP version is looking great!

I just found your build log last week and started reading up on it.

Seems like everyone builds faster then me :(.
 
Your Golden BP version is looking great!

I just found your build log last week and started reading up on it.

Seems like everyone builds faster then me :(.
I am going on my 3rd year of my Le Mirage build and I am nowhere near finished. It seems that as I complete the model, I find myself wanting to add more and more details that aren't included with the original kit. I don't know where to stop...
 
Thanks gentlemen for the support.

I did end up using "liquid tape" on the solder wires (a member suggested that).
Much easier than wrapping with electrical tape.

To jump back in time a bit regarding the installment of the corner braces on the 2nd level beams, pieces J11 through J20.
The instructions are on page 134 and it states "It is up to you to install J11 and J20 or not."

What they fail to mention is that if you do install J20 then the doors will not open :oops:.
That would have been pertinent information to know.
I ended up cutting away much of those two corner supports as I wanted to open the doors.

Another note: Make sure to align the mast holes between each deck.
Now, I know that doesn't need to be stated but I've found that the deck can shift slightly when the glue is setting.
This happened to me and my mast holes were off center line about 1mm or 2mm. Rather than pull the deck up I enlarged the holes.
Hopefully this doesn't come back to bite me in the a$$ :rolleyes:.


Rowboat out.
Rowboat, great tip on the masts! I never checked to align my masts...rookie mistake. So, I checked and the fore and main mast were OK. The mizzenmast gave me a headache...ok from main deck to gun deck but a no-go through the lower deck! I drilled through but still mis-aligned tilting left of the other two masts. Luckily, I didn’t go further with the drill! I was getting pissed! So, I decided rather than create more damage, (worrying I would hit a wire or something) I’ll just make a slight ring around the mast from some scrap wood (because I enlarged the main deck hole too much) and sink the mast through and as far as it can go to the lower deck! Then of course the deck above the Captain’s Qtrs is a 4th hole which I’ll have to align but it should help secure the mizzenmast since I enlarged the main deck hole too much. I’ll deal with securing this mast when I get to the end! But, I learned a valuable lesson for when I do my San Felipe.....
 
Last edited:
Back
Top