Even a cheap Chinese mass-printed kit can make an attractive model with some extra work.
You are using an out of date browser. It may not display this or other websites correctly.
You should upgrade or use an alternative browser.
You should upgrade or use an alternative browser.
Another Halcon 1:100 scale [COMPLETED BUILD]
- Thread starter Martin555.
- Start date
- Watchers 13
-
- Tags
- completed build halcon
Hi Martin,
Nice improvisation.
Cheers,
Stephen.
Nice improvisation.
Cheers,
Stephen.
Thank you.Hi Martin,
Nice improvisation.
Cheers,
Stephen.
I have to use whatever I can find.
Good morning Martin. For a 10 pound buy, this is the best bang for buck model build I have seen Great work. Cheers GrantHi Guys,
The Cannons are also supplied in 2mm plywood sheet so these were promptly thrown in the bin.
(A friend jokingly said the cannons in the kit were made square to match the square gunport’s LOL!!)
Made ten small simple cannons using a length of BBQ stick, and one larger cannon from a piece of wooden knitting needle.
Oh and I used a hand drill clamped in a vice.
A small strip of copper hull sheeting was used to go over the pis of the cannons.
A little bit of tinkering and then fitted them to the ship.
View attachment 330541View attachment 330542View attachment 330543View attachment 330544View attachment 330545View attachment 330546View attachment 330547View attachment 330548
Hi Grant,Good morning Martin. For a 10 pound buy, this is the best bang for buck model build I have seen Great work. Cheers Grant
Thank you for the complement, I really appreciate it.
Hi Guys,
Just a quick update.
As you can see in my introduction of this kit the instructions are next to useless.
There are no measurements for the masts, yards or even the bowsprit.
In fact there are no standing rigging or running rigging information ether.
But thanks to the fantastic members of this site the information had been posted in other build logs.
If you are like me you tend to forget where to find things so I quickly scribbled down the measurements just incase.
So thanks again guys.
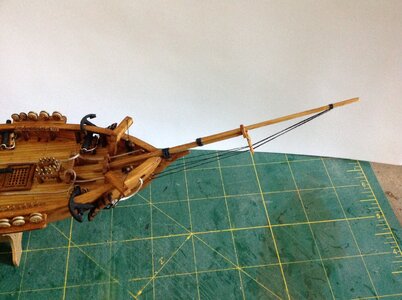
I started with the bowsprit.
Partly rigged and fitted.
All the masts and yardarms and the bowsprit was tapered by hand with a file and sandpaper as I do not have a lathe and the only electric drill I had decided to die on me a few week ago.
The diameter of the dowels supplied in the kit for the bottom parts of the masts where to thick so the wooden knitting needles came in handy again.
It always pays to look in the charity shops for wooden knitting needles as you never know when you might need them.
This post brings my build log up to date.
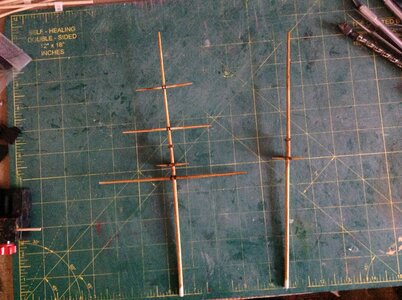
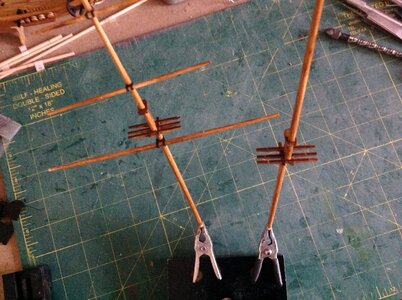


I didn't know wooden knitting needles existed. Another potential source of pre-sized wood for bashing. Amazing what you learn on this forum. Do you have a link to these things?
Hi,
The easiest is to Just type in 'wooden knitting needles ' into Ebay, or keep your eyes open in the charity shops.
The easiest is to Just type in 'wooden knitting needles ' into Ebay, or keep your eyes open in the charity shops.
Hi Guys,
It is at this stage of the build it will just look like sticks and string so there will not be many updates.
I glued the two masts in place and started the rigging, altho I still have a few booms to shape and fit.
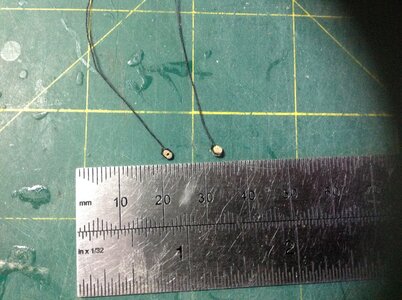
Like a total idiot I decided to make the rigging blocks from cocktail sticks that I reduced the outside diameter of with a file.
I still think they look a little big.
The rigging itself I know will not be totally correct but for a cheep rubbish kit I have to do something.
As you can see I am working on the ratlines at the moment.
So here are a couple of photos of some of the rigging and the ratlines.
I might even make some sail for this ship.
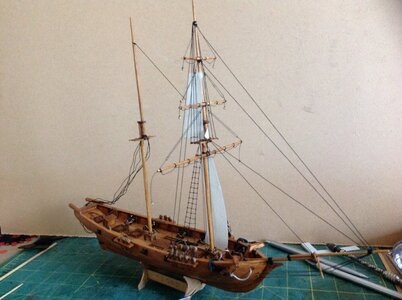
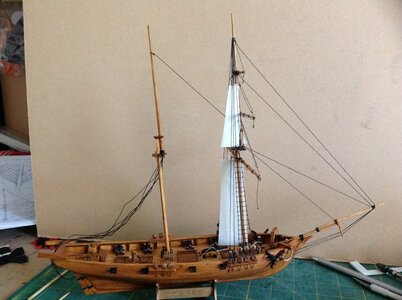


Nice progress Martin.
Cheers,
Stephen.
Cheers,
Stephen.
Looking good!
Thank you Stephen and Darivs.
I can now see there is light at the end of the tunnel I am just hoping it is not just someone with a torch LOL!!
I can now see there is light at the end of the tunnel I am just hoping it is not just someone with a torch LOL!!
At least if it's someone with a torch, you'll have the help of someone with a light source. . . Great work so far!Thank you Stephen and Darivs.
I can now see there is light at the end of the tunnel I am just hoping it is not just someone with a torch LOL!!
Hi Guys,
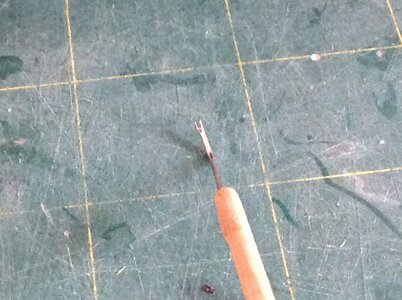
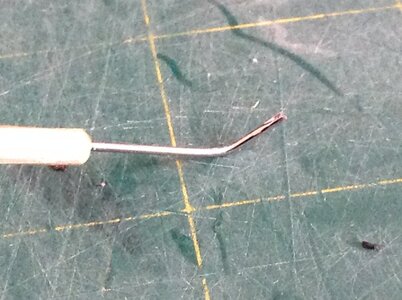
I had to make a small tool to help get the rigging to go around the bottom of the belaying pins as my fat fingers could not get to where they needed to be.
I raided my wife’s needle work box and took a needle I then filed the top of the eye so that it formed a ‘U’ shape then bent it a little and glued it to a piece of BBQ stick as a handle.
I must say it worked very well.


Hi Guys,
Another little update.
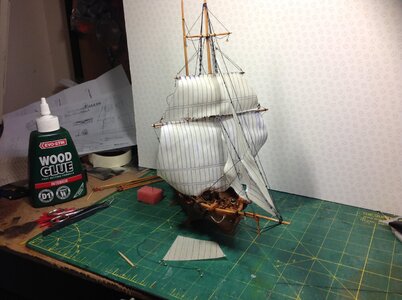
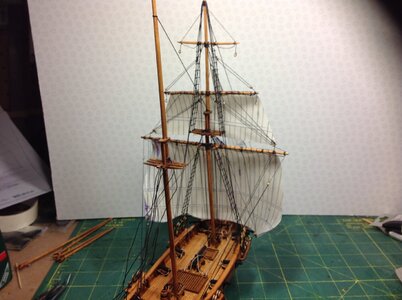
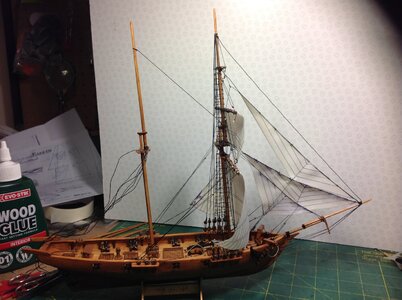
I found it best for me to add the sails as I work my way through the ships rigging thus reducing the risk of braking something altho it certainly gets the mind working dealing with all the different rigging systems.
The sails are made from curtain lining material this material is good for large and small models as it is very thin.
The sail material was soaked in tea for about half an hour then rinsed and hung out to dry.
Then soaked with a mixture of white wood glue and water and again hung out to dry.
The stitching lines were then drawn on.
I did make a big mistake, after tying the forward sails to the stays I used a small drop of super glue on the knots to stop them from untying and as you can see it made the ink run from the pen.
Big mistake.
I have had to try and blend some paint on the sails to try and hide these pen marks.
I knew I should not put sail on this boat.
So I am now using white wood glue instead for the knots.


Nice progress Martin,
I hope your admiral was consulted about the plundering of her sewing box to avoid a keel hauling.
Just wondering about the main lower fore stay where is the lower end going to attach to?
Cheers,
Stephen.
I hope your admiral was consulted about the plundering of her sewing box to avoid a keel hauling.
Just wondering about the main lower fore stay where is the lower end going to attach to?
Cheers,
Stephen.
@Martin555
Hi, Martin:
I am following your build with very great interest as I purchased several of these cheap Chinese kits (Naxos, Halcon, Harvey, etc.) as a way of getting myself back into the hobby and to prepare myself for more complicated builds. Having examined them all in detail, I am extremely impressed with and encouraged by what you have accomplished so far. I began a Naxos model and got halfway through the planking, breaking several in the process, and finally threw it in the circular file. After watching you, I may try it again. Thanks for your build log, it is giving me an education.
Chris (1812er)
Any light down here would be great Martin- rolling blackouts have been the norm for a while- we are in the dark so to speakThank you Stephen and Darivs.
I can now see there is light at the end of the tunnel I am just hoping it is not just someone with a torch LOL!!

Hi Stephen,Nice progress Martin,
I hope your admiral was consulted about the plundering of her sewing box to avoid a keel hauling.
Just wondering about the main lower fore stay where is the lower end going to attach to?
Cheers,
Stephen.
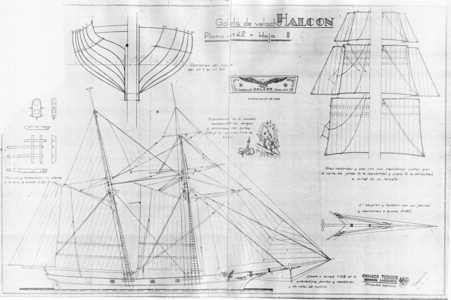
I don't know much about ships rigging or sails
I have been trying to follow this picture.
I have just recently purchase a book called RIGGING PERIOD SHIP MODELS from a charity shop but it talks mainly about square riggers.
But here is a closer look at what I have done.
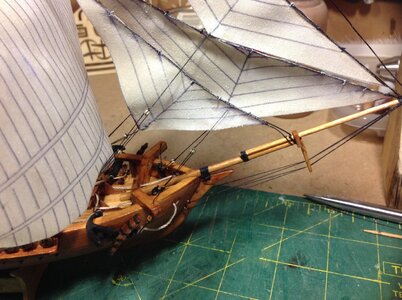
I know it is not right but it is only going to sit on a shelf were only my wife and I are liable to see it.
And she won't know LOL!!!
Last edited:
Hi Chris,@Martin555
Hi, Martin:
I am following your build with very great interest as I purchased several of these cheap Chinese kits (Naxos, Halcon, Harvey, etc.) as a way of getting myself back into the hobby and to prepare myself for more complicated builds. Having examined them all in detail, I am extremely impressed with and encouraged by what you have accomplished so far. I began a Naxos model and got halfway through the planking, breaking several in the process, and finally threw it in the circular file. After watching you, I may try it again. Thanks for your build log, it is giving me an education.
Chris (1812er)
I am glad you like this build but I am not skilful enough to be followed LOL!!
Unfortunately with these cheep kits you get what you pay for, this one has nearly ended up in the round filing cabinet many times.
I am just trying to make this cheap kit look a little bit decent.
My biggest mistake is trying to fit sails to it.
I feel that I have now ruined it and am just trying to get it finished and out of the way.
Hopefully I will have it finished this week and will post an update.
Last edited:


