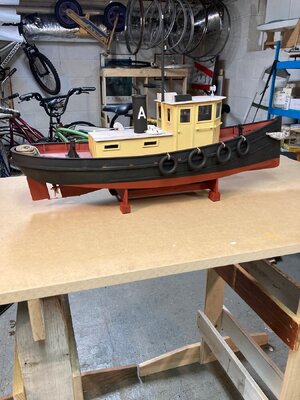
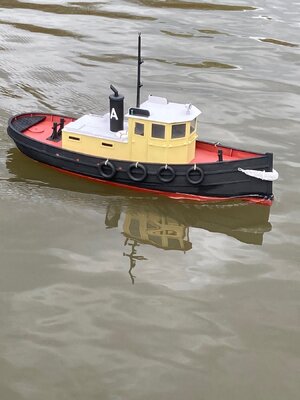
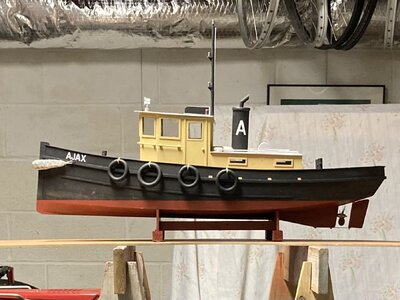
36' Tugboat

Joined
Jan 4, 2024
Messages
115
Points
113

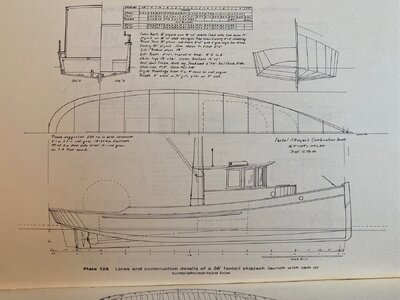
This project is a bit different from many on this forum as it's a radio control boat, has significant departures from scale accuracy, and is a fictional craft. Still, it's a fair representation of a full-size boat that could be built and the work utilized some modeling techniques that may be useful to other modelers. It is based on plans for a "36' Fantail Skipjack Launch with Ram or Tumblehome-type Bow" as presented by Harry V. Sucher in his book "Simplified Boatbuilding: The V-Bottom Boat." Lines are shown below. I selected a scale of 3/4" = 1' to produce a convenient size for radio control boating.

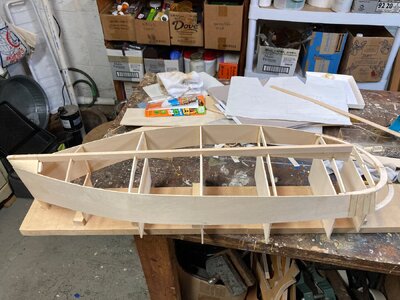
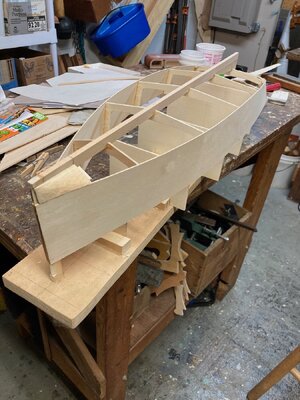
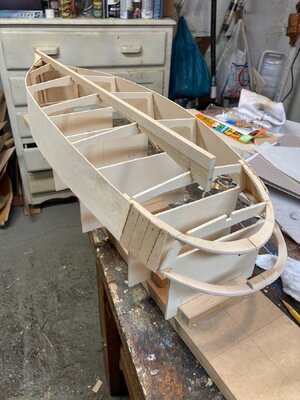
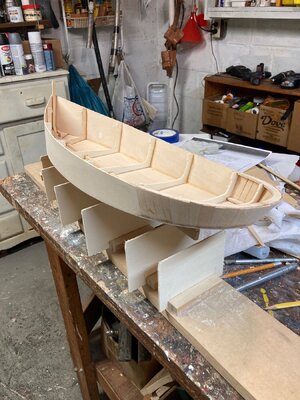
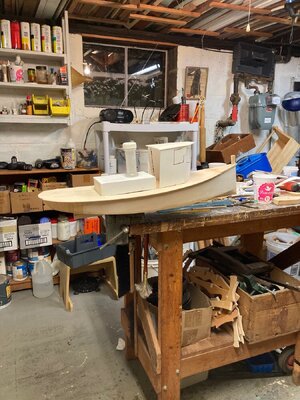
The backbone is of 1/4" basswood. Frames of 1/8" plywood. Planking of 1/16" basswood. Frames were sawn out with integral extensions to the base line and attached to a baseboard. The plans show 11 stations. I made frames for even-numbered stations 2 through 10 plus station 11. After planking, the frames were sawn free. Photos show the framing of the fantail and the vertical staves, which pretty much mimics full-size construction. At the bow, I found the the bottom planking was not going to twist enough as it approached the stem, so I adopted a technique used by Chesapeake Bay boatbuilders: the chunk forefoot. Like it sounds, it's a chunk of wood carved to fill in the transition from the v-bottom planking to the vertical stem. Fastening was mostly with cyanoacrylate glue with some epoxy in places for reinforcement.

To be continued...

skipjack tug 222.jpgskipjack tug 2.jpgskipjack tug 1 .jpgskipjack tug 18.jpg
 
Chapter 2

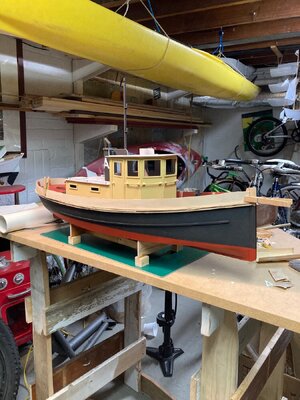
Photo1: Off the building board with bottom planks and side planks in place and fantail planked. Chunk forefoot is visible forward.

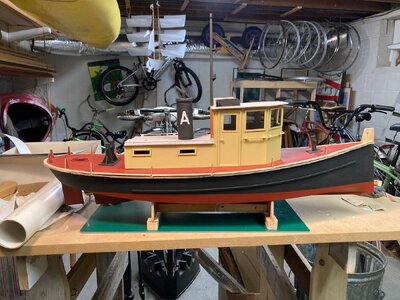
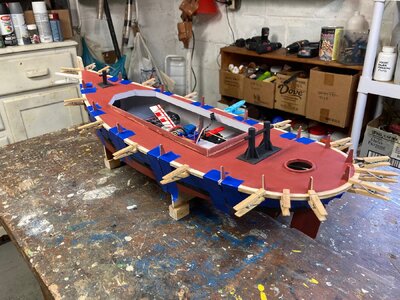
Photo 2: Mockup of deck (1/16" basswood), superstructure (card stock) and stack (plastic jar). Checking to see if these features pass the eyeball test.

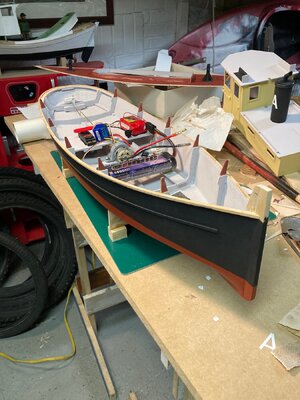
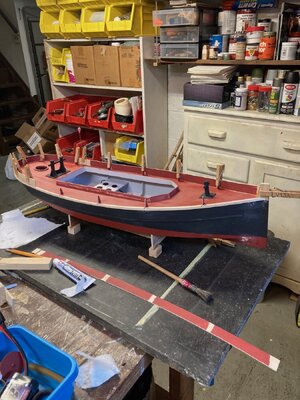
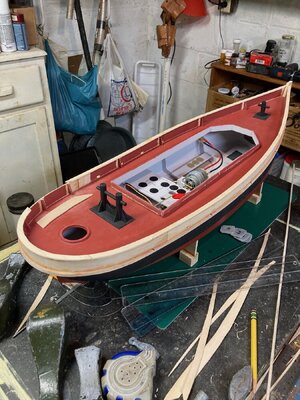
Photo 3: Outside and inside of hull painted with hobby acrylics. Gunwales and rub rails attached. Stanchions for bulwarks attached to frames. RC gear in place. Deck showing coaming, which will fit inside superstructure, and towing bitts fore and aft. Superstructure built of 1/16" basswood. Stack was the barrel of a discarded plastic ball pump. Note that stem is rabbeted for bulwark.

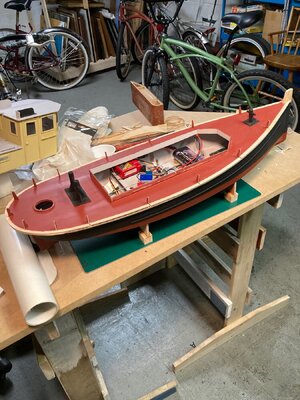
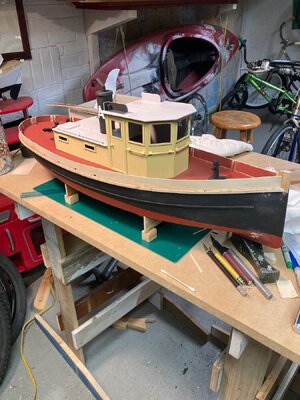
Photo 4: Trial fit of deck showing stanchions and towing bitts. At the stern is a manhole for access to the rudder stock, just in case there is a problem with the RC gear.


skipjack tug 19.jpgskipjack tug 20.jpgskipjack tug 30.jpgskipjack tug 40.jpg
 
very good progress - also the deck house is already prepared :cool:
 
Hello Andy
A very interesting project. I like the hull lines. I will continue to look over your shoulder. How long is the boat?
 
very good progress - also the deck house is already prepared :cool:
Thanks for the kind words, but please don't think that I am a speedy worker. This log isn't in real time; it's retrospective. :rolleyes:
 
Hello Andy
A very interesting project. I like the hull lines. I will continue to look over your shoulder. How long is the boat?
Brother Wolle:
Plans show a boat 36 feet long. Model scale is 3/4" = 1' or 1:16. Model is 27" long. Sorry about the archaic imperial system but it's what I grew up with and what almost all my books and plans use. (my thumb is 1" wide and my shoes are 1' long).
Fair winds!
 
Great little project. She certainly is going to be strong enough to actually put her work pushing or pulling barges. (maybe a future project). I once entered a competition where we had to navigate a course pulling a scale barge.

Jim
 
Great little project. She certainly is going to be strong enough to actually put her work pushing or pulling barges. (maybe a future project). I once entered a competition where we had to navigate a course pulling a scale barge.

Jim
Cap'n Jim:
I've toyed with the idea of a scow barge but haven't gotten further than setting aside a piece of 1/4" plywood (bottom) and a couple of 1 X 4's (sides). A barge needs to be pretty big so as not to look silly with the tug. That contest sounds like fun; was there a minimum hawser length? BTW what is that impressive vessel in front of you?
Fair winds!
 
Chapter 3

Photo 1: Trial fit of deck and superstructure. Mast with towing lights in place. Handrails are constructed of small dowels. Rudder and screw are fitted but rudder shoe isn't attached yet.

Photo 2: Trial fit of bulwarks.

Photo 3: Deck glued on with epoxy. What would we do without clothes pins?

Photo 4: Gluing on the bulwarks (1/16" basswood). Note the butt block on the port quarter that attaches the side portion of the bulwark to the fantail portion. I didn't take a picture of the operation, but I first pre-bent the fantail portion around a form, sprayed it with water, and let it dry. The starboard bulwark can be seen lying on the bench; note the butt block and the unpainted areas to permit good glue adhesion at the stanchions.


skipjack tug 50.jpgskipjack tug 60.jpgskipjack tug 70.jpgskipjack tug 90.jpg
 
Chapter 4

Photo 1: Bulwarks complete. Note the scuppers.

Photo 2: Fitting last piece of cap rail (1/16" basswood).

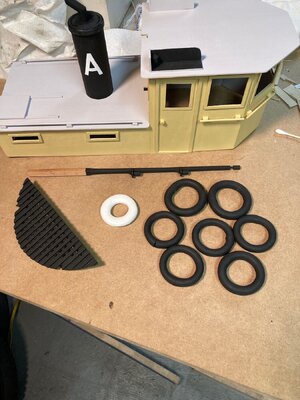
Photo 3: Some small parts. Mast with towing lights. Stern grating is from 1/16" X 1/8" basswood. Life ring is carved from polystyrene foam. Tire fenders are made from 5/16" OD surgical tubing with ends joined with a wood plug and cyanoacrylate glue and painted with acrylic paint.

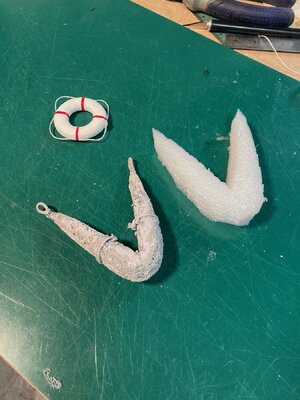
Photo 4: Completed life ring and bow fender. Fender is carved from polyethylene foam with rope threaded through with a needle and glued with cyanoacrylate. Entire assembly is painted with acrylic paint

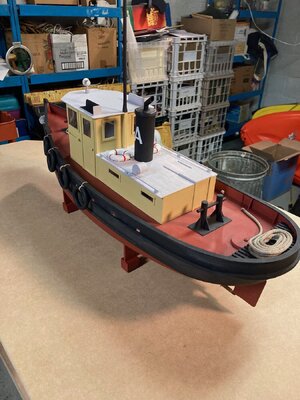
Photo 5: Various small pieces in place. Spotlight is fabricated from a small aluminum candle cup. Round manhole cover at the stern is held down by a brass toggle under the deck tapped for a screw inserted from the top of the cover. Brass rudder shoe can be seen under hull.

skipjack tug 100.jpgskipjack tug 110.jpgskipjack tug 130.jpgskipjack tug 140.jpgskipjack tug 180.jpg
 
Very nicely finished.. I love the look of these older small tugs from yesteryear.
what technique did you use for the front bumper ?
Thanks! There is a photo in post #14 that shows the finished bow fender and one roughed out. I used polyethylene foam, which is the resilient, slightly slimy-feeling foam often used for packing. I whittled it down with hobby knives and rough sandpaper then attached the eyes with a sailmaker's needle threaded through the foam. It took a couple of coats of hobby acrylic paint to fill some of the holes in the surface. I think the rough texture does a fair job simulating a rope fender. Of course, if you wanted to be more authentic, you could get out your copy of The Ashley Book of Knots and have a go.
Fair winds!
 
Chapter 5

Photo 1: Window glass (acetate) in place. Towing lights and navigation lights painted.

Photo 2: Maiden voyage. Launching without a name probably violates nautical tradition. I hope Neptune isn't angry.

Photo 3: Name is on the bow. "AJA" are my grandson's initials. "Ajax" and other classical heroes are pretty common names for tugboats. This shot gives a good view of the skeg, rudder, and screw.

skipjack tug 190.jpgskipjack tug 4.jpgskipjack tug 220.jpg
 
Highly interesting form of the hull - very good work
 
Back
Top