1805 Virginia Swift by AL

Yeah,
I came to an understanding with myself that this was a "learning the craft of ship modeling" type of kit. That way it became a learning tool instead a waste of time.
Try to approach yours the same way all you can do is improve your skills.
Remember to have fun over frustration...
Steve
 
Thank you for the information. I couldn't decide if I had to narrow the keel or grind out the brass fitting.
My Swift kit came with two cannons that are no longer provided. You are welcome to the if you want them.
Interesting that your kit came with two cannon. I still have my invoice from Model Expo in the box.... dated 1984! Forty years ago! And after reading your posts, I decided to take the box down from the shelf and have a peek inside (again). No cannons. No sign of them on the box cover photo, nor in the instructions or plan sheets. So the change to kit contents must have occurred shortly after your kit was produced. I'm trying to remember if my first version of the boat had them or not, and I honestly can't recall. I think I'll follow your example in this case and build my Swift without cannon as well. I thank you for the offer, but maybe it's best you just keep them in case you decide to put them to use in some future model... or you could use them to scratch build a small bulwark model showing a couple of cannon positions and all the associated blocking and tools (if you decide to do that, drop me a line here and I can provide you with photos of a couple of kits I built that could give you an idea of what it might look like). I'm also a kit pack rat. Any surplus materials from any of my builds get tucked away in case I need them in the future... it's always nice to have bits of dowel and various sizes of planking and dimensional stock handy in a variety of materials.

And, exactly like your kit, I see my keel section is warped (bowed out longitudinally) from stem to stern, with about a 1/3" out of line at the centre point... so I've got some straightening to do as well when I tackle mine. Only one double sided sheet of plans, but the written instructions provided in those early kits are far better than what AL provides with their more recent kits. My Red Dragon had very minimalist written instructions and relied heavily on a double sided sheet of photos from which you were supposed to ascertain what the heck you were supposed to do. That said, and off topic, some of their later kits are providing much better instructions, albeit on either CD or via their website in .pdf format. The newer versions of their instructions would remind you very much of doing a LEGO Technic build, if you've ever seen one of those. Literally a "step-by-step" using images to guide you through the build.
 
That's where I'm running into a problem. Some of the second layer planking was only .3mm thick. I sanded where I could and coated the hull with Watco.

Interesting that your kit came with two cannon. I still have my invoice from Model Expo in the box.... dated 1984! Forty years ago! And after reading your posts, I decided to take the box down from the shelf and have a peek inside (again). No cannons. No sign of them on the box cover photo, nor in the instructions or plan sheets. So the change to kit contents must have occurred shortly after your kit was produced. I'm trying to remember if my first version of the boat had them or not, and I honestly can't recall. I think I'll follow your example in this case and build my Swift without cannon as well. I thank you for the offer, but maybe it's best you just keep them in case you decide to put them to use in some future model... or you could use them to scratch build a small bulwark model showing a couple of cannon positions and all the associated blocking and tools (if you decide to do that, drop me a line here and I can provide you with photos of a couple of kits I built that could give you an idea of what it might look like). I'm also a kit pack rat. Any surplus materials from any of my builds get tucked away in case I need them in the future... it's always nice to have bits of dowel and various sizes of planking and dimensional stock handy in a variety of materials.

And, exactly like your kit, I see my keel section is warped (bowed out longitudinally) from stem to stern, with about a 1/3" out of line at the centre point... so I've got some straightening to do as well when I tackle mine. Only one double sided sheet of plans, but the written instructions provided in those early kits are far better than what AL provides with their more recent kits. My Red Dragon had very minimalist written instructions and relied heavily on a double sided sheet of photos from which you were supposed to ascertain what the heck you were supposed to do. That said, and off topic, some of their later kits are providing much better instructions, albeit on either CD or via their website in .pdf format. The newer versions of their instructions would remind you very much of doing a LEGO Technic build, if you've ever seen one of those. Literally a "step-by-step" using images to guide you through the build.
Thank you for your response. The newer version is also only single planked and is a totaly different build. I looked up the instructions on the AL website hoping for better information. . I just purchased my next project from another sos member. It's the full frames Bluenose ll. It feels like Christmas.
 
Thank you for your response. The newer version is also only single planked and is a totaly different build. I looked up the instructions on the AL website hoping for better information. . I just purchased my next project from another sos member. It's the full frames Bluenose ll. It feels like Christmas.
Congratulations, Ted! Now Bluenose is another kettle of cod altogether! :)
 
Thank you for your response. The newer version is also only single planked and is a totaly different build. I looked up the instructions on the AL website hoping for better information. . I just purchased my next project from another sos member. It's the full frames Bluenose ll. It feels like Christmas.
I just finished looking at the instructions on the AL site as well. The good news is that they're the new style that look like what I described as a LEGO instruction book. The bad side (IMHO), and as you've spotted, it's now a single planking layer kit. Additionally, it no longer includes all the really handy instructions and illustrations that were there to help new ship modelling folks out with how to approach the build. Back when AL used to provide those large tan instruction manuals, there was a lot of really useful information to get a person started. That's why I was happy to be supported in that manner when the Swift became my first build so many decades ago.

That's a shame really, as I prefer not to paint the hulls of my models. I love the look of the finished wood. Thankfully, my kit is one of the much older versions that includes a layer of thin walnut planking for the second layer of the hull. If I were someone who had purchased the new version of the kit, I think I'd invest in the purchase of some thin walnut strips. I know I have a bias, but to me, if you're going through the effort of planking and filling to achieve a shape that you're just going to paint over... why not just produce the kit as a solid wooden hull to begin with? And yes, I know the answer to that... bigger box, more weight, etc. etc. Recreational whining on my part. lol

Congrats on the acquisition of your Bluenose II kit. Once you've honed your skills on building the Swift, the Bluenose will be a beautiful successor in your build list. I think you're off to a wonderful start.
 
Thank you. I'm working on installing the rudder. I have a set of diamond encrusted bits I bought somewhere online. I've worn out five of the bits carving the hole for the rudder and it's only a single layer of .6mm walnut. It's really a crap shoot when going to Amazon, etc. I don't know where to go to get quality modeling tools. The more expensive stuff at the hobby store is just more Chinese junk.
Got my whining out of the way too.
Have a good day.
 
Yeah,
I came to an understanding with myself that this was a "learning the craft of ship modeling" type of kit. That way it became a learning tool instead a waste of time.
Try to approach yours the same way all you can do is improve your skills.
Remember to have fun over frustration...
Steve
Strange, that was exactly my reaction. I have been having fun.
 
Thank you. I'm working on installing the rudder. I have a set of diamond encrusted bits I bought somewhere online. I've worn out five of the bits carving the hole for the rudder and it's only a single layer of .6mm walnut. It's really a crap shoot when going to Amazon, etc. I don't know where to go to get quality modeling tools. The more expensive stuff at the hobby store is just more Chinese junk.
Got my whining out of the way too.
Have a good day.
When I create the holes for rudder posts, on ships of this type, I use long wood drill bits that I purchase from Home Depot. Individually, they run around $5 for an 12" length bit. Standard bit... not a spade bit. Key point: Firmly place a strip of painters tape on the wood over the entry and exit points for the hole in the hull and deck to prevent wood tear out during the drilling process. Mark the centre point for the hole, and then use a hard pointed object (tip of a nail, or even an old pen), to create a dimple in the wood so that your bit starts centred in the location you want to begin making the hole.

I use two diameters. The smaller diameter one I use to create the initial hole and ensure it's aligned properly. Then I use the second bit that's the diameter of the final hole I need to have created to finish the work. I don't use power tools with the bits. I literally hold the bit in my fingers and gradually rotate it back and forth to drill the hole. To help create a better grip I wrap a bunch of painters tape around the end of the bit that would normally go in the drill chuck. If I used a power tool, or even a manual hand drill, I fear I would lose control of the work and end up making a mess. Here's a link to a 1/8" bit from Home Depot and Amazon that are similar to what I'm talking about. These links are just examples to get you pointed in the right direction. Just pick the diameters you need to match your kit's instructions for final rudder post hole diameter. Others here many have alternate suggestions on how to approach this, but this is how I tackle them.
Home Depot 1/8" long bit
Amazon 1/8" long bit
 
Last edited:
That's a great idea. Once learned never forgotten. I had already drilled and filed/ground the rudder opening but I will use this technique for the masts and hawser holes.
 
Yeah,
I came to an understanding with myself that this was a "learning the craft of ship modeling" type of kit. That way it became a learning tool instead a waste of time.
Try to approach yours the same way all you can do is improve your skills.
Remember to have fun over frustration...
Steve
 
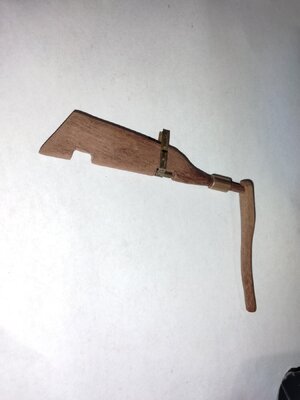
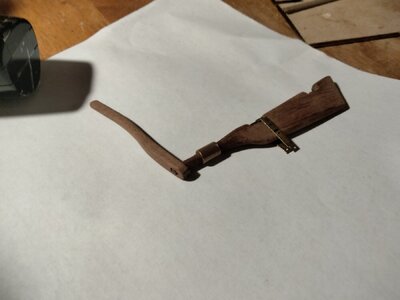
Do you think the handle should be sanded thinner to look more graceful or left as is to be more sturdy
 
Do you think the handle should be sanded thinner to look more graceful or left as is to be more sturdy
Looks fine to me, but if you're game for some research, here's what I'd suggest. Do some searches for photos of actual ships of this type to get a feel for how large the tiller handle would be. Then you can do the scale calculation to determine if the one you've created for your model needs to be further thinned down or not. I suspect that it would need to be rather robust on the actual ship as it could require a significant amount of force at times and you wouldn't want to do doing that with something the size of an axe handle. You could always round it out more, but the general thickness seems fit for purpose. At least in my uneducated eyes. :)
 
Moving right along.
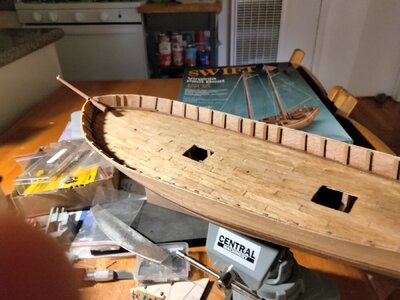
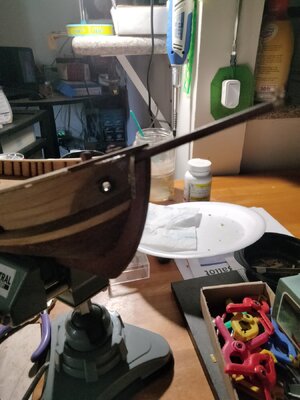
Installed reinforcement inside the bulwarks
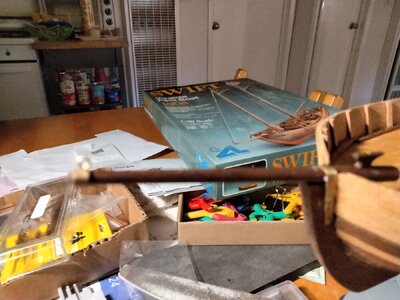
Started installation of the bowsprit.
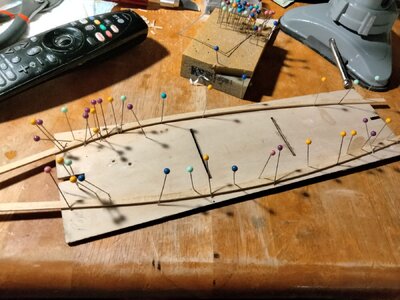
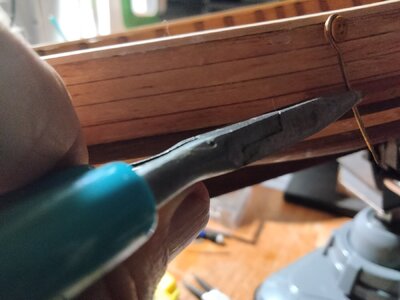
Started bending rail caps. Had to use Ramin because I only had half enough Walnut in the kit17078529185982530078080910924042.jpg17078530997253088424155364290885.jpg17078538285758577104423451619903.jpg
 
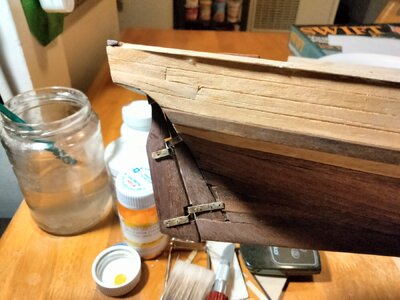
I installed the rudder today and last night. Got the hinges upside down. That really makes me feel like an idiot.
Installed the c as p railing
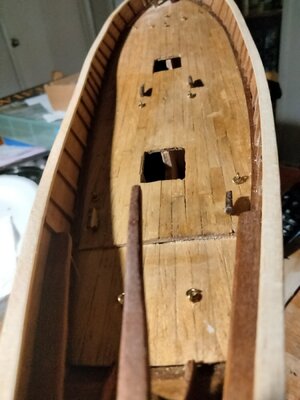
Now working on the fiddley bits for the deck.
IMG20240214143624.jpgIMG20240214143700.jpg
 
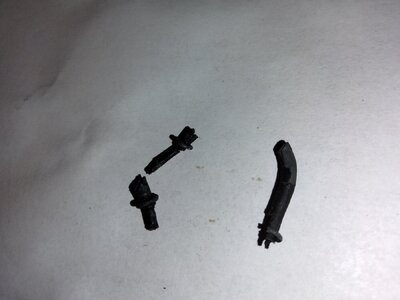
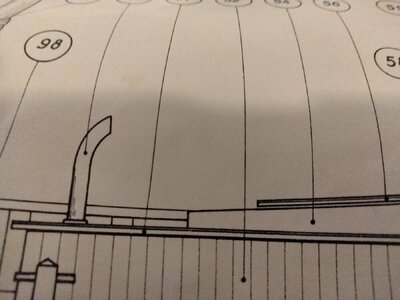
One of the smoke stacks is broken in half. It appears to be made of the Britannia metal. Is their any practical way of repairing this or should I just attempt to manufacture one17080204500194019011325791427742.jpg

17080205130538047598127485885947.jpg
 
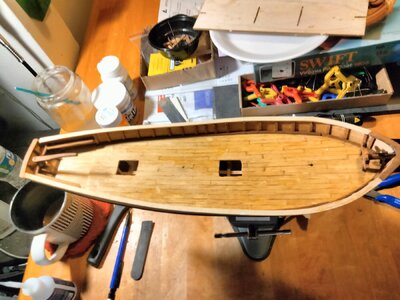
Got all of the fiddley bits on the deck installed. Installed the hawse hole fixtures. Predrilled the blocks and deadeyesm Started working on the deadeyes. Another argh moment. The chain plates are too short to install as per plans. When will I check ahead and not fall into a trap. Note the wavy bulwark edge on the left. This is the bulwark that disintegratd during assembly.

17080287931605515135315336342158.jpg17080288267352908029403925248933.jpg17080288669992514036991370949380.jpg
 
One of the smoke stacks is broken in half. It appears to be made of the Britannia metal. Is their any practical way of repairing this or should I just attempt to manufacture oneView attachment 428151

View attachment 428152
I would junk both (or how many there are) smokestacks and use wood dowels. Two thirds of the way up I would use a miter box and cut them at a 30 degree or so bias and then use another piece with the same bias as the top part to produce a bend in the "pipe".
 
Back
Top