- Home
- Forums
- Ships of Scale Group Builds and Projects
- HMS Alert 1777 1:48 PoF Group Build
- HMS Alert 1777 1:48 Group Build Logs
You are using an out of date browser. It may not display this or other websites correctly.
You should upgrade or use an alternative browser.
You should upgrade or use an alternative browser.
- Joined
- Jan 10, 2022
- Messages
- 473
- Points
- 373

Thanks Heinrich. Yes she does look very wide and when the hull is cut from the jig a lot of the depth will be gone tooBeautiful interior to that hull, Keith. She is quite a wide ship, isn't she?
- Joined
- Jan 10, 2022
- Messages
- 473
- Points
- 373

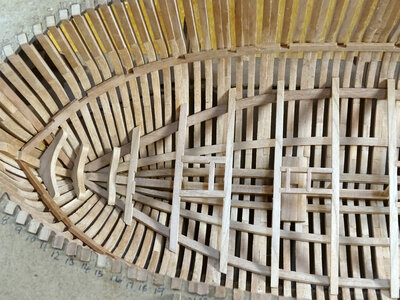
Thick stuff and Deck clamps are now all done and the positioning lugs have been removed allowing the lower deck timbers to be shaped and fitted. Everything fitted exactly as it should. The only problem was the first deck beam nearest the bow (No. 4) was made the wrong way round. l had to re-make the beam so the 2 nicks faced the stern and off-set to the correct side. Not a big problem but l wonder if Trident are aware of this error. Also 3 of the parts are numbered incorrectly, which threw me for a while looking for them. Apart from that, the accuracy of this kit is amazing and l'm really pleased with the progress so far
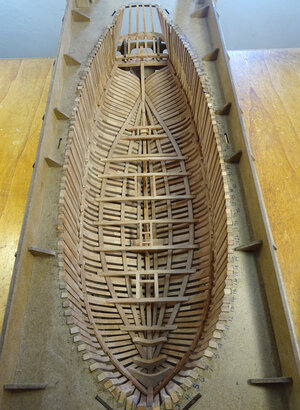
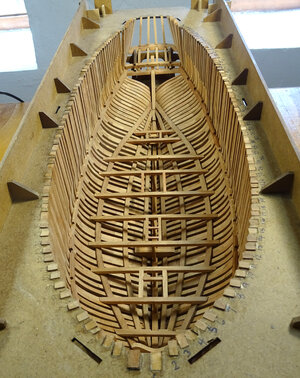
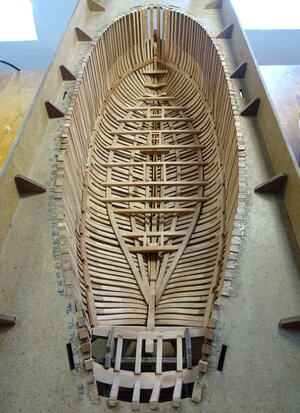
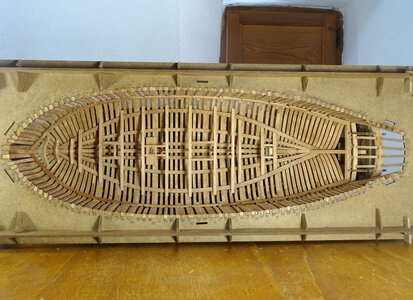
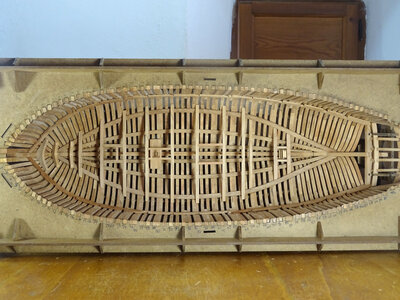
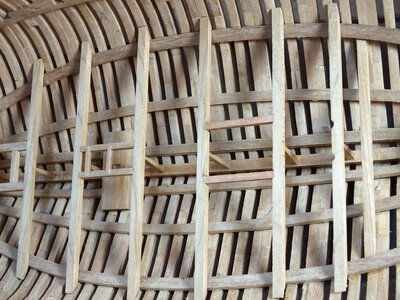
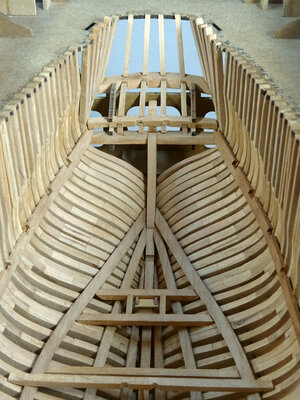


That's a lot of progress! And everything is looking just great!
Also 3 of the parts are numbered incorrectly, which threw me for a while looking for them.
Hello Keef and congratulations on your progress on this magnificent kit. Can you tell us which are the 3 incorrectly numbered pieces so that we don't have to look for them ...
Last edited:
- Joined
- Jan 10, 2022
- Messages
- 473
- Points
- 373

Hi dhabert. The pieces in question are carlings for the lower deck and are shown on the deck plan in the instruction manual on page 27. DL6 (2 pieces) are DL82 (port and starboard), DL14 (2 pieces) are DL87. Although l made these pieces from some spare 4 mm pearwood strips l had left over from another kit. DL8 l could not find at all, but again l made from 4 mm pearwood strip. DL82 and DL87 can be found on sheet No. 12Hello Keef and congratulations on your progress on this magnificent kit. Can you tell us which are the 3 incorrectly numbered pieces so that we don't have to look for them ...
- Joined
- Jan 10, 2022
- Messages
- 473
- Points
- 373

Hi Cathber. No. lt's just a 35 x 4 x 4 mm strip, easy to make from spare strip, which is hidden under the ship's boiler and won't be seen. You can get away with missing it out completely, it makes no differenceBonjour,
Avez vous contacté le fabriquant pour vous aider a trouver la piéce DL8 ?
Elle doit bien être sur une planche.
Good morning,
Have you contacted the manufacturer to help you find part DL8?
She must be on a board.
A huge THANK YOU, Keef for your quick and precise responseHi dhabert. The pieces in question are carlings for the lower deck and are shown on the deck plan in the instruction manual on page 27. DL6 (2 pieces) are DL82 (port and starboard), DL14 (2 pieces) are DL87. Although l made these pieces from some spare 4 mm pearwood strips l had left over from another kit. DL8 l could not find at all, but again l made from 4 mm pearwood strip. DL82 and DL87 can be found on sheet No. 12
- Joined
- Jan 10, 2022
- Messages
- 473
- Points
- 373

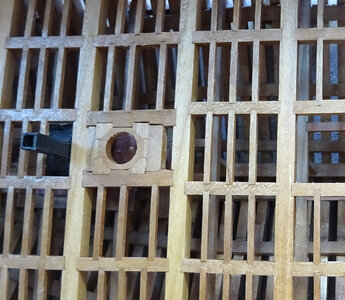
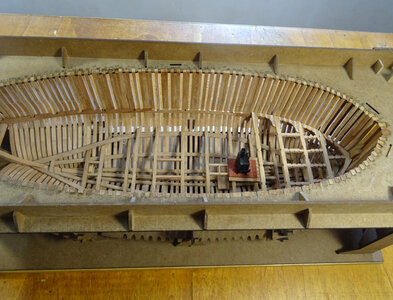
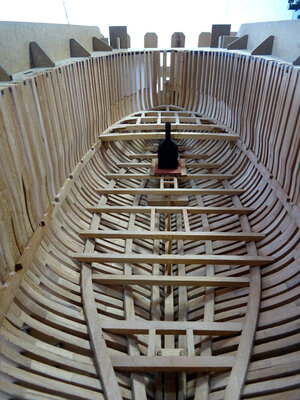
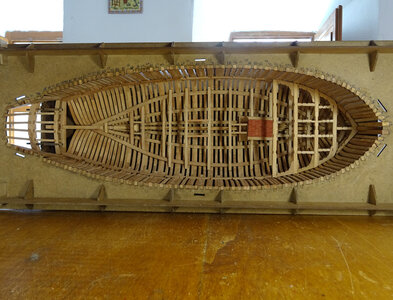
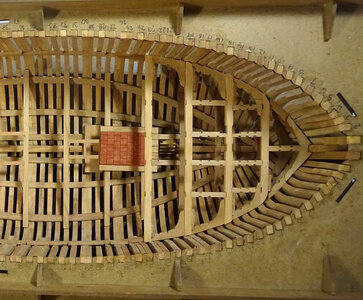
l have made a start with the upper deck timbers, beams and carlings. There are many issues with the parts for the carlings on the sheets not matching the numbers on the deck plan. Very confusing at first but with a bit of working out, this can be rectified, so far at least. This is as far as l'm going until the wood finish l have ordered on e-bay arrives. Any more beams added will make it difficult to reach the lower section of the hull. l have borrowed the idea from Uwek of using Clou G1  . Will show the results after the weekend hopefully. The ship's stove is only placed in position, not glued, until the time comes for its permanent fitting


- Joined
- Jan 9, 2020
- Messages
- 10,378
- Points
- 938

Each time that I check in on your build, I am simply amazed at the rate of your progress. And despite the rate of knots, you deliver outstandingly accurate and neat work. What I really appreciate is that you seem totally unbothered by missing parts, incorrect instructions and labeled parts and the like.
I think you will be most pleased with the results of the Clou.
I think you will be most pleased with the results of the Clou.
I noticed the same thing. If you're married, I bet you are a great husband!What I really appreciate is that you seem totally unbothered by missing parts, incorrect instructions and labeled parts and the like.
- Joined
- Jan 10, 2022
- Messages
- 473
- Points
- 373

l'll ask my wifeI noticed the same thing. If you're married, I bet you are a great husband!
- Joined
- Jan 10, 2022
- Messages
- 473
- Points
- 373

Thank you very much Heinrich for your interest and support for my build. The issues with the parts have been, at least so far relatively easy to sort out, l still think this is a great kit. l'm sure you're right about the Clou. With what l've seen of Uwek's Granado posts it looks very goodEach time that I check in on your build, I am simply amazed at the rate of your progress. And despite the rate of knots, you deliver outstandingly accurate and neat work. What I really appreciate is that you seem totally unbothered by missing parts, incorrect instructions and labeled parts and the like.
I think you will be most pleased with the results of the Clou.
Bonjour Keef et félicitation pour vos constructions (HMS Blandford, etc...).
J'ai une question concernant cette construction. Je remarque des traces brillantes sur votre chantier entre les couples et le gabarit.
S'agit-il d'un effet d'optique, ou vous avez collé (provisoirement) les couples sur le gabarit pour maintenir les couples à leurs places pour être sur qu'il ne bouge pas lors de l'installation de l'intérieur.
Merci d'avance pour votre réponse
Hello Keef and congratulations on your constructions (HMS Blandford, etc...).
I have a question regarding this build. I notice shiny marks on your site between the torques and the template.
Is this an optical effect, or have you glued (temporarily) the couples to the template to hold the couples in their places to be sure that it does not move during installation from the inside.
Thank you in advance for your answer

- Joined
- Jan 10, 2022
- Messages
- 473
- Points
- 373

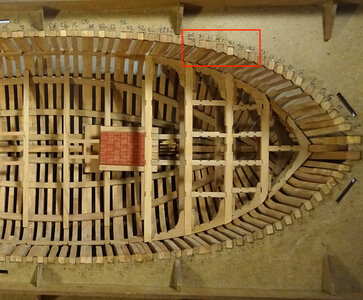
Hi Cathber. Thank you for your comments and interest in my build log. To get this photo l turned the whole thing on it's side and the effect you see is the light striking the inside of the frames creating the illusion they are filled but they are notBonjour Keef et félicitation pour vos constructions (HMS Blandford, etc...).
J'ai une question concernant cette construction. Je remarque des traces brillantes sur votre chantier entre les couples et le gabarit.
S'agit-il d'un effet d'optique, ou vous avez collé (provisoirement) les couples sur le gabarit pour maintenir les couples à leurs places pour être sur qu'il ne bouge pas lors de l'installation de l'intérieur.
Merci d'avance pour votre réponse
Hello Keef and congratulations on your constructions (HMS Blandford, etc...).
I have a question regarding this build. I notice shiny marks on your site between the torques and the template.
Is this an optical effect, or have you glued (temporarily) the couples to the template to hold the couples in their places to be sure that it does not move during installation from the inside.
Thank you in advance for your answer
View attachment 395196
Donc pas de collage provisoire des couples sur le gabarit.J e vous ai posé cette question car j'ai vu cette technique mais je ne sais plus sur quel topic.
Je vois que vous avez présenté les poutres internes sur votre modèle, mais il n'y a t-til pas de risque d'une mauvaise position sans le bordage interne ?
So no temporary gluing of the couples on the template. I asked you this question because I saw this technique but I don't know on what topic.
I see that you have presented the internal beams on your model, but is there no risk of a bad position without the internal planking?
- Joined
- Dec 16, 2016
- Messages
- 1,026
- Points
- 493

Keith, That’s some progress, it just get better each time that I look. KenThick stuff and Deck clamps are now all done and the positioning lugs have been removed allowing the lower deck timbers to be shaped and fitted. Everything fitted exactly as it should. The only problem was the first deck beam nearest the bow (No. 4) was made the wrong way round. l had to re-make the beam so the 2 nicks faced the stern and off-set to the correct side. Not a big problem but l wonder if Trident are aware of this error. Also 3 of the parts are numbered incorrectly, which threw me for a while looking for them. Apart from that, the accuracy of this kit is amazing and l'm really pleased with the progress so far
View attachment 393687
View attachment 393688
View attachment 393689
View attachment 393690
View attachment 393691
View attachment 393692
View attachment 393693
View attachment 393694
View attachment 393695
View attachment 393696
- Joined
- Jan 10, 2022
- Messages
- 473
- Points
- 373

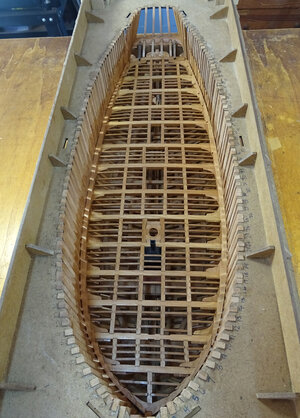
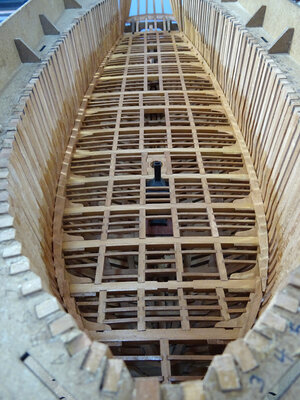
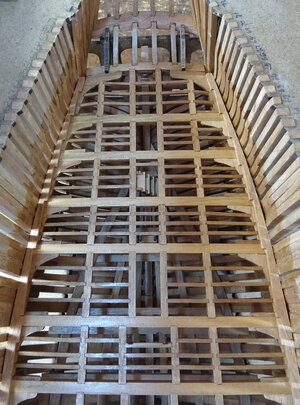
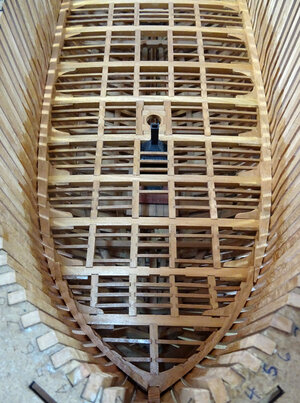
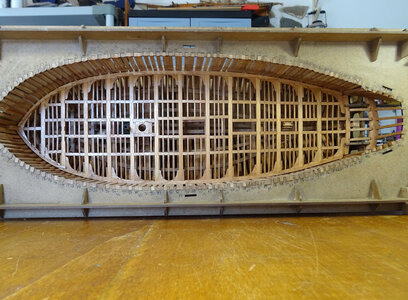
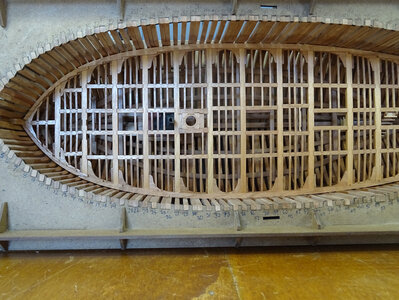
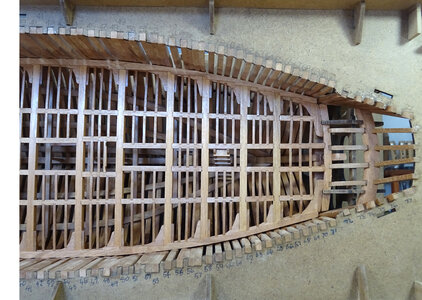
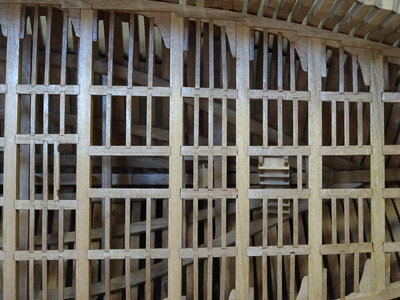
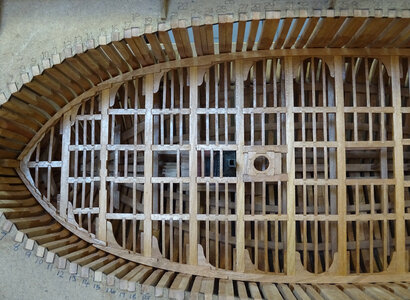
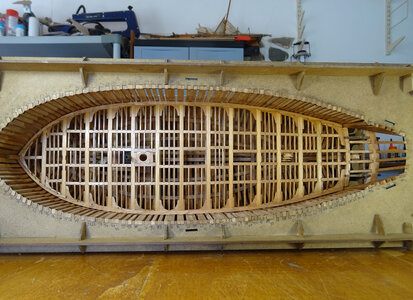
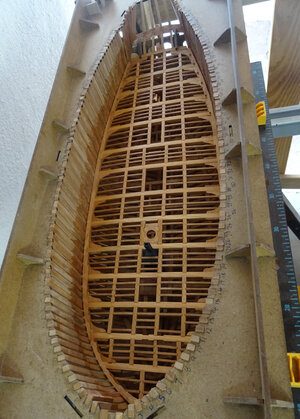
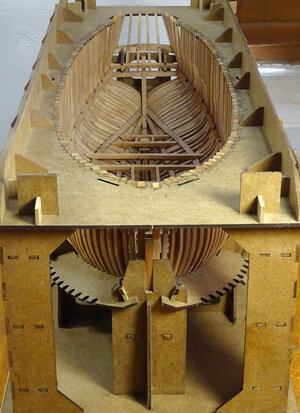
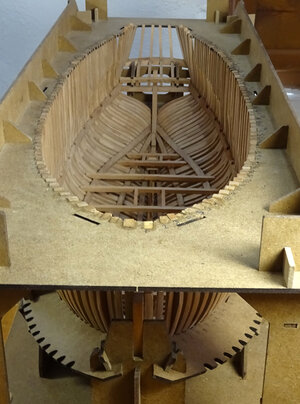
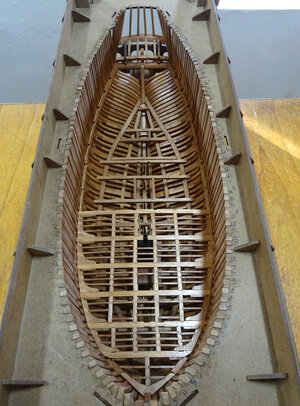
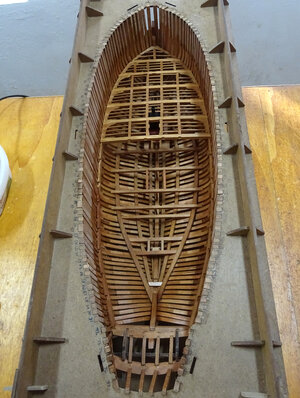
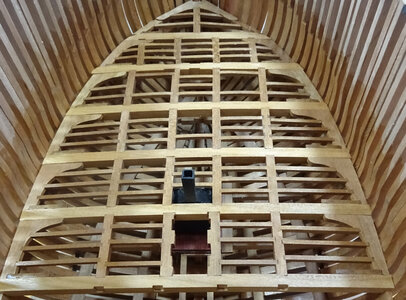
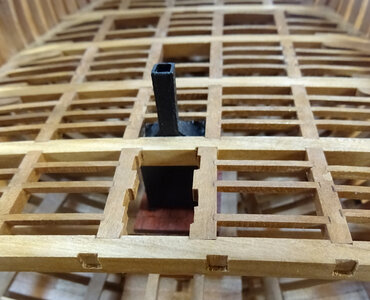
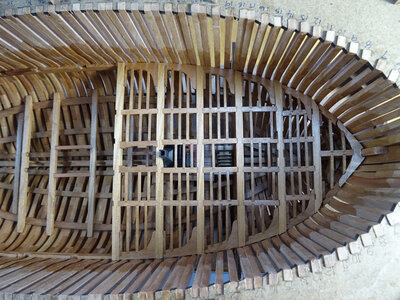
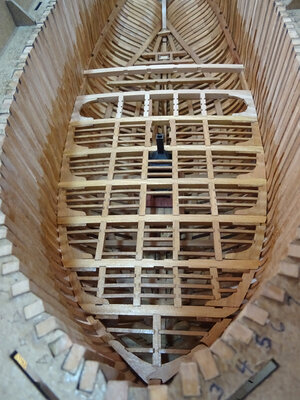
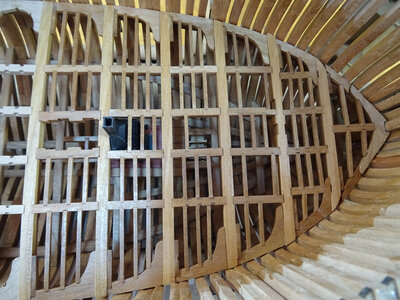
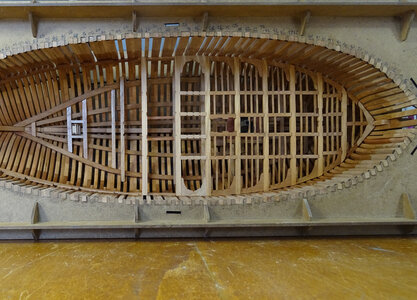
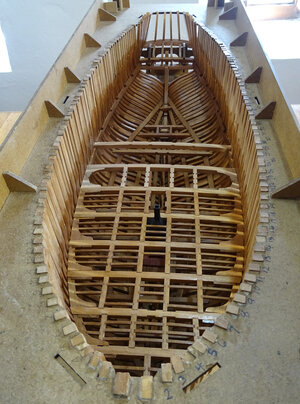
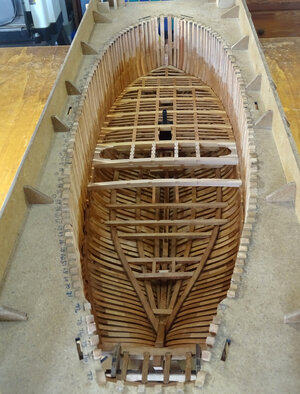
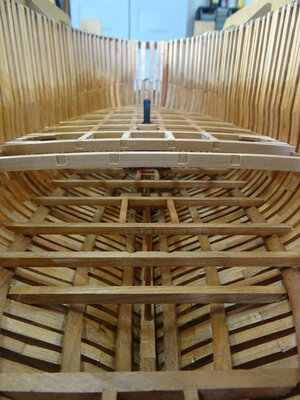
The inside of the hull and deck timbers have now been treated to a dose of Clou G1 sanding sealer. l like the rich colour it brings out but not sure about the slight gloss to the finish. l've fitted the ship's stove and have been working on the ledges, making my way back to the stern with the upper deck timbers. As you can see, this ship is quite broad across the beam, which will be more apparent after it is cut and removed from the jig.


- Joined
- Jan 10, 2022
- Messages
- 473
- Points
- 373

l have spent some hours in my workshop this last 2 weeks and made good progress on HMS Alert. The upper deck is completed with the addition of the mast partners, bringing the second phase of this project to a close. The next thing is to take the hull out of the cradle to give the outside of the hull it's final sanding. Then it's the big cut to release the hull from the jig, cutting all the frames to their correct heights. We will then see Alert's hull as it should be. At least that's the plan.
