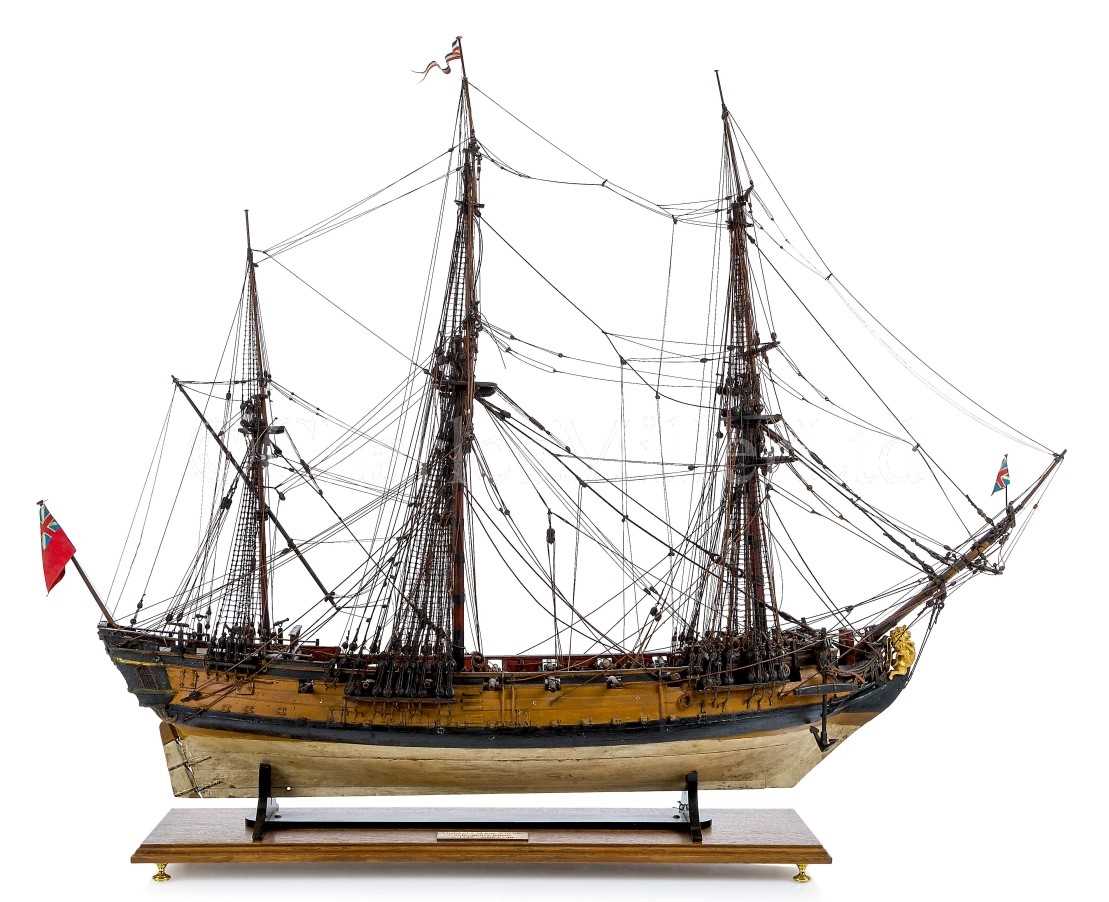
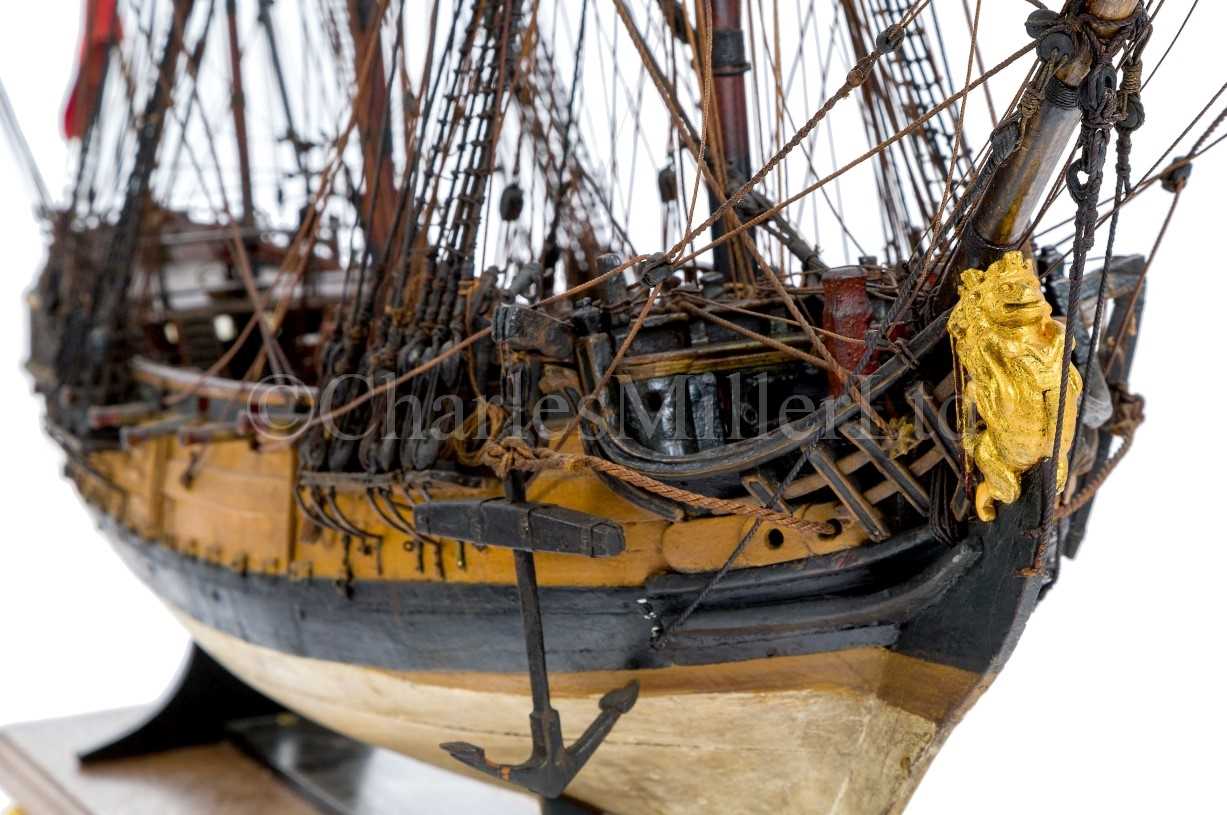
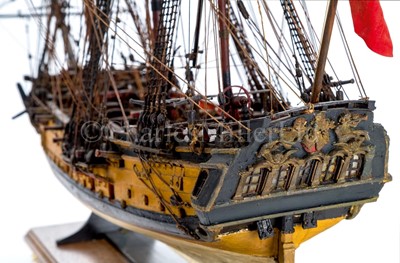
1/48 scale 20 gun ship from Modelship Dockyard kit [COMPLETED BUILD]

Hi Jack,
Lovely work as always. Maybe I missed the explanation somewhere but what is happening with the stern windows/casements? I think you are showing a boxwood CNC kit provided part in one photo and then in another photo a blue construction that is clearly not the same part. I'm interested...
 
Hi Jack,
Lovely work as always. Maybe I missed the explanation somewhere but what is happening with the stern windows/casements? I think you are showing a boxwood CNC kit provided part in one photo and then in another photo a blue construction that is clearly not the same part. I'm interested...
Hi Paul, the blue painted parts are pear and come with the kit, one is the inside window frames, the second is cut to hold the 'glazing', the the box carved part goes on the outside. I only pictured it sitting in place to see what it could look like. Thank you for your interest. JJ..
 
HMS Scarborough
Just a quick update, I had trial made some columns and decided on one with a bit of a twist. Since I made the trials out of beech I thought to paint them. This I done ,blue and white, and they turned out really ugly. So I made a small batch, this time out of walnut and first tried an oak stain but this wasn't much better so I gave them a dusting with a mahogany spray stain, to a much better result. The nicest columns I have ever seen are on the frigate Trincomalee berthed in Hartlepool. Trincomalee, built in Bombay 1812 and mostly of teak that has over the last one hundred years or so developed a wonderfully rich patina. The ship herself having been beautifully restored is now a museum and well worth a visit.
I have installed the first eleven beams now and this about half way so I think I will add the carlings, companion ways, gratings etc. just to break things up a bit. The gratings that come with the kit where intended for this upper deck but they are a bit 'agricultural' so I demoted them to the lower deck and will make some new ones out of walnut. I made a trial one for the main hatch with a gentle curve matching the curve of the beams but the curve is hardly noticeable so I will trial another with a more exaggerated curve to see if it looks any better. Well that's tonight sorted.
For anyone interested or who has not seen it the RN Museums have an interactive tour of the Trincomalee, here is the link; https://matterport.com/discover/space/national-museum-royal-navy-hms-trincomalee

And here are some pics.

IMG_20230310_181735.jpgIMG_20230311_073214.jpgIMG_20230311_204143.jpgIMG_20230312_081957.jpgIMG_20230312_081730.jpgIMG_20230312_081935.jpg

Cheers JJ..
 
Wonderful work !!!

From the end of the grating I can plainly see the curve. But from above, you probably won't be able to see it even if you exaggerate the curve quite a bit. Then it won't properly fit.

Jeff
 
HMS Scarborough
Just a quick update, I had trial made some columns and decided on one with a bit of a twist. Since I made the trials out of beech I thought to paint them. This I done ,blue and white, and they turned out really ugly. So I made a small batch, this time out of walnut and first tried an oak stain but this wasn't much better so I gave them a dusting with a mahogany spray stain, to a much better result. The nicest columns I have ever seen are on the frigate Trincomalee berthed in Hartlepool. Trincomalee, built in Bombay 1812 and mostly of teak that has over the last one hundred years or so developed a wonderfully rich patina. The ship herself having been beautifully restored is now a museum and well worth a visit.
I have installed the first eleven beams now and this about half way so I think I will add the carlings, companion ways, gratings etc. just to break things up a bit. The gratings that come with the kit where intended for this upper deck but they are a bit 'agricultural' so I demoted them to the lower deck and will make some new ones out of walnut. I made a trial one for the main hatch with a gentle curve matching the curve of the beams but the curve is hardly noticeable so I will trial another with a more exaggerated curve to see if it looks any better. Well that's tonight sorted.
For anyone interested or who has not seen it the RN Museums have an interactive tour of the Trincomalee, here is the link; https://matterport.com/discover/space/national-museum-royal-navy-hms-trincomalee

And here are some pics.

View attachment 362482View attachment 362483View attachment 362484View attachment 362485View attachment 362486View attachment 362487

Cheers JJ..
I just went to the link you provided and it is a wonderful site ! I thought it was very curious that on the top deck the guns alternated between cannons and caronnades.
 
I just went to the link you provided and it is a wonderful site ! I thought it was very curious that on the top deck the guns alternated between cannons and caronnades.
Hi Corsair, yea I think she was used as a gunnery training ship for a few years way back, you can see marks on the lower deck where some sort of swinging gun mount had been fitted then removed again. I doubt she would ever have sailed with the gun arrangement she shows now. Most of the rest of her has been restored to mid 1800's. Apart from the masts and some of the rigging,(the masts are metal but look good anyway) I love her. And yes it is a great site, great for model builders with lots of information to gather. Cheers JJ..
 
HMS Scarborough
Been working away at the carlings for the first half of the main deck and now finished the, just some sanding. I have made and set in the main hatch grating. The top is gently curved and I am pleased with it, although not so happy with the colour of the surrounding coaming. Scarborough was built circa. 1722 with a brick stove and with, probably, a single copper chimney, there a dozens of different flue designs and they where not of an insignificant size. I have plumbed for a plain sweeping curved one plus the addition of an end baffle. With the air of a dummy fore mast I have centered and added the mast partner and chocks.
There will be a lot to do around the well area and first of all I will have to turn a dummy main mast and place the elm tree pumps, that's next.

Some pictures.
IMG_20230313_145643.jpgIMG_20230314_172127.jpgIMG_20230314_172147.jpgIMG_20230314_172202.jpgIMG_20230314_172218.jpgIMG_20230314_172300.jpgIMG_20230314_172357.jpgIMG_20230314_172451.jpgIMG_20230315_104821.jpgIMG_20230315_104900.jpg
Cheers JJ..
 
Hello Jack. I have had a lot of catching up to do now, but better late than never. You have made wonderful progress on your build. Judging by your build and that of @Keef Keith's, this really looks like a great kit to work with. I just love your thinking out of the box and the alterations that go with it!
 
It seems like I have done a lot of work but made little progress over the last few days. Mostly I have been working at the fittings around the well and every thing is getting a bit tight in this area since I have added non kit elm tree pumps and remade the chain pump cistern to a more realistic size. All this meant that it would be very difficult to fit the long legs of the jeer and sheet bits, However I had been thinking of cheating here anyway as these legs went a long way to obscure the chain pump, so 'artistic licence' has been used. This led to another happy outcome in that the bitts that come with the kit are a bit skinny looking for this scale,(I have never like the ones installed around the fore mast). So away with them all to be replaced with 4 x 4 mm walnut ones, I think these look far more realistic. As you can see in the following pictures I have made a temporary lower half of the main mast this to allow me to align the two sets of mast chokes and clamps to give the correct angle for the mast. the kit only provides one of these parts, so the lower is made up from some scrap. Incidentally the kit piece comes with a hole for the mast of 12.2mm this is correct for the top partners, whereas 'Goodwin's AoS' has the dia. of the mast a bit less.
All the fittings you see in the photographs are not as yet permanently fixed, just drilled and pinned in place. I want to finish the upper deck beams before final placement. And the beams all the way to the stern are what comes next.

All these pic's. have been taken in 'super macro', which is very useful for spotting and hopefully correcting my mistakes!

IMG_20230319_074909.jpgIMG_20230319_074931.jpgIMG_20230319_074946.jpgIMG_20230319_075000.jpgIMG_20230319_075016.jpgIMG_20230319_075204.jpgIMG_20230320_152518.jpgIMG_20230320_152530.jpgIMG_20230320_152552.jpgIMG_20230320_152607.jpgIMG_20230320_152620.jpgIMG_20230320_152828.jpgIMG_20230320_152845.jpgIMG_20230320_152908.jpgIMG_20230320_152933.jpg

Cheers JJ..
 
Hi Folks,
It's been a while so I thought I would post a short update of what I have been up to this last week or so. First of all I planked the inner bulwark an gave it a coat of matt finish red oxide w/b acrylic. Then I cut down the central gun ports as per the NMM plan for Blandford, Lyme and Scarborough, this to make space for the 'plank sheer' rail ( as it is called in AoS book), I thought it was the drift rail but I am happy to take advice. Interestingly this plan is singed off for Lyme 1720 with rebuild in brackets. The open drift will give space for three single sheave blocks on each side, the rail held up by extending the frames either side of the gun ports.
After that I completed the main deck beams and again was disappointed when I lacquered them, getting similar results as the case with the lower beams, i.e. inconsistent gloss level and white powdery deposits, this despite changing from an oil based enamel to Tamiya semi-gloss clear acrylic. Hopefully another coat will sort it as I don't really want to paint them some colour or other, no to mention how difficult it would be to do it.
That completed it was the waterways and scuppers next. The scuppers drain drain out through 2" lead pipes I represented this with 2.5mm aluminium pipe, at the moment they stick out too far but I will leave them that way until coating the outer hull. I intend displaying the guns along the port side run out and sitting on the partially planked deck. I tried a gun on a carriage around the size I will use and it was good to see that the barrel sat at about the right height. Having 'planked' out eight rows from the waterway there should be sufficient floor space to place the gun carriages As you can see from the pics. I have made a tentative start to the panelling of the captains quarters. Thought I would try a burred walnut look to give them a bit of 'bling'...then again?
Well that's everything up to date. Next I plan to make a small jig so as to place the 88 odd ring bolts that will hold the gun tackle along the bulwarks. Below are some pictures of how I got on. I have also added some pics of a model of a sixth rate that was built in the 1740's, this was sold at auction recently. ( https://www.charlesmillerltd.com/au...=0&au=58&ef=&et=&ic=False&sd=1&pp=48&pn=3&g=1) It is not a Navy board model but one made by a shipwright's apprentice wow! For sure it is a bit scruffy but the paint looks original and she is beautiful. Doubt anything I throw out will be around in three hundred years.

Cheers JJ..

IMG_20230331_204006.jpgIMG_20230401_161643.jpgIMG_20230401_161716.jpgIMG_20230401_162530.jpgIMG_20230401_202516.jpgIMG_20230401_202529.jpgIMG_20230403_113007.jpgIMG_20230403_170604.jpgIMG_20230403_170628.jpgIMG_20230403_170634.jpg

14571-0-medium.jpg


14571-2-medium.jpg

14571-3-small.jpg


IMG_20230401_202516.jpg
 
HMS Scarborough
Now that I have finished the basic hull and deck planking it's time to start adding some of the fittings and other goodies. The first change to the 'plans' that I have made is to the forecastle, the kit has it a bit flat and the fife rail as wide as the plank sheer rail and it just doesn't look right to me. So I have gave it a slight sweep upwards and opened up the now thinner rail giving, at least to my eye, a far nicer sheer. This is also how it looks in the NMM plans. I built the belfry as per the plans but replaced the bell as Noddy wanted the original back for his hat. There isn't much space for a latter up to the forecastle decking so I made some steps and attached them to the bulkhead. As I intend to only place guns on the port side I fixed all the rings to the starboard bulwarks, the port side are drilled but I will wait until I rig the guns before adding them.
Next it is on to the rudder and constructing the quarter deck, while continuing with the deck fittings just to mix things up a bit. Still have not decided about painting or leaving the upper hull 'bright' with just a coat of satin clear. Here are some pictures.

IMG_20230414_084158.jpgIMG_20230414_084232.jpgIMG_20230414_084518.jpgIMG_20230414_084621.jpgIMG_20230414_084653.jpgIMG_20230414_085502.jpgIMG_20230416_082349.jpgIMG_20230416_082407.jpg Cheers JJ..
 
Back
Top