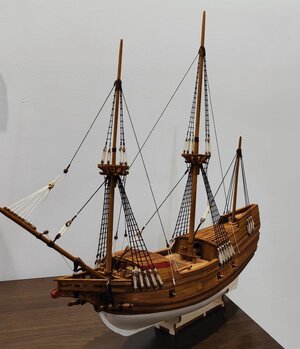
HMS PANDORA 1:72 - Modelship Dockyard

With all those different available models, you just had to pick "Pandora". Based on the name, I suspect you to have more issues than you bargained for. I'm afraid your WB-expedition will look like the proverbial walk in the park, before you finish your Pandora.

From Wikipedia:
"According to Hesiod, when Prometheus stole fire from heaven, Zeus, the king of the gods, took vengeance by presenting Pandora to Prometheus' brother Epimetheus. Pandora opened a jar left in her care containing sickness, death and many other unspecified evils which were then released into the world.[4] Though she hastened to close the container, only one thing was left behind – usually translated as Hope, though it could also have the pessimistic meaning of "deceptive expectation".[5]

From this story has grown the idiom "to open a Pandora's box", meaning to do or start something that will cause many unforeseen problems.[6] A modern, more colloquial equivalent is "to open a can of worms".[7]Pandora's box is a metaphor for something that brings about great troubles or misfortune, but also holds hope. In Greek mythology, Pandora's box was a gift from the gods to Pandora, the first woman on Earth. It contained all the evils of the world, which were released when Pandora opened the box. However, it also contained hope, which remained inside the box. Symbolically, the box represents the curiosity and desire for knowledge that can lead to both negative consequences and positive outcomes. The evils inside the box can be seen as the challenges and difficulties of life, while the hope represents the optimism and resilience to overcome those challenges.[8]"

Good luck my friend...
Now how did I miss this wonderful post? Figuratively speaking, I had opened Pandora's box a long time ago, my friend - the moment I started researching the WB. With HMS Pandora, I can assure you that the mythological history of the character had nothing to do with my choice of model. ROTF Aspects like the upside-down bulkheads, getting practice to work with the resin filler pieces and trying to allay my dislike of CA, were the main considerations for choosing this model. But seeing that you mention Wikipedia, I would have to opt for the part that states "curiosity and desire for knowledge". That there will be both positive and negative outcomes, is inevitable I suppose.
 
Your progress so far is very interesting. Is the second planking material the same thickness?

Jan
Jan, no it's not the same thickness, but I will have to lie if I have to tell you what the thickness is. I will have to check up on that. I am so relaxed with this build that I sometimes wonder what had happened? ROTF
 
Something of a beginner to this, I have completed just one ship, the Bounty and I am working on my second, the Snake. I have been looking at this Pandora model for some time, I particularly like the cut-away style with the exposed beamwork but have been put off a little by the use of "new" construction techniques. I did start to put together a set of working sheets for a 1:64 scratch model based on the material provided in John McKays "Anatomy of" with the intention of creating a semi-admiralty model along similar lines to this kit. I have set this aside for the moment as I think it is a bit ambitious but I may go back to it when my skill set improves.

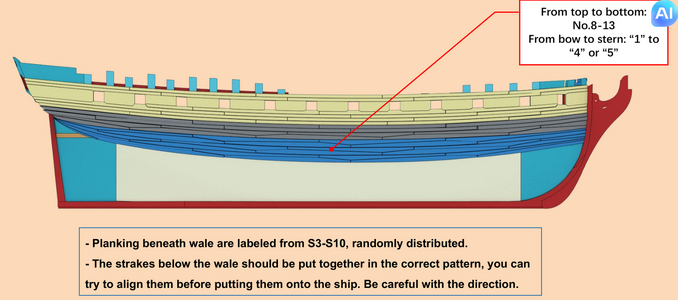
Regarding this model, I have a few questions. The first concerns the planking pattern that makes up the wale, this is very different from the locked scarf planking shown on other models and in John McKays book. Has anyone improved on this?

The second concerns coppering, some of the display models, and in particular the bow reconstruction in the Townsville, QLD museum, show the Pandora as copper bottomed but I see no reference to this in the documentation. Was she coppered or no?

The deck and hull planking all seem to be well formed, but in practice, how well do all of these pre-cut pieces go together?

Really looking forward to the completion of this build log!
Dear Steve. Welcome to my build log - I will try my best to provide answers to your questions.

New construction techniques:

Initially, I also had my reservations about this as I do like an all-wooden construction. On other versions of @Modelship Dockyard models, the company has used a different route to shape the hull at the bow and stern and to create the gunports (see below)

11.jpg
Test-build of Le Cygne 1

12.jpg
Test build of Le Cygne 2

17.jpg
Test build of Le Cygne 3

However, "the-times-they-are-a-changing" and if there is a better and more cost-efficient way of achieving the same results, then why not? If I had never shaped a bow and stern from wood before, then I probably would not have gone this route, but seeing that it is something which I have done on numerous occasions, I now wanted to try something else (even if it means using CA glue which I am really not a fan of.)

Wale Planking:

Wale Planking McKay.png
Here are the "locked scarph joints" as shown by MacKay.

Wale Planking.png
And here is the way that the wales are planked on the kit.

Yes, there is a difference, but seeing that the kit uses ebony wood for the wales (which make it difficult to see the finer details in any case), it is not something that I am going to lose any sleep over.

Hull Coppering:

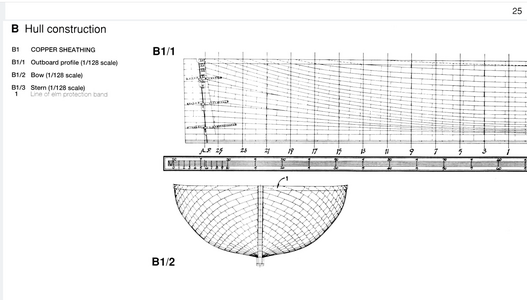
According to McKay, the Pandora's hull was coppered. The illustration below, was taken directly from the Anatomy.

Coppering.png

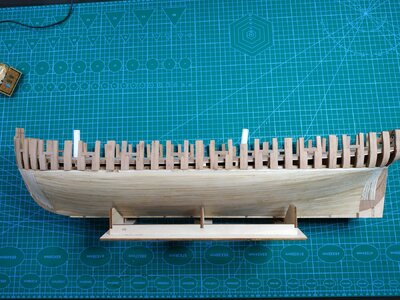
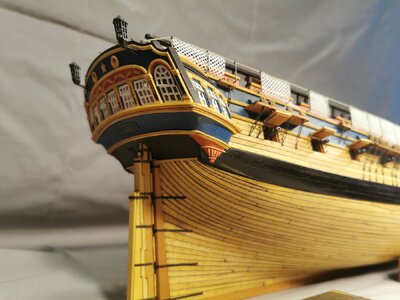
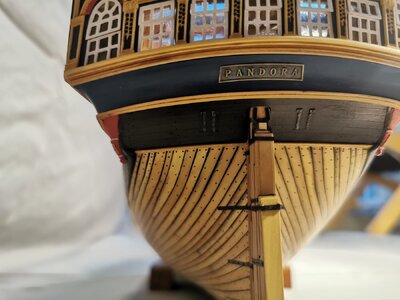
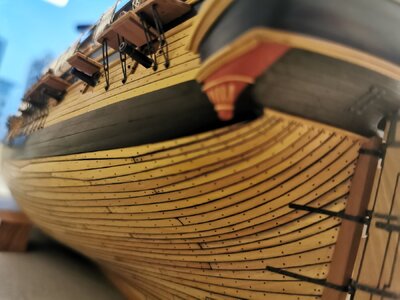
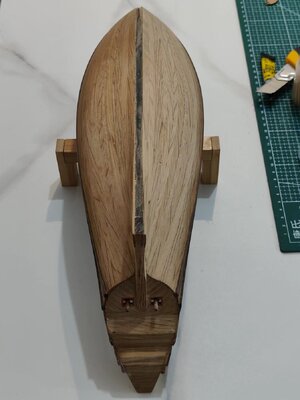
However, this is not something that I will do. If I can get my planked hull to look like the one in the picture below, I am not going to cover it with coppering.

IMG_20231014_182206.jpg
IMG_20231014_182308.jpg
IMG_20231014_182510.jpg

As to how well the pre-cut deck pieces will go together, you will have to bear with me as there is still some way to go before, I reach that point. On the parts I have assembled so far (false keel, false decks and bulkheads), the accuracy has been superb!

I trust this answers some of your questions. If you have any more, please feel free to ask and - once again - welcome to the log.
 
I like the approach of Cygne much much more than the 3d printed part. I would use this kind of pieces also for the Enterprize
Point taken, Christian. As far as I know, on the POF models, there are no resin parts that form part of the hull assembly. On a POB model, I suppose the rationale was that construction would be faster and more accurate. As I have said before, IF I have never shaped bow and stern fillers out of wood, manually, then I would not have gone this route as I believe it is a skill that a modeler should have. On my second iteration of the WB, I had boxed the whole hull and shaped it by hand (see below). Working on it every day for about 6 hours a day, this little exercise took more than a week. I think I qualify for the faster (I hope) option.

微信图片_20240303142944.jpg
微信图片_20240303142952.jpg
微信图片_20240303143000.jpg
微信图片_20230219180131.jpg
 
Dear Friends

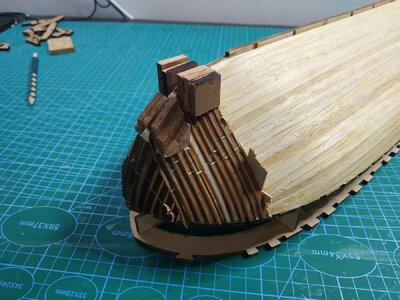
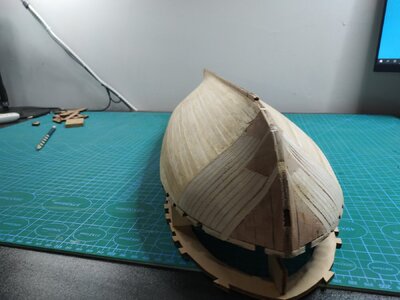
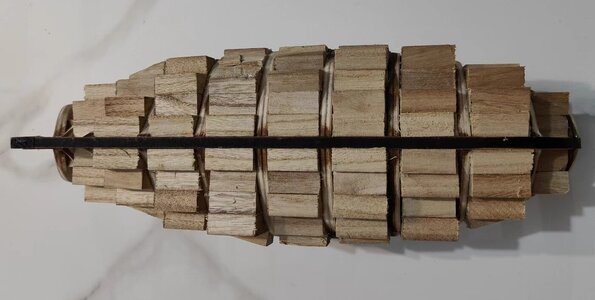
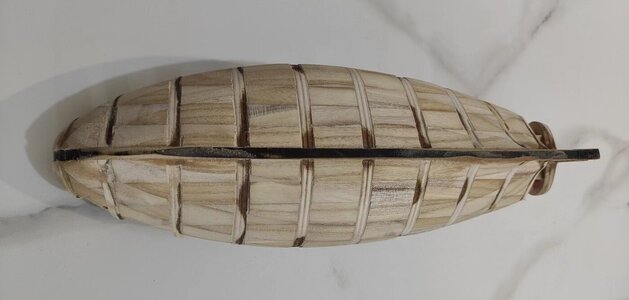
Time for a little update. Seeing that I can only work on weekends, my progress is slower than I would have liked, but it is what it is. I continued with planking the first layer and am reasonably satisfied with my effort so far. Thewood is simply described in the instructions as "white" wood (I believe it is more likely than not Paulownia) which is 4mm wide and only 0.5mm thick. That thickness is not going to allow for too much sanding to get a smooth first layer, so I am spending extra time in an attempt to get it as smooth as I can from the word go. I do make use of edge gluing on all of the planks while I use my clamps and push pins to align the symmetry constantly. On the subject of my push pins - I do miss my 6mm-thick @Kolderstok frames which can take an awful lot of abuse from my customary heavy-handed and heavy-hammered approach. ROTF

View attachment 431973
Judging by where I am tonight, I would guesstimate that it would probably take another two weekends to close up the hull.

Thank you all for looking in and joining me in this build. This part of the build is something I enjoy (I always enjoy planking), whilst the hull shape is relatively straightforward. If I had wood inserts at the bow and stern and 1.5mm-thick walnut wood, that first layer would have been the final one! ROTF Oh well ...
Good morning Heinrich. Looking good. 0.5mm is thin for first layer, probably so it lines up with the resin pieces. Still leaves little margin for error. Your “skinny horse” bulkhead effects are so tiny the second layer will sort these. Cool term tho and only Johan would come up with this ROTF. Lovely planking, however you own this so no surprises here:D. Cheers Grant
 
Cool term tho and only Johan would come up with this ROTF.
Can't really take credit for that term; it's a term from ages long past, where at the Fokker Aircraft we used to have very thin Al sheets on grids of frames and stringers. If the grid was not controlled within very exacting tolerances, we would be punished with the "magere paard effect", or the skinny horse effect. It could be even worse on bonded skin/stringer combinations, with relatively wide stringer flanges, since for the curing of the adhesive, elevated temperatures and pressures were used. The higher autoclave pressure caused the thin skins to conform to the stringer geometry.
With the introduction of composites I thought we would be freed from this phenomenon, but lo and behold; after having developed and delivered composite tail plane parts to one of our customers, we were treated with a picture of the aircraft in the setting sun: we could clearly identify each and every stiffener of the skin panel...
 
Dear Steve. Welcome to my build log - I will try my best to provide answers to your questions.

New construction techniques:

Initially, I also had my reservations about this as I do like an all-wooden construction. On other versions of @Modelship Dockyard models, the company has used a different route to shape the hull at the bow and stern and to create the gunports (see below)

View attachment 432099
Test-build of Le Cygne 1

View attachment 432100
Test build of Le Cygne 2

View attachment 432101
Test build of Le Cygne 3

However, "the-times-they-are-a-changing" and if there is a better and more cost-efficient way of achieving the same results, then why not? If I had never shaped a bow and stern from wood before, then I probably would not have gone this route, but seeing that it is something which I have done on numerous occasions, I now wanted to try something else (even if it means using CA glue which I am really not a fan of.)

Wale Planking:

View attachment 432102
Here are the "locked scarph joints" as shown by MacKay.

View attachment 432103
And here is the way that the wales are planked on the kit.

Yes, there is a difference, but seeing that the kit uses ebony wood for the wales (which make it difficult to see the finer details in any case), it is not something that I am going to lose any sleep over.

Hull Coppering:

According to McKay, the Pandora's hull was coppered. The illustration below, was taken directly from the Anatomy.

View attachment 432104

However, this is not something that I will do. If I can get my planked hull to look like the one in the picture below, I am not going to cover it with coppering.

View attachment 432105
View attachment 432106
View attachment 432107

As to how well the pre-cut deck pieces will go together, you will have to bear with me as there is still some way to go before, I reach that point. On the parts I have assembled so far (false keel, false decks and bulkheads), the accuracy has been superb!

I trust this answers some of your questions. If you have any more, please feel free to ask and - once again - welcome to the log.
Thank you for your reply, Heinrich, greatly appreciated. I must agree, that hull planking does look handsome!
 
Good morning Heinrich. Looking good. 0.5mm is thin for first layer, probably so it lines up with the resin pieces. Still leaves little margin for error. Your “skinny horse” bulkhead effects are so tiny the second layer will sort these. Cool term tho and only Johan would come up with this ROTF. Lovely planking, however you own this so no surprises here:D. Cheers Grant
Thank you very much for the kind words, my friend. As you can see from Wuxi's correction, the planks are not 0.5mm but 1.0mm thick - my mistakes. I agree with you on the skinny horse - I am not worried about that at all. More important is that the first layer of planking lines up with the resin parts and this they do beautifully. I enjoy planking but here I have painted myself a little into a corner. I should have planked from top and bottom simultaneously but I got so carried away planking from the garboard strake upwards, that I will have to get a little creative with closing up the hull. ROTF However, that will make for a bit of extra excitement.
 
Haha, it's okay
0.5mm thick wood is very prone to moisture and deformation in my city. If it is not necessary, I will try to reduce the usage of 0.5mm as much as possible
You are right, Wuxi. In Nantong, humidity is also something that always has to be taken into account.
 
Can't really take credit for that term; it's a term from ages long past, where at the Fokker Aircraft we used to have very thin Al sheets on grids of frames and stringers. If the grid was not controlled within very exacting tolerances, we would be punished with the "magere paard effect", or the skinny horse effect. It could be even worse on bonded skin/stringer combinations, with relatively wide stringer flanges, since for the curing of the adhesive, elevated temperatures and pressures were used. The higher autoclave pressure caused the thin skins to conform to the stringer geometry.
With the introduction of composites I thought we would be freed from this phenomenon, but lo and behold; after having developed and delivered composite tail plane parts to one of our customers, we were treated with a picture of the aircraft in the setting sun: we could clearly identify each and every stiffener of the skin panel...
Now that is an interesting explanation, Johan. Now that you mentioned it, I can recall seeing quite a few pictures of the "magere paard" phenomenon in WWI aeroplanes. It is also interesting that composite materials exhibited the same effect - however, in their case, I imagine, it would not compromise strength or rigidity or am I wrong?
 
Thank you very much for the kind words, my friend. As you can see from Wuxi's correction, the planks are not 0.5mm but 1.0mm thick - my mistakes. I agree with you on the skinny horse - I am not worried about that at all. More important is that the first layer of planking lines up with the resin parts and this they do beautifully. I enjoy planking but here I have painted myself a little into a corner. I should have planked from top and bottom simultaneously but I got so carried away planking from the garboard strake upwards, that I will have to get a little creative with closing up the hull. ROTF However, that will make for a bit of extra excitement.
Luckily it’s the first layer….. :D
 
Now that is an interesting explanation, Johan. Now that you mentioned it, I can recall seeing quite a few pictures of the "magere paard" phenomenon in WWI aeroplanes. It is also interesting that composite materials exhibited the same effect - however, in their case, I imagine, it would not compromise strength or rigidity or am I wrong?
In WWI aircraft it was slightly different, those aircraft tended to have a welded frame, made from pipes, with a fabric covering. The effect is still similar.

With the composite structures it was a bit odd; we couldn't find dimensional deviations to account for the visual appearance. The phenomenon could also only be observed when the light was close to tangent to the surface.
We were never able to determine any detrimental effect on the stability, stiffness and strengt of the parts.
Thank you for the answer, Johan. The effect on the composite materials which was only visible in certain light conditions, is most interesting and the fact that there was no dimensional difference, makes it even more odd. I wonder if this effect would also be visible in the hull construction of the GRP/Kevlar race boats.
 
Back
Top